OPEL INSIGNIA BREAK 2018.5 Manual user
Manufacturer: OPEL, Model Year: 2018.5, Model line: INSIGNIA BREAK, Model: OPEL INSIGNIA BREAK 2018.5Pages: 329, PDF Size: 9.32 MB
Page 81 of 329

Storage79Opening roller blind
Pull the roller blind handle to the rear
and downwards. It rolls up
automatically.
Opening roller blind in load position
Press the roller blind handle.
The rear of the roller blind is guided
upwards automatically.
Removing roller blind
Open the roller blind.
Pull the release lever on the right side
up an hold it. Lift the roller blind first
on the right side and remove from retrainers.
Installing roller blind
Insert the left side of the roller blind in
recess, then pull release lever up.
Hold and insert the right side of the roller blind in recess and engage.
Page 82 of 329

80StorageRear floor storage coverGrand Sport
The rear floor cover can be removed.
Raise cover at the loop and remove.
Sports Tourer, Country Tourer
The rear floor cover can be removed. Raise cover at the loop and remove.
Pull the handle and fold the rear part
of the cover forward.
Set up the folded cover upright behind the rear seat backrests.
Rear storage
Storage box
A storage box is located in the load
compartment. Remove the cover to
gain access to the storage box.
Page 83 of 329

Storage81Lashing eyes
The lashing eyes are designed to
secure items against slippage, e.g.
using lashing straps or luggage net.
Cargo management system The cargo rail system is a movable
system to secure items at the the load
compartment floor against slippage.
Mounting carriages in the rail
Insert carriages into the rails at the
load compartment floor. Thereby use
the recess in the rail and press the
button on the carriage while inserting
it.
Using the lashing eyes
Press the button on a carriage and
slide it to the required position. Fold up the lashing eyes to use them.
Removing
Fold down the lashing eyes. Press the button of a carriage and remove it
fromt the rail via recess.
Safety net
The safety net can be installed behind the rear seats. If the rear seat
backrests are folded the safety net
can be installed behind the front
seats.
Page 84 of 329

82StoragePassengers must not be transported
behind the safety net.
Behind the rear seats
Installation
● Insert the cassette into retainers on left and right side. Note the
signs L (left side) and R (right
side) on the cassette as an
installation hint.
Turn cassette slightly forward until the arrows face each other,
to lock the cassette.
● Pull safety net rod out of cassette. Suspend and engagesafety net rod into installation
opening on one side of the roof frame. Compress rod and
suspend and engage at the other
side.
Remove load compartment cover
3 78
Removal ● Remove and compress one side of safety net rod from installationopening. Remove other side of
safety net rod from installation
opening.
● Roll up safety net.● Turn cassette slightly backwards to unlock and remove from
retainers.
Page 85 of 329

Storage83Behind the front seats
Installation
● Suspend and engage safety net rod into installation opening on
one side of the roof frame.
Compress rod, suspend and
engage at the other side. Pull
safety net rod out of cassette.
● Attach hooks of safety net cassette to lashing eyes in the
floor in front of rear seats. To get
access to the lashing eyes, push
hooks in the perforated parts in
the floor cover on both sides.
● Tension both straps by pulling at the loose end.
● Push down head restraints and fold down rear seat backrests
3 75.
Removal
● Pull the flap at the tightener on
both sides to release the straps.
● Remove and compress one side of safety net rod from installation
opening. Remove other side of
safety net rod from installation
opening.
● Roll up safety net.
● Detach hooks from the lashing eyes.
Page 86 of 329

84StorageWarning triangle
Grand Sport
Stow the warning triangle in the space
at the rear of the load compartment.
Sports Tourer, Country Tourer
Stow the warning triangle with the
retaining straps of the tailgate inner
panelling.
First aid kit
Grand Sport
Stow the first aid kit on the right side
of the load compartment and secure it with the strap.
Page 87 of 329

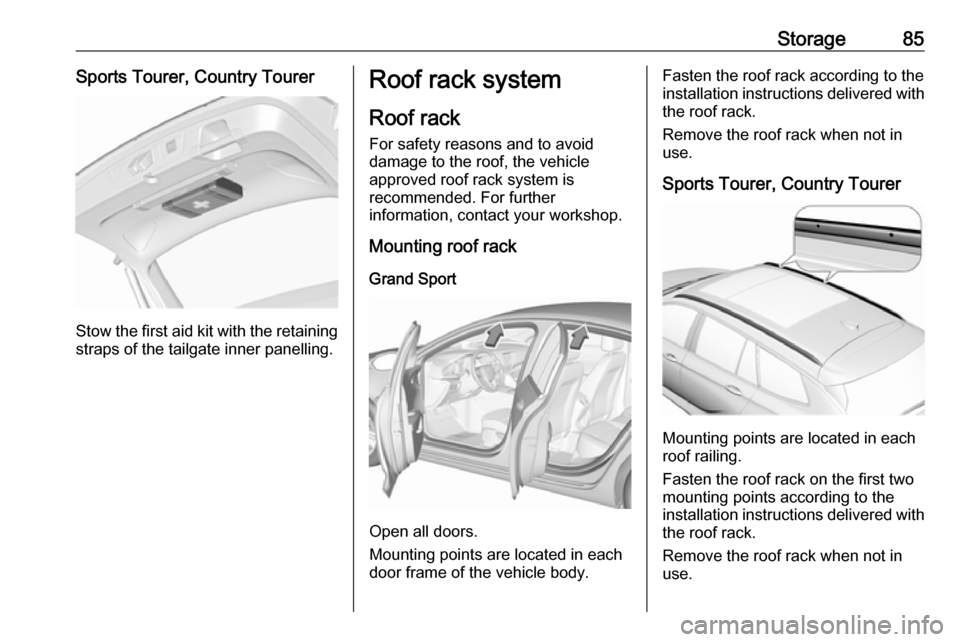
Storage85Sports Tourer, Country Tourer
Stow the first aid kit with the retainingstraps of the tailgate inner panelling.
Roof rack system
Roof rack
For safety reasons and to avoid
damage to the roof, the vehicle
approved roof rack system is
recommended. For further
information, contact your workshop.
Mounting roof rack
Grand Sport
Open all doors.
Mounting points are located in each
door frame of the vehicle body.
Fasten the roof rack according to the installation instructions delivered with the roof rack.
Remove the roof rack when not in use.
Sports Tourer, Country Tourer
Mounting points are located in each
roof railing.
Fasten the roof rack on the first two
mounting points according to the
installation instructions delivered with the roof rack.
Remove the roof rack when not in
use.
Page 88 of 329

86StorageLoading information
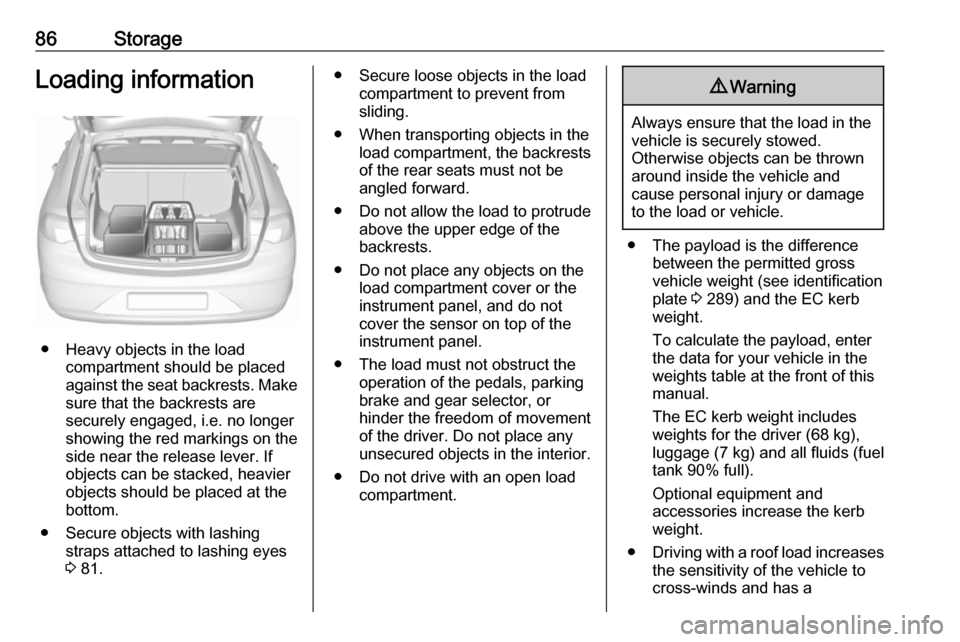
● Heavy objects in the loadcompartment should be placed
against the seat backrests. Make
sure that the backrests are
securely engaged, i.e. no longer
showing the red markings on the side near the release lever. If
objects can be stacked, heavier
objects should be placed at the
bottom.
● Secure objects with lashing straps attached to lashing eyes
3 81.
● Secure loose objects in the load
compartment to prevent from
sliding.
● When transporting objects in the load compartment, the backrestsof the rear seats must not be
angled forward.
● Do not allow the load to protrude above the upper edge of the
backrests.
● Do not place any objects on the load compartment cover or theinstrument panel, and do not
cover the sensor on top of the instrument panel.
● The load must not obstruct the operation of the pedals, parking
brake and gear selector, or
hinder the freedom of movement of the driver. Do not place any
unsecured objects in the interior.
● Do not drive with an open load compartment.9Warning
Always ensure that the load in the
vehicle is securely stowed.
Otherwise objects can be thrown
around inside the vehicle and
cause personal injury or damage
to the load or vehicle.
● The payload is the difference between the permitted grossvehicle weight (see identification
plate 3 289) and the EC kerb
weight.
To calculate the payload, enter the data for your vehicle in the
weights table at the front of this
manual.
The EC kerb weight includes
weights for the driver (68 kg),
luggage (7 kg) and all fluids (fuel
tank 90% full).
Optional equipment and
accessories increase the kerb
weight.
● Driving with a roof load increases
the sensitivity of the vehicle to
cross-winds and has a
Page 89 of 329

Storage87detrimental effect on vehicle
handling due to the vehicle's
higher centre of gravity.
Distribute the load evenly and
secure it properly with retaining
straps. Adjust the tyre pressure
and vehicle speed according to
the load conditions. Check and
retighten the straps frequently.
Do not drive faster than 120 km/ h.
The permissible roof load is
100 kg. The roof load is the
combined weight of the roof rack
and the load.
Page 90 of 329

88Instruments and controlsInstruments and
controlsControls ....................................... 89
Steering wheel adjustment ........89
Steering wheel controls .............89
Heated steering wheel ...............90
Horn ........................................... 90
Windscreen wiper and washer ..90
Rear window wiper and washer ...................................... 92
Outside temperature ..................93
Clock ......................................... 93
Power outlets ............................. 95
Inductive charging .....................96
Ashtrays .................................... 97
Warning lights, gauges and indi‐
cators ........................................... 98
Instrument cluster ......................98
Speedometer ........................... 103
Odometer ................................ 104
Trip odometer .......................... 104
Tachometer ............................. 105
Fuel gauge .............................. 105
Engine coolant temperature gauge ..................................... 106
Service display ........................ 106Control indicators ....................107
Turn lights ................................ 107
Seat belt reminder ...................107
Airbag and belt tensioners .......108
Airbag deactivation ..................108
Charging system .....................109
Malfunction indicator light ........109
Brake and clutch system .........109
Electric parking brake ..............109
Electric parking brake fault ......109
Antilock brake system (ABS) ...110
Gear shifting ............................ 110
Following distance ...................110
Lane keep assist .....................110
Electronic Stability Control off . 110
Electronic Stability Control and Traction Control system .........110
Traction Control system off .....111
Engine coolant temperature ....111
Preheating ............................... 111
AdBlue ..................................... 111
Tyre pressure monitoring system .................................... 111
Engine oil pressure ..................111
Low fuel ................................... 112
Immobiliser .............................. 112
Exterior light ............................ 112
High beam ............................... 112
High beam assist .....................112
LED headlights ........................ 112Fog light................................... 112
Rear fog light ........................... 113
Cruise control .......................... 113
Adaptive cruise control ............113
Vehicle detected ahead ...........113
Pedestrian detection ................113
Speed limiter ........................... 113
Traffic sign assistant ................113
Door open ................................ 113
Displays ..................................... 114
Driver Information Centre ........114
Info Display .............................. 121
Head-up display ......................122
Vehicle messages ......................125
Warning chimes .......................126
Battery voltage ........................ 126
Vehicle personalisation ..............127
Telematics service .....................131
OnStar ..................................... 131