run flat OPEL INSIGNIA BREAK 2018.5 Manual user
[x] Cancel search | Manufacturer: OPEL, Model Year: 2018.5, Model line: INSIGNIA BREAK, Model: OPEL INSIGNIA BREAK 2018.5Pages: 329, PDF Size: 9.32 MB
Page 122 of 329

120Instruments and controlsVehicle information menu, ? or
Options
The following list contains all possible
Options Menu pages. Some may not be available for your particular
vehicle. Depending on the display
some functions are symbolised.
Turn the adjuster wheel or press ä or
å to select a page and follow the
instructions given in the submenus:
● units
● display themes
● info pages
● speed warning
● tyre loading
● pocket gauges
● software information
Units
Press é while units page is
displayed. Select imperial or metric
units by pressing 9.
Display themes
Press é while display themes is
displayed. Select Sport or Touring
mode by pressing 9. Sport modeincludes more vehicle information,
Tour mode includes more mediainformation.
This setting is only available with
Uplevel display.
Info pages
Press é while Info pages is
displayed. A list of all items in the Info Menu is displayed. Select the
functions to be displayed in the Info
page by pressing 9. Selected pages
have a 9 in a checkbox. Non
viewable functions have a blank
checkbox. See Info Menu above.
Speed warning
The speed warning display allows
you to set a speed that you do not
want to exceed.
To set the speed warning, press é
while the page is displayed. Press ä
or å to adjust the value. Press 9 to
set the speed. Once the speed is set,
this feature can be turned off by
pressing 9 while viewing this page. If
the selected speed limit is exceeded,
a pop-up warning is displayed with a
chime.Tyre loading
The tyre pressure category according to the actual tyre inflation pressure
can be selected 3 265.
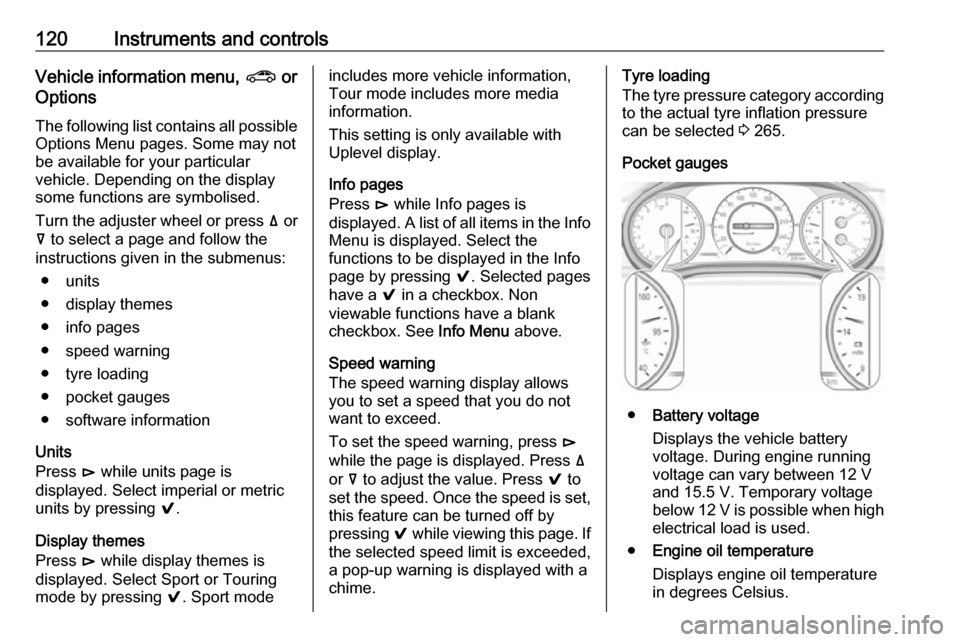
Pocket gauges
● Battery voltage
Displays the vehicle battery
voltage. During engine running
voltage can vary between 12 V and 15.5 V. Temporary voltage
below 12 V is possible when high
electrical load is used.
● Engine oil temperature
Displays engine oil temperature
in degrees Celsius.
Page 266 of 329

264Vehicle careGSi with Michelin Pilot Super Sport orPilot Sport 4 S tyres
This model is factory-fitted with high
performance sports tyres, which have
a reduced performance at low
temperature.9 Danger
Use winter tyres at temperatures
below 0 °C, otherwise damage of
the high performance sports tyres
is possible.
Tyre designations
E.g. 215/60 R 16 95 V
215:tyre width, mm60:cross-section ratio (tyre height
to tyre width), %R:belt type: RadialRF:type: RunFlat16:wheel diameter, inches95:load index e.g. 95 is equivalent
to 690 kgV:speed code letter
Speed code letter:
Q:up to 160 km/hS:up to 180 km/hT:up to 190 km/hH:up to 210 km/hV:up to 240 km/hW:up to 270 km/h
Choose a tyre appropriate for the
maximum speed of your vehicle.
The maximum speed is achievable at kerb weight with driver (75 kg) plus
125 kg payload. Optional equipment
could reduce the maximum speed of
the vehicle.
Performance 3 296.
Directional tyres
Directional tyres should be mounted
so that they rotate in the correct
direction. The proper rotation
direction is indicated by a symbol (e.g. an arrow) on the sidewall.
Tyre pressure
Check the pressure of cold tyres at
least every 14 days and before any
long journey. Do not forget the spare
wheel. This also applies to vehicles
with tyre pressure monitoring system.
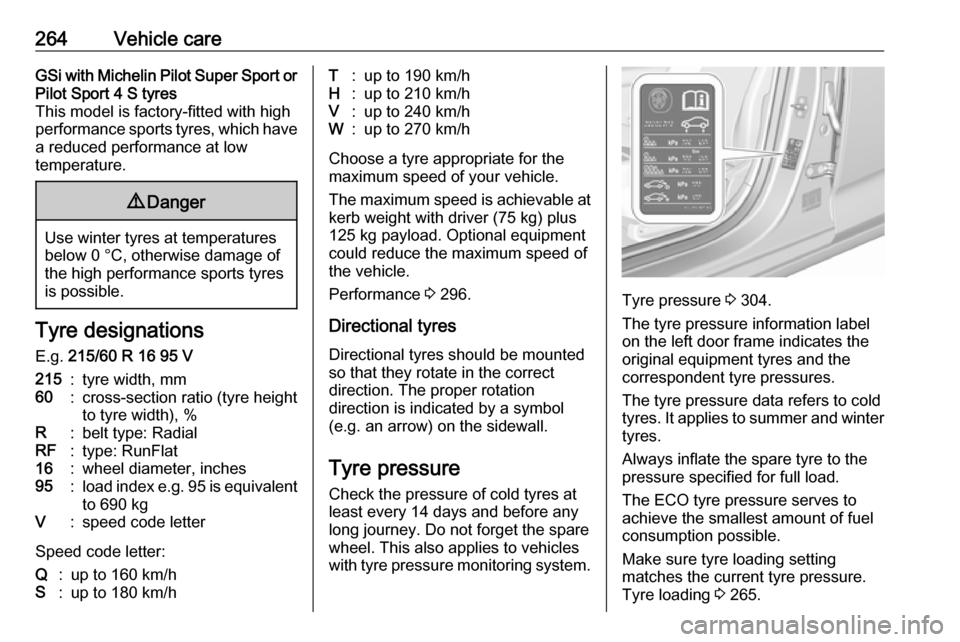
Tyre pressure 3 304.
The tyre pressure information label
on the left door frame indicates the
original equipment tyres and the
correspondent tyre pressures.
The tyre pressure data refers to cold
tyres. It applies to summer and winter tyres.
Always inflate the spare tyre to the
pressure specified for full load.
The ECO tyre pressure serves to
achieve the smallest amount of fuel
consumption possible.
Make sure tyre loading setting
matches the current tyre pressure.
Tyre loading 3 265.
Page 274 of 329

272Vehicle carerelease valve must be closed (turnclockwise).
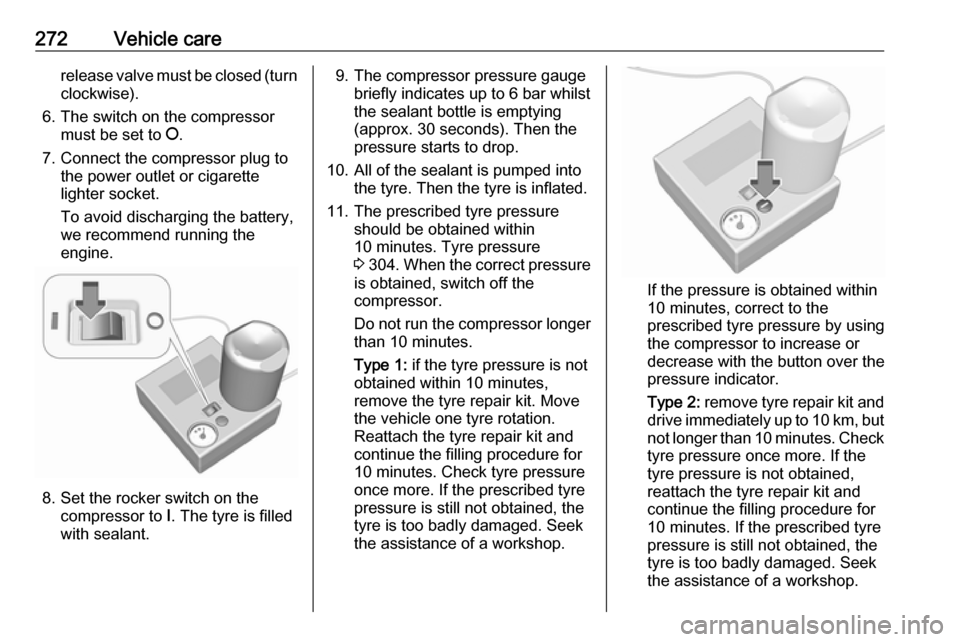
6. The switch on the compressor must be set to J.
7. Connect the compressor plug to the power outlet or cigarette
lighter socket.
To avoid discharging the battery, we recommend running the
engine.
8. Set the rocker switch on the compressor to I. The tyre is filled
with sealant.
9. The compressor pressure gauge briefly indicates up to 6 bar whilstthe sealant bottle is emptying
(approx. 30 seconds). Then the
pressure starts to drop.
10. All of the sealant is pumped into the tyre. Then the tyre is inflated.
11. The prescribed tyre pressure should be obtained within
10 minutes. Tyre pressure
3 304 . When the correct pressure
is obtained, switch off the
compressor.
Do not run the compressor longer than 10 minutes.
Type 1: if the tyre pressure is not
obtained within 10 minutes,
remove the tyre repair kit. Move
the vehicle one tyre rotation.
Reattach the tyre repair kit and
continue the filling procedure for
10 minutes. Check tyre pressure
once more. If the prescribed tyre
pressure is still not obtained, the
tyre is too badly damaged. Seek
the assistance of a workshop.
If the pressure is obtained within
10 minutes, correct to the
prescribed tyre pressure by using
the compressor to increase or
decrease with the button over the
pressure indicator.
Type 2: remove tyre repair kit and
drive immediately up to 10 km, but
not longer than 10 minutes. Check tyre pressure once more. If the
tyre pressure is not obtained,
reattach the tyre repair kit and
continue the filling procedure for
10 minutes. If the prescribed tyre
pressure is still not obtained, the
tyre is too badly damaged. Seek
the assistance of a workshop.
Page 282 of 329

280Vehicle care
Screw in the towing eye as far as it will
go until it stops in a horizontal
position.
Attach a tow rope – or better still a tow
rod – to the towing eye.
The towing eye must only be used for towing and not for recovering the
vehicle.
Switch on ignition to release steering
wheel lock and to permit operation of
brake lights, horn and windscreen
wiper.
Switch the selector lever to neutral.
Release the parking brake.
Caution
Drive slowly. Do not drive jerkily.
Excessive tractive force can
damage the vehicle.
When the engine is not running,
considerably more force is needed to
brake and steer.
To prevent the entry of exhaust gases from the towing vehicle, switch on the
air recirculation and close the
windows.
Vehicles with manual transmission
and All-wheel drive: If the vehicle is
towed with all four wheels on the
ground then there are no technical
limitations for speed and distance. If
only one axle has been raised, the
maximum speed is 50 km/h. There is
no distance limitation.
Vehicles with automatic transmission and All-wheel drive: The vehicle must
be towed facing forwards. If the
vehicle is towed with all four wheels
on the ground, the maximum speed is 50 km/h and for a maximum of
50 km. If the front axle has been
raised, the maximum speed is
50 km/h. There is no distance
limitation.
Seek the assistance of a workshop.
After towing, unscrew the towing eye.
Iinsert cap with the outer flange into
the recess and fix cap by pushing.
Towing another vehicle
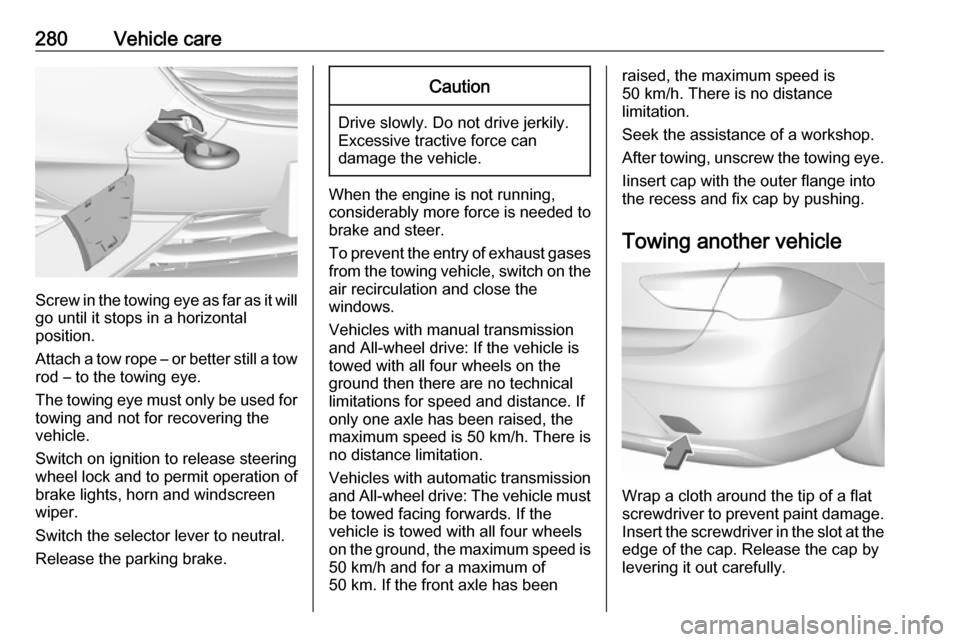
Wrap a cloth around the tip of a flat
screwdriver to prevent paint damage.
Insert the screwdriver in the slot at the
edge of the cap. Release the cap by
levering it out carefully.