tailgate OPEL INSIGNIA BREAK 2018 Manual user
[x] Cancel search | Manufacturer: OPEL, Model Year: 2018, Model line: INSIGNIA BREAK, Model: OPEL INSIGNIA BREAK 2018Pages: 323, PDF Size: 9.37 MB
Page 37 of 323
Keys, doors and windows35Status LED
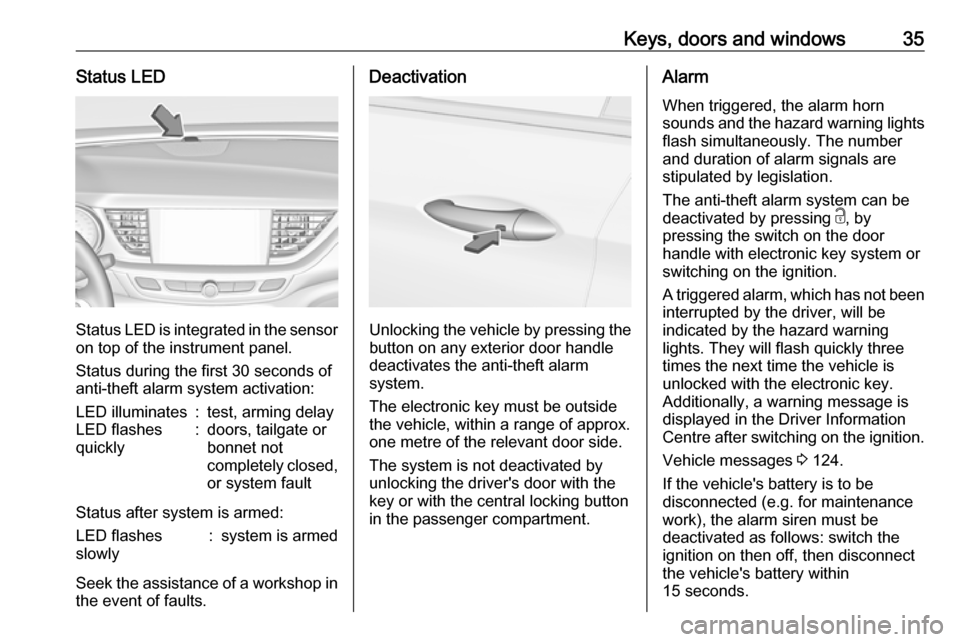
Status LED is integrated in the sensor
on top of the instrument panel.
Status during the first 30 seconds of
anti-theft alarm system activation:
LED illuminates:test, arming delayLED flashes
quickly:doors, tailgate or
bonnet not
completely closed,
or system fault
Status after system is armed:
LED flashes
slowly:system is armed
Seek the assistance of a workshop in the event of faults.
Deactivation
Unlocking the vehicle by pressing the
button on any exterior door handle
deactivates the anti-theft alarm
system.
The electronic key must be outside
the vehicle, within a range of approx. one metre of the relevant door side.
The system is not deactivated by
unlocking the driver's door with the
key or with the central locking button
in the passenger compartment.
Alarm
When triggered, the alarm horn
sounds and the hazard warning lights
flash simultaneously. The number
and duration of alarm signals are
stipulated by legislation.
The anti-theft alarm system can be
deactivated by pressing c, by
pressing the switch on the door
handle with electronic key system or
switching on the ignition.
A triggered alarm, which has not been interrupted by the driver, will be
indicated by the hazard warning
lights. They will flash quickly three
times the next time the vehicle is
unlocked with the electronic key.
Additionally, a warning message is
displayed in the Driver Information Centre after switching on the ignition.
Vehicle messages 3 124.
If the vehicle's battery is to be
disconnected (e.g. for maintenance
work), the alarm siren must be
deactivated as follows: switch the
ignition on then off, then disconnect
the vehicle's battery within
15 seconds.
Page 79 of 323

Storage779Warning
When folding up, ensure that
backrests are securely locked in
position before driving. Failure to
do so may result in personal injury or damage to the load or vehicle in the event of hard braking or a
collision.
The seat belt of the centre seat could
be blocked when the backrest is
folded up too quickly. To unlock the
retractor, push in the seat belt or pull
it out by approx. 20 mm then release.
Load compartment cover
Do not place any objects on the cover.
Grand Sport
Removing cover
Unhook retaining straps from tailgate.
Lift cover at the rear and at the front.
Remove the cover.
Fitting cover
Engage cover in side guides and fold
downwards. Attach the retaining
straps to the tailgate.
Sports Tourer, Country Tourer
Closing roller blind
Pull the roller blind using the handle
towards the rear and upwards until it
engages in the sideward retainers.
Page 85 of 323

Storage83Warning triangle
Grand Sport
Stow the warning triangle in the space
at the rear of the load compartment.
Sports Tourer, Country Tourer
Stow the warning triangle with the
retaining straps of the tailgate inner
panelling.
First aid kit
Grand Sport
Stow the first aid kit on the right side
of the load compartment and secure it with the strap.
Page 86 of 323

84StorageSports Tourer, Country Tourer
Stow the first aid kit with the retainingstraps of the tailgate inner panelling.
Roof rack system
Roof rack
For safety reasons and to avoid
damage to the roof, the vehicle
approved roof rack system is
recommended. For further
information, contact your workshop.
Mounting roof rack
Grand Sport
Open all doors.
Mounting points are located in each
door frame of the vehicle body.
Fasten the roof rack according to the installation instructions delivered with the roof rack.
Remove the roof rack when not in use.
Sports Tourer, Country Tourer
Mounting points are located in each
roof railing.
Fasten the roof rack on the first two
mounting points according to the
installation instructions delivered with the roof rack.
Remove the roof rack when not in
use.
Page 114 of 323

112Instruments and controlsRear fog lightø illuminates yellow.
The rear fog light is on 3 143.
Cruise control m illuminates white or green.
Illuminates white The system is on.
Illuminates green
Cruise control is active. Set speed is
indicated in the Driver Information
Centre.
Cruise control 3 187.
Adaptive cruise control
C illuminates in the Driver
Information Centre.
C illuminates white
The system is on.
C illuminates green
Adaptive cruise control is active.Adaptive cruise control 3 190.
Vehicle detected ahead
A illuminates green or yellow.
Illuminates green
A vehicle ahead is detected in the
same lane.
Illuminates yellow The distance to a preceding moving
vehicle gets too small or when
approaching another vehicle too
rapidly.
Adaptive cruise control 3 190,
Forward collision alert 3 198.
Pedestrian detection
7 illuminates yellow.
A pedestrian ahead is detected.
Speed limiter
L illuminates white or green.
Illuminates white The system is on.Illuminates green
Speed limiter is active. Set speed is
indicated near L symbol.
Speed limiter 3 189.
Traffic sign assistant L displays detected traffic signs as
control indicator.
Traffic sign assistant 3 224.
Door open h illuminates red.
A door or the tailgate is open.
Page 127 of 323
Instruments and controls125
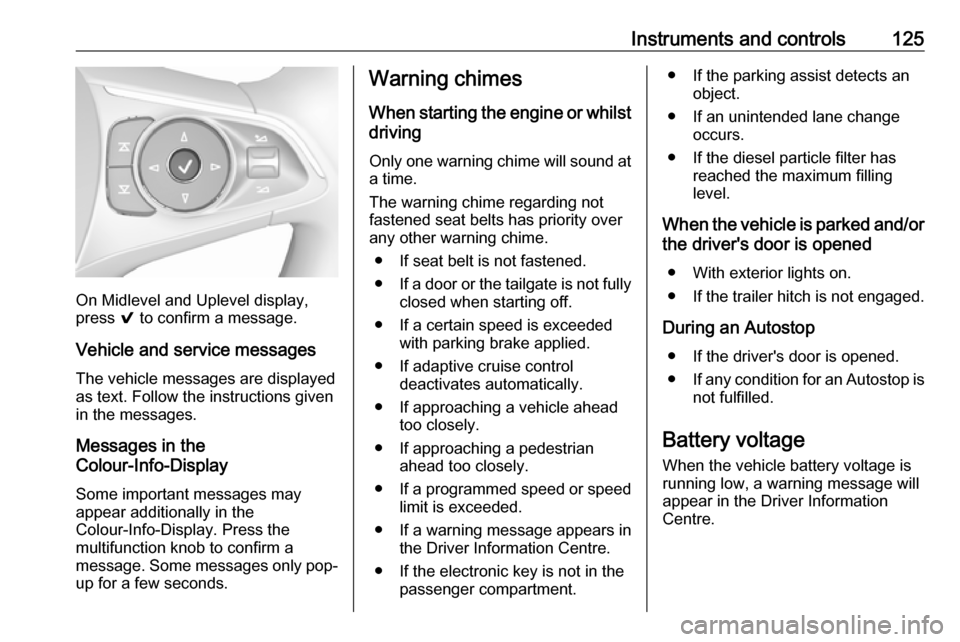
On Midlevel and Uplevel display,
press 9 to confirm a message.
Vehicle and service messages The vehicle messages are displayed
as text. Follow the instructions given
in the messages.
Messages in the
Colour-Info-Display
Some important messages may
appear additionally in the
Colour-Info-Display. Press the
multifunction knob to confirm a
message. Some messages only pop- up for a few seconds.
Warning chimes
When starting the engine or whilst
driving
Only one warning chime will sound at
a time.
The warning chime regarding not
fastened seat belts has priority over
any other warning chime.
● If seat belt is not fastened.
● If a door or the tailgate is not fully
closed when starting off.
● If a certain speed is exceeded with parking brake applied.
● If adaptive cruise control deactivates automatically.
● If approaching a vehicle ahead too closely.
● If approaching a pedestrian ahead too closely.
● If a programmed speed or speed
limit is exceeded.
● If a warning message appears in the Driver Information Centre.
● If the electronic key is not in the passenger compartment.● If the parking assist detects anobject.
● If an unintended lane change occurs.
● If the diesel particle filter has reached the maximum filling
level.
When the vehicle is parked and/or the driver's door is opened
● With exterior lights on.
● If the trailer hitch is not engaged.
During an Autostop ● If the driver's door is opened.
● If any condition for an Autostop is
not fulfilled.
Battery voltage When the vehicle battery voltage is
running low, a warning message will
appear in the Driver Information
Centre.
Page 221 of 323
Driving and operating219Panoramic view system
This system allows views of the
vehicle's surroundings to be
displayed as a nearly 360° picture in
the Info Display, like a bird's eye view.
The system uses four cameras: ● rear camera, installed in the tailgate
● front camera, installed in the front
grill below the emblem
● side cameras, located at the bottom of both exterior mirrors.
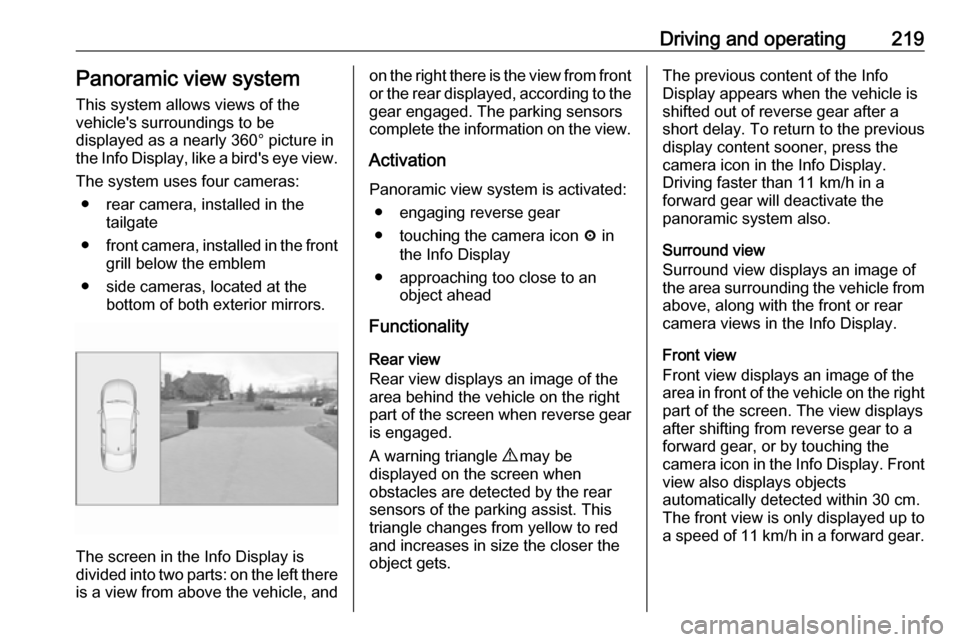
The screen in the Info Display is
divided into two parts: on the left there
is a view from above the vehicle, and
on the right there is the view from front
or the rear displayed, according to the gear engaged. The parking sensors
complete the information on the view.
Activation Panoramic view system is activated: ● engaging reverse gear
● touching the camera icon ë in
the Info Display
● approaching too close to an object ahead
Functionality
Rear view
Rear view displays an image of the
area behind the vehicle on the right
part of the screen when reverse gear
is engaged.
A warning triangle 9 may be
displayed on the screen when
obstacles are detected by the rear
sensors of the parking assist. This
triangle changes from yellow to red
and increases in size the closer the
object gets.The previous content of the Info
Display appears when the vehicle is
shifted out of reverse gear after a short delay. To return to the previous
display content sooner, press the
camera icon in the Info Display.
Driving faster than 11 km/h in a
forward gear will deactivate the
panoramic system also.
Surround view
Surround view displays an image of
the area surrounding the vehicle from
above, along with the front or rear
camera views in the Info Display.
Front view
Front view displays an image of the
area in front of the vehicle on the right
part of the screen. The view displays
after shifting from reverse gear to a
forward gear, or by touching the
camera icon in the Info Display. Front
view also displays objects
automatically detected within 30 cm.
The front view is only displayed up to
a speed of 11 km/h in a forward gear.
Page 223 of 323
Driving and operating221System limitationsCaution
For optimal operation of the
system, it is important to keep the
lenses of the cameras in the front
grille, the housings of outside
mirrors and in the tailgate between the number plate lights always
clean. Rinse the lenses with water and wipe with a soft cloth.
Do not clean the lenses with a
steam-jet or high-pressure jet
cleaner.
The panoramic view system may not
operate properly when:
● The surrounding is dark.
● The sun or the beam of headlights is shining directly into
the camera lenses.
● During nighttime driving.
● Weather limits visibility, such as fog, rain, or snow.
● The camera lenses are blocked by snow, ice, slush, mud, dirt.
● The vehicle is towing a trailer.
● The vehicle had an accident.
● There are extreme temperature changes.
Rear view camera The rear view camera assists the
driver when reversing by displaying a
view of the area behind the vehicle.
The view of the camera is displayed
in the Info-Display.9 Warning
The rear view camera does not
replace driver vision. Note that
objects that are outside the
camera's field of view and the
parking assist sensors, e.g. below
the bumper or underneath the
vehicle, are not displayed.
Do not reverse or park the vehicle
using only the rear view camera.
Always check the surrounding of
the vehicle before driving.
Activation
Rear view camera is automatically
activated when reverse gear is
engaged.
Functionality
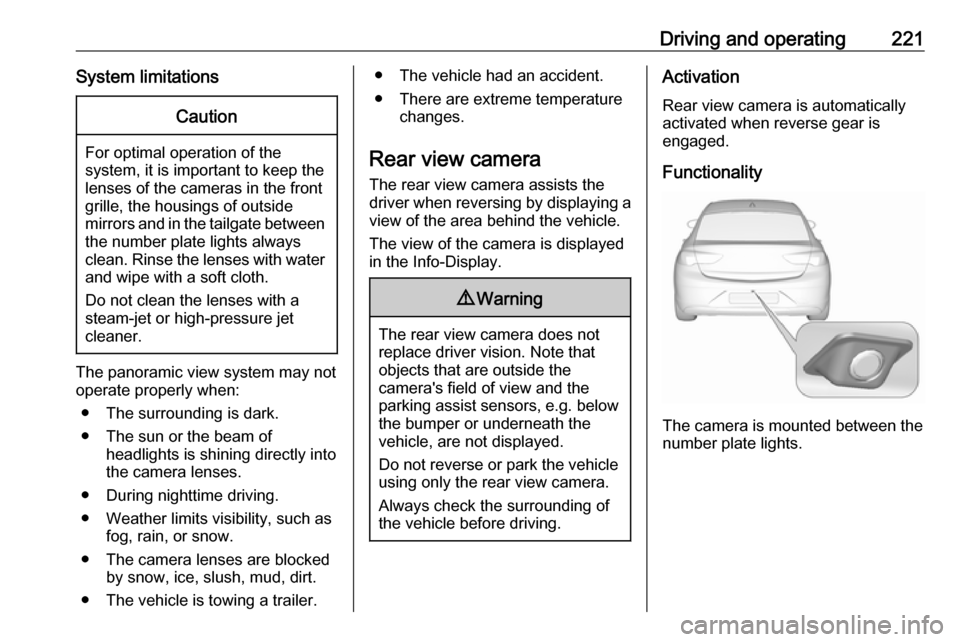
The camera is mounted between the
number plate lights.
Page 236 of 323
234Driving and operating
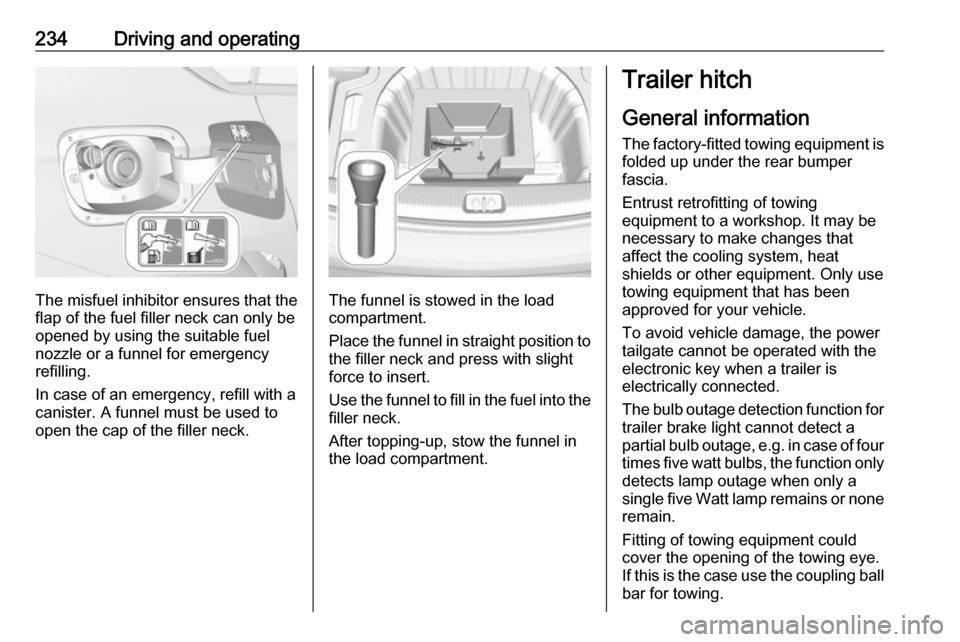
The misfuel inhibitor ensures that theflap of the fuel filler neck can only be
opened by using the suitable fuel
nozzle or a funnel for emergency
refilling.
In case of an emergency, refill with a
canister. A funnel must be used to
open the cap of the filler neck.The funnel is stowed in the load
compartment.
Place the funnel in straight position to
the filler neck and press with slight
force to insert.
Use the funnel to fill in the fuel into the
filler neck.
After topping-up, stow the funnel in
the load compartment.
Trailer hitch
General information
The factory-fitted towing equipment is
folded up under the rear bumper
fascia.
Entrust retrofitting of towing
equipment to a workshop. It may be
necessary to make changes that
affect the cooling system, heat
shields or other equipment. Only use
towing equipment that has been
approved for your vehicle.
To avoid vehicle damage, the power
tailgate cannot be operated with the
electronic key when a trailer is
electrically connected.
The bulb outage detection function for trailer brake light cannot detect a
partial bulb outage, e.g. in case of four
times five watt bulbs, the function only detects lamp outage when only a
single five Watt lamp remains or none remain.
Fitting of towing equipment could
cover the opening of the towing eye.
If this is the case use the coupling ball
bar for towing.
Page 253 of 323

Vehicle care2513. Carefully withdraw tail lightassembly from recess and
remove. Take care that the cable
duct remains in position.
4. Turn the turn signal light bulb socket anticlockwise and removeit from the light assembly.
5. Remove and replace the turn signal light bulb.
6. Attach the bulb socket to the light assembly.
7. Attach the light assembly to the vehicle body and tighten the
securing nuts from the inside of
the load compartment. Attach
cover.
Light assembly in the tailgate
1. Release the cover in the tailgate and remove it.
2. Unscrew the plastic securing nutby hand.