ESP OPEL INSIGNIA BREAK 2019 Manual user
[x] Cancel search | Manufacturer: OPEL, Model Year: 2019, Model line: INSIGNIA BREAK, Model: OPEL INSIGNIA BREAK 2019Pages: 347, PDF Size: 9.79 MB
Page 86 of 347
84StorageSports Tourer, Country Tourer
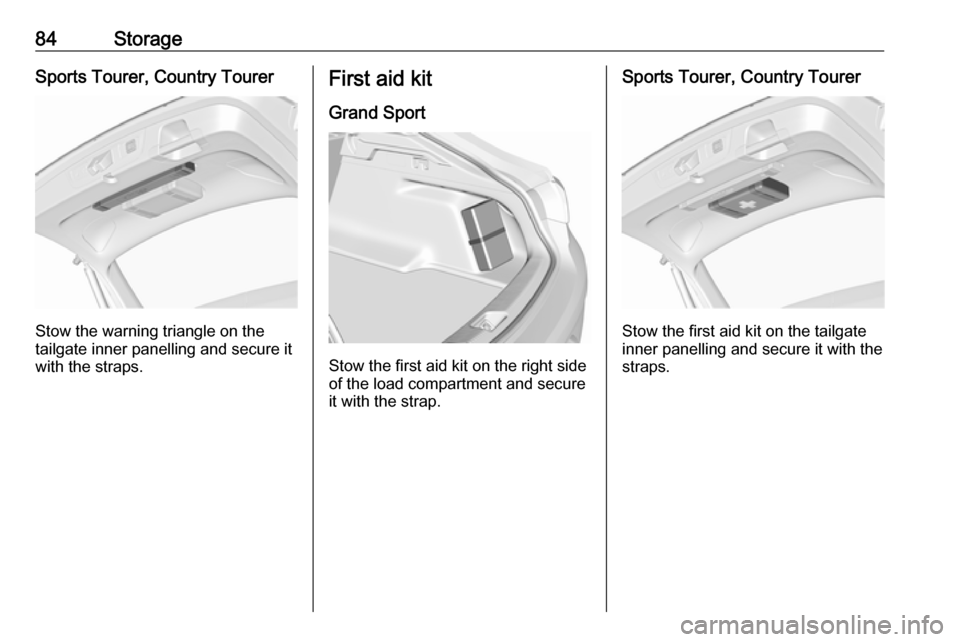
Stow the warning triangle on the
tailgate inner panelling and secure it with the straps.
First aid kit
Grand Sport
Stow the first aid kit on the right side
of the load compartment and secure it with the strap.
Sports Tourer, Country Tourer
Stow the first aid kit on the tailgate
inner panelling and secure it with the straps.
Page 94 of 347
92Instruments and controlsThe rear window washer system is
deactivated when the fluid level is
low.
Washer fluid 3 259.
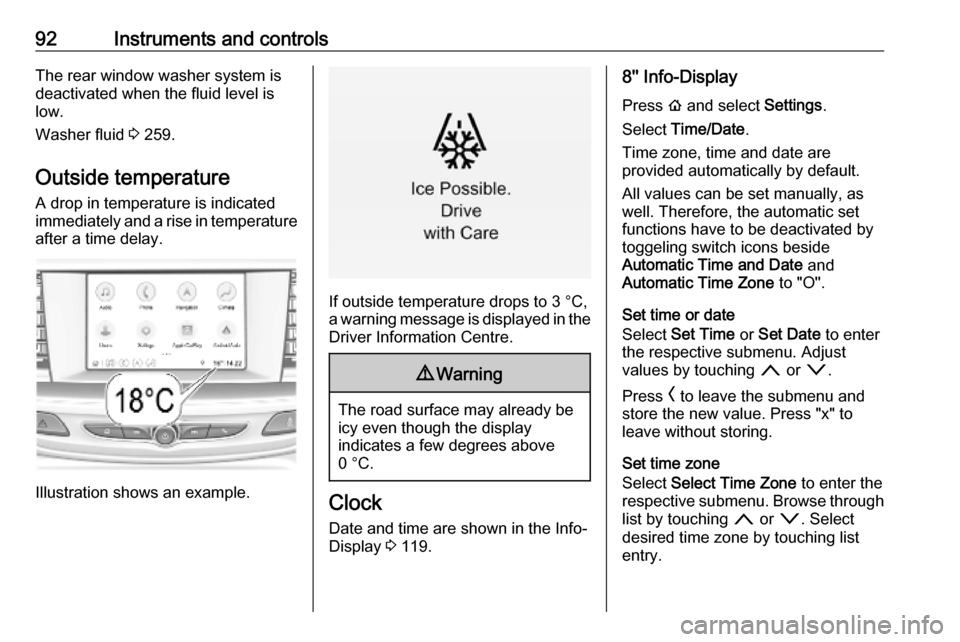
Outside temperature A drop in temperature is indicated
immediately and a rise in temperature
after a time delay.
Illustration shows an example.
If outside temperature drops to 3 °C,
a warning message is displayed in the Driver Information Centre.
9 Warning
The road surface may already be
icy even though the display
indicates a few degrees above
0 °C.
Clock
Date and time are shown in the Info-
Display 3 119.
8'' Info-Display
Press ! and select Settings.
Select Time/Date .
Time zone, time and date are
provided automatically by default.
All values can be set manually, as
well. Therefore, the automatic set
functions have to be deactivated by
toggeling switch icons beside
Automatic Time and Date and
Automatic Time Zone to "O".
Set time or date
Select Set Time or Set Date to enter
the respective submenu. Adjust
values by touching n or o.
Press O to leave the submenu and
store the new value. Press "x" to
leave without storing.
Set time zone
Select Select Time Zone to enter the
respective submenu. Browse through list by touching n or o. Select
desired time zone by touching list entry.
Page 104 of 347
102Instruments and controlsOdometer
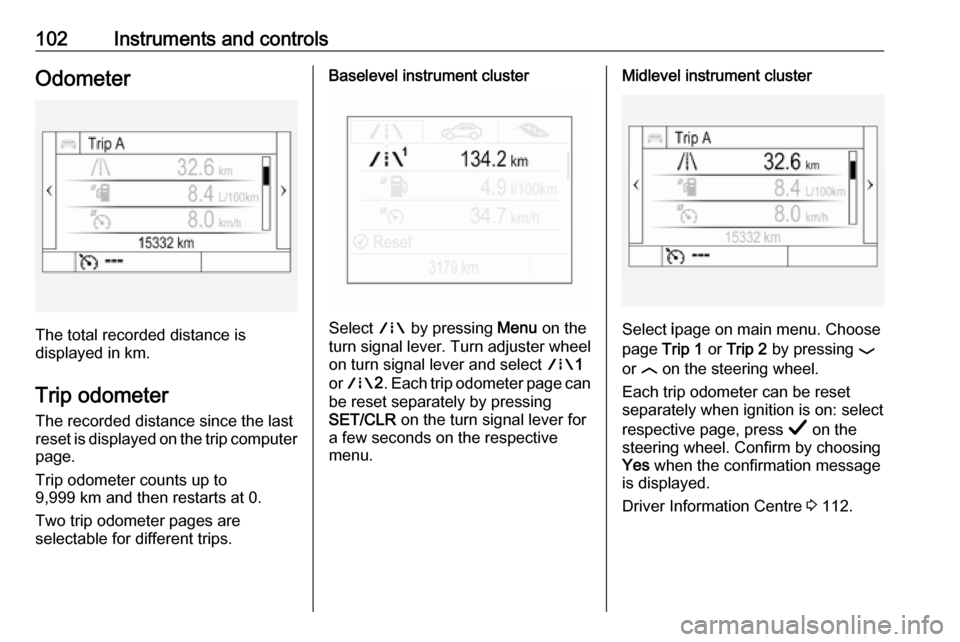
The total recorded distance is
displayed in km.
Trip odometer The recorded distance since the last
reset is displayed on the trip computer
page.
Trip odometer counts up to
9,999 km and then restarts at 0.
Two trip odometer pages are
selectable for different trips.
Baselevel instrument cluster
Select ; by pressing Menu on the
turn signal lever. Turn adjuster wheel
on turn signal lever and select ;1
or ; 2. Each trip odometer page can
be reset separately by pressing
SET/CLR on the turn signal lever for
a few seconds on the respective
menu.
Midlevel instrument cluster
Select ipage on main menu. Choose
page Trip 1 or Trip 2 by pressing P
or N on the steering wheel.
Each trip odometer can be reset separately when ignition is on: select
respective page, press Å on the
steering wheel. Confirm by choosing
Yes when the confirmation message
is displayed.
Driver Information Centre 3 112.
Page 105 of 347
Instruments and controls103Uplevel instrument cluster
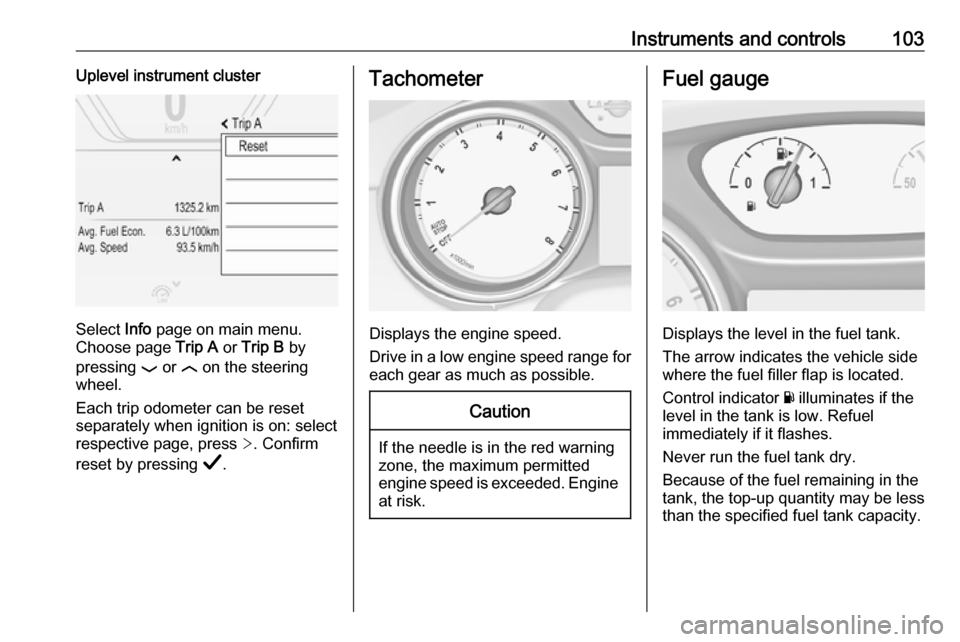
Select Info page on main menu.
Choose page Trip A or Trip B by
pressing P or N on the steering
wheel.
Each trip odometer can be reset separately when ignition is on: select
respective page, press >. Confirm
reset by pressing Å.
Tachometer
Displays the engine speed.
Drive in a low engine speed range for each gear as much as possible.
Caution
If the needle is in the red warning
zone, the maximum permitted
engine speed is exceeded. Engine at risk.
Fuel gauge
Displays the level in the fuel tank.
The arrow indicates the vehicle side
where the fuel filler flap is located.
Control indicator Y illuminates if the
level in the tank is low. Refuel
immediately if it flashes.
Never run the fuel tank dry.
Because of the fuel remaining in the
tank, the top-up quantity may be less
than the specified fuel tank capacity.
Page 131 of 347

Instruments and controls129Note
The Wi-Fi hotspot functionality is not
available for all markets.
Note
Some mobile devices connect to Wi- Fi hotspots automatically and use
mobile data capacity in the
background, even if they are not in
use. This includes automatic
updates, downloads, as well as
programme or app synchronisation
traffic. The data volume purchased
via OnStar might be consumed
rapidly. Turn off automatic
synchronisations in the settings of
your device.
Up to seven devices may be
connected.
To connect a mobile device with the
Wi-Fi hotspot:
1. Press j and then select Wi-Fi
settings on the Info-Display. The
settings displayed include the Wi-
Fi hotspot name (SSID),
password and connection type.
2. Start a Wi-Fi network search on your mobile device.3. Select your vehicle hotspot(SSID) when listed.
4. When prompted, enter the password on your mobile device.
Note
To change the SSID or password,
press Z and talk to an advisor or log
in to your account.
To switch off the Wi-Fi hotspot
functionality, press Z to call an
advisor.
Smartphone app
With the myOpel smartphone app,
some vehicle functions can be
operated remotely.
The following functions are available: ● Lock or unlock vehicle.
● Honk horn or flash lights.
● Check fuel level, engine oil life and tyre pressure (only with tyre
pressure monitoring system).
● Send navigation destination to the vehicle, if equipped with a
built-in navigation system.
● Locate vehicle on a map.
● Manage Wi-Fi settings.To operate these functions, download the app from App Store ®
or
Google Play™ Store.
Remote control
If desired, use any phone to call an
advisor, who can remotely operate
specific vehicle functions. Find the
respective OnStar phone number on
our country-specific website.
The following functions are available: ● Lock or unlock vehicle.
● Provide information on the vehicle location.
● Honk horn or flash lights.
Stolen vehicle assistance
If the vehicle is stolen, report the theft
to the authorities and request OnStar
stolen vehicle assistance. Use any
phone to call an advisor. Find the
respective OnStar phone number on
our country-specific website.
OnStar can provide support in
locating and recovering the vehicle.
Page 142 of 347
140LightingParking lights
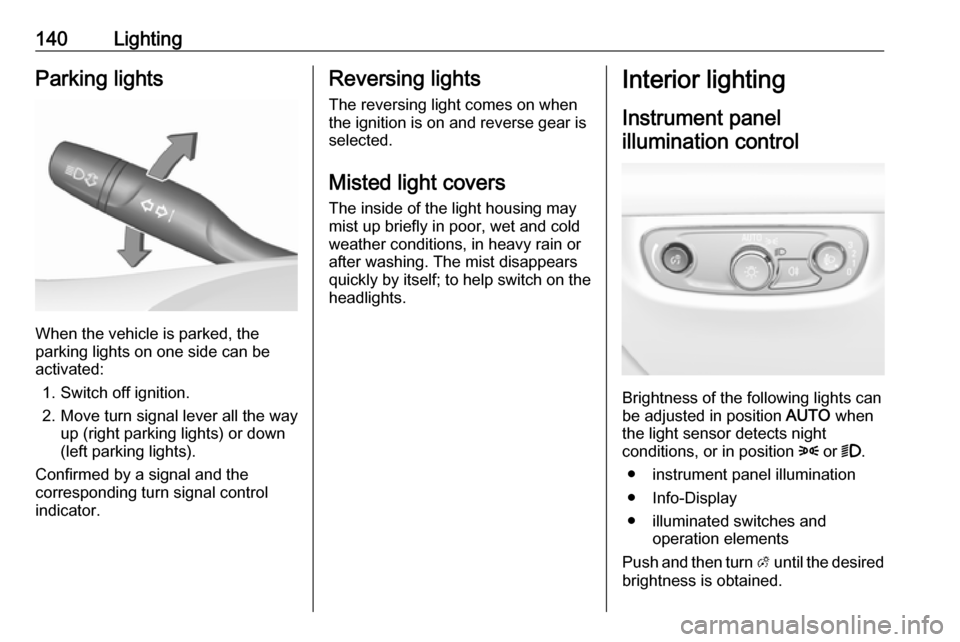
When the vehicle is parked, the
parking lights on one side can be
activated:
1. Switch off ignition.
2. Move turn signal lever all the way up (right parking lights) or down
(left parking lights).
Confirmed by a signal and the
corresponding turn signal control
indicator.
Reversing lights
The reversing light comes on when
the ignition is on and reverse gear is
selected.
Misted light covers
The inside of the light housing may
mist up briefly in poor, wet and cold weather conditions, in heavy rain or
after washing. The mist disappears
quickly by itself; to help switch on the
headlights.Interior lighting
Instrument panel illumination control
Brightness of the following lights can
be adjusted in position AUTO when
the light sensor detects night
conditions, or in position 8 or 9.
● instrument panel illumination
● Info-Display
● illuminated switches and operation elements
Push and then turn A until the desired
brightness is obtained.
Page 143 of 347
Lighting141Interior lights
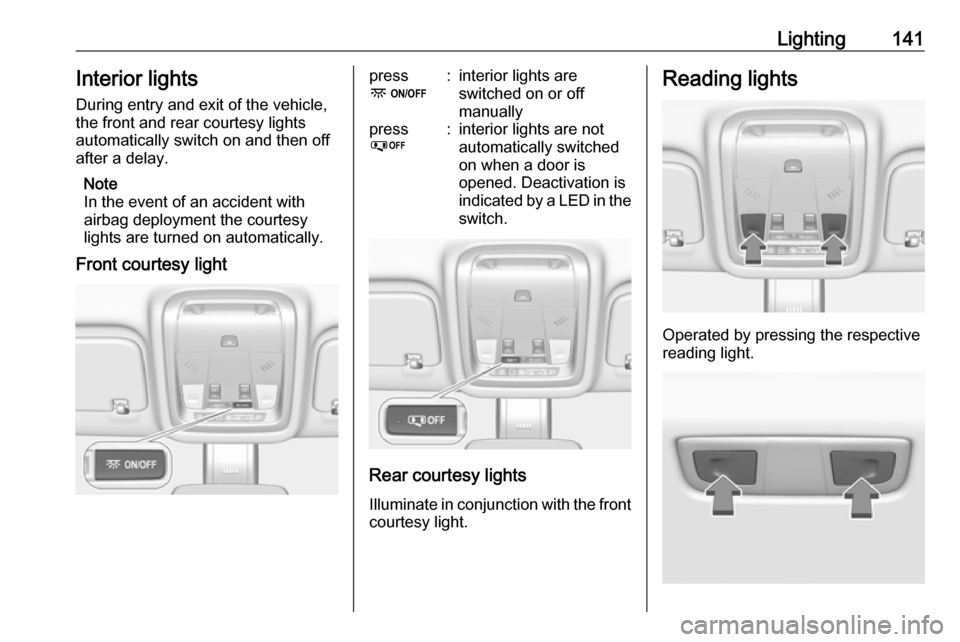
During entry and exit of the vehicle,
the front and rear courtesy lights
automatically switch on and then off
after a delay.
Note
In the event of an accident with
airbag deployment the courtesy
lights are turned on automatically.
Front courtesy lightpress
-:interior lights are
switched on or off
manuallypress
%:interior lights are not
automatically switched
on when a door is
opened. Deactivation is
indicated by a LED in the switch.
Rear courtesy lights
Illuminate in conjunction with the front courtesy light.
Reading lights
Operated by pressing the respective
reading light.
Page 151 of 347
Infotainment system149●OnStar Services : Display the
OnStar Services screen if
available.
● Wi-Fi Hotspot : Display the Wi-Fi
hotspot settings if available.
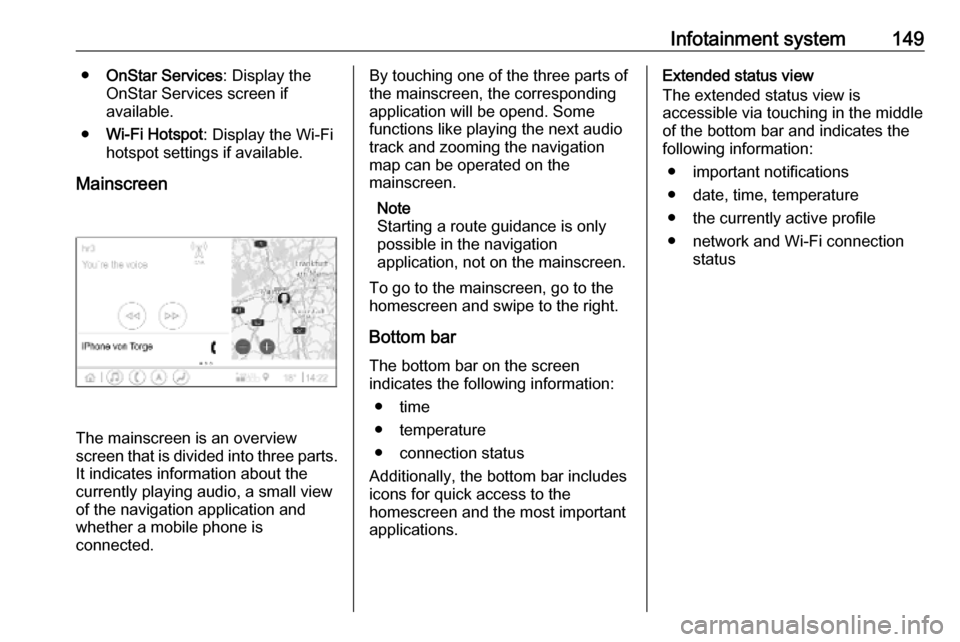
Mainscreen
The mainscreen is an overview
screen that is divided into three parts.
It indicates information about the
currently playing audio, a small view
of the navigation application and
whether a mobile phone is
connected.
By touching one of the three parts of the mainscreen, the corresponding
application will be opend. Some
functions like playing the next audio
track and zooming the navigation
map can be operated on the
mainscreen.
Note
Starting a route guidance is only possible in the navigation
application, not on the mainscreen.
To go to the mainscreen, go to the
homescreen and swipe to the right.
Bottom bar The bottom bar on the screen
indicates the following information:
● time
● temperature
● connection status
Additionally, the bottom bar includes
icons for quick access to the
homescreen and the most important
applications.Extended status view
The extended status view is
accessible via touching in the middle
of the bottom bar and indicates the
following information:
● important notifications
● date, time, temperature
● the currently active profile
● network and Wi-Fi connection status
Page 154 of 347

152Infotainment systemReturning to the homescreen
To return to the homescreen,
touch ;.
Wi-Fi connection
The Infotainment system can be
connected to a Wi-Fi network, e.g. the hotspot of a mobile phone, or activate
an own Wi-Fi hotspot if OnStar is
available.
Connecting to a Wi-Fi network
To connect to a Wi-Fi network, go to
the homescreen and select Settings.
Then go to the System tab and select
Wi-Fi Networks .
A list of all available Wi-Fi networks is displayed. After choosing a Wi-Fi
network, it might be necessary to log
in by entering a corresponding
password on the Info Display. In this
case, a corresponding window will
pop up.Activating the Wi-Fi hotspot
If OnStar is available, a Wi-Fi hotspot
can be activated. There are two ways
to go to the Wi-Fi hotspot menu:
● Go to the homescreen and select
the Wi-Fi Hotspot icon.
● Go to the homescreen and select
Settings . Then go to the System
tab and select Wi-Fi Hotspot.
In the Wi-Fi Hotspot menu, the Wi-Fi
hotspot can be activated or deactivated and the name and the
password of the Wi-Fi hotspot can be changed. Also the connected devicesare indicated.
System settings To go to the system settings menu, go
to the homescreen and select
Settings . The settings are divided into
System and Apps .
The following settings can be
changed under System:
● Time/Date
● Language
● Phones : Display connected / not
connected phones or add a
phone.● Wi-Fi Networks : Connect to an
available Wi-Fi network.
● Wi-Fi Hotspot : Activate /
deactivate Wi-Fi services and display name, password and
connected devices.
● Display : Select display mode,
calibrate touchscreen and turn
display off.
● Privacy : Activate / deactivate
location services and data
services.
● Sounds : Set maximum startup
volume, activate / deactivate audio cues and audible touch
feedback.
● Voice : Set prompt lenght, audio
feedback speed and activate /
deactivate tutorial mode.
● Favourites : Manage favourites
and set number of audio
favourites.
● About : Display information about
open soure software and device registration.
Page 155 of 347

Infotainment system153●Running Applications : Stop
applications, e.g. Climate or
Users .
● Restore Factory Settings : Reset
vehicle settings, delete settings
and personal data and clear
default applications
The following settings can be
changed under Apps:
● Android Auto : Activate /
deactivate the Android Auto
application.
● Apple CarPlay : Activate /
deactivate the Apple CarPlay
application.
● Audio (options depend on current
audio source): Change the tone
settings, auto volume, activate /
deactivate traffic programme,
DAB-FM linking, DAB
announcements, etc.
● Navigation : Change the
navigation settings.
● Phone : Sort contacts, re-
synchronise contacts, delete all
vehicle contacts, etc.Profiles
This application is only applicable toMultimedia Navi Pro.
Touch Users on the homescreen to
display a list of all available profiles:
Due to the option of creating profiles,
the Infotainment system can be fitted
to several drivers. Different settings
as well as favourite radio stations and destinations will be connected to aspecific profile. Thereby, the settings
and favourites don't need to be
adjusted every time another person is driving the vehicle.
A profile can be connected to a
specific vehicle key. While unlocking the vehicle, the corresponding profile
will be activated, if available.
Creating a profile 1. Select Users on the homescreen.
2. Select Add User Profile .
3. Select Create Profile .
4. Enter a profile name and select Next .5.If desired, choose a profile picture
and select Next. Otherwise, select
Skip .
6. If desired, choose a vehicle key which is intended to be connectedto the profile and select Next.
Otherwise, select Skip.
7. Select Done.
A new profile is created. The settings
of the profile can be changed at any
time.
Note
Whenever a new profile is created or the active profile is switched, the
audio application is paused and
restarted.
Creating a PIN for a profile
Every profile can be secured with a
PIN. After switching on the vehicle,
the PIN has to be entered.
To create a PIN, go to the
homescreen and select Settings, go
to the Personal tab and select
Security .