steering wheel OPEL INSIGNIA BREAK 2019 Manual user
[x] Cancel search | Manufacturer: OPEL, Model Year: 2019, Model line: INSIGNIA BREAK, Model: OPEL INSIGNIA BREAK 2019Pages: 347, PDF Size: 9.79 MB
Page 105 of 347
Instruments and controls103Uplevel instrument cluster
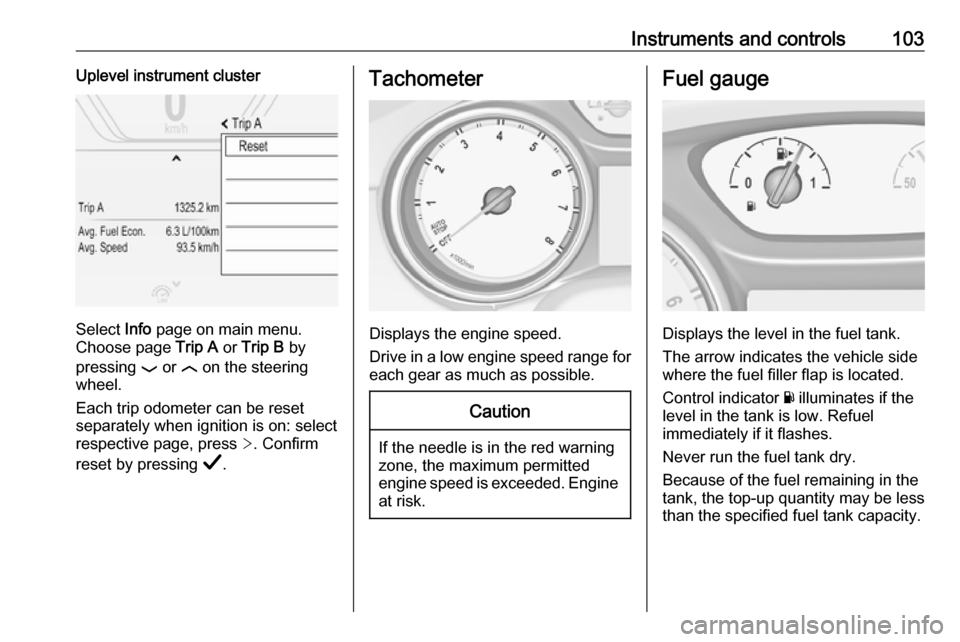
Select Info page on main menu.
Choose page Trip A or Trip B by
pressing P or N on the steering
wheel.
Each trip odometer can be reset separately when ignition is on: select
respective page, press >. Confirm
reset by pressing Å.
Tachometer
Displays the engine speed.
Drive in a low engine speed range for each gear as much as possible.
Caution
If the needle is in the red warning
zone, the maximum permitted
engine speed is exceeded. Engine at risk.
Fuel gauge
Displays the level in the fuel tank.
The arrow indicates the vehicle side
where the fuel filler flap is located.
Control indicator Y illuminates if the
level in the tank is low. Refuel
immediately if it flashes.
Never run the fuel tank dry.
Because of the fuel remaining in the
tank, the top-up quantity may be less
than the specified fuel tank capacity.
Page 107 of 347

Instruments and controls105Select Info, " or ? Menu by
pressing è on steering wheel. Press
å to select Oil Life page.
Remaining oil life duration is indicated
in percentage.
Reset On Baselevel display press
SET/CLR on turn signal lever for
several seconds to reset. The ignition must be switched on but engine not
running.
On Midlevel display press Å on
steering wheel. Confirm reset by
choosing Yes and pressing Å again.
The ignition must be switched on but
engine not running.
On Uplevel display press é on
steering wheel to open the subfolder. Select Reset and confirm by pressing
Å . The ignition must be switched on
but engine not running.
The system must be reset every time
the engine oil is changed to allow
proper functionality. Seek the
assistance of a workshop.Next service
A message appears in the Driver
Information Centre, when
maintenance of the vehicle is
required. Have maintenance work
carried out by a workshop within one week or 500 km, whichever occursfirst.
Service information 3 301.
Control indicators The control indicators described are
not present in all vehicles. The
description applies to all instrument
versions. Depending on the
equipment, the position of the control indicators may vary. When the
ignition is switched on, most control
indicators will illuminate briefly as a
functionality test.
The control indicator colours mean:red:danger, important reminderyellow:warning, information, faultgreen:confirmation of activationblue:confirmation of activationwhite:confirmation of activationSee all control indicators on different
instrument clusters 3 96.
Turn lights
O illuminates or flashes green.
Illuminates briefly The parking lights are switched on.
Flashes
A turn signal or the hazard warning
flashers are activated.
Rapid flashing: failure of a turn signal
light or associated fuse, failure of turn signal light on trailer.
Bulb replacement 3 262, Fuses
3 272.
Turn signals 3 139.
Seat belt reminder
Seat belt reminder on front seats
X for driver seat illuminates or flashes
red in the instrument cluster.
Page 112 of 347

110Instruments and controls1. Depress clutch.
2. Select neutral gear.
3. Move out of the flow of traffic as quickly as possible without
impeding other vehicles.
4. Switch off ignition.9 Warning
When the engine is off,
considerably more force is needed
to brake and steer.
During an Autostop, the brake
servo unit will still be operational.
Do not remove key until vehicle is stationary, otherwise the steeringwheel lock could engage
unexpectedly.
Keep engine turned off and let the
vehicle be towed to a workshop.
Low fuel Y illuminates or flashes yellow.
Illuminates
Level in fuel tank is too low.
Flashes
Fuel used up. Refuel immediately.
Never run the tank dry.
Refuelling 3 248.
Catalytic converter 3 186.
Bleeding the diesel fuel system
3 261.
Immobiliser
d flashes yellow.
Fault in the immobiliser system. The
engine cannot be started.
Immobiliser 3 37.
Exterior light 8 illuminates green.
The exterior lights are on 3 132.
High beam
C illuminates blue.
Illuminated when high beam is on or
during headlight flash 3 133.High beam assist
f illuminates green.
The high beam assist is activated,
see LED headlights 3 135.
LED headlights f illuminates or flashes yellow.
Illuminates
Fault in the system.
Seek the assistance of a workshop.
Flashes
System is switched to symmetrical
low beam.
Control indicator f flashes for approx.
four seconds after the ignition is
switched on as a reminder for
symmetrical headlight 3 135.
Front fog lights
> illuminates green.
The front fog lights are on 3 139.
Page 114 of 347
112Instruments and controlsDisplaysDriver Information Centre
The Driver Information Centre is
located in the instrument cluster.
Depending on the version and the
instrument cluster, the Driver
Information Centre is available as
Baselevel display, Midlevel display or Uplevel display.
Driver Information Centre indicates
depending on the equipment:
● overall and trip odometer
● vehicle information and settings
● trip/fuel information
● driving economic information
● driver assistance alerts
● warning messages
● audio and infotainment information
● phone information
● navigation informationBaselevel display
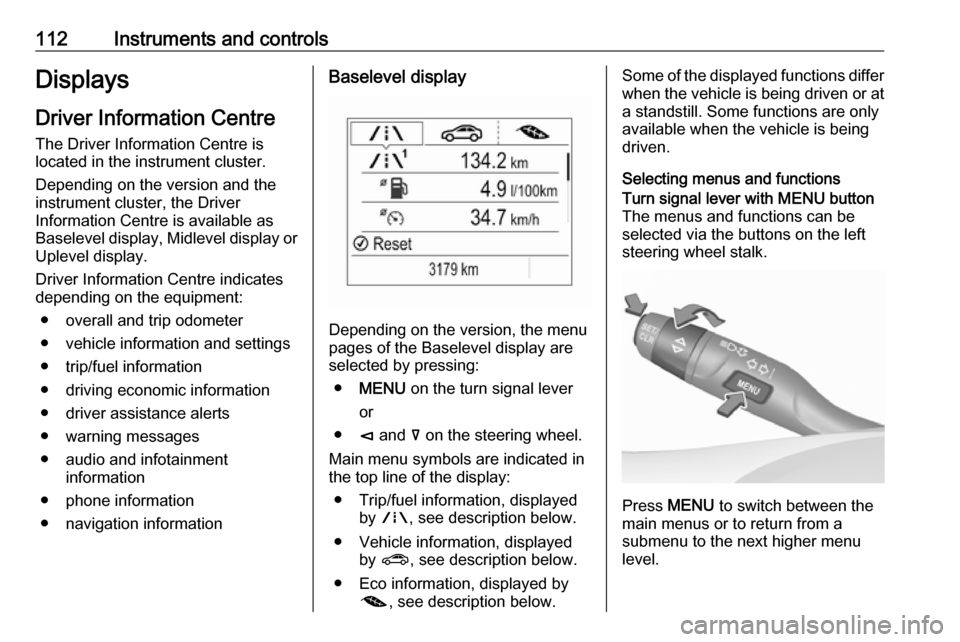
Depending on the version, the menu
pages of the Baselevel display are selected by pressing:
● MENU on the turn signal lever
or
● è and å on the steering wheel.
Main menu symbols are indicated in
the top line of the display:
● Trip/fuel information, displayed by ; , see description below.
● Vehicle information, displayed by ? , see description below.
● Eco information, displayed by @ , see description below.
Some of the displayed functions differ
when the vehicle is being driven or at a standstill. Some functions are only
available when the vehicle is being
driven.
Selecting menus and functionsTurn signal lever with MENU button
The menus and functions can be selected via the buttons on the left
steering wheel stalk.
Press MENU to switch between the
main menus or to return from a
submenu to the next higher menu
level.
Page 115 of 347
Instruments and controls113Turn the adjuster wheel to select a
submenu of the main menu or to set a numeric value.
Press SET/CLR to select and confirm
a function.
Vehicle and service messages are
popped-up in the Driver Information Centre when required. Confirm
messages by pressing SET/CLR.
Vehicle messages 3 123.Steering wheel controls
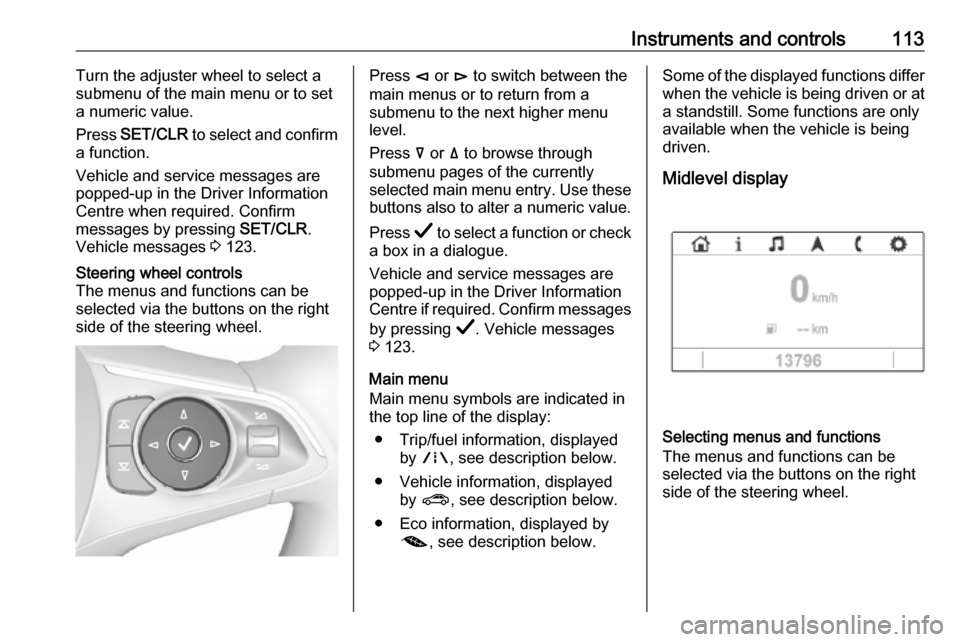
The menus and functions can be selected via the buttons on the right
side of the steering wheel.Press è or é to switch between the
main menus or to return from a
submenu to the next higher menu
level.
Press å or ä to browse through
submenu pages of the currently
selected main menu entry. Use these
buttons also to alter a numeric value.
Press Å to select a function or check
a box in a dialogue.
Vehicle and service messages are
popped-up in the Driver Information
Centre if required. Confirm messages
by pressing Å. Vehicle messages
3 123.
Main menu
Main menu symbols are indicated in
the top line of the display:
● Trip/fuel information, displayed by ; , see description below.
● Vehicle information, displayed by ? , see description below.
● Eco information, displayed by @ , see description below.Some of the displayed functions differ
when the vehicle is being driven or at
a standstill. Some functions are only
available when the vehicle is being
driven.
Midlevel display
Selecting menus and functions
The menus and functions can be
selected via the buttons on the right
side of the steering wheel.
Page 116 of 347
114Instruments and controls
Browse through main menu by
pressing è or é.
Press å or ä to browse through
submenu pages of the currently
selected main menu entry. Use these
buttons also to alter a numeric value.
Press Å to select a function or check
a box in a dialogue.
Vehicle and service messages are
popped-up in the Driver Information
Centre if required. Confirm messages
by pressing Å. Vehicle messages
3 123.
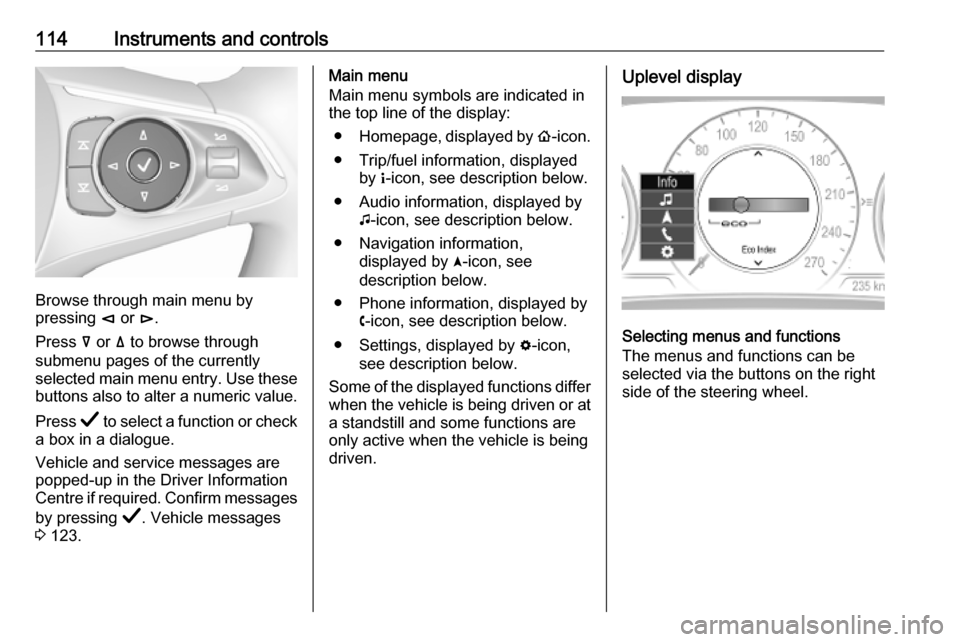
Main menu
Main menu symbols are indicated in
the top line of the display:
● Homepage, displayed by !-icon.
● Trip/fuel information, displayed by "-icon, see description below.
● Audio information, displayed by G-icon, see description below.
● Navigation information, displayed by §-icon, see
description below.
● Phone information, displayed by $-icon, see description below.
● Settings, displayed by %-icon,
see description below.
Some of the displayed functions differ when the vehicle is being driven or at
a standstill and some functions are
only active when the vehicle is being
driven.Uplevel display
Selecting menus and functions
The menus and functions can be
selected via the buttons on the right
side of the steering wheel.
Page 124 of 347

122Instruments and controlsAdjust position of head-up display
image
1. Adjust the driver's seat.
2. Start the engine.
3. Press down or lift up button . to
centre the image. It can only be
adjusted up and down, not side to
side.9 Warning
If the head-up display image is too
bright or too high in your field of
view, it may obstruct your view
when it is dark outside. Be sure to keep the head-up display imagedim and placed low in your field of
view.
Adjust brightness
The head-up display image will
automatically dim and brighten to compensate for outside lighting.
Brightness can also be adjusted
manually as needed:
Lift up & and hold to brighten the
display. Press down and hold to dim
the display.
The image can temporarily light up
depending on angel and position of
sunlight.
Adjust rotation Select Options /% in the Driver
Information Center main menu.
Select submenu page
Head-Up Display . Press é on the
steering wheel to open adjustment dialogue. Press ä or å to turn
projection clockwise or counter- clockwise. Press è to leave
adjustment dialogue.
Switching off
Hold down & to turn the head-up
display off.
Language Preferred language can be set in
vehicle personalisation menu 3 124.
Units
Units can be changed in the settings
menu of the Driver Information Centre 3 112.Care of head-up display
Clean the inside of the windscreen as needed to remove any dirt or film that
could reduce the sharpness or clarity
of the head-up image.
Clean the head-up display lens in the
instrument panel with a soft cloth
sprayed with glass cleaner. Wipe the
lens gently, then dry it.
System limitations
Head-up display may not operate
properly when:
● The lens in the instrument panel is covered by objects or
windscreen and lens are not
clean.
● Display brightness is too dim or bright.
● Image is not adjusted to the proper height.
● The driver wears polarised sunglasses.
If the head-up image is not correct for other reasons, contact a workshop.
Page 141 of 347
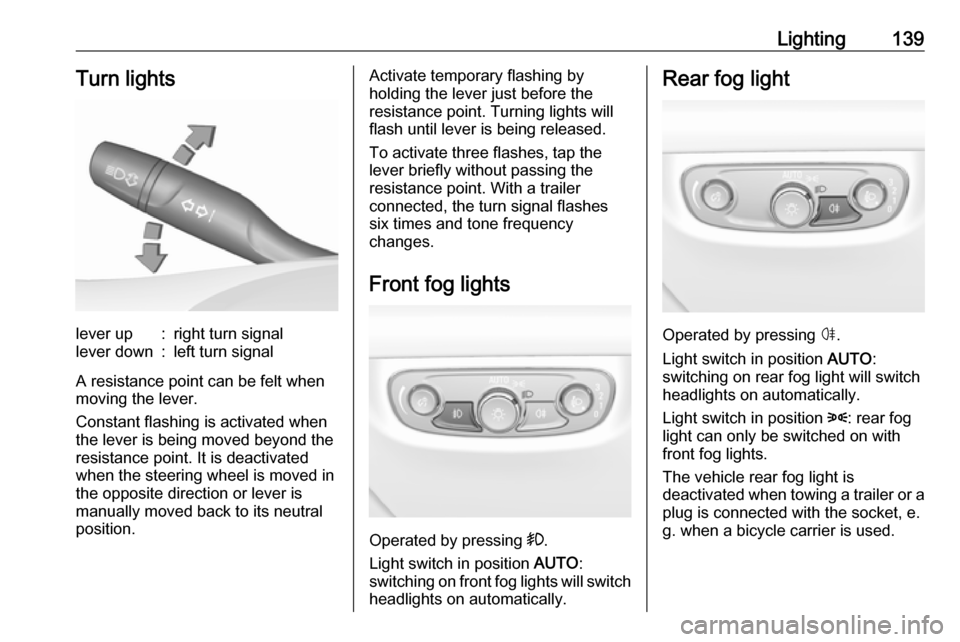
Lighting139Turn lightslever up:right turn signallever down:left turn signal
A resistance point can be felt when
moving the lever.
Constant flashing is activated when
the lever is being moved beyond the
resistance point. It is deactivated
when the steering wheel is moved in
the opposite direction or lever is
manually moved back to its neutral
position.
Activate temporary flashing by
holding the lever just before the
resistance point. Turning lights will
flash until lever is being released.
To activate three flashes, tap the
lever briefly without passing the
resistance point. With a trailer
connected, the turn signal flashes
six times and tone frequency
changes.
Front fog lights
Operated by pressing >.
Light switch in position AUTO:
switching on front fog lights will switch headlights on automatically.
Rear fog light
Operated by pressing ø.
Light switch in position AUTO:
switching on rear fog light will switch
headlights on automatically.
Light switch in position 8: rear fog
light can only be switched on with
front fog lights.
The vehicle rear fog light is
deactivated when towing a trailer or a
plug is connected with the socket, e.
g. when a bicycle carrier is used.
Page 145 of 347
Lighting143They will switch off automatically after
a delay. This function works only in
the dark. Theatre lighting is activated
if the driver's door is opened during
this time.
Path lighting
Headlights, tail lights and number
plate lights illuminate the surrounding area for an adjustable time after
leaving the vehicle.
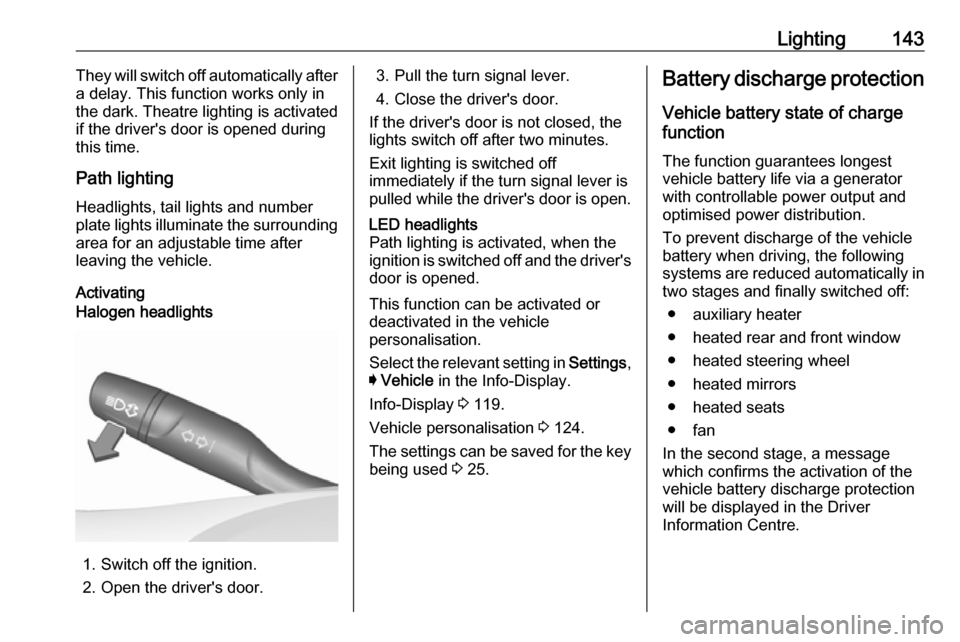
ActivatingHalogen headlights
1. Switch off the ignition.
2. Open the driver's door.
3. Pull the turn signal lever.
4. Close the driver's door.
If the driver's door is not closed, the
lights switch off after two minutes.
Exit lighting is switched off
immediately if the turn signal lever is pulled while the driver's door is open.LED headlights
Path lighting is activated, when the
ignition is switched off and the driver's door is opened.
This function can be activated or
deactivated in the vehicle
personalisation.
Select the relevant setting in Settings,
I Vehicle in the Info-Display.
Info-Display 3 119.
Vehicle personalisation 3 124.
The settings can be saved for the key being used 3 25.
Battery discharge protection
Vehicle battery state of charge
function
The function guarantees longest
vehicle battery life via a generator
with controllable power output and
optimised power distribution.
To prevent discharge of the vehicle
battery when driving, the following
systems are reduced automatically in two stages and finally switched off:
● auxiliary heater
● heated rear and front window
● heated steering wheel
● heated mirrors
● heated seats
● fan
In the second stage, a message
which confirms the activation of the
vehicle battery discharge protection
will be displayed in the Driver
Information Centre.
Page 147 of 347

Infotainment system145Infotainment systemIntroduction................................ 145
Basic operation .......................... 150
Profiles ....................................... 153
Audio .......................................... 154
Navigation .................................. 156
Navigation system ...................156
Connected navigation ..............158
Speech recognition ....................159
General information .................159
Usage ...................................... 161
Phone ........................................ 162
General information .................162
Bluetooth connection ...............163
Using smartphone applications ............................ 164Introduction
The Infotainment system provides
you with state-of-the-art in-car
Infotainment.
Using radio tuner functions, many
radio stations can be saved as
favourites.
External data storage devices can be connected to the Infotainment systemas further audio sources; either via
USB or via Bluetooth ®
.
In addition, the Infotainment system allows comfortable and safe use of a mobile phone in the vehicle.
Specific smartphone applications can
also be operated via the Infotainment system.
Optionally, the Infotainment system
can be operated using the touch
screen and buttons on the control
panel, the controls on the steering
wheel, or via speech recognition
(Multimedia Navi Pro).
Note
This manual describes all options
and features available for the
various Infotainment systems.Certain descriptions, including those
for display and menu functions, may not apply to your vehicle due to
model variant, country
specifications, special equipment or
accessories.
For additional information including
some videos, visit us online.
Important information on
operation and traffic safety9 Warning
The Infotainment system must be
used so that the vehicle can be
driven safely at all times. If in
doubt, stop the vehicle and
operate the Infotainment system
while the vehicle is stationary.