storage OPEL INSIGNIA BREAK 2019 Manual user
[x] Cancel search | Manufacturer: OPEL, Model Year: 2019, Model line: INSIGNIA BREAK, Model: OPEL INSIGNIA BREAK 2019Pages: 345, PDF Size: 9.73 MB
Page 83 of 345

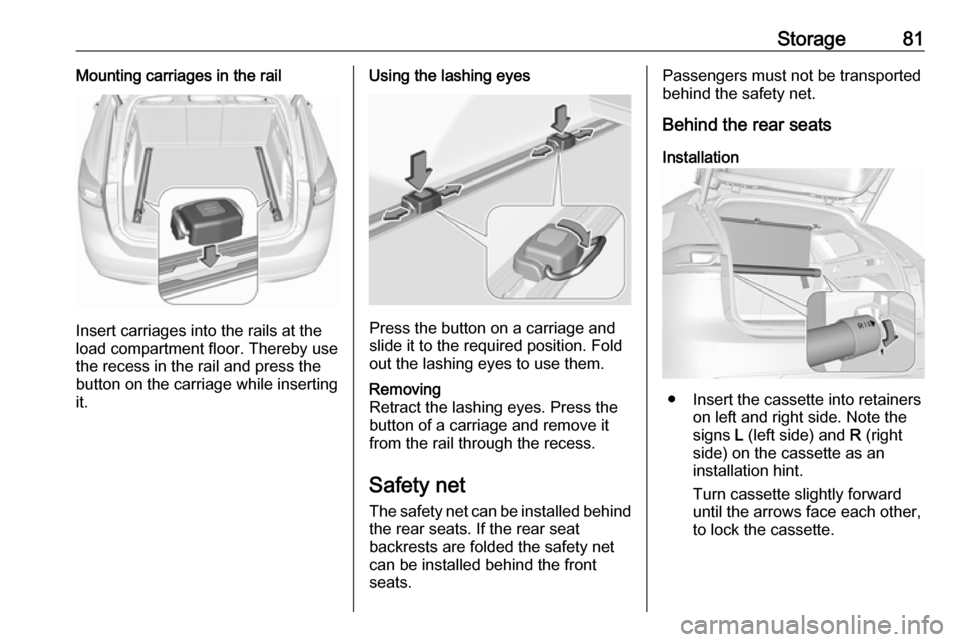
Storage81Mounting carriages in the rail
Insert carriages into the rails at the
load compartment floor. Thereby use
the recess in the rail and press the
button on the carriage while inserting
it.
Using the lashing eyes
Press the button on a carriage and
slide it to the required position. Fold out the lashing eyes to use them.
Removing
Retract the lashing eyes. Press the
button of a carriage and remove it
from the rail through the recess.
Safety net
The safety net can be installed behind the rear seats. If the rear seat
backrests are folded the safety net
can be installed behind the front
seats.
Passengers must not be transported
behind the safety net.
Behind the rear seats
Installation
● Insert the cassette into retainers on left and right side. Note the
signs L (left side) and R (right
side) on the cassette as an
installation hint.
Turn cassette slightly forward until the arrows face each other,
to lock the cassette.
Page 84 of 345

82Storage
● Pull safety net rod out ofcassette. Suspend and engage
safety net rod into installation
opening on one side of the roof
frame. Compress rod and
suspend and engage at the other
side.
Remove load compartment cover
3 78
Removal ● Remove and compress one side of safety net rod from installationopening. Remove other side of
safety net rod from installation
opening.
● Roll up safety net.● Turn cassette slightly backwards to unlock and remove from
retainers.
Behind the front seats
Installation
● Suspend and engage safety net rod into installation opening on
one side of the roof frame.
Compress rod, suspend and
engage at the other side. Pull
safety net rod out of cassette.
Page 85 of 345

Storage83
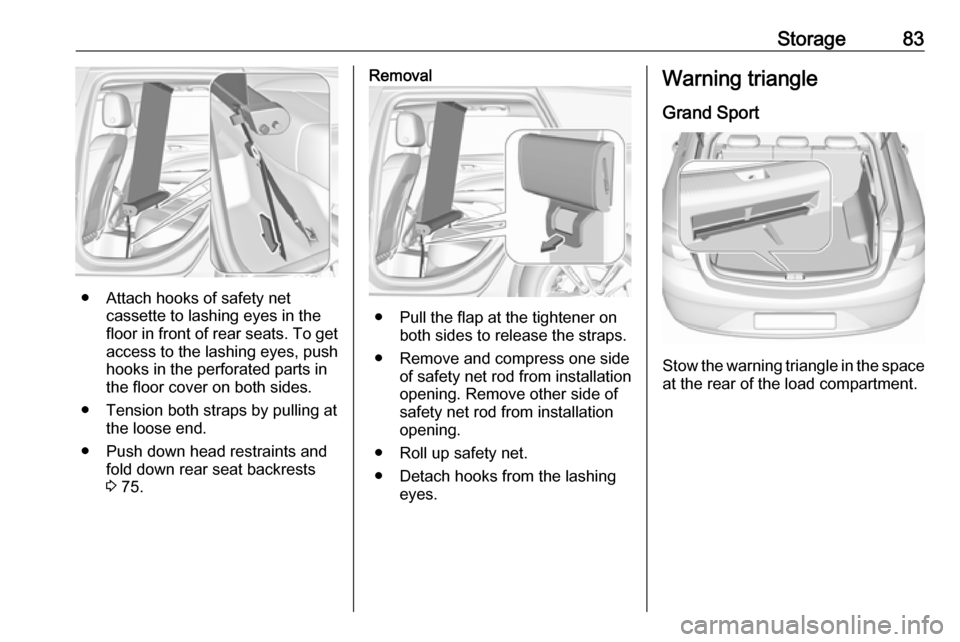
● Attach hooks of safety netcassette to lashing eyes in the
floor in front of rear seats. To get
access to the lashing eyes, push
hooks in the perforated parts in
the floor cover on both sides.
● Tension both straps by pulling at the loose end.
● Push down head restraints and fold down rear seat backrests
3 75.
Removal
● Pull the flap at the tightener on
both sides to release the straps.
● Remove and compress one side of safety net rod from installation
opening. Remove other side of
safety net rod from installation
opening.
● Roll up safety net.
● Detach hooks from the lashing eyes.
Warning triangle
Grand Sport
Stow the warning triangle in the space
at the rear of the load compartment.
Page 86 of 345

84StorageSports Tourer, Country Tourer
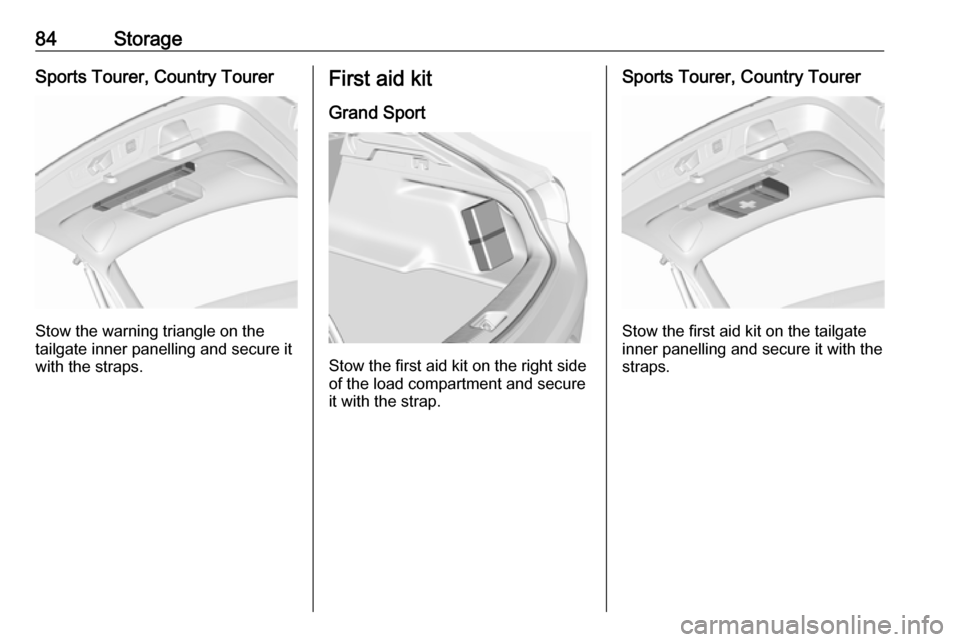
Stow the warning triangle on the
tailgate inner panelling and secure it with the straps.
First aid kit
Grand Sport
Stow the first aid kit on the right side
of the load compartment and secure it with the strap.
Sports Tourer, Country Tourer
Stow the first aid kit on the tailgate
inner panelling and secure it with the straps.
Page 87 of 345

Storage85Roof rack system
Roof rack For safety reasons and to avoiddamage to the roof, the vehicle
approved roof rack system is
recommended. For further
information, contact your workshop.
Mounting roof rack
Grand Sport
Open all doors.
Mounting points are located in each
door frame of the vehicle body.
Fasten the roof rack according to the installation instructions delivered with the roof rack.
Remove the roof rack when not in use.
Sports Tourer, Country Tourer
Mounting points are located in each
roof railing.
Fasten the roof rack on the first two
mounting points according to the
installation instructions delivered with the roof rack.
Remove the roof rack when not in
use.
Loading information
● Heavy objects in the load compartment should be placed
against the seat backrests. Make
sure that the backrests are
securely engaged, i.e. no longer
showing the red markings on the side near the release lever. If
objects can be stacked, heavier
objects should be placed at the
bottom.
● Prevent sliding of loose objects by securing them with straps
attached to the lashing eyes
3 80.
Page 88 of 345

86Storage● Do not allow the load to protrudeabove the upper edge of the
backrests.
● Do not place any objects on the load compartment cover or theinstrument panel, and do notcover the sensor on top of the
instrument panel.
● The load must not obstruct the operation of the pedals, parking
brake and gear selector, or
hinder the freedom of movement
of the driver. Do not place any
unsecured objects in the interior.
● Do not drive with an open load compartment.9Warning
Always ensure that the load in the
vehicle is securely stowed.
Otherwise objects can be thrown
around inside the vehicle and
cause personal injury or damage
to the load or vehicle.
● The payload is the difference between the permitted grossvehicle weight (see identification
plate 3 302) and the EC kerb
weight.
To calculate the payload, enter the data for your vehicle in the
weights table at the front of this
manual.
The EC kerb weight includes
weights for the driver (68 kg),
luggage (7 kg) and all fluids (fuel
tank 90% full).
Optional equipment and
accessories increase the kerb
weight.
● Driving with a roof load increases
the sensitivity of the vehicle to
cross-winds and has a
detrimental effect on vehicle
handling due to the vehicle's
higher centre of gravity.
Distribute the load evenly and secure it properly with retaining
straps. Adjust the tyre pressure
and vehicle speed according to
the load conditions. Check and
retighten the straps frequently.
Do not drive faster than 120 km/ h.The permissible roof load is
100 kg. The roof load is the
combined weight of the roof rack and the load.
Page 146 of 345

144Infotainment systemInfotainment systemIntroduction................................ 144
Basic operation .......................... 148
Profiles ....................................... 151
Audio .......................................... 152
Navigation .................................. 154
Navigation system ...................154
Connected navigation ..............156
Speech recognition ....................157
General information .................157
Usage ...................................... 159
Phone ........................................ 160
General information .................160
Bluetooth connection ...............161
Using smartphone applications ............................ 162Introduction
The Infotainment system provides
you with state-of-the-art in-car
Infotainment.
Using radio tuner functions, many
radio stations can be saved as
favourites.
External data storage devices can be connected to the Infotainment systemas further audio sources; either via
USB or via Bluetooth ®
.
In addition, the Infotainment system allows comfortable and safe use of a mobile phone in the vehicle.
Specific smartphone applications can
also be operated via the Infotainment system.
Optionally, the Infotainment system
can be operated using the touch
screen and buttons on the control
panel, the controls on the steering
wheel, or via speech recognition
(Multimedia Navi Pro).
Note
This manual describes all options
and features available for the
various Infotainment systems.Certain descriptions, including those
for display and menu functions, may not apply to your vehicle due to
model variant, country
specifications, special equipment or
accessories.
For additional information including
some videos, visit us online.
Important information on
operation and traffic safety9 Warning
The Infotainment system must be
used so that the vehicle can be
driven safely at all times. If in
doubt, stop the vehicle and
operate the Infotainment system
while the vehicle is stationary.
Page 254 of 345

252Vehicle careVehicle careGeneral Information...................252
Accessories and vehicle modifications .......................... 252
Vehicle storage ........................253
End-of-life vehicle recovery .....253
Vehicle checks ........................... 254
Performing work ......................254
Bonnet ..................................... 254
Engine oil ................................. 255
Engine coolant ......................... 256
Washer fluid ............................ 257
Brakes ..................................... 257
Brake fluid ............................... 257
Vehicle battery ......................... 258
Diesel fuel system bleeding .....259
Wiper blade replacement ........259
Bulb replacement .......................260
Halogen headlights ..................260
LED headlights ........................ 262
Front fog lights ......................... 262
Tail lights ................................. 264
Side turn lights ......................... 269
Number plate light ...................270
Interior lights ............................ 270
Instrument panel illumination ...270Electrical system ........................270
Fuses ....................................... 270
Engine compartment fuse box . 271
Instrument panel fuse box .......274
Vehicle tools .............................. 275
Tools ........................................ 275
Wheels and tyres .......................276
Winter tyres ............................. 276
Tyre designations ....................277
Tyre pressure .......................... 277
Tyre pressure monitoring system .................................... 278
Tread depth ............................. 281
Changing tyre and wheel size . 281
Wheel covers ........................... 281
Tyre chains .............................. 282
Tyre repair kit .......................... 282
Wheel changing .......................287
Spare wheel ............................ 288
Jump starting ............................. 291
Towing ....................................... 293
Towing the vehicle ...................293
Towing another vehicle ...........294
Appearance care .......................295
Exterior care ............................ 295
Interior care ............................. 297General Information
Accessories and vehiclemodifications
We recommend the use of genuine
parts and accessories and factory approved parts specific for your
vehicle type. We cannot assess or guarantee reliability of other products
- even if they have a regulatory or
otherwise granted approval.
Any modification, conversion or other changes made to standard vehicle
specifications (including, without
limitation, software modifications,
modifications of the electronic control
units) may invalidate the warranty
offered by Opel. Furthermore, such
changes may affect driver assistance
systems, fuel consumption, CO 2
emissions and other emissions of the
vehicle. They may also invalidate the
vehicle operating permit.
Page 255 of 345

Vehicle care253Caution
When transporting the vehicle on
a train or on a recovery vehicle, the
mud flaps might be damaged.
Vehicle storage
Storage for a long period of time
If the vehicle is to be stored for several months:
● Wash and wax the vehicle.
● Have the wax in the engine compartment and underbody
checked.
● Clean and preserve the rubber seals.
● Fill up fuel tank completely.
● Change the engine oil.
● Drain the washer fluid reservoir.
● Check the coolant antifreeze and
corrosion protection.
● Adjust tyre pressure to the value specified for full load.
● Park the vehicle in a dry, wellventilated place. Engage first or
reverse gear or set selector lever
to P. Prevent the vehicle from
rolling.
● Do not apply the parking brake.
● Open the bonnet, close all doors and lock the vehicle.
● Disconnect the clamp from the negative terminal of the vehicle
battery. Beware that all systems
are not functional, e.g. anti-theft
alarm system.
Putting back into operation
When the vehicle is to be put back into
operation:
● Connect the clamp to the negative terminal of the vehicle
battery. Activate the electronics
of the power windows.
● Check tyre pressure.
● Fill up the washer fluid reservoir.
● Check the engine oil level.
● Check the coolant level.
● Fit the number plate if necessary.End-of-life vehicle recovery
Information on end-of-life vehicle
recovery centres and the recycling of
end-of-life vehicles is available on our website, where legally required. Only
entrust this work to an authorised
recycling centre.
Page 288 of 345

286Vehicle careType 2: remove tyre repair kit and
drive immediately up to 10 km, but not longer than 10 minutes. Check
tyre pressure once more. If the
tyre pressure is not obtained,
reattach the tyre repair kit and
continue the filling procedure for
10 minutes. If the prescribed tyre
pressure is still not obtained, the
tyre is too badly damaged. Seek
the assistance of a workshop.
If the pressure is obtained, correct to the prescribed tyre pressure byusing the compressor to increase
or decrease by opening the air
release valve (turn anticlockwise)
at the air filler hose.
12. Detach the tyre repair kit. Type 1: push catch on bracket to
remove sealant bottle from
bracket. Screw tyre inflation hose
to the free connection of sealant
bottle. This prevents sealant from
escaping.
Type 2: Sealant bottle can not be
removed from the compressor.
Have the sealant bottle replaced
by your workshop.13. Stow tyre repair kit in the load compartment.
14. Remove any excess sealant using a cloth.
15. Take the label indicating maximum permitted speed from
the sealant bottle and affix in the
driver's field of view.
16. Continue driving immediately so that sealant is evenly distributed
in the tyre. After driving approx.
10 km (but no more than
10 minutes), stop and check tyre
pressure. Screw compressor air
hose directly onto tyre valve.
If tyre pressure is more than
1.3 bar , set it to the correct value.
Repeat the procedure until there
is no more loss of pressure.
If the tyre pressure has fallen
below 1.3 bar, the vehicle must
not be used. Seek the assistance
of a workshop.
17. Stow away tyre repair kit in the box.
18. Fix the box with the screw.
Note
The driving characteristics of the
repaired tyre are severely affected,
therefore have this tyre replaced.
If unusual noise is heard or the
compressor becomes hot, turn
compressor off for at least 30 min.
The built-in safety valve opens at a
pressure of 7 bar.
Note the expiry date of the kit. After
this date its sealing capability is no
longer guaranteed. Pay attention to
storage information on sealant
bottle.
Replace the used sealant bottle. Dispose of the bottle as prescribed
by applicable laws.