buttons OPEL INSIGNIA BREAK 2019 Manual user
[x] Cancel search | Manufacturer: OPEL, Model Year: 2019, Model line: INSIGNIA BREAK, Model: OPEL INSIGNIA BREAK 2019Pages: 345, PDF Size: 9.73 MB
Page 13 of 345

In brief111Power windows .....................40
2 Exterior mirrors .....................37
3 Central locking system ..........25
4 Side air vents ...................... 172
5 Cruise control .....................201
Speed limiter ....................... 202
Adaptive cruise control .......204
Forward collision alert .........214
6 Turn and lane-change
signals, headlight flash,
low/high beam, high beam
assist ................................... 138
Exit lighting ......................... 141
Parking lights ...................... 139
Buttons for Driver
Information Centre ..............112
7 Instruments ........................ 101
Driver Information Centre .... 112
8 Buttons for Driver
Information Centre ..............112
9 Head-up display ..................11910Windscreen wiper and
washer, headlight washer,
rear wiper and washer .........89
11 Centre air vents .................. 172
12 Hazard warning flashers ....137
13 Info-Display ........................ 118
14 Anti-theft alarm system
status LED ........................... 34
15 Electronic Stability Control . 197
Traction Control system .....196
16 Glovebox .............................. 73
17 Controls for Info-Display
operation ............................. 118
18 Climate control system ........ 163
19 Power outlet .......................... 93
20 Sport/Tour mode ................199
Parking assist/Advanced
parking assist .....................223
Lane keep assist ................242
Eco button for stop-start
system ................................. 180
21 Manual transmission ..........192
Automatic transmission ......18722Electric parking brake .........194
23 Power switch ....................... 177
24 Steering wheel adjustment ..88
25 Horn ..................................... 89
26 Bonnet release lever ..........254
27 Fuse box ............................ 274
28 Light switch ........................ 131
Headlight range
adjustment ......................... 133
Front/rear fog lights ............138
Instrument illumination .......139
29 Head-up display ..................119
Page 23 of 345
Keys, doors and windows21battery replacement is indicated by a
message in the Driver Information
Centre 3 122.
Batteries do not belong in household
waste. They must be disposed of at
an appropriate recycling collection
point.
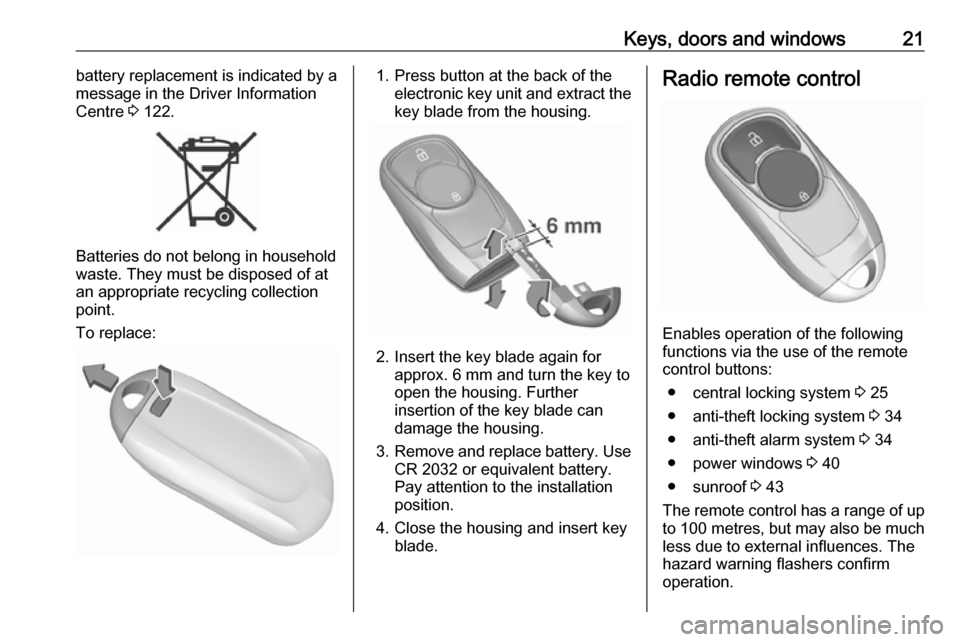
To replace:
1. Press button at the back of the electronic key unit and extract thekey blade from the housing.
2. Insert the key blade again for approx. 6 mm and turn the key to
open the housing. Further
insertion of the key blade can
damage the housing.
3. Remove and replace battery. Use
CR 2032 or equivalent battery.
Pay attention to the installation
position.
4. Close the housing and insert key blade.
Radio remote control
Enables operation of the following
functions via the use of the remote control buttons:
● central locking system 3 25
● anti-theft locking system 3 34
● anti-theft alarm system 3 34
● power windows 3 40
● sunroof 3 43
The remote control has a range of up
to 100 metres , but may also be much
less due to external influences. The
hazard warning flashers confirm
operation.
Page 26 of 345
24Keys, doors and windowsUnlocking and opening the power
tailgate
The power tailgate can be unlocked and opened handsfree by moving the foot below the rear bumper.
Alternatively, press the touchpad switch under the brand emblem. Theelectronic key has to be in range. The
doors remain locked. Load
compartment 3 29.
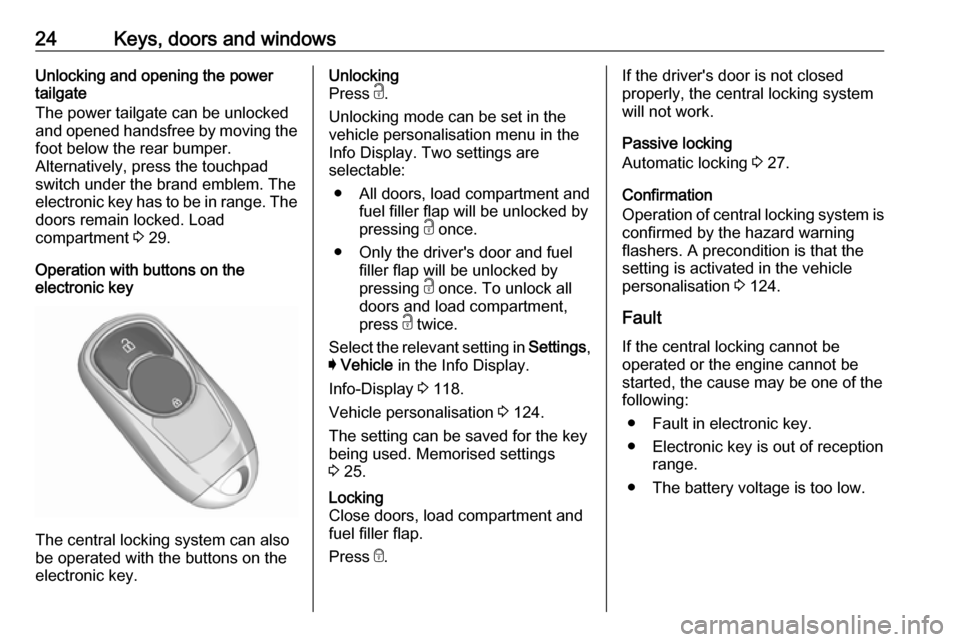
Operation with buttons on the
electronic key
The central locking system can also
be operated with the buttons on the
electronic key.
Unlocking
Press c.
Unlocking mode can be set in the
vehicle personalisation menu in the
Info Display. Two settings are
selectable:
● All doors, load compartment and fuel filler flap will be unlocked by
pressing c once.
● Only the driver's door and fuel filler flap will be unlocked by
pressing c once. To unlock all
doors and load compartment,
press c twice.
Select the relevant setting in Settings,
I Vehicle in the Info Display.
Info-Display 3 118.
Vehicle personalisation 3 124.
The setting can be saved for the key
being used. Memorised settings
3 25.Locking
Close doors, load compartment and
fuel filler flap.
Press e.If the driver's door is not closed
properly, the central locking system will not work.
Passive locking
Automatic locking 3 27.
Confirmation
Operation of central locking system is
confirmed by the hazard warning
flashers. A precondition is that the
setting is activated in the vehicle
personalisation 3 124.
Fault
If the central locking cannot be
operated or the engine cannot be
started, the cause may be one of the
following:
● Fault in electronic key.
● Electronic key is out of reception range.
● The battery voltage is too low.
Page 27 of 345

Keys, doors and windows25● Overload of the central lockingsystem by operating at frequent
intervals, the power supply is
interrupted for a short time.
● Interference from higher-power radio waves from other sources.
To rectify the cause of the fault,
change the position of the electronic
key.
Manual unlocking 3 25.
Memorised settings
Whenever the ignition is switched off, some functions of the following
settings may be automatically
memorised by the remote control unit
or the electronic key:
● automatic climate control
● lighting
● Infotainment system
● central locking system
● Sport mode settings
● comfort settingsThe saved settings are automatically
used the next time the ignition is
switched on with the memorised
electronic key 3 22.
A precondition is that Personalisation
by Driver is activated in the personal
settings of the Info-Display. This must
be set for each electronic key which is
used. The status change is available
only after locking and unlocking the
vehicle.
The assigned memory position of the power seat is automatically recalled
when switching on ignition and Auto
Memory Recall is activated in the
Info-Display for the memorised
electronic key.
Power seat 3 50.
Vehicle personalisation 3 124.
Central locking system Unlocks and locks doors, load
compartment and fuel filler flap.
A pull on an interior door handle
unlocks the respective door. Pulling
the handle once more opens the door.Note
In the event of an accident in which
airbags or belt pretensioners are
deployed, the vehicle is
automatically unlocked.
Note
A short time after unlocking with the
electronic key, the doors are being
locked automatically if no door has
been opened. A precondition is that
the setting is activated in the vehicle
personalisation 3 124.
Central locking buttons
Locks or unlocks all doors, the load
compartment and fuel filler flap from
the passenger compartment via a
switch in the driver's door panel.
Page 56 of 345
54Seats, restraintsHeating
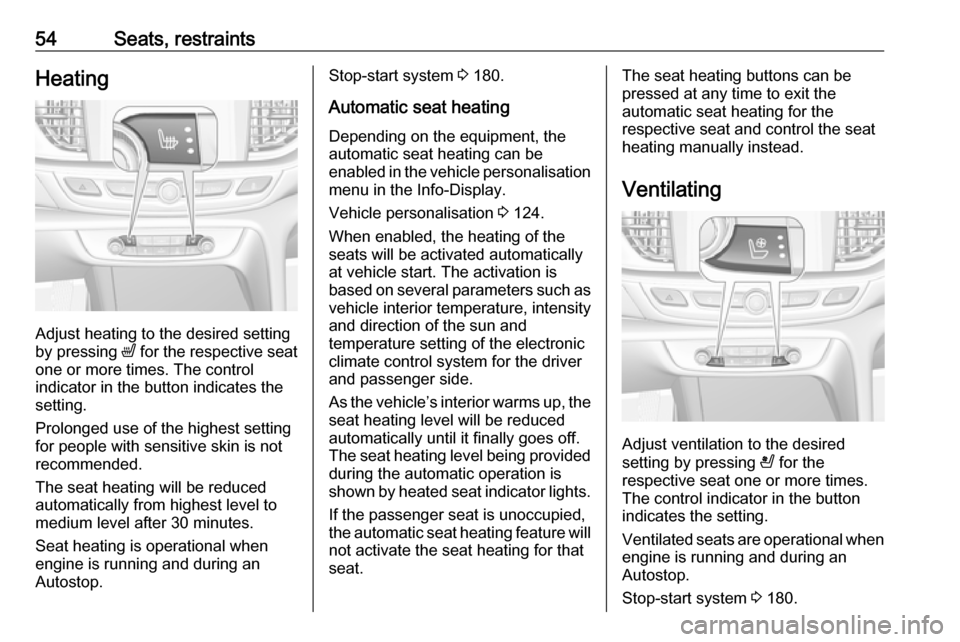
Adjust heating to the desired setting
by pressing ß for the respective seat
one or more times. The control
indicator in the button indicates the
setting.
Prolonged use of the highest setting
for people with sensitive skin is not
recommended.
The seat heating will be reduced
automatically from highest level to
medium level after 30 minutes.
Seat heating is operational when
engine is running and during an
Autostop.
Stop-start system 3 180.
Automatic seat heating Depending on the equipment, the
automatic seat heating can be
enabled in the vehicle personalisation
menu in the Info-Display.
Vehicle personalisation 3 124.
When enabled, the heating of the
seats will be activated automatically
at vehicle start. The activation is
based on several parameters such as vehicle interior temperature, intensity
and direction of the sun and
temperature setting of the electronic
climate control system for the driver
and passenger side.
As the vehicle’s interior warms up, the seat heating level will be reduced
automatically until it finally goes off. The seat heating level being provided
during the automatic operation is
shown by heated seat indicator lights.
If the passenger seat is unoccupied,
the automatic seat heating feature will not activate the seat heating for that
seat.The seat heating buttons can be
pressed at any time to exit the
automatic seat heating for the
respective seat and control the seat
heating manually instead.
Ventilating
Adjust ventilation to the desired
setting by pressing A for the
respective seat one or more times.
The control indicator in the button
indicates the setting.
Ventilated seats are operational when
engine is running and during an
Autostop.
Stop-start system 3 180.
Page 114 of 345
112Instruments and controlsDisplaysDriver Information Centre
The Driver Information Centre is
located in the instrument cluster.
Depending on the version and the
instrument cluster, the Driver
Information Centre is available as
Baselevel display, Midlevel display or Uplevel display.
Driver Information Centre indicates
depending on the equipment:
● overall and trip odometer
● vehicle information and settings
● trip/fuel information
● driving economic information
● driver assistance alerts
● warning messages
● audio and infotainment information
● phone information
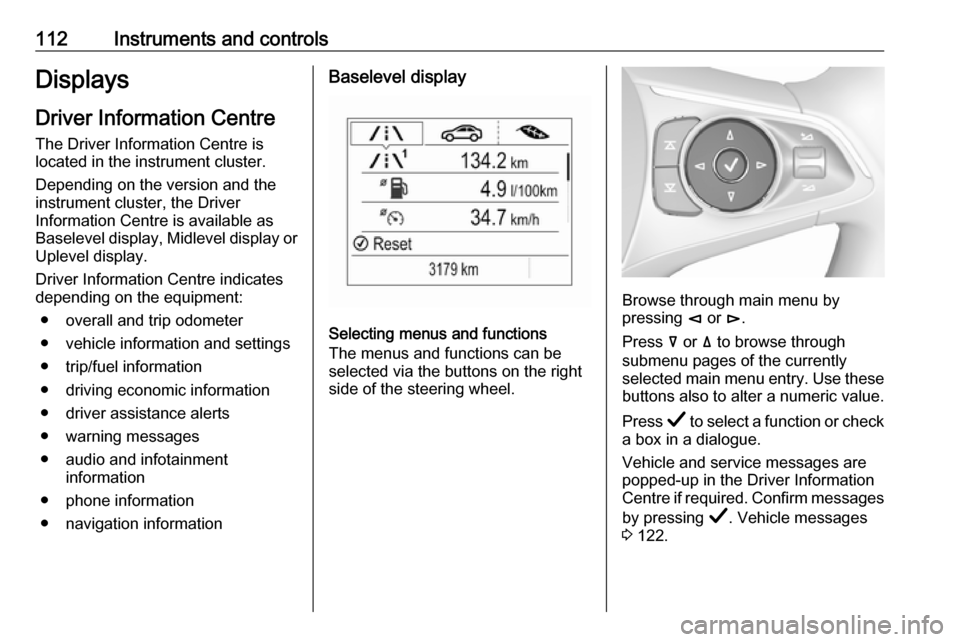
● navigation informationBaselevel display
Selecting menus and functions
The menus and functions can be
selected via the buttons on the right
side of the steering wheel.
Browse through main menu by
pressing è or é.
Press å or ä to browse through
submenu pages of the currently
selected main menu entry. Use these
buttons also to alter a numeric value.
Press Å to select a function or check
a box in a dialogue.
Vehicle and service messages are
popped-up in the Driver Information
Centre if required. Confirm messages
by pressing Å. Vehicle messages
3 122.
Page 115 of 345
Instruments and controls113Main menu
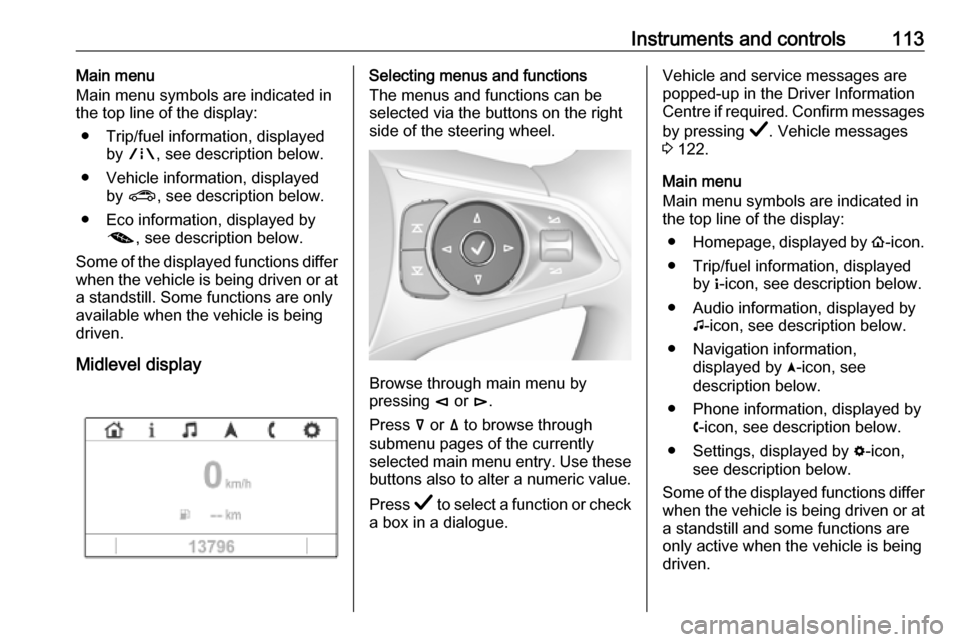
Main menu symbols are indicated in
the top line of the display:
● Trip/fuel information, displayed by ; , see description below.
● Vehicle information, displayed by ? , see description below.
● Eco information, displayed by @ , see description below.
Some of the displayed functions differ
when the vehicle is being driven or at
a standstill. Some functions are only
available when the vehicle is being
driven.
Midlevel displaySelecting menus and functions
The menus and functions can be
selected via the buttons on the right
side of the steering wheel.
Browse through main menu by
pressing è or é.
Press å or ä to browse through
submenu pages of the currently
selected main menu entry. Use these
buttons also to alter a numeric value.
Press Å to select a function or check
a box in a dialogue.
Vehicle and service messages are
popped-up in the Driver Information
Centre if required. Confirm messages
by pressing Å. Vehicle messages
3 122.
Main menu
Main menu symbols are indicated in
the top line of the display:
● Homepage, displayed by !-icon.
● Trip/fuel information, displayed by "-icon, see description below.
● Audio information, displayed by G-icon, see description below.
● Navigation information, displayed by §-icon, see
description below.
● Phone information, displayed by $-icon, see description below.
● Settings, displayed by %-icon,
see description below.
Some of the displayed functions differ when the vehicle is being driven or at
a standstill and some functions are
only active when the vehicle is being
driven.
Page 116 of 345
114Instruments and controlsUplevel display
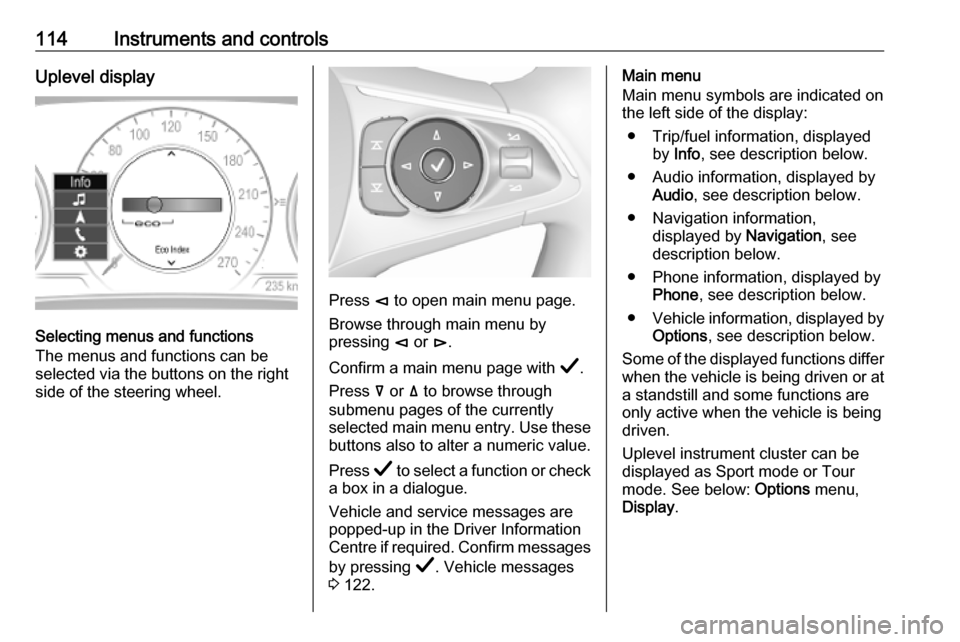
Selecting menus and functions
The menus and functions can be
selected via the buttons on the right
side of the steering wheel.
Press è to open main menu page.
Browse through main menu by
pressing è or é.
Confirm a main menu page with Å.
Press å or ä to browse through
submenu pages of the currently
selected main menu entry. Use these
buttons also to alter a numeric value.
Press Å to select a function or check
a box in a dialogue.
Vehicle and service messages are
popped-up in the Driver Information
Centre if required. Confirm messages
by pressing Å. Vehicle messages
3 122.
Main menu
Main menu symbols are indicated on
the left side of the display:
● Trip/fuel information, displayed by Info , see description below.
● Audio information, displayed by Audio , see description below.
● Navigation information, displayed by Navigation, see
description below.
● Phone information, displayed by Phone , see description below.
● Vehicle information, displayed by
Options , see description below.
Some of the displayed functions differ
when the vehicle is being driven or at
a standstill and some functions are
only active when the vehicle is being
driven.
Uplevel instrument cluster can be
displayed as Sport mode or Tour
mode. See below: Options menu,
Display .
Page 121 of 345
Instruments and controls1198'' Info DisplaySelecting menus and settings
There are three options to operate the
display:
● via buttons below the display● by touching the touchscreen with
the finger
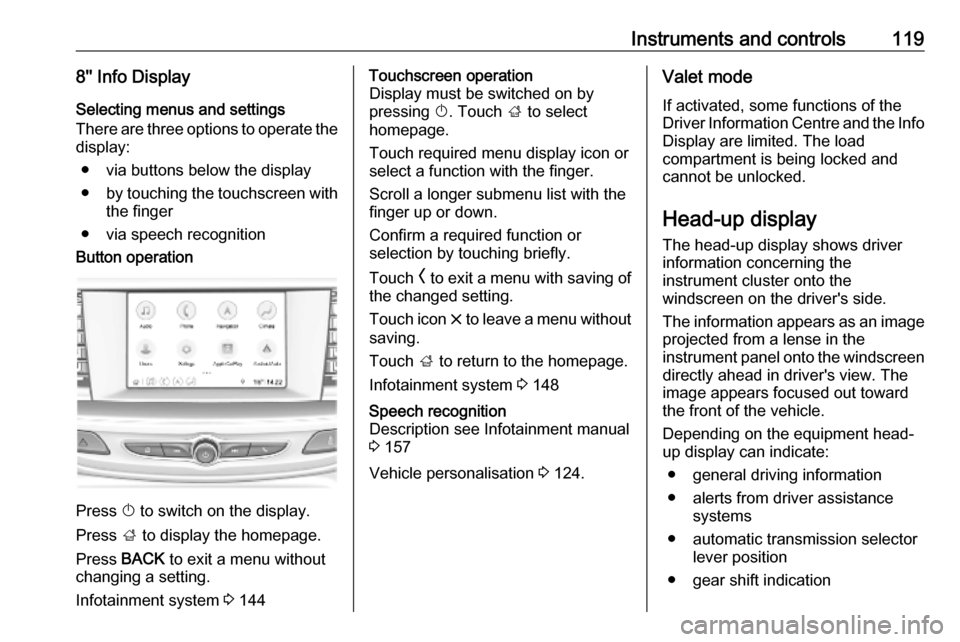
● via speech recognitionButton operation
Press X to switch on the display.
Press ; to display the homepage.
Press BACK to exit a menu without
changing a setting.
Infotainment system 3 144
Touchscreen operation
Display must be switched on by
pressing X. Touch ; to select
homepage.
Touch required menu display icon or select a function with the finger.
Scroll a longer submenu list with the
finger up or down.
Confirm a required function or
selection by touching briefly.
Touch O to exit a menu with saving of
the changed setting.
Touch icon & to leave a menu without
saving.
Touch ; to return to the homepage.
Infotainment system 3 148Speech recognition
Description see Infotainment manual
3 157
Vehicle personalisation 3 124.
Valet mode
If activated, some functions of the
Driver Information Centre and the Info
Display are limited. The load
compartment is being locked and
cannot be unlocked.
Head-up display The head-up display shows driver
information concerning the
instrument cluster onto the
windscreen on the driver's side.
The information appears as an image
projected from a lense in the
instrument panel onto the windscreen
directly ahead in driver's view. The
image appears focused out toward
the front of the vehicle.
Depending on the equipment head-
up display can indicate:
● general driving information
● alerts from driver assistance systems
● automatic transmission selector lever position
● gear shift indication
Page 129 of 345
Instruments and controls127Depending on the equipment of the
vehicle, the following services are available:
● Emergency services and support
in the case of a vehicle
breakdown
● Wi-Fi hotspot
● Smartphone application
● Remote control, e.g. location of the vehicle, activation of horn and
lights, control of central locking system
● Stolen vehicle assistance
● Vehicle diagnostics
● Destination download
Note
The OnStar module of the vehicle is
deactivated after ten days without an
ignition cycle. Functions requiring a
data connection will be available
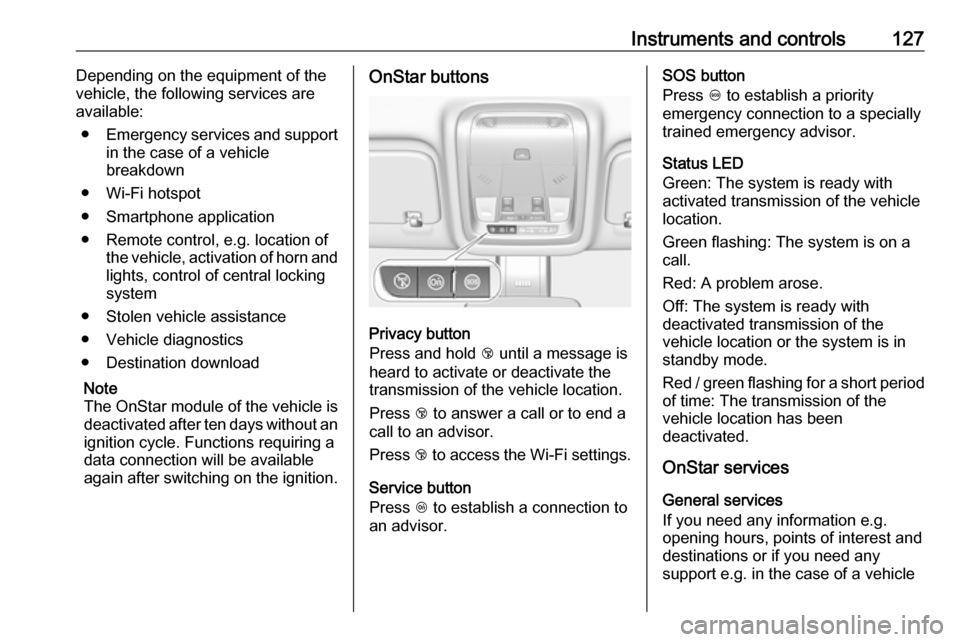
again after switching on the ignition.OnStar buttons
Privacy button
Press and hold j until a message is
heard to activate or deactivate the
transmission of the vehicle location.
Press j to answer a call or to end a
call to an advisor.
Press j to access the Wi-Fi settings.
Service button
Press Z to establish a connection to
an advisor.
SOS button
Press [ to establish a priority
emergency connection to a specially
trained emergency advisor.
Status LED
Green: The system is ready with
activated transmission of the vehicle
location.
Green flashing: The system is on a
call.
Red: A problem arose.
Off: The system is ready with
deactivated transmission of the
vehicle location or the system is in
standby mode.
Red / green flashing for a short period of time: The transmission of the
vehicle location has been
deactivated.
OnStar services
General services
If you need any information e.g.
opening hours, points of interest and
destinations or if you need any
support e.g. in the case of a vehicle