display OPEL INSIGNIA BREAK 2020 Infotainment system
[x] Cancel search | Manufacturer: OPEL, Model Year: 2020, Model line: INSIGNIA BREAK, Model: OPEL INSIGNIA BREAK 2020Pages: 85, PDF Size: 1.88 MB
Page 66 of 85

66NavigationTo redisplay the keyboard, tap within
the entry field.
If desired, select a destination from
the list. The Details menu is
displayed. Select Go to start route
guidance.
Lists with selectable destinations
To access the lists, select * on the
map and, if required, touch Q to scroll
the page.
Select one of the options: ● Recent : list of destinations
recently used
● Favourites : list of destinations
stored as favourites
● Contacts : list of addresses stored
in the phone book of the mobile
phone currently connected via
Bluetooth
To choose a destination from one of
the lists, scroll through the respective
list and select the desired destination.
The Details menu is displayed. Select
Go to start route guidance.Recent destinations
The recent destinations list is
automatically filled with destinations
used in route guidance.
The addresses in the recent
destinations list can be stored as
favourites. Enter the recent
destinations list, select n next to the
desired address to display additional
function buttons and then select ;. If
the icon is filled, the address is saved
in the favourites list.
Addresses can be deleted from the
recent destinations list. Enter the
recent destinations list, select n next
to the desired address and then
select f to delete the respective
address.
Favourites
Favourites can be added when a ;
icon is displayed next to an address.
When the star icon is filled, the
respective address is stored as a
favourite.The position of a favourite in the list can be changed. Enter the favouriteslist, select n next to the desired
favourite to display additional function buttons and then select S or R.
The name of a favourite can be
changed. Enter the favourites list,
select n next to the desired favourite
to display additional function buttons
and then select >. A keyboard is
displayed. Enter the desired name
and then select Done.
Favourites can be deleted. Enter the
favourites list, select n next to the
desired favourite to display additional
function buttons and then select ;.
The favourite is deactivated (unfilled
star). If the icon is selected again, the favourite is reactivated (filled star).
When leaving the favourites list while
favourites are deactivated, they are
deleted from the list.
Contacts
The keyboard can be used to search
for addresses within the list. Enter the
first letters of the desired word (name
Page 67 of 85
Navigation67or address) and all entries containing
a word starting with these letters are
displayed.
For a detailed description of the
keyboard, see above.
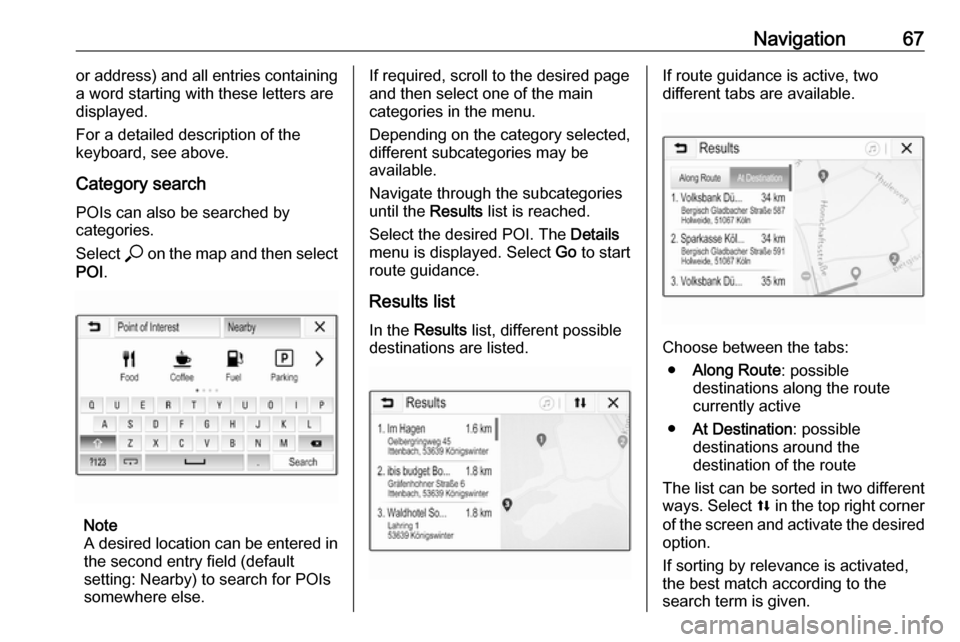
Category search POIs can also be searched by
categories.
Select * on the map and then select
POI .
Note
A desired location can be entered in
the second entry field (default
setting: Nearby) to search for POIs
somewhere else.
If required, scroll to the desired page
and then select one of the main
categories in the menu.
Depending on the category selected,
different subcategories may be
available.
Navigate through the subcategories until the Results list is reached.
Select the desired POI. The Details
menu is displayed. Select Go to start
route guidance.
Results list In the Results list, different possible
destinations are listed.If route guidance is active, two
different tabs are available.
Choose between the tabs:
● Along Route : possible
destinations along the route
currently active
● At Destination : possible
destinations around the
destination of the route
The list can be sorted in two different
ways. Select l in the top right corner
of the screen and activate the desired
option.
If sorting by relevance is activated,
the best match according to the
search term is given.
Page 68 of 85
68NavigationIf sorting by distance is activated, thedestinations are given accordingly to
their distance to the current location.
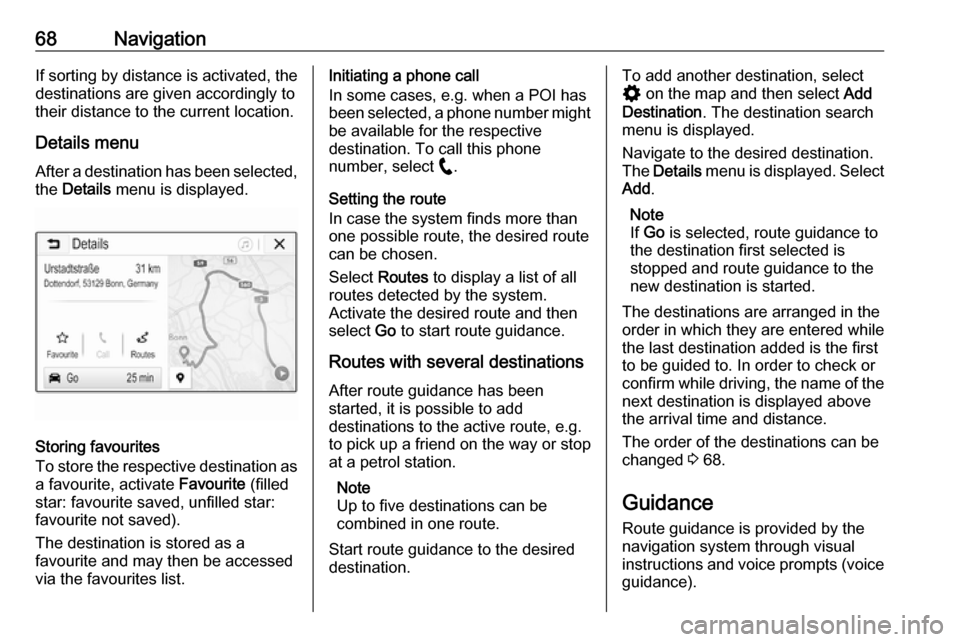
Details menu
After a destination has been selected, the Details menu is displayed.
Storing favourites
To store the respective destination as
a favourite, activate Favourite (filled
star: favourite saved, unfilled star:
favourite not saved).
The destination is stored as a
favourite and may then be accessed
via the favourites list.
Initiating a phone call
In some cases, e.g. when a POI has
been selected, a phone number might
be available for the respective
destination. To call this phone
number, select w.
Setting the route
In case the system finds more than
one possible route, the desired route
can be chosen.
Select Routes to display a list of all
routes detected by the system.
Activate the desired route and then
select Go to start route guidance.
Routes with several destinations After route guidance has been
started, it is possible to add
destinations to the active route, e.g.
to pick up a friend on the way or stop
at a petrol station.
Note
Up to five destinations can be
combined in one route.
Start route guidance to the desired destination.To add another destination, select
% on the map and then select Add
Destination . The destination search
menu is displayed.
Navigate to the desired destination.
The Details menu is displayed. Select
Add .
Note
If Go is selected, route guidance to
the destination first selected is
stopped and route guidance to the
new destination is started.
The destinations are arranged in the
order in which they are entered while
the last destination added is the first
to be guided to. In order to check or
confirm while driving, the name of the next destination is displayed above
the arrival time and distance.
The order of the destinations can be
changed 3 68.
Guidance Route guidance is provided by the
navigation system through visual
instructions and voice prompts (voice guidance).
Page 69 of 85
Navigation69Visual instructions
Visual instructions are provided on
the display.
Note
When route guidance is active and
the navigation application is not the
currently displayed application,
turning manoeuvres are indicated by
pop-up messages displayed on top
of the screen.
Voice guidance
Navigation voice prompts announce
which direction to follow when
approaching an intersection.
To activate the voice prompts
function 3 59.Touch the big turn arrow on the left
side of the screen to replay the last voice guidance instruction.
Starting and cancelling route
guidance
To start route guidance, select Go in
the Details menu after a destination
has been selected 3 64.
To cancel route guidance, select
Cancel on the left side of the screen
3 59.
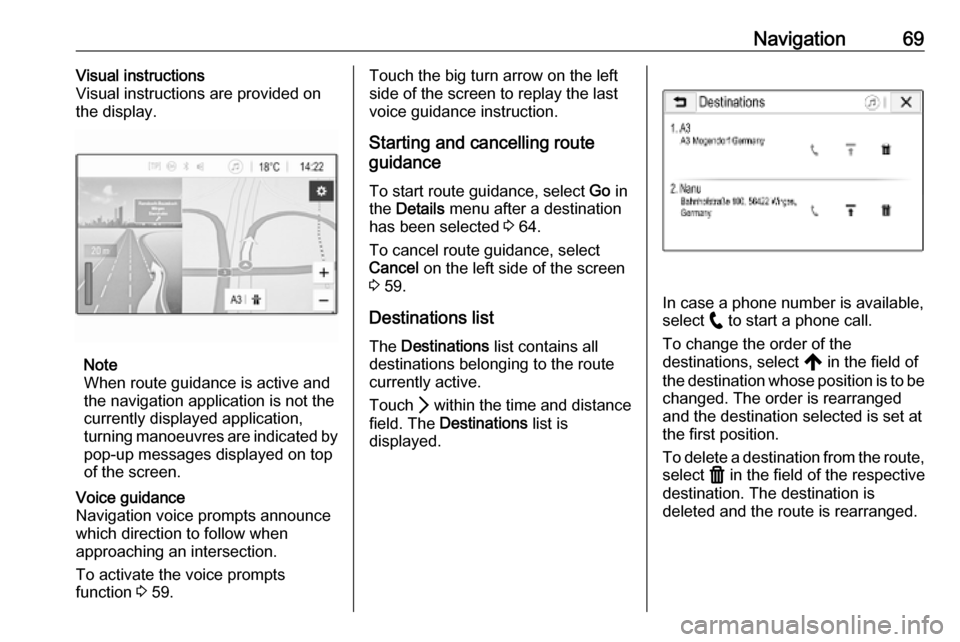
Destinations list
The Destinations list contains all
destinations belonging to the route
currently active.
Touch Q within the time and distance
field. The Destinations list is
displayed.
In case a phone number is available,
select w to start a phone call.
To change the order of the
destinations, select , in the field of
the destination whose position is to be changed. The order is rearranged
and the destination selected is set at
the first position.
To delete a destination from the route,
select f in the field of the respective
destination. The destination is
deleted and the route is rearranged.
Page 70 of 85
70NavigationTurn list
The next turning manoeuvre is
displayed on the left side of the
screen.
Select a underneath the manoeuvre
indication to display the turn list. The
turn list contains all upcoming turns
on the active route.
To display a turning manoeuvre on
the map, scroll through the list and
touch the desired manoeuvre. The
map jumps to the respective locationon the map.
To avoid a route section, select n next
to the respective turning manoeuvre.
A m symbol is displayed.
To recalculate the route without the
respective route section, select m.
The route is changed.
Select the arrow above the list to
return to the normal navigation map
screen.
Traffic settings There are different options available
concerning traffic events.
Traffic list
The traffic list contains all traffic
events detected by the system.
To access the traffic list, select % on
the map and then Traffic List. The list
is displayed.
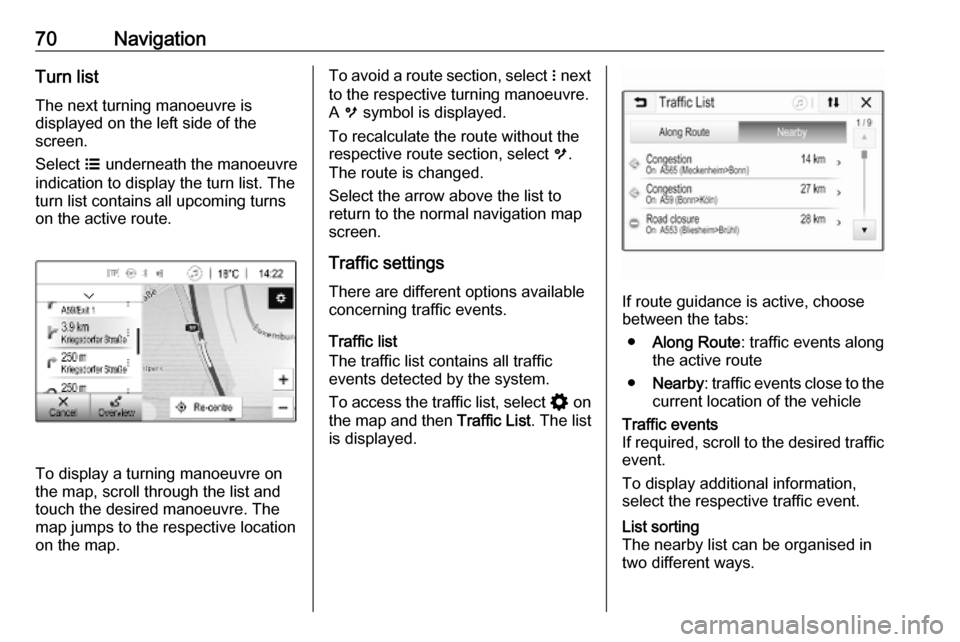
If route guidance is active, choose
between the tabs:
● Along Route : traffic events along
the active route
● Nearby : traffic events close to the
current location of the vehicle
Traffic events
If required, scroll to the desired traffic event.
To display additional information,
select the respective traffic event.List sorting
The nearby list can be organised in
two different ways.
Page 71 of 85

Navigation71To change the sorting order, select
l in the top right corner of the screen.
The Traffic Events Sorting menu is
displayed.
Activate the desired option.
Traffic station
The traffic message channel
providing the traffic information can
be personally set, if desired.
Select % on the map to display the
Options menu. Select Navigation
Settings and then Traffic Resource .
A list of all traffic stations currently available is displayed.
By default, Auto is activated. The
station is adapted automatically by
the system.
To receive traffic information from a
specific station, activate the
respective station.
Traffic avoidance function
Traffic events are taken into
consideration when the system
determines a route to a destination.During active route guidance, the
route can be modified according to
incoming traffic messages.
To set the parameters for these
modifications, select % on the map to
display the Options menu. Select
Navigation Settings , Routing options
and then Auto-Reroute to Avoid
Traffic .
To automatically modify the route
according to new traffic messages,
activate Automatically reroute .
To be consulted when a route is
modified, activate Always ask.
If modified routes are not desired, activate Never.
Route settings Parameters for road and route
selection can be set.
Road types
If desired, certain road types can be
avoided.
Select % on the map to display the
Options menu. Select Avoid on
Route and then activate the road
types to be avoided.Note
If route guidance is active when
changing the road settings, the route
is recalculated according to the new
settings.
Route type
To set the route type, select % on the
map to display the Options menu.
Select Navigation Settings , Routing
options and then Route type .
Activate the desired option: ● Fastest for the fastest route
● Eco-friendly for a route that
allows ecologically friendly
driving
Page 72 of 85

72Speech recognitionSpeech recognitionGeneral information.....................72
Usage .......................................... 72General information
The voice pass-thru application of the Infotainment system allows access tothe speech recognition commands on
a smartphone. See the smartphone
manufacturer's operating instructions
to find out whether the smartphone
supports this feature.
In order to use the voice pass-thru
application, the smartphone must be
connected to the Infotainment system
via USB cable 3 51 or via Bluetooth
3 74.
Usage
Activating speech recognition Press and hold w on the control panel
or Y on the steering wheel to start a
speech recognition session. A voice
command message is displayed on
the screen.
As soon as a beep is heard, a
command can be said. For
information on the commands
supported, see the operating
instructions of the smartphone.Adjusting the volume of voice
prompts
Turn ) on the control panel or press
+ / - on the right side of the steering
wheel to increase or decrease the
volume of voice prompts.
Deactivating speech recognition
Press 7 on the steering wheel. The
voice command message disappears and the speech recognition session is
ended.
Page 74 of 85
74Phoneinterference is caused by the
mobile phone or if dangerous
situations can occur.
Bluetooth
The phone function is certified by theBluetooth Special Interest Group
(SIG).
Further information about the
specification can be found on the
Internet at http://www.bluetooth.com.
Bluetooth connection Bluetooth is a radio standard for the
wireless connection of e.g. mobile
phones, smartphones or other
devices.
The pairing and connecting of the Bluetooth devices to the Infotainment
system are carried out via the
Bluetooth menu. Pairing is the PIN
code exchange between the
Bluetooth device and the
Infotainment system.
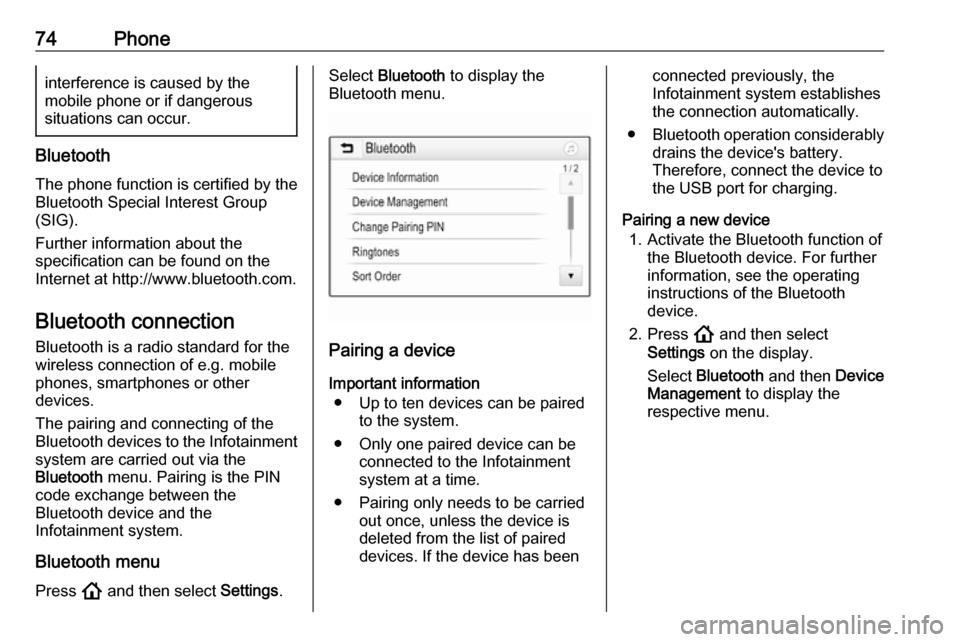
Bluetooth menu Press ! and then select Settings.
Select Bluetooth to display the
Bluetooth menu.
Pairing a device
Important information ● Up to ten devices can be paired to the system.
● Only one paired device can be connected to the Infotainment
system at a time.
● Pairing only needs to be carried out once, unless the device is
deleted from the list of paired
devices. If the device has been
connected previously, the
Infotainment system establishes
the connection automatically.
● Bluetooth operation considerably
drains the device's battery.
Therefore, connect the device to
the USB port for charging.
Pairing a new device 1. Activate the Bluetooth function of the Bluetooth device. For further
information, see the operating
instructions of the Bluetooth
device.
2. Press ! and then select
Settings on the display.
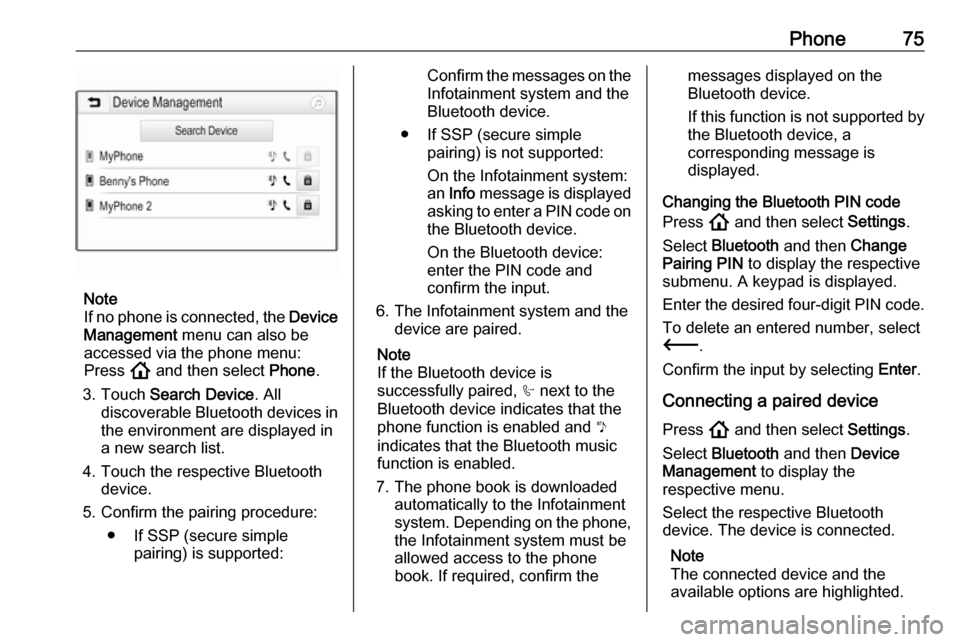
Select Bluetooth and then Device
Management to display the
respective menu.
Page 75 of 85
Phone75
Note
If no phone is connected, the Device
Management menu can also be
accessed via the phone menu:
Press ! and then select Phone.
3. Touch Search Device . All
discoverable Bluetooth devices in
the environment are displayed in a new search list.
4. Touch the respective Bluetooth device.
5. Confirm the pairing procedure:
● If SSP (secure simple pairing) is supported:
Confirm the messages on the
Infotainment system and the
Bluetooth device.
● If SSP (secure simple pairing) is not supported:
On the Infotainment system: an Info message is displayed
asking to enter a PIN code on the Bluetooth device.
On the Bluetooth device:
enter the PIN code and
confirm the input.
6. The Infotainment system and the device are paired.
Note
If the Bluetooth device is
successfully paired, h next to the
Bluetooth device indicates that the
phone function is enabled and y
indicates that the Bluetooth music
function is enabled.
7. The phone book is downloaded automatically to the Infotainment
system. Depending on the phone,
the Infotainment system must be allowed access to the phone
book. If required, confirm themessages displayed on the
Bluetooth device.
If this function is not supported by the Bluetooth device, a
corresponding message is
displayed.
Changing the Bluetooth PIN code
Press ! and then select Settings.
Select Bluetooth and then Change
Pairing PIN to display the respective
submenu. A keypad is displayed.
Enter the desired four-digit PIN code.
To delete an entered number, select
3 .
Confirm the input by selecting Enter.
Connecting a paired device Press ! and then select Settings.
Select Bluetooth and then Device
Management to display the
respective menu.
Select the respective Bluetooth
device. The device is connected.
Note
The connected device and the
available options are highlighted.
Page 76 of 85
76PhoneDisconnecting a device
Press ! and then select Settings.
Select Bluetooth and then Device
Management to display the
respective menu.
Select the Bluetooth device currently connected. A message will be
displayed.
Select Yes to disconnect the device.
Deleting a device Press ! and then select Settings.
Select Bluetooth and then Device
Management to display the
respective menu.
Select f next to the Bluetooth
device. A message will be displayed.
Select Yes to delete the device.
Device info Press ! and then select Settings.
Select Bluetooth and then Device
Information to display the respective
menu.The information displayed includes
Device Name , Address , and PIN
Code .
Operation As soon as a connection via
Bluetooth has been set up between
the mobile phone and the
Infotainment system, many functions of the mobile phone can be operated
via the Infotainment system.
Note
In the hands-free mode, mobile
phone operation is still possible, e.g.
taking a call or adjusting the volume.
After setup of a connection between
the mobile phone and the
Infotainment system, mobile phone
data is transmitted to the Infotainment
system. This can take some time
depending on the mobile phone and
the amount of data to be transferred.
During this period, operation of the
mobile phone via the Infotainment
system is possible only to a limited extent.Note
Not every mobile phone fully
supports the phone function.
Therefore, deviations from the range of functions described below are
possible.
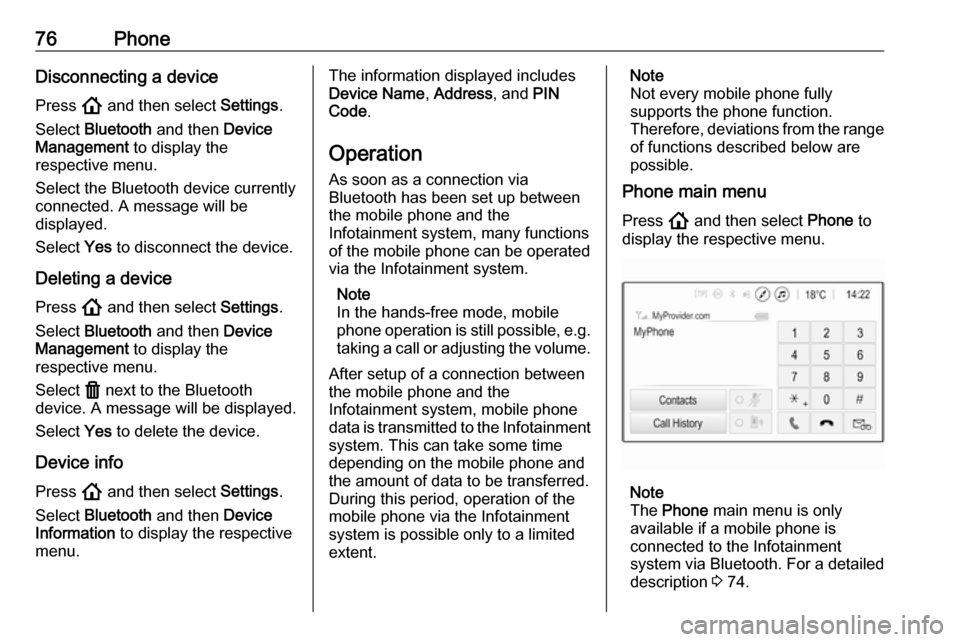
Phone main menu
Press ! and then select Phone to
display the respective menu.
Note
The Phone main menu is only
available if a mobile phone is connected to the Infotainment
system via Bluetooth. For a detailed
description 3 74.