display OPEL INSIGNIA BREAK 2020 Manual user
[x] Cancel search | Manufacturer: OPEL, Model Year: 2020, Model line: INSIGNIA BREAK, Model: OPEL INSIGNIA BREAK 2020Pages: 315, PDF Size: 9.45 MB
Page 217 of 315

Driving and operating215Limit and no passing signs● speed limit
● no passing
● end of speed limit
● end of no passingRoad signs
Beginning and end of:
● city regions (country-specific)
● motorways
● A-roads
● play streetsAdd on signs ● additional hints to traffic signs
● restriction of trailer towing
● tractor constraints
● wet warning
● ice warning
● time constraints ● distance constraints
● direction arrows
Speed limit signs and no passing
signs are displayed in the Driver
Information Centre until the nextspeed limit sign or end of speed limit
is detected or up to a defined sign
timeout.
Indication of multiple signs on the
display is possible.
An exclamation mark in a frame
indicates that there is an additional
sign detected which cannot be clearly
identified by the system.
The system operates without loss of
performance up to a speed of
200 km/h depending on the lighting
conditions. At night the system is
active up to a speed of 160 km/h.
Display indication
Information about the currently valid
traffic signs is available on the
designated traffic sign assistant page in the Driver Information Centre.
Additionally, the currently valid speed
limit is displayed permanently in the
lower line of the Driver Information
Centre. In case a speed limit with add on sign is available, a + symbol is
displayed in this area.
Page 218 of 315

216Driving and operating
Choose Info, " or ? Menu via right
steering wheel buttons and select
traffic sign assistant page 3 111.
When another page on the Driver
Information Centre menu was
selected and then traffic sign
assistant page is chosen again, the
last recognised traffic sign will be
displayed.
Alert function The alert function can be activated or
deactivated in the setting menu of the
traffic sign assistant page.Once activated and when the traffic
sign detection page is currently not
displayed, newly detected speed limit
and no passing signs are displayed
as pop-up alerts in the Driver
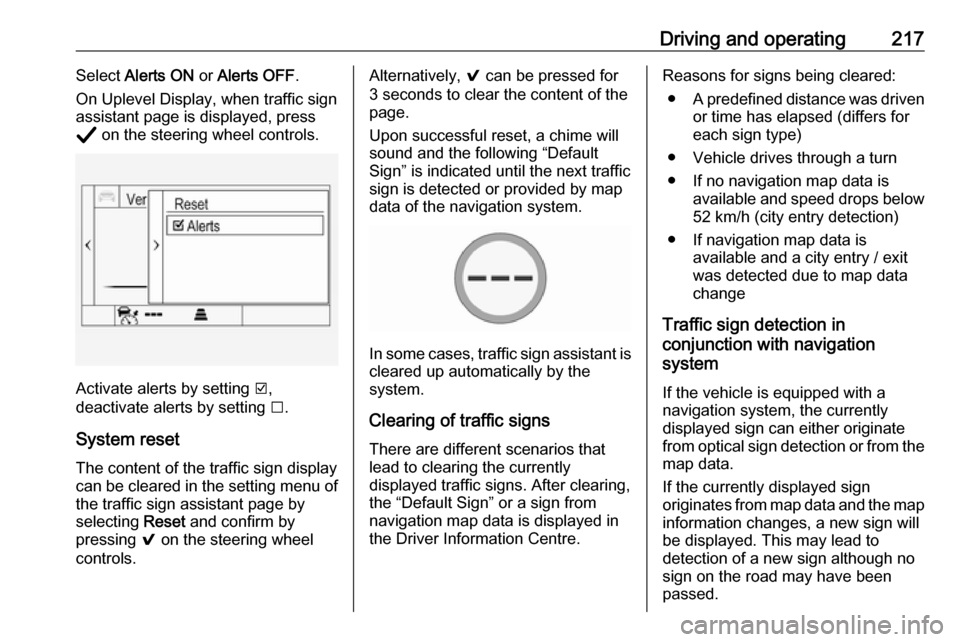
Information Centre.On Baselevel Display, when traffic
sign assistant page is displayed,
press Å on the steering wheel
controls.
Page 219 of 315

Driving and operating217Select Alerts ON or Alerts OFF .
On Uplevel Display, when traffic sign
assistant page is displayed, press
Å on the steering wheel controls.
Activate alerts by setting J,
deactivate alerts by setting I.
System reset The content of the traffic sign displaycan be cleared in the setting menu of the traffic sign assistant page by
selecting Reset and confirm by
pressing 9 on the steering wheel
controls.
Alternatively, 9 can be pressed for
3 seconds to clear the content of the
page.
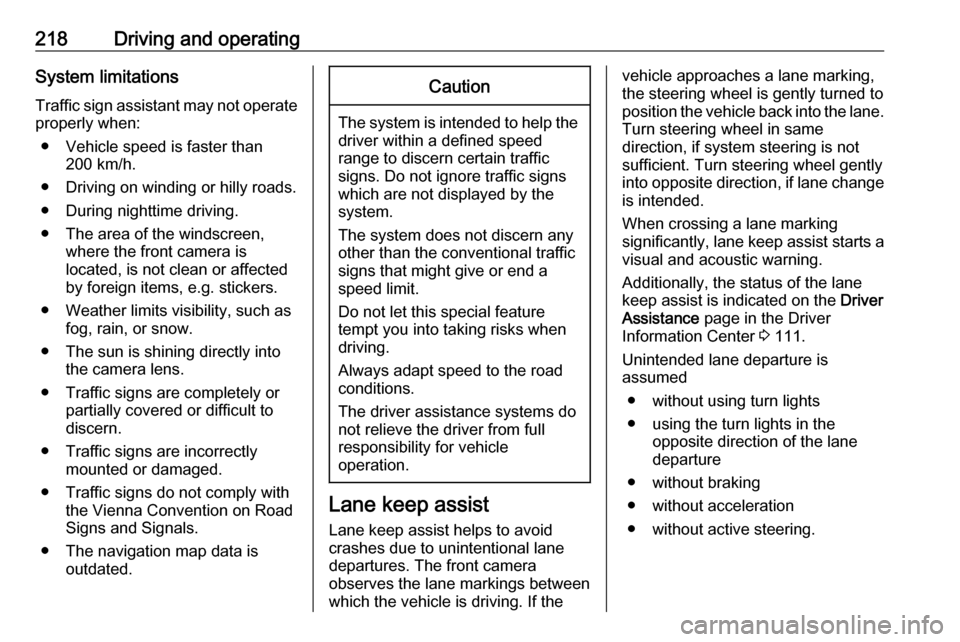
Upon successful reset, a chime will
sound and the following “Default
Sign” is indicated until the next traffic
sign is detected or provided by map
data of the navigation system.
In some cases, traffic sign assistant is
cleared up automatically by the
system.
Clearing of traffic signs
There are different scenarios that
lead to clearing the currently
displayed traffic signs. After clearing,
the “Default Sign” or a sign from
navigation map data is displayed in
the Driver Information Centre.
Reasons for signs being cleared:
● A predefined distance was driven
or time has elapsed (differs for
each sign type)
● Vehicle drives through a turn
● If no navigation map data is available and speed drops below52 km/h (city entry detection)
● If navigation map data is available and a city entry / exit
was detected due to map data
change
Traffic sign detection in
conjunction with navigation
system
If the vehicle is equipped with a
navigation system, the currently
displayed sign can either originate
from optical sign detection or from the
map data.
If the currently displayed sign
originates from map data and the map
information changes, a new sign will
be displayed. This may lead to
detection of a new sign although no
sign on the road may have been
passed.
Page 220 of 315

218Driving and operatingSystem limitations
Traffic sign assistant may not operate properly when:
● Vehicle speed is faster than 200 km/h.
● Driving on winding or hilly roads. ● During nighttime driving.
● The area of the windscreen, where the front camera is
located, is not clean or affected
by foreign items, e.g. stickers.
● Weather limits visibility, such as fog, rain, or snow.
● The sun is shining directly into the camera lens.
● Traffic signs are completely or partially covered or difficult to
discern.
● Traffic signs are incorrectly mounted or damaged.
● Traffic signs do not comply with the Vienna Convention on Road
Signs and Signals.
● The navigation map data is outdated.Caution
The system is intended to help thedriver within a defined speed
range to discern certain traffic
signs. Do not ignore traffic signs
which are not displayed by the
system.
The system does not discern any other than the conventional traffic
signs that might give or end a
speed limit.
Do not let this special feature
tempt you into taking risks when
driving.
Always adapt speed to the road
conditions.
The driver assistance systems do not relieve the driver from full
responsibility for vehicle
operation.
Lane keep assist
Lane keep assist helps to avoid
crashes due to unintentional lane
departures. The front camera
observes the lane markings between
which the vehicle is driving. If the
vehicle approaches a lane marking, the steering wheel is gently turned to
position the vehicle back into the lane. Turn steering wheel in same
direction, if system steering is not
sufficient. Turn steering wheel gently
into opposite direction, if lane change is intended.
When crossing a lane marking
significantly, lane keep assist starts a
visual and acoustic warning.
Additionally, the status of the lane
keep assist is indicated on the Driver
Assistance page in the Driver
Information Center 3 111.
Unintended lane departure is
assumed
● without using turn lights● using the turn lights in the opposite direction of the lane
departure
● without braking
● without acceleration
● without active steering.
Page 221 of 315

Driving and operating219Note
The system is switched off during
detection of ambiguous lane
markings, e.g. in construction areas.
Note
The system may be switched off if it
detects lanes which are too narrow,
too wide or too curved.
Activation
The lane keep assist is activated by
pressing a. The LED in the button
illuminates to indicate that the system
is switched on.
When the control indicator a in the
instrument cluster or in the head-up
display illuminates green, the system
is ready to assist.
The system is operational at vehicle
speeds between 60 km/h and
180 km/h and if lane markings are
available.
The system gently turns the steering
wheel and the control indicator a
changes to yellow, if the vehicle
approaches a detected lane marking
without using the turn lights in that
direction.
The system alerts by flashing a
together with three chimes, from the respective direction, if the lane is
departed significantly.
The system is only operable when a
lane marking is detected.
If the system only detects lane
markings on one side of the road, it
will only assist for this side.
Lane keep assist detects hands-free
driving. In this case a message in the
Driver Information Centre pops-up
and a chime sounds as long as lane
keep assist detects hands-free
driving.
Indication on Driver Assistance page
If the system is active but one or both
lanes are not detected, they appear
as a line of hollow dashes, as shown
on the right side of the vehicle in the
graphic above.
Page 238 of 315

236Vehicle careReplacing the vehicle batteryNote
Any deviation from the instructions
given in this section may lead to
temporary deactivation or
disturbance of the stop-start system.
When the vehicle battery is being
replaced, please ensure that there
are no open ventilation holes in the
vicinity of the positive terminal. If a
ventilation hole is open in this area, it
must be closed off with a dummy cap, and the ventilation in the vicinity of the negative terminal must be opened.
Ensure that the battery is always
replaced by the same type of battery.
We recommend that you have the
vehicle battery replaced by a
workshop.
Stop-start system 3 157.Charging the vehicle battery9 Warning
On vehicles with stop-start
system, ensure that the charging potential does not exceed 14.6 V
when using a battery charger.
Otherwise the vehicle battery may be damaged.
Jump starting 3 269.
Discharge protection Battery voltage
When the vehicle battery voltage is
running low, a warning message will
appear in the Driver Information
Centre.
1. Switch off any electrical consumers which are not requiredfor a safe ride, e.g. seat heating,
heated rear window or other main consumers.
2. Charge the vehicle battery by driving continuously for a while or
by using a charging device.
The warning message will disappear
after the engine has been started
twice without a voltage drop.
If the vehicle battery cannot be
recharged, have the cause of the fault
remedied by a workshop.
Vehicle battery state of charge
function
The function guarantees longest vehicle battery life via a generator
with controllable power output and
optimised power distribution.
To prevent discharge of the vehicle
battery when driving, the following
systems are reduced automatically in two stages and finally switched off:
● auxiliary heater
● heated rear and front window
● heated steering wheel
● heated mirrors
● heated seats
● fan
In the second stage, a message
which confirms the activation of the
vehicle battery discharge protection
will be displayed in the Driver
Information Centre.
Page 254 of 315

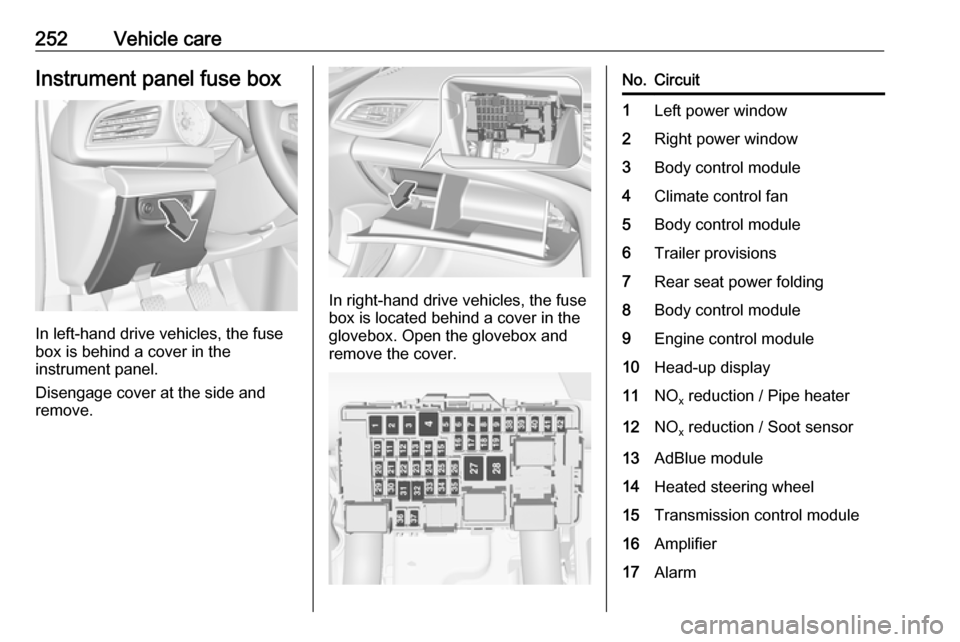
252Vehicle careInstrument panel fuse box
In left-hand drive vehicles, the fuse
box is behind a cover in the
instrument panel.
Disengage cover at the side and
remove.
In right-hand drive vehicles, the fuse
box is located behind a cover in the
glovebox. Open the glovebox and
remove the cover.
No.Circuit1Left power window2Right power window3Body control module4Climate control fan5Body control module6Trailer provisions7Rear seat power folding8Body control module9Engine control module10Head-up display11NO x reduction / Pipe heater12NO
x reduction / Soot sensor13AdBlue module14Heated steering wheel15Transmission control module16Amplifier17Alarm
Page 255 of 315

Vehicle care253No.Circuit18Body control module19AdBlue module20Body control module21Body control module22Body control module23Electric steering wheel lock24Airbag25Diagnostic connector26Power outlet load compartment27EBCM valve28Police provision29–30–31Steering wheel controls32Ignition switch33Climate control34Central gateway moduleNo.Circuit35AUX / USB connector36Wireless charger37Rear wiper38Emergency call39Display40Parking assist41Overhead console42Infotainment SystemVehicle tools
Tools
Vehicles with spare wheel
The jack with wheel wrench, the tools,
an extension bolt for securing a
damaged wheel and the towing eye
are placed in the tool box below the
spare wheel in the load compartment.
Spare wheel 3 265.
Page 258 of 315

256Vehicle careIncorrect tyre pressures will impair
safety, vehicle handling, comfort and
fuel economy and will increase tyre
wear.
Tyre pressures differ depending on
various options. For the correct tyre
pressure value, follow the procedure
below:
1. Identify drive axle and body style.
2. Identify the engine identifier code.
Engine data 3 286.
3. Identify the respective tyre.
The tyre pressure tables show all possible tyre combinations 3 293.
For the tyres approved for your
vehicle, refer to the EEC Certificate of
Conformity provided with your vehicle or other national registration
documents.
The driver is responsible for correct
adjustment of tyre pressure.9 Warning
If the pressure is too low, this can
result in considerable tyre warm-
up and internal damage, leading to tread separation and even to tyre
blow-out at high speeds.
9 Warning
For specific tyres the
recommended tyre pressure as
shown in the tyre pressure table may exceed the maximum tyre
pressure as indicated on the tyre.
Never exceed the maximum tyre
pressure as indicated on the tyre.
After adjusting tyre pressure, select
the according tyre loading setting on
the page Tyre load in the Driver
Information Centre 3 111.
Temperature dependency The tyre pressure depends on the
temperature of the tyre. During
driving, tyre temperature and
pressure increase. Tyre pressure
values provided on the tyre
information label and tyre pressure
chart are valid for cold tyres, which means at 20 °C.
The pressure increases by nearly
10 kPa for a 10 °C temperature
increase. This must be considered
when warm tyres are checked.
The tyre pressure value displayed in
the Driver Information Centre shows
the real tyre pressure. A cooled down tyre will show a decreased value,
which does not indicate an air leak.
Tyre pressure monitoring system
The tyre pressure monitoring system
checks the pressure of all four wheels once a minute when vehicle speed
exceeds a certain limit.Caution
Tyre pressure monitoring system
warns just about low tyre pressure condition and does not replace
regular tyre maintenance by the
driver.
Page 259 of 315

Vehicle care257All wheels must be equipped with
pressure sensors and the tyres must have the prescribed pressure.
Note
In countries where the tyre pressure
monitoring system is legally
required, the use of wheels without
pressure sensors will invalidate the
vehicle operating permit.
Select the Tyre pressure monitoring
page under the Info Menu in the
Driver Information Centre 3 111.
System status and pressure warnings
are displayed by a message
indicating the corresponding tyre in the Driver Information Centre.
The system considers the tyre
temperature and the tyre loading
setting for the warnings.
Tyre loading setting, see below in this chapter.
Temperature dependency 3 255.
Baselevel display: If the pressure of a
tyre decreases significantly, the
respective tyre pressure value is displayed inverted.
Uplevel display: Tyre pressure values in normal range are shown in greenletters. If the pressure of a tyre
decreases significantly, the
respective value will turn its colour to
amber.
A detected low tyre pressure
condition is indicated by the control
indicator w 3 109.
If
w illuminates, stop as soon as
possible and inflate the tyres as
recommended 3 293.
Ensure that vehicle loading status
matches selected tyre pressure.
Vehicle loading status, see below in
this chapter.
After inflating, some driving may be
required to update the tyre pressure
values in the Driver Information
Centre. During this time w may
continue to illuminate.
If w illuminates at lower temperatures
and extinguishes after some driving,
this could be an indicator for
approaching a low tyre pressure
condition. Check tyre pressure.
Vehicle messages 3 122.
Only mount wheels with pressure
sensors, otherwise the tyre pressure
will not be displayed and w
illuminates continuously.
A spare wheel or temporary spare
wheel is not equipped with pressure
sensors. The tyre pressure
monitoring system is not operational
for these wheels. Control indicator w