ESP OPEL INSIGNIA BREAK 2020 Manual user
[x] Cancel search | Manufacturer: OPEL, Model Year: 2020, Model line: INSIGNIA BREAK, Model: OPEL INSIGNIA BREAK 2020Pages: 315, PDF Size: 9.45 MB
Page 95 of 315
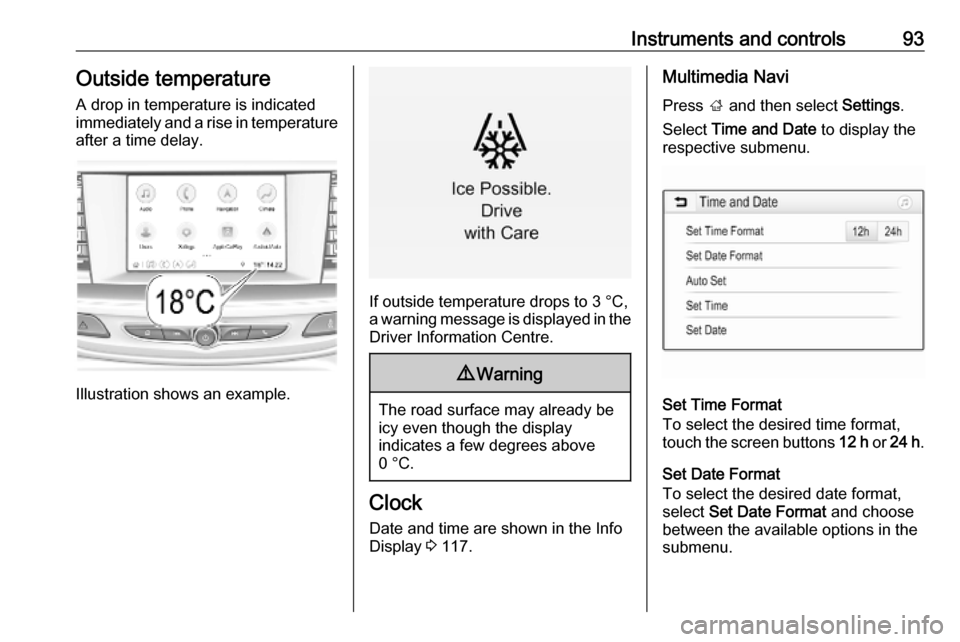
Instruments and controls93Outside temperatureA drop in temperature is indicated
immediately and a rise in temperature
after a time delay.
Illustration shows an example.
If outside temperature drops to 3 °C,
a warning message is displayed in the Driver Information Centre.
9 Warning
The road surface may already be
icy even though the display
indicates a few degrees above
0 °C.
Clock
Date and time are shown in the InfoDisplay 3 117.
Multimedia Navi
Press ; and then select Settings.
Select Time and Date to display the
respective submenu.
Set Time Format
To select the desired time format,
touch the screen buttons 12 h or 24 h .
Set Date Format
To select the desired date format,
select Set Date Format and choose
between the available options in the
submenu.
Page 96 of 315

94Instruments and controlsAuto Set
To choose whether time and date are
to be set automatically or manually,
select Auto Set .
For time and date to be set
automatically, select On - RDS.
For time and date to be set manually, select Off - Manual . If Auto Set is set
to Off - Manual , the submenu items
Set Time and Set Date become
available.
Set time and date
To adjust the time and date settings, select Set Time or Set Date .
Touch + and - to adjust the settings.
Multimedia / Multimedia Navi Pro
Press ! and select Settings.
Select Time/Date .
Time zone, time and date are
provided automatically by default.
All values can be set manually, as
well. Therefore, the automatic set
functions have to be deactivated by
toggeling switch icons beside
Automatic Time and Date and
Automatic Time Zone to "O".Set time or date
Select Set Time or Set Date to enter
the respective submenu. Adjust
values by touching n or o.
Press O to leave the submenu and
store the new value. Press "x" to
leave without storing.
Set time zone
Select Select Time Zone to enter the
respective submenu. Browse through list by touching n or o. Select
desired time zone by touching list entry.
Press O to leave the submenu and
store the new value. Press "x" to
leave without storing.
Set time format
By default, the time is displayed in 24-
hour format. To set 12-hour format,
toggle switch icon beside 24-hour
Format to "O".Power outlets
A 12 V power outlet is located in the
centre console. With ignition off, this
power outlet is deactivated.
Page 104 of 315

102Instruments and controlsOdometer
The total recorded distance is
displayed in km.
Trip odometer The recorded distance since the last
reset is displayed on the trip computer
page.
Trip odometer counts up to
9,999 km and then restarts at 0.
Two trip odometer pages are
selectable for different trips.
Baselevel instrument cluster
Select ; on main menu. Choose
page Trip 1 or Trip 2 by pressing P
or N on the steering wheel.
Each trip odometer can be reset
separately when ignition is on: select
respective page, press Å on the
steering wheel. Confirm by choosing
Yes: when the confirmation message
is displayed.
Uplevel instrument cluster
Select Info page on main menu.
Choose page Trip A or Trip B by
pressing P or N on the steering
wheel.
Each trip odometer can be reset separately when ignition is on: select
respective page, press >. Confirm
reset by pressing Å.
Page 120 of 315
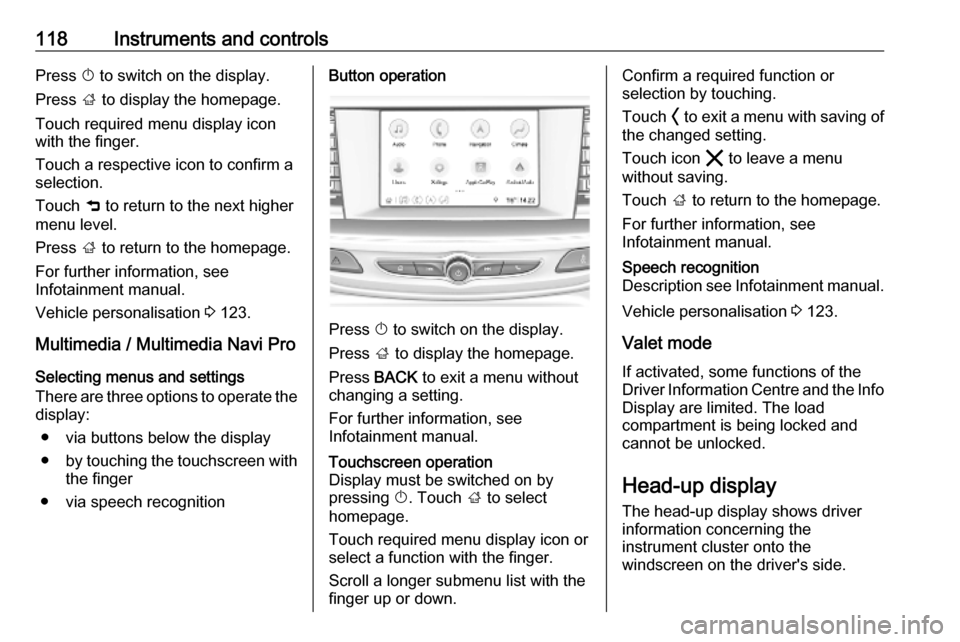
118Instruments and controlsPress X to switch on the display.
Press ; to display the homepage.
Touch required menu display icon
with the finger.
Touch a respective icon to confirm a
selection.
Touch 9 to return to the next higher
menu level.
Press ; to return to the homepage.
For further information, see
Infotainment manual.
Vehicle personalisation 3 123.
Multimedia / Multimedia Navi Pro Selecting menus and settings
There are three options to operate the
display:
● via buttons below the display
● by touching the touchscreen with
the finger
● via speech recognitionButton operation
Press X to switch on the display.
Press ; to display the homepage.
Press BACK to exit a menu without
changing a setting.
For further information, see
Infotainment manual.
Touchscreen operation
Display must be switched on by
pressing X. Touch ; to select
homepage.
Touch required menu display icon or select a function with the finger.
Scroll a longer submenu list with the
finger up or down.Confirm a required function or
selection by touching.
Touch O to exit a menu with saving of
the changed setting.
Touch icon & to leave a menu
without saving.
Touch ; to return to the homepage.
For further information, see
Infotainment manual.Speech recognition
Description see Infotainment manual.
Vehicle personalisation 3 123.
Valet mode
If activated, some functions of the
Driver Information Centre and the Info Display are limited. The load
compartment is being locked and cannot be unlocked.
Head-up display The head-up display shows driver
information concerning the
instrument cluster onto the
windscreen on the driver's side.
Page 125 of 315
Instruments and controls123Vehicle personalisation
The vehicle's behaviour can be
personalised by changing the settings in the Info Display.
Some of the personal settings for
different drivers can be memorised
individually for each vehicle key.
Memorised settings 3 26.
Depending on vehicle equipment and
country-specific regulations some of
the functions described below may
not be available.
Some functions are only displayed or
active when the engine is running.
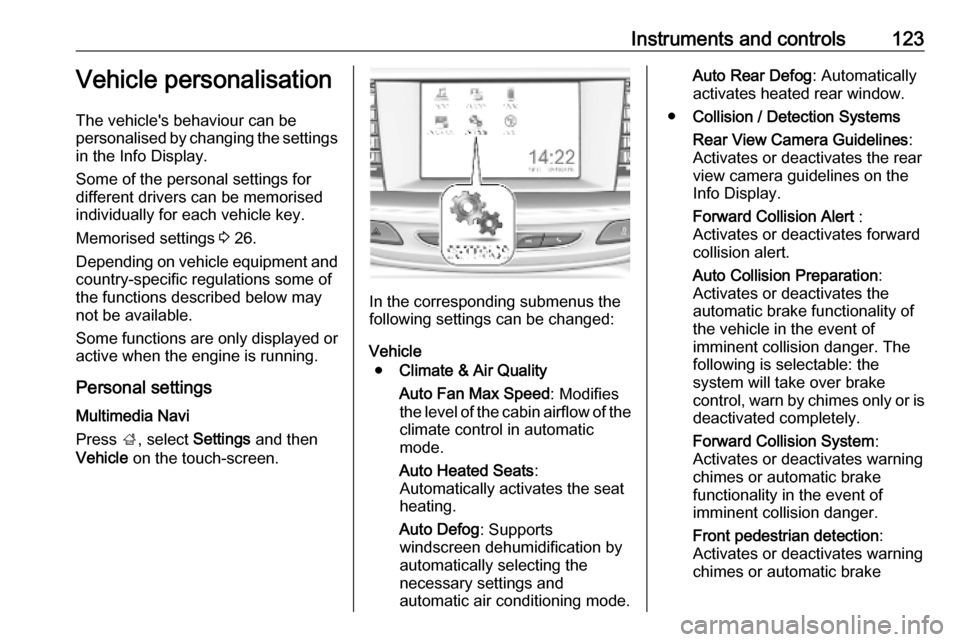
Personal settings Multimedia Navi
Press ;, select Settings and then
Vehicle on the touch-screen.
In the corresponding submenus the
following settings can be changed:
Vehicle ● Climate & Air Quality
Auto Fan Max Speed : Modifies
the level of the cabin airflow of the climate control in automatic
mode.
Auto Heated Seats :
Automatically activates the seat
heating.
Auto Defog : Supports
windscreen dehumidification by
automatically selecting the
necessary settings and
automatic air conditioning mode.
Auto Rear Defog : Automatically
activates heated rear window.
● Collision / Detection Systems
Rear View Camera Guidelines :
Activates or deactivates the rear
view camera guidelines on the
Info Display.
Forward Collision Alert :
Activates or deactivates forward collision alert.
Auto Collision Preparation :
Activates or deactivates the
automatic brake functionality of
the vehicle in the event of
imminent collision danger. The
following is selectable: the
system will take over brake
control, warn by chimes only or is
deactivated completely.
Forward Collision System :
Activates or deactivates warning
chimes or automatic brake
functionality in the event of
imminent collision danger.
Front pedestrian detection :
Activates or deactivates warning
chimes or automatic brake
Page 138 of 315

136LightingParking lights
When the vehicle is parked, the
parking lights on one side can be
activated:
1. Switch off ignition.
2. Move indicator lever all the way up
(right parking lights) or down (left
parking lights).
Confirmed by a signal and the
corresponding turn light control
indicator.
Reversing lights
The reversing light comes on when
the ignition is on and reverse gear is
selected.
Misted light covers
The inside of the light housing may
mist up briefly in poor, wet and cold weather conditions, in heavy rain or
after washing. The mist disappears
quickly by itself; to help switch on the
headlights.Interior lighting
Instrument panel illumination control
Brightness of the following lights can
be adjusted in position AUTO when
the light sensor detects night
conditions, or in position 8 or 9.
● instrument panel illumination
● Info Display
● illuminated switches and operation elements
Push and then turn A until the desired
brightness is obtained.
Page 139 of 315
Lighting137Interior lights
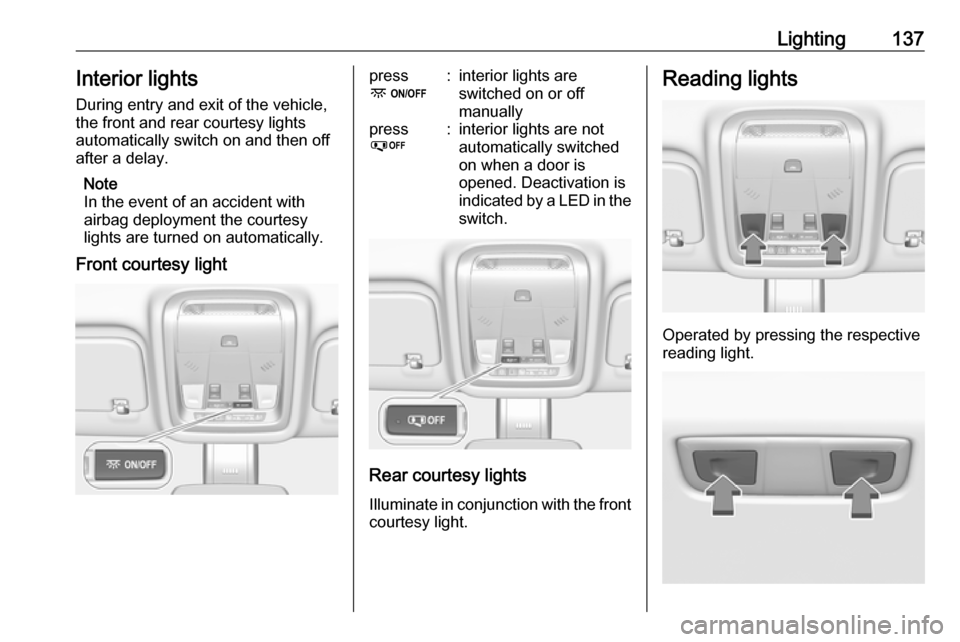
During entry and exit of the vehicle,
the front and rear courtesy lights
automatically switch on and then off
after a delay.
Note
In the event of an accident with
airbag deployment the courtesy
lights are turned on automatically.
Front courtesy lightpress
-:interior lights are
switched on or off
manuallypress
%:interior lights are not
automatically switched
on when a door is
opened. Deactivation is
indicated by a LED in the switch.
Rear courtesy lights
Illuminate in conjunction with the front courtesy light.
Reading lights
Operated by pressing the respective
reading light.
Page 142 of 315

140Climate controlClimate controlClimate control systems.............140
Air conditioning system ...........140
Electronic climate control system .................................... 143
Auxiliary heater ........................149
Air vents ..................................... 149
Adjustable air vents .................149
Fixed air vents ......................... 150
Maintenance .............................. 150
Air intake ................................. 150
Air conditioning regular operation ................................ 150
Service .................................... 150Climate control systems
Air conditioning system
Illustration shows functions which
may not be available for your
particular vehicle.
Controls for: ● Fan speed E
● Temperature TEMP
● Air distribution ",x and y
● Air conditioning A/C
● Demisting and defrosting á
● Air recirculation n
● External air (
● Heated rear window and exterior
mirrors b
● Heated windscreen ,
● Heated seats ß
Some changes of settings are
indicated briefly in the Info Display.
Activated functions are indicated by
the LED in the respective button.
Fan speed E
Adjust the air flow by turning E to the
desired speed.clockwise:increaseanti-clockwise:decrease
Temperature TEMP
Adjust the temperature by turning
TEMP to the desired temperature.
red area:warmerblue area:colder
Heating will not be fully effective until
the engine has reached normal
operating temperature.
Page 146 of 315
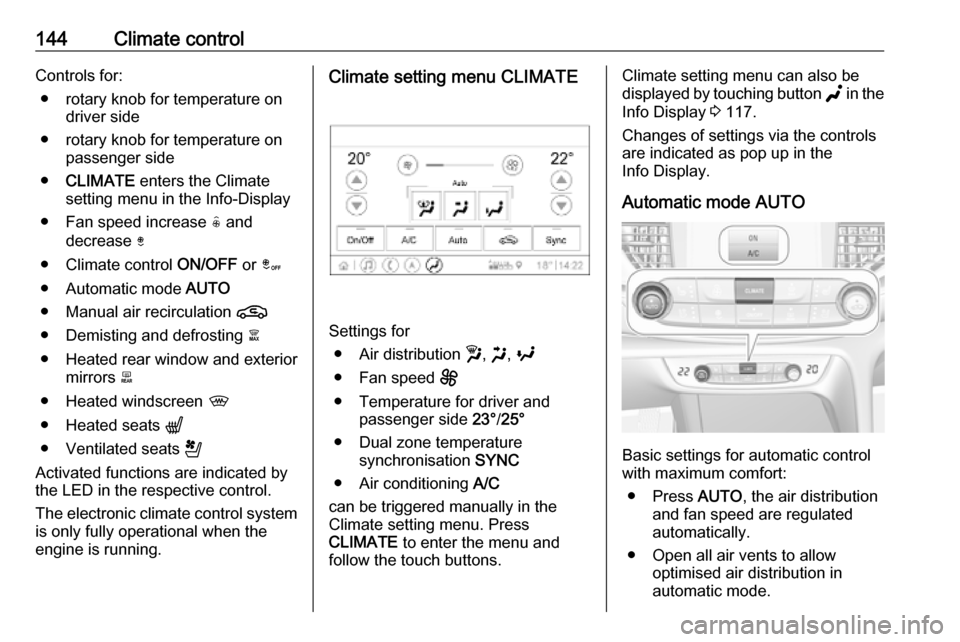
144Climate controlControls for:● rotary knob for temperature on driver side
● rotary knob for temperature on passenger side
● CLIMATE enters the Climate
setting menu in the Info-Display
● Fan speed increase ( and
decrease )
● Climate control ON/OFF or â
● Automatic mode AUTO
● Manual air recirculation n
● Demisting and defrosting à
● Heated rear window and exterior mirrors b
● Heated windscreen ,
● Heated seats q
● Ventilated seats r
Activated functions are indicated by
the LED in the respective control.
The electronic climate control system
is only fully operational when the
engine is running.Climate setting menu CLIMATE
Settings for
● Air distribution w, x , y
● Fan speed E
● Temperature for driver and passenger side 23°/25°
● Dual zone temperature synchronisation SYNC
● Air conditioning A/C
can be triggered manually in the Climate setting menu. Press
CLIMATE to enter the menu and
follow the touch buttons.
Climate setting menu can also be
displayed by touching button g in the
Info Display 3 117.
Changes of settings via the controls
are indicated as pop up in the
Info Display.
Automatic mode AUTO
Basic settings for automatic control
with maximum comfort:
● Press AUTO, the air distribution
and fan speed are regulated
automatically.
● Open all air vents to allow optimised air distribution in
automatic mode.
Page 152 of 315

150Climate controlDirect the flow of air by tilting and
swivelling the slats.
To close the vent, swivel the slat
sideways.9 Warning
Do not attach any objects to the
slats of the air vents. Risk of
damage and injury in case of an
accident.
Fixed air vents
Additional air vents are located
beneath the windscreen and door windows and in the foot wells.
Maintenance
Air intake
The air intake in front of the
windscreen in the engine
compartment must be kept clear to
allow air intake. Remove any leaves,
dirt or snow.
Cabin air filter
Change filter regulary for maximum
effect.
Air conditioning regular
operation
In order to ensure continuously
efficient performance, cooling must
be operated for a few minutes once a
month, irrespective of the weather
and time of year. Operation with
cooling is not possible when the
outside temperature is too low.
Service For optimal cooling performance, it is
recommended to annually check the
climate control system, starting
three years after initial vehicle
registration, including:
● functionality and pressure test
● heating functionality
● leakage check
● check of drive belts
● cleaning of condenser and evaporator drainage
● performance check
● cabin air filter check