lock OPEL INSIGNIA BREAK 2020 Manual user
[x] Cancel search | Manufacturer: OPEL, Model Year: 2020, Model line: INSIGNIA BREAK, Model: OPEL INSIGNIA BREAK 2020Pages: 315, PDF Size: 9.45 MB
Page 129 of 315
Instruments and controls127locking function while a door is
open.
Auto Door Lock : Activates or
deactivates the automatic door locking function after switching
on ignition.
Delayed Door Lock : Activates or
deactivates the delayed door
locking function. This feature
delays the actual locking of the
doors until all doors are closed.
● Remote Lock, Unlock and Start
Remote Unlock Light Feedback :
Activates or deactivates the
hazard warning flasher feedback
whilst unlocking.
Remote Lock Feedback :
Changes what kind of feedback
is given when locking the vehicle.
Remote Door Unlock : Changes
the configuration to unlock only
the driver's door or the whole
vehicle whilst unlocking.
Relock Doors Unlocked
Remotely : Activates or
deactivates the automatic relock function after unlocking without
opening the vehicle.Remote Window Operation :
Activates or deactivates the
operation of power windows with
electronic key.
Passive Door Unlock : Changes
the configuration to unlock only the driver's door or the whole
vehicle whilst unlocking.
Passive Door Lock : Activates or
deactivates the passive locking
function. This feature locks the
vehicle automatically after
several seconds if all doors have been closed and an electronic
key has been removed from the
vehicle.
Remote Left in Vehicle Alert :
Activates or deactivates the
warning chime when the
electronic key remains in the
vehicle.
Personal
See infotainment manual.Telematics service
Emergency call
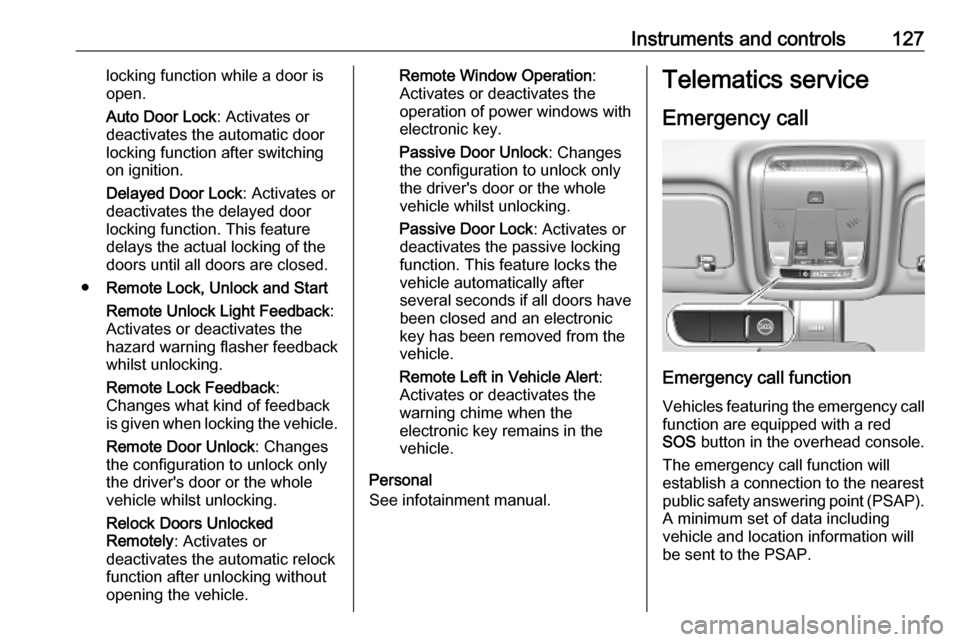
Emergency call function Vehicles featuring the emergency call
function are equipped with a red
SOS button in the overhead console.
The emergency call function will
establish a connection to the nearest
public safety answering point (PSAP).
A minimum set of data including
vehicle and location information will
be sent to the PSAP.
Page 140 of 315

138LightingIllustration shows rear reading light.Sunvisor lights
Illuminates when the cover is opened.Lighting features
Centre console lighting Spotlight incorporated in the interior
lighting comes on when headlights
are switched on.
Entry lighting Welcome lighting
The following lights are switched on
for a short time by unlocking the
vehicle with the radio remote control:
● headlights
● puddle lights in both outside mirrors
● number plate lights
● instrument panel light
● interior lights
Some functions are only operable
when it is dark outside to facilitate
locating the vehicle.
The lighting switches off immediately
when the ignition is switched on.
Starting off 3 18.This function can be activated or
deactivated in the vehicle
personalisation.
Select the relevant setting in Settings
I Vehicle in the Info Display.
Info Display 3 117.
Vehicle personalisation 3 123.
The settings can be saved for the key
being used 3 26.
The following lights will additionally
switch on when the driver's door is
opened:
● illumination of some switches
● Driver Information Centre
● door pocket lights
Exit lighting The following lights will switch on
when the ignition is switched off:
● interior lights
● instrument panel light
● puddle lights in both outside mirrors
They will switch off automatically after
a delay. This function works only in
the dark.
Page 142 of 315

140Climate controlClimate controlClimate control systems.............140
Air conditioning system ...........140
Electronic climate control system .................................... 143
Auxiliary heater ........................149
Air vents ..................................... 149
Adjustable air vents .................149
Fixed air vents ......................... 150
Maintenance .............................. 150
Air intake ................................. 150
Air conditioning regular operation ................................ 150
Service .................................... 150Climate control systems
Air conditioning system
Illustration shows functions which
may not be available for your
particular vehicle.
Controls for: ● Fan speed E
● Temperature TEMP
● Air distribution ",x and y
● Air conditioning A/C
● Demisting and defrosting á
● Air recirculation n
● External air (
● Heated rear window and exterior
mirrors b
● Heated windscreen ,
● Heated seats ß
Some changes of settings are
indicated briefly in the Info Display.
Activated functions are indicated by
the LED in the respective button.
Fan speed E
Adjust the air flow by turning E to the
desired speed.clockwise:increaseanti-clockwise:decrease
Temperature TEMP
Adjust the temperature by turning
TEMP to the desired temperature.
red area:warmerblue area:colder
Heating will not be fully effective until
the engine has reached normal
operating temperature.
Page 144 of 315

142Climate controlAir recirculation system n
Press n to activate air recirculation
mode, LED is indicated.
Select air recirculation to assist in
cooling the interior or in blocking
outside odours or exhaust.
Press n again to deactivate air
recirculation mode.
On version without heated
windscreen, press ( to deactivate
air recirculation. External air mode is
activated.
9 Warning
The exchange of fresh air is
reduced in air recirculation mode.
In operation without cooling the air humidity increases, so the
windows may mist up from inside.
The quality of the passenger
compartment air deteriorates,
which may cause the vehicle
occupants to feel drowsy.
In warm and very humid ambient air conditions, the windscreen may mist
up from outside when cold air is
directed towards it. If windscreen
mists up from outside, activate
windscreen wiper and deactivate w.
External air mode (
Press (to activate external air
mode, LED is indicated.
Press n to activate air recirculation
mode. External air mode is
deactivated.
Page 153 of 315

Driving and operating151Driving and
operatingDriving hints ............................... 152
Control of the vehicle ...............152
Steering ................................... 152
Starting and operating ...............152
New vehicle running-in ............152
Ignition switch positions ...........152
Power button ........................... 153
Retained power off ..................155
Starting the engine ..................155
Overrun cut-off ........................ 157
Stop-start system ....................157
Parking .................................... 159
Engine exhaust .......................... 160
Exhaust filter ............................ 160
Catalytic converter ...................162
AdBlue ..................................... 162
Automatic transmission ..............165
Transmission display ...............165
Gear selection ......................... 165
Manual mode ........................... 166
Electronic driving programmes 167
Fault ........................................ 168
Interruption of power supply ....168Manual transmission ..................169
Drive systems ............................ 170
All-wheel drive ......................... 170
Brakes ........................................ 170
Antilock brake system .............170
Parking brake .......................... 171
Brake assist ............................. 173
Hill start assist ......................... 173
Ride control systems .................174
Traction Control system ..........174
Electronic Stability Control ......175
Interactive driving system ........176
Driver assistance systems .........178
Cruise control .......................... 178
Speed limiter ........................... 180
Adaptive cruise control ............181
Forward collision alert .............190
Following distance indication ...193
Active emergency braking .......194
Front pedestrian protection .....197
Parking assist .......................... 199
Side blind spot alert .................206
Lane change alert ....................207
Panoramic view system ...........209
Rear view camera ...................211
Rear cross traffic alert .............213
Traffic sign assistant ................214
Lane keep assist .....................218Fuel............................................ 221
Fuel for petrol engines .............221
Fuel for diesel engines ............222
Refuelling ................................ 223
Trailer hitch ................................ 225
General information .................225
Driving characteristics and towing tips .............................. 225
Trailer towing ........................... 225
Towing equipment ...................226
Trailer stability assist ...............228
Page 155 of 315
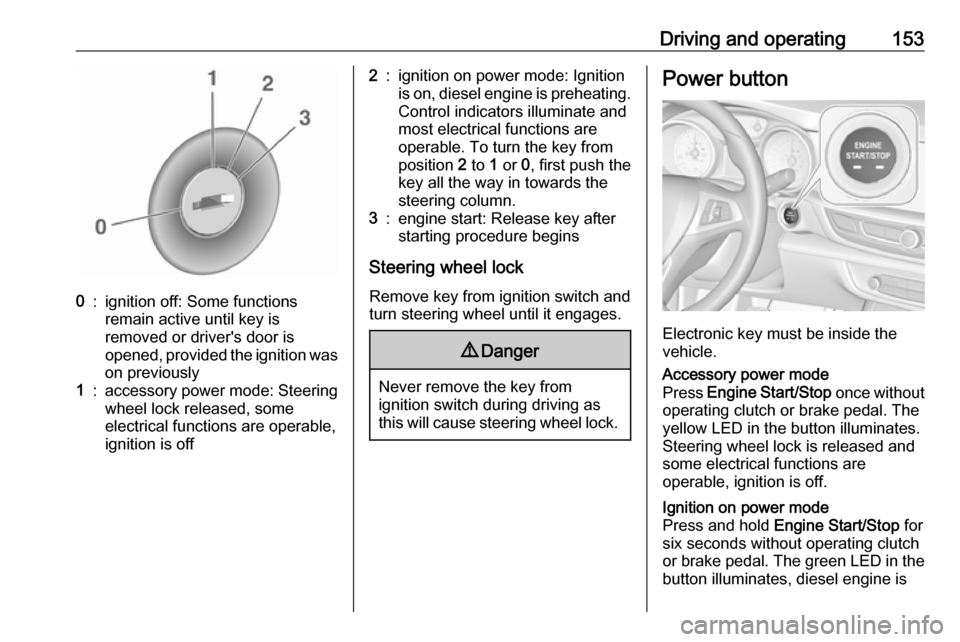
Driving and operating1530:ignition off: Some functions
remain active until key is
removed or driver's door is
opened, provided the ignition was
on previously1:accessory power mode: Steering wheel lock released, some
electrical functions are operable,
ignition is off2:ignition on power mode: Ignition
is on, diesel engine is preheating.
Control indicators illuminate and
most electrical functions are
operable. To turn the key from
position 2 to 1 or 0, first push the
key all the way in towards the steering column.3:engine start: Release key after
starting procedure begins
Steering wheel lock
Remove key from ignition switch and
turn steering wheel until it engages.
9 Danger
Never remove the key from
ignition switch during driving as
this will cause steering wheel lock.
Power button
Electronic key must be inside the
vehicle.
Accessory power mode
Press Engine Start/Stop once without
operating clutch or brake pedal. The yellow LED in the button illuminates.
Steering wheel lock is released and
some electrical functions are
operable, ignition is off.Ignition on power mode
Press and hold Engine Start/Stop for
six seconds without operating clutch
or brake pedal. The green LED in the button illuminates, diesel engine is
Page 156 of 315
154Driving and operatingpreheating. Control indicators
illuminate and most electrical
functions are operable.Engine start
Press Engine Start/Stop briefly while:
● manual transmission: operating clutch pedal,
● automatic transmission: operating brake pedal with
selector lever in P or N.
Starting the engine 3 155.Ignition off
Press Engine Start/Stop briefly when
Autostop is activated or when engine is running and vehicle is stationary.
Automatic transmission: apply the
parking brake and engage P.
Press Engine Start/Stop briefly
without operating clutch or brake pedal when in ignition on power
mode.
Some functions remain active until
driver's door is opened, provided the
ignition was on previously.Emergency engine shut off during
driving
Press Engine Start/Stop for more
than 2 seconds or press twice briefly
within 5 seconds 3 155.
Steering wheel lock The steering wheel lock activates
automatically when:
● The vehicle is stationary.
● The ignition has been switched off.
● The driver's door is opened.
To release steering wheel lock, open
and close driver's door and switch on accessory mode or start the engine
directly.9 Warning
If the vehicle battery is discharged,
the vehicle must not be towed,
tow-started or jump-started as the
steering wheel lock cannot be
disengaged.
Operation on vehicles with
electronic key system in case of
failure
If either the electronic key fails or the
battery of the electronic key is weak,
the Driver Information Centre may
display No Remote Detected or
Replace Battery in Remote Key when
you try to start the vehicle.
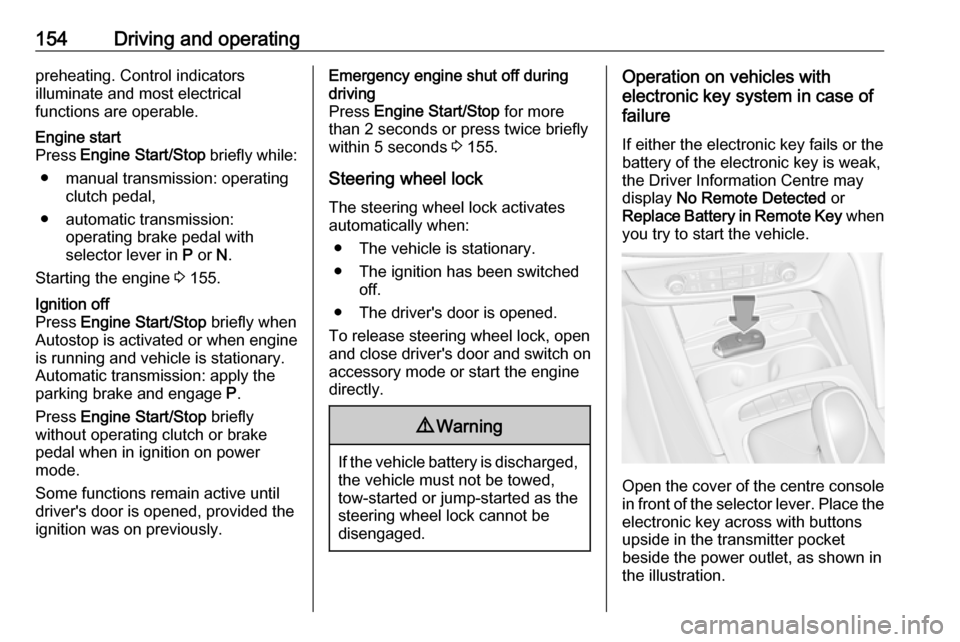
Open the cover of the centre console
in front of the selector lever. Place the
electronic key across with buttons
upside in the transmitter pocket
beside the power outlet, as shown in
the illustration.
Page 157 of 315
Driving and operating155Other objects, e.g. other keys,
transponder, tags, coins etc. must be
removed from the pocket.
Depress the clutch pedal (manual
transmission), the brake pedal and
press Engine Start/Stop . Release the
button after starting procedure
begins.
To switch off the engine, press
Engine Start/Stop again. Remove the
electronic key from the transmitter
pocket.
This option is intended for
emergencies only. Replace the
electronic key battery as soon as
possible 3 23.
For unlocking or locking the doors,
see fault in radio remote control unit
or electronic key system 3 26.
Retained power off The following electronic systems can
work until the driver's door is opened
or for 10 minutes after the ignition is
switched off:● power windows
● sunroof
● power outlets
Starting the engine
Vehicles with ignition switch
Turn key to position 1 to release the
steering wheel lock.
Manual transmission: operate clutch
and brake pedal.
Automatic transmission: operate
brake pedal and move selector lever
to P or N.
Do not operate accelerator pedal.
Diesel engines: turn the key to
position 2 for preheating and wait until
control indicator ! extinguishes.
Turn key briefly to position 3 and
release: an automatic procedure operates the starter with a short delay
until the engine is running, see
Automatic Starter Control.
Manual transmission: during an
Autostop, the engine can be started
by depressing the clutch pedal
3 157.
Automatic transmission: during an
Autostop, the engine can be started
by releasing the brake pedal 3 157.
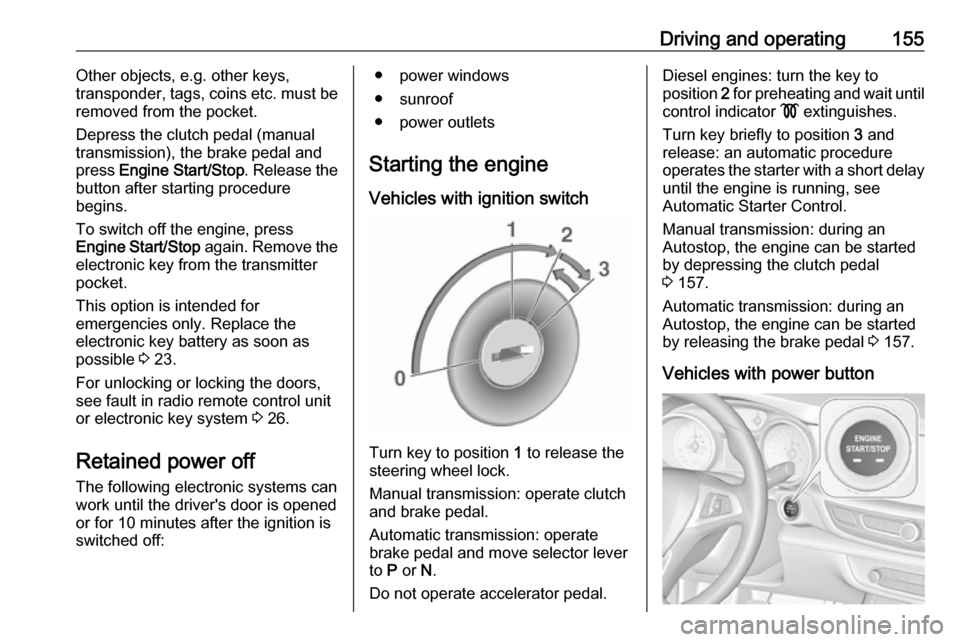
Vehicles with power button
Page 162 of 315
160Driving and operating● If the vehicle is on a levelsurface or uphill slope, engage
first gear or set the selector
lever to position P before
removing the ignition key or
switching off ignition on
vehicles with power button. On an uphill slope, turn the front
wheels away from the kerb.
If the vehicle is on a downhill
slope, engage reverse gear or
set the selector lever to position
P before removing the ignition
key or switching off ignition on
vehicles with power button.
Turn the front wheels towards
the kerb.
● Close the windows and the sunroof.
● Remove the ignition key from the ignition switch or switch off
ignition on vehicles with power
button. Turn the steering wheel until the steering wheel lock is
felt to engage.
For vehicles with automatic
transmission, the key can onlybe removed when the selector
lever is in position P.
● Lock the vehicle by pressing the
button on the door handle or the
button e on the remote control.
● Activate the anti-theft alarm system.
● The engine cooling fans may run
after the engine has been
switched off 3 231.
Caution
After running at high engine
speeds or with high engine loads,
operate the engine briefly at a low load or run in neutral for
approx. 30 seconds before
switching off, in order to protect
the turbocharger.
Note
In the event of an accident with
airbag deployment, the engine is
turned off automatically if the vehicle
comes to a standstill within a certain time.
Engine exhaust9 Danger
Engine exhaust gases contain
poisonous carbon monoxide,
which is colourless and odourless and could be fatal if inhaled.
If exhaust gases enter the interior
of the vehicle, open the windows.
Have the cause of the fault
rectified by a workshop.
Avoid driving with an open load
compartment, otherwise exhaust
gases could enter the vehicle.
Exhaust filter
The exhaust filter is a particle filter for diesel and petrol engines.
Page 166 of 315
164Driving and operatingNote
Whenever a filling pump with a
nozzle for passenger cars is not
available at a filling station, use only
AdBlue bottles or canisters with a
sealed refill adapter for refilling, to
prevent splashback and overspill,
and in order to ensure that the fumes
from the tank are captured and do
not emerge. AdBlue in bottles or
canisters is available in many filling
stations and can be purchased e.g. at Opel dealers and other retail
outlets.
Since AdBlue has a limited
durability, check the date of expiry
before refilling.
Note
When unscrewing the protective cap from the filler neck, ammonia fumesmay emerge. Do not inhale as the
fumes have a pungent smell. The
fumes are not harmful by inhalation.
The AdBlue tank should be filled
completely. This must be done if the
warning message regarding
prevention of an engine restart is
already displayed.The vehicle must be parked on a level surface.
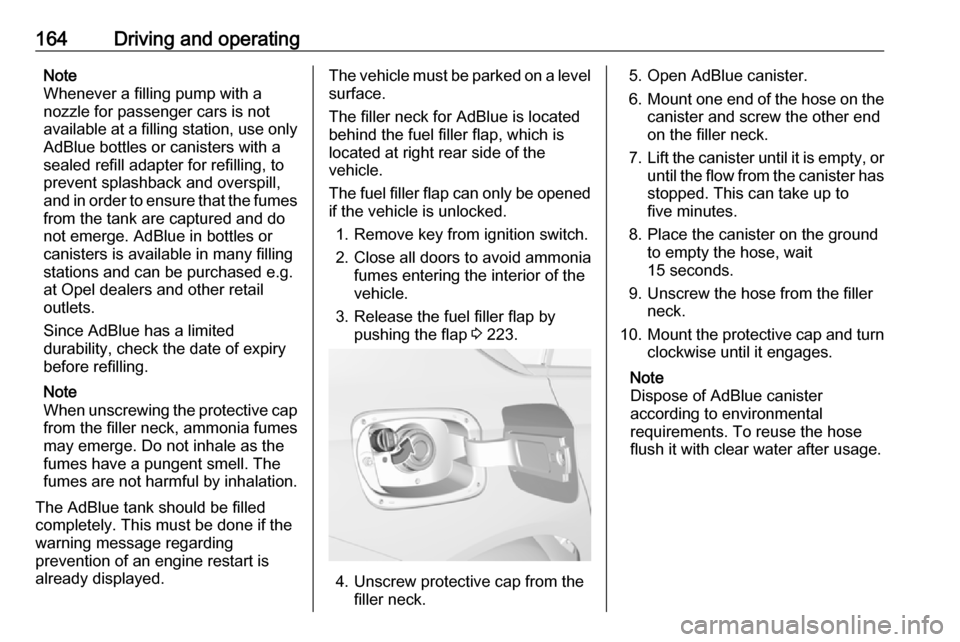
The filler neck for AdBlue is located
behind the fuel filler flap, which is
located at right rear side of the
vehicle.
The fuel filler flap can only be opened
if the vehicle is unlocked.
1. Remove key from ignition switch.
2. Close all doors to avoid ammonia fumes entering the interior of the
vehicle.
3. Release the fuel filler flap by pushing the flap 3 223.
4. Unscrew protective cap from the
filler neck.
5. Open AdBlue canister.
6. Mount one end of the hose on the
canister and screw the other end
on the filler neck.
7. Lift the canister until it is empty, or
until the flow from the canister has stopped. This can take up to
five minutes.
8. Place the canister on the ground to empty the hose, wait
15 seconds.
9. Unscrew the hose from the filler neck.
10. Mount the protective cap and turn
clockwise until it engages.
Note
Dispose of AdBlue canister
according to environmental
requirements. To reuse the hose
flush it with clear water after usage.