turn signal OPEL KARL 2017 Manual user
[x] Cancel search | Manufacturer: OPEL, Model Year: 2017, Model line: KARL, Model: OPEL KARL 2017Pages: 203, PDF Size: 5.39 MB
Page 85 of 203
Instruments and controls83
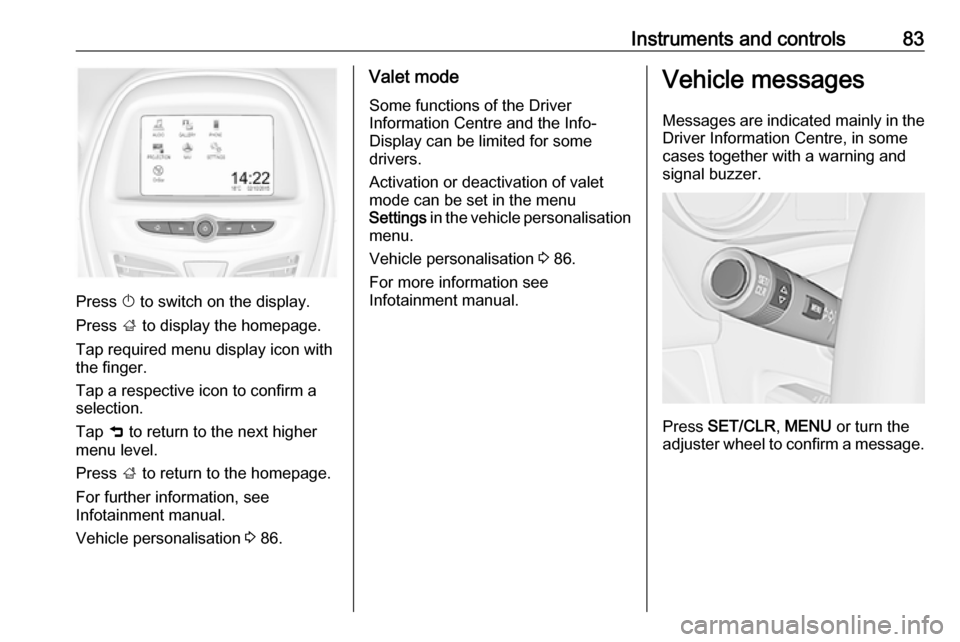
Press X to switch on the display.
Press ; to display the homepage.
Tap required menu display icon with
the finger.
Tap a respective icon to confirm a
selection.
Tap 9 to return to the next higher
menu level.
Press ; to return to the homepage.
For further information, see Infotainment manual.
Vehicle personalisation 3 86.
Valet mode
Some functions of the Driver
Information Centre and the Info-
Display can be limited for some
drivers.
Activation or deactivation of valet
mode can be set in the menu
Settings in the vehicle personalisation
menu.
Vehicle personalisation 3 86.
For more information see
Infotainment manual.Vehicle messages
Messages are indicated mainly in the
Driver Information Centre, in some
cases together with a warning and
signal buzzer.
Press SET/CLR , MENU or turn the
adjuster wheel to confirm a message.
Page 86 of 203
84Instruments and controlsVehicle messages in Driver
Information Centre
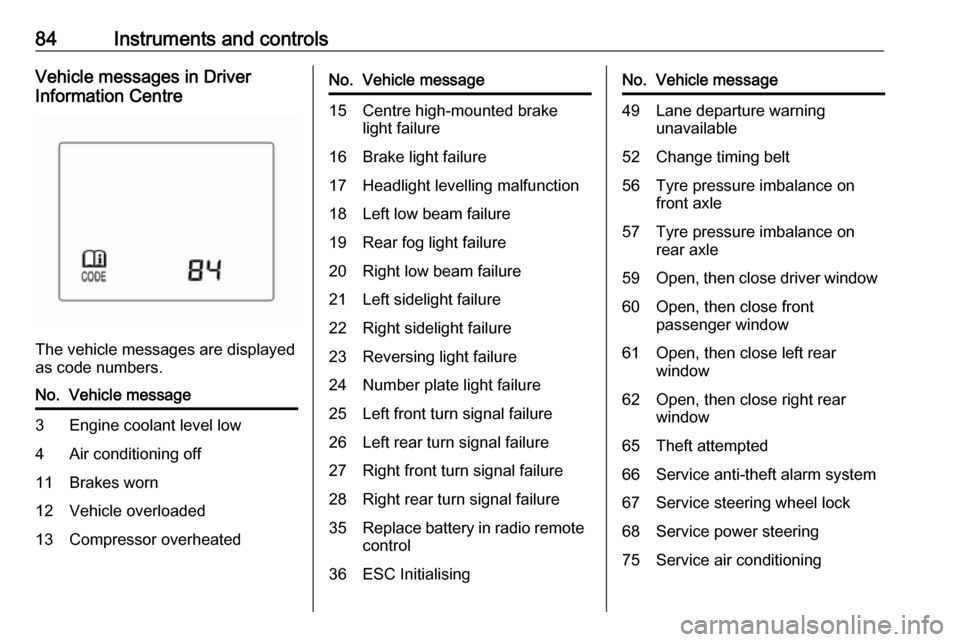
The vehicle messages are displayed
as code numbers.
No.Vehicle message3Engine coolant level low4Air conditioning off11Brakes worn12Vehicle overloaded13Compressor overheatedNo.Vehicle message15Centre high-mounted brake
light failure16Brake light failure17Headlight levelling malfunction18Left low beam failure19Rear fog light failure20Right low beam failure21Left sidelight failure22Right sidelight failure23Reversing light failure24Number plate light failure25Left front turn signal failure26Left rear turn signal failure27Right front turn signal failure28Right rear turn signal failure35Replace battery in radio remote
control36ESC InitialisingNo.Vehicle message49Lane departure warning unavailable52Change timing belt56Tyre pressure imbalance on
front axle57Tyre pressure imbalance on
rear axle59Open, then close driver window60Open, then close front
passenger window61Open, then close left rear
window62Open, then close right rear
window65Theft attempted66Service anti-theft alarm system67Service steering wheel lock68Service power steering75Service air conditioning
Page 93 of 203

Instruments and controls91Stolen vehicle assistance
If the vehicle is stolen, report the theft
to the authorities and request OnStar
stolen vehicle assistance. Use any
phone to call an advisor. Find the
respective OnStar phone number on
our country-specific website.
OnStar can provide support in
locating and recovering the vehicle.Theft alert
When the anti-theft alarm system is
triggered, a notification is sent to
OnStar. You are then informed about
this event by text message or email.Restart prevention
By sending remote signals, OnStar can prevent the vehicle from
restarting once it has been turned off.
On-demand diagnostics
At any time e.g. if the vehicle displays a vehicle message, press Z to
contact an advisor and ask to
complete a real-time diagnostic check
to directly determine the issue.
Depending on the results, the advisor
will provide further support.
Diagnostic report
The vehicle automatically transmits
diagnostic data to OnStar which
sends a monthly email report to you
and your preferred workshop.
Note
The workshop notification function
can be disabled in your account.
The report contains the status of key
operating systems of the vehicle like
engine, transmission, airbags, ABS,
and other major systems. It also
provides information on possible
maintenance items and tyre pressure
(only with tyre pressure monitoring
system).
To look at the information in greater
detail, select the link within the email and log in to your account.
Destination download
A desired destination can be directly
downloaded to the navigation system.
Press Z to call an advisor and
describe the destination or point of interest.The advisor can look up any address
or point of interest and directly send
the destination to the built-in
navigation system.
OnStar settings
OnStar PIN
To have full access to all OnStar
services, a four-digit PIN is required.
The PIN has to be personalised when first talking to an advisor.
To change the PIN, press Z to call an
advisor.
Account data
An OnStar subscriber has an account
where all the data is stored. To
request a change of the account
information, press Z and talk to an
advisor or log in to your account.
If the OnStar service is used on
another vehicle, press Z and request
that the account be transferred to the
new vehicle.
Page 95 of 203
Lighting93LightingExterior lighting............................ 93
Light switch ................................ 93
High beam ................................. 93
Headlight flash ........................... 93
Headlight range adjustment ......94
Headlights when driving abroad ...................................... 94
Daytime running lights ...............94
Cornering lights ......................... 94
Hazard warning flashers ............94
Turn and lane-change signals ...95
Front fog lights ........................... 95
Rear fog light ............................. 95
Parking lights ............................. 96
Reversing lights .........................96
Misted light covers .....................96
Interior lighting ............................. 96
Instrument panel illumination control ....................................... 96
Interior lights .............................. 97
Reading lights ............................ 97
Lighting features ..........................97
Exit lighting ................................ 97
Battery discharge protection ......98Exterior lighting
Light switch
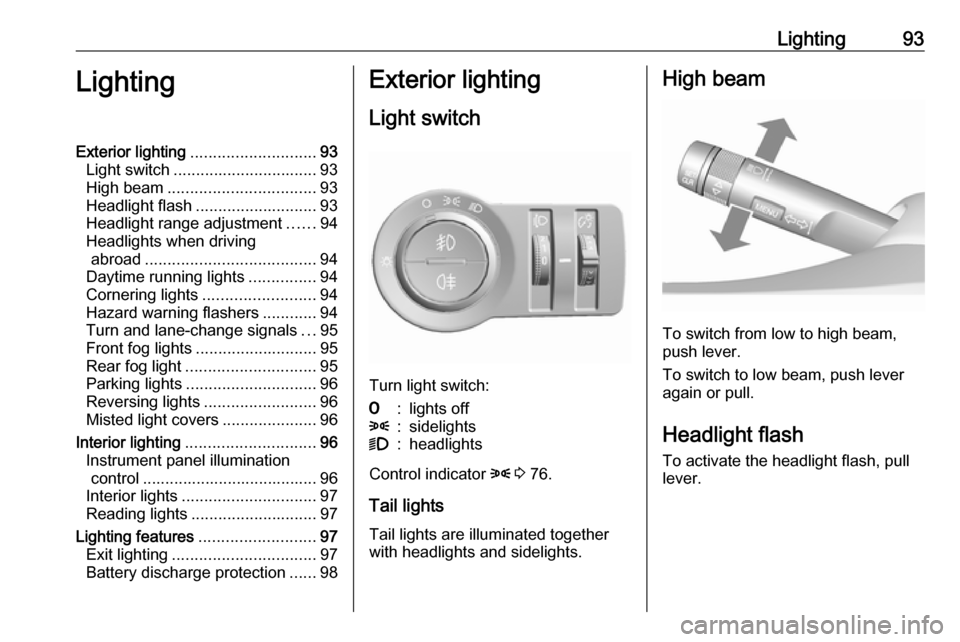
Turn light switch:
7:lights off8:sidelights9:headlights
Control indicator 8 3 76.
Tail lights Tail lights are illuminated together
with headlights and sidelights.
High beam
To switch from low to high beam,
push lever.
To switch to low beam, push lever
again or pull.
Headlight flash To activate the headlight flash, pull
lever.
Page 96 of 203
94LightingHeadlight range adjustment
Manual headlight range
adjustment
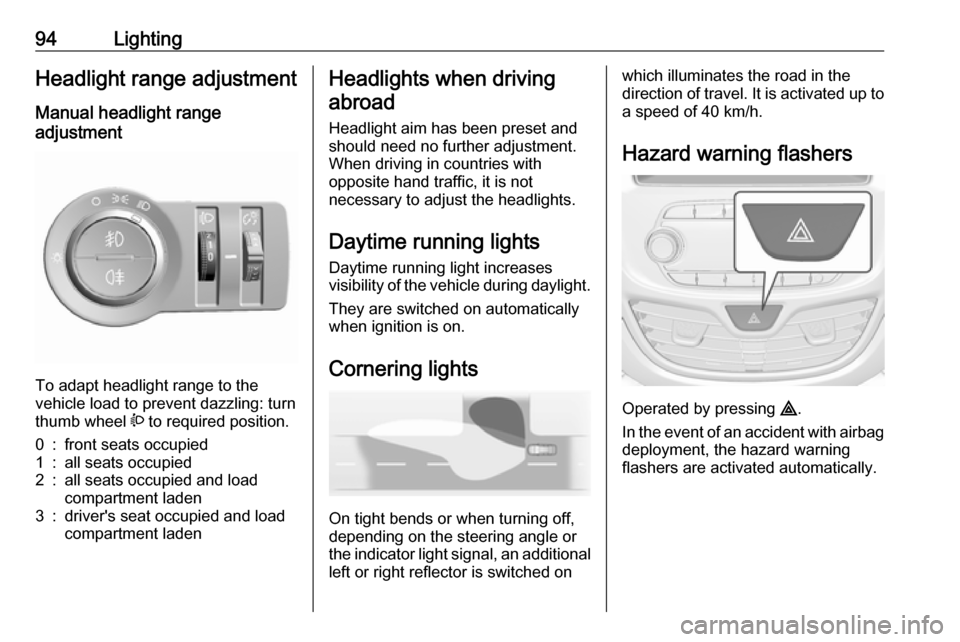
To adapt headlight range to the
vehicle load to prevent dazzling: turn
thumb wheel ? to required position.
0:front seats occupied1:all seats occupied2:all seats occupied and load
compartment laden3:driver's seat occupied and load
compartment ladenHeadlights when driving
abroad
Headlight aim has been preset and
should need no further adjustment.
When driving in countries with
opposite hand traffic, it is not
necessary to adjust the headlights.
Daytime running lights Daytime running light increases
visibility of the vehicle during daylight.
They are switched on automatically
when ignition is on.
Cornering lights
On tight bends or when turning off,
depending on the steering angle or
the indicator light signal, an additional left or right reflector is switched on
which illuminates the road in the
direction of travel. It is activated up to
a speed of 40 km/h.
Hazard warning flashers
Operated by pressing ¨
.
In the event of an accident with airbag
deployment, the hazard warning
flashers are activated automatically.
Page 97 of 203
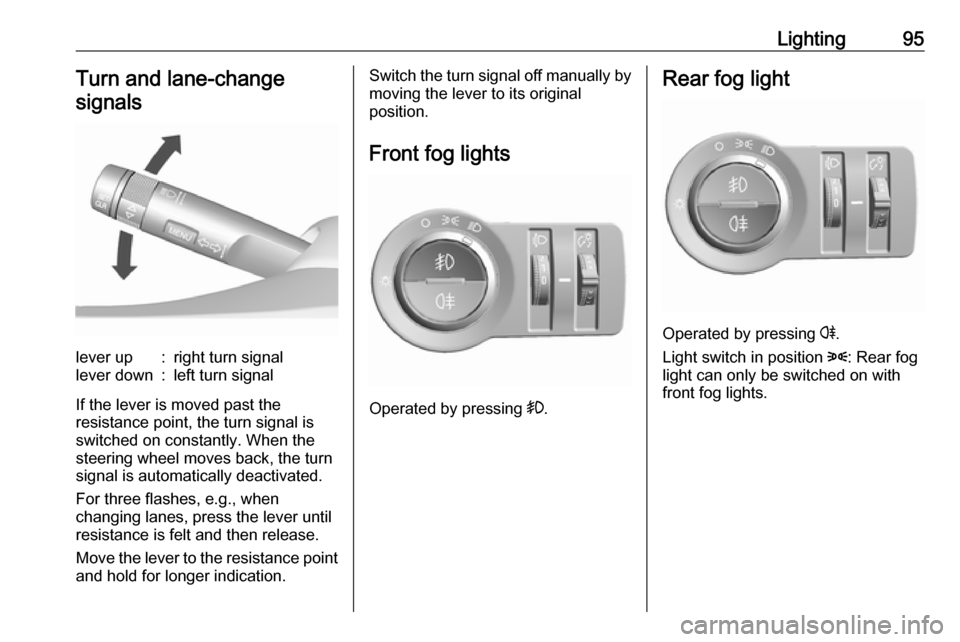
Lighting95Turn and lane-changesignalslever up:right turn signallever down:left turn signal
If the lever is moved past the
resistance point, the turn signal is
switched on constantly. When the
steering wheel moves back, the turn
signal is automatically deactivated.
For three flashes, e.g., when
changing lanes, press the lever until
resistance is felt and then release.
Move the lever to the resistance point
and hold for longer indication.
Switch the turn signal off manually by moving the lever to its original
position.
Front fog lights
Operated by pressing >
.
Rear fog light
Operated by pressing r.
Light switch in position 8: Rear fog
light can only be switched on with
front fog lights.
Page 98 of 203
96LightingParking lights
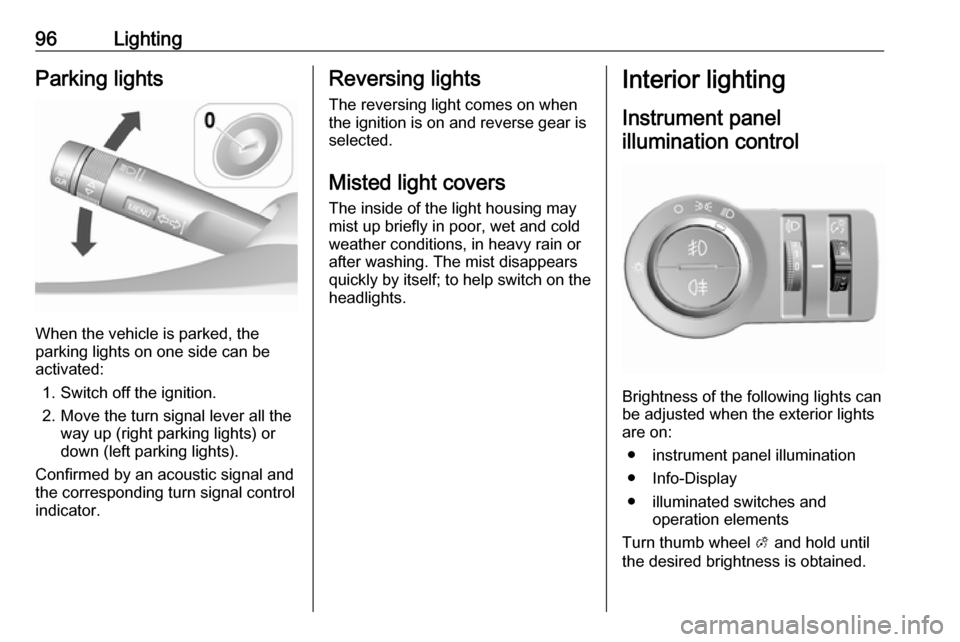
When the vehicle is parked, the
parking lights on one side can be
activated:
1. Switch off the ignition.
2. Move the turn signal lever all the way up (right parking lights) or
down (left parking lights).
Confirmed by an acoustic signal and
the corresponding turn signal control
indicator.
Reversing lights
The reversing light comes on when
the ignition is on and reverse gear is
selected.
Misted light covers
The inside of the light housing may
mist up briefly in poor, wet and cold weather conditions, in heavy rain or
after washing. The mist disappears
quickly by itself; to help switch on the
headlights.Interior lighting
Instrument panel illumination control
Brightness of the following lights can
be adjusted when the exterior lights
are on:
● instrument panel illumination
● Info-Display
● illuminated switches and operation elements
Turn thumb wheel A and hold until
the desired brightness is obtained.
Page 100 of 203

98Lighting4. Pull the turn signal lever.
5. Close the driver's door.
If the driver's door is not closed the
lights switch off after two minutes.
Exit lighting is switched off
immediately if the turn signal lever is
pulled while the driver's door is open.
Activation, deactivation and duration
of this function can be changed in the Info-Display. Vehicle personalisation
3 86.
The settings can be saved for the key
being used 3 23.
Battery discharge protection Switching off electric lights
To prevent discharge of the vehicle
battery when the ignition is switched
off, some interior lights are switched
off automatically after some time.
Page 130 of 203
128Driving and operatingBasic notes on parking assist
systems9 Warning
Under certain circumstances,
various reflective surfaces on
objects or clothing as well as
external noise sources may cause the system to fail to detect
obstacles.
Special attention must be paid to
low obstacles which can damage
the lower part of the bumper.
Caution
Performance of the system can be reduced when sensors are
covered, e.g. by ice or snow.
Performance of the parking assist
system can be reduced due to
heavy loading.
Special conditions apply if there
are taller vehicles in the vicinity
(e.g. off-road vehicles, mini vans,
vans). Object identification and
correct distance indication in the
upper part of these vehicles
cannot be guaranteed.
Objects with a very small reflection
cross-section, e.g. objects of
narrow size or soft materials, may
not be detected by the system.
Parking assist systems do not
detect objects outside the
detection range.
Lane departure warning
The lane departure warning system
observes the lane markings between
which the vehicle is driving via a front camera. The system detects lane
changes and warns the driver in the
event of an unintended lane change
via visual and acoustic signals.
Criteria for the detection of an
unintended lane change are:
● No operation of turn signals.
● No brake pedal operation.
● No active accelerator operation or speeding-up.
● No active steering.
If the driver is performing these
actions, no warning will be issued.
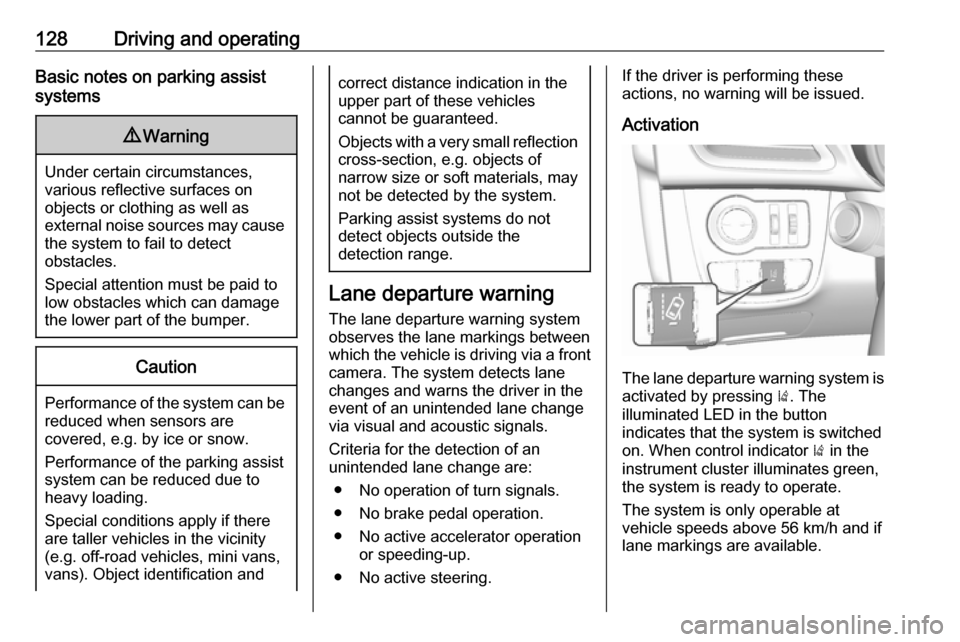
Activation
The lane departure warning system is activated by pressing ). The
illuminated LED in the button
indicates that the system is switched
on. When control indicator ) in the
instrument cluster illuminates green, the system is ready to operate.
The system is only operable at
vehicle speeds above 56 km/h and if lane markings are available.
Page 139 of 203

Vehicle care137Vehicle careGeneral Information...................137
Accessories and vehicle modifications .......................... 137
Vehicle storage ........................138
End-of-life vehicle recovery .....138
Vehicle checks ........................... 139
Performing work ......................139
Bonnet ..................................... 139
Engine oil ................................. 140
Engine coolant ......................... 141
Washer fluid ............................ 142
Brakes ..................................... 142
Brake fluid ............................... 142
Vehicle battery ......................... 142
Wiper blade replacement ........144
Bulb replacement .......................145
Halogen headlights ..................145
Fog lights ................................. 147
Front turn signal lights .............147
Tail lights ................................. 148
Side turn signal lights ..............149
Centre high-mounted brake light ......................................... 149
Number plate light ...................150Interior lights ............................ 150
Instrument panel illumination ...150
Electrical system ........................151
Fuses ....................................... 151
Engine compartment fuse box . 152
Instrument panel fuse box .......154
Vehicle tools .............................. 155
Tools ........................................ 155
Wheels and tyres .......................156
Winter tyres ............................. 156
Tyre designations ....................156
Tyre pressure .......................... 157
Tyre pressure monitoring
system .................................... 158
Tread depth ............................. 161
Changing tyre and wheel size . 161 Wheel covers ........................... 162
Tyre chains .............................. 162
Tyre repair kit .......................... 162
Wheel changing .......................165
Spare wheel ............................ 168
Jump starting ............................. 170
Towing ....................................... 171
Towing the vehicle ...................171
Appearance care .......................172
Exterior care ............................ 172
Interior care ............................. 174General Information
Accessories and vehiclemodifications
We recommend the use of genuine
parts and accessories and factory approved parts specific for your
vehicle type. We cannot assess or
guarantee reliability of other products
- even if they have a regulatory or
otherwise granted approval.
Any modification, conversion or other changes made to standard vehicle
specifications (including, without
limitation, software modifications,
modifications of the electronic control
units) may invalidate the warranty
offered by Opel. Furthermore, such
changes may impact fuel
consumption, CO 2 emissions and
other emissions of the vehicle and
cause the vehicle to no longer
conform to the type approval,
impacting the validity of your vehicle
registration.