OPEL KARL 2019 Owners Manual
Manufacturer: OPEL, Model Year: 2019, Model line: KARL, Model: OPEL KARL 2019Pages: 191, PDF Size: 5.51 MB
Page 91 of 191

Instruments and controls89maintenance items and tyre pressure
(only with tyre pressure monitoring
system).
To look at the information in greater
detail, select the link within the email and log in to your account.
Destination download
A desired destination can be directly
downloaded to the navigation system.
Press Z to call an advisor and
describe the destination or point of
interest.
The advisor can look up any address
or point of interest and directly send
the destination to the built-in
navigation system.
OnStar settings
OnStar PIN
To have full access to all OnStar
services, a four-digit PIN is required. The PIN has to be personalised when
first talking to an advisor.
To change the PIN, press Z to call an
advisor.Account data
An OnStar subscriber has an account
where all the data is stored. To
request a change of the account
information, press Z and talk to an
advisor or log in to your account.
If the OnStar service is used on
another vehicle, press Z and request
that the account be transferred to the
new vehicle.
Note
In any case, if the vehicle is disposed of, sold or otherwise transferred,
immediately inform OnStar about
the changes and terminate the
OnStar service on this vehicle.
Vehicle location
The vehicle location is transmitted to OnStar when service is requested or triggered. A message on the Info
Display informs about this
transmission.
To activate or deactivate the
transmission of the vehicle location,
press and hold j until an audio
message is heard.The deactivation is indicated by the
status light flashing red and green for
a short period of time and each time
the vehicle is started.
Note
If the transmission of the vehicle
location is deactivated, some
services are no longer available.
Note
The vehicle location always remains accessible to OnStar in the case of
an emergency.
Find the privacy policy in your
account.
Software updates
OnStar may remotely carry out
software updates without further
notice or consent. These updates are
to enhance or maintain safety and
security or the operation of the
vehicle.
These updates may concern privacy
issues. Find the privacy policy in your account.
Page 92 of 191
90LightingLightingExterior lighting............................ 90
Light switch ................................ 90
High beam ................................. 90
Headlight flash ........................... 90
Headlight range adjustment ......91
Headlights when driving abroad ...................................... 91
Daytime running lights ...............91
Cornering lights ......................... 91
Hazard warning flashers ............91
Turn lights .................................. 92
Front fog lights ........................... 92
Rear fog light ............................. 92
Parking lights ............................. 93
Reversing lights .........................93
Misted light covers .....................93
Interior lighting ............................. 93
Instrument panel illumination control ....................................... 93
Interior lights .............................. 94
Reading lights ............................ 94
Lighting features ..........................94
Exit lighting ................................ 94
Battery discharge protection ......95Exterior lighting
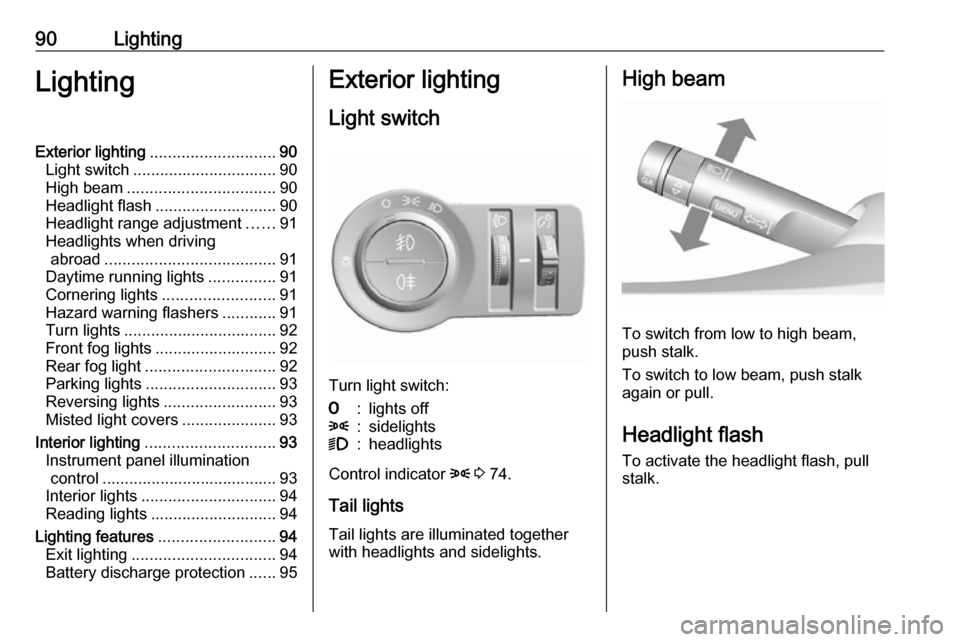
Light switch
Turn light switch:
7:lights off8:sidelights9:headlights
Control indicator 8 3 74.
Tail lights Tail lights are illuminated together
with headlights and sidelights.
High beam
To switch from low to high beam,
push stalk.
To switch to low beam, push stalk again or pull.
Headlight flash To activate the headlight flash, pull
stalk.
Page 93 of 191
Lighting91Headlight range adjustment
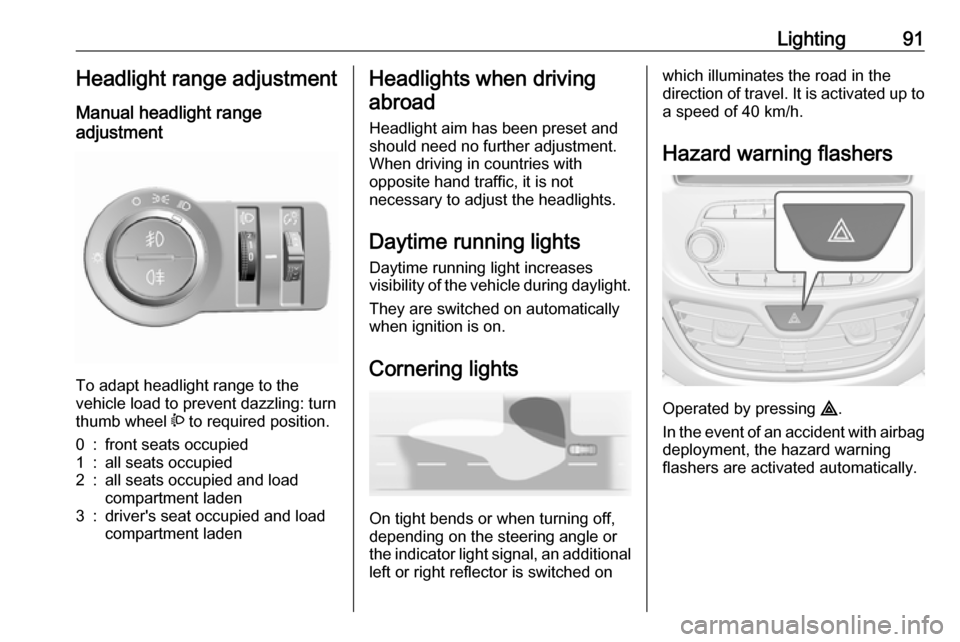
Manual headlight range
adjustment
To adapt headlight range to the
vehicle load to prevent dazzling: turn
thumb wheel ? to required position.
0:front seats occupied1:all seats occupied2:all seats occupied and load
compartment laden3:driver's seat occupied and load
compartment ladenHeadlights when driving
abroad
Headlight aim has been preset and
should need no further adjustment.
When driving in countries with
opposite hand traffic, it is not
necessary to adjust the headlights.
Daytime running lights Daytime running light increases
visibility of the vehicle during daylight.
They are switched on automatically
when ignition is on.
Cornering lights
On tight bends or when turning off,
depending on the steering angle or
the indicator light signal, an additional left or right reflector is switched on
which illuminates the road in the
direction of travel. It is activated up to
a speed of 40 km/h.
Hazard warning flashers
Operated by pressing ¨
.
In the event of an accident with airbag
deployment, the hazard warning
flashers are activated automatically.
Page 94 of 191
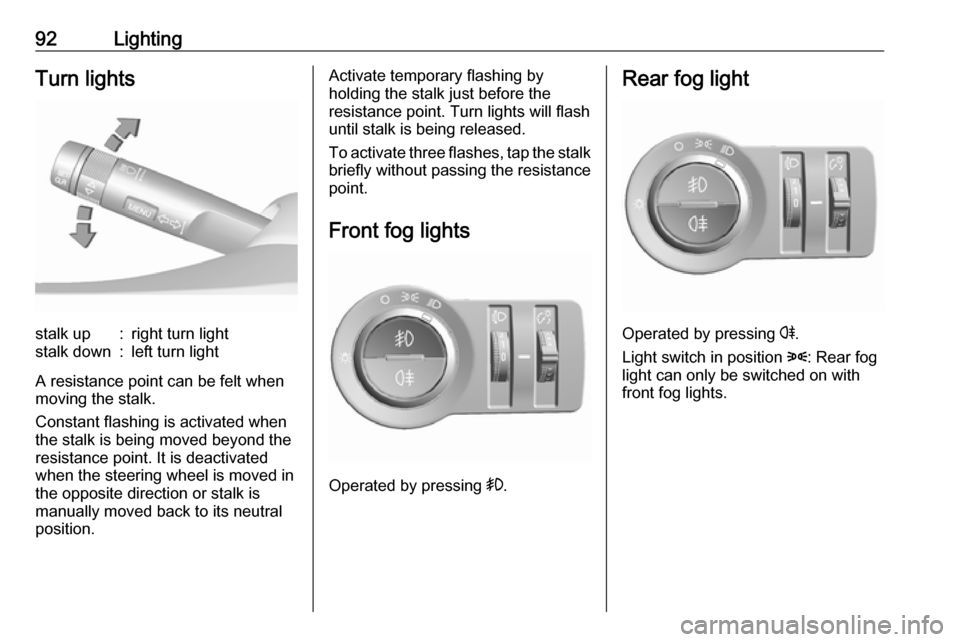
92LightingTurn lightsstalk up:right turn lightstalk down:left turn light
A resistance point can be felt when
moving the stalk.
Constant flashing is activated when
the stalk is being moved beyond the
resistance point. It is deactivated
when the steering wheel is moved in
the opposite direction or stalk is
manually moved back to its neutral
position.
Activate temporary flashing by
holding the stalk just before the
resistance point. Turn lights will flash
until stalk is being released.
To activate three flashes, tap the stalk
briefly without passing the resistance
point.
Front fog lights
Operated by pressing >
.
Rear fog light
Operated by pressing r.
Light switch in position 8: Rear fog
light can only be switched on with
front fog lights.
Page 95 of 191
Lighting93Parking lights
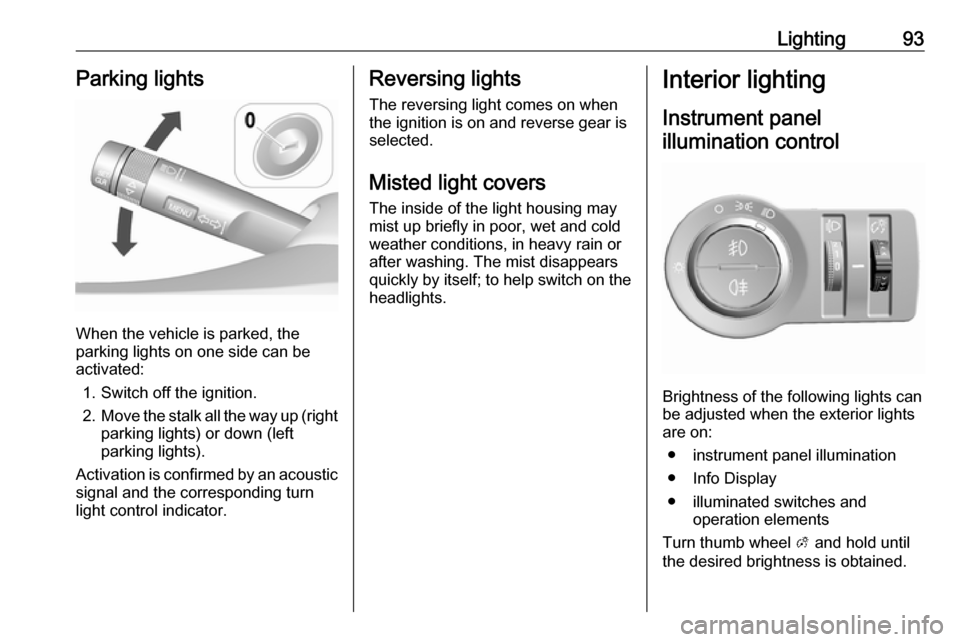
When the vehicle is parked, the
parking lights on one side can be
activated:
1. Switch off the ignition.
2. Move the stalk all the way up (right
parking lights) or down (left
parking lights).
Activation is confirmed by an acoustic
signal and the corresponding turn
light control indicator.
Reversing lights
The reversing light comes on when
the ignition is on and reverse gear is
selected.
Misted light covers
The inside of the light housing may
mist up briefly in poor, wet and cold weather conditions, in heavy rain or
after washing. The mist disappears
quickly by itself; to help switch on the
headlights.Interior lighting
Instrument panel illumination control
Brightness of the following lights can
be adjusted when the exterior lights
are on:
● instrument panel illumination
● Info Display
● illuminated switches and operation elements
Turn thumb wheel A and hold until
the desired brightness is obtained.
Page 96 of 191
94LightingInterior lights
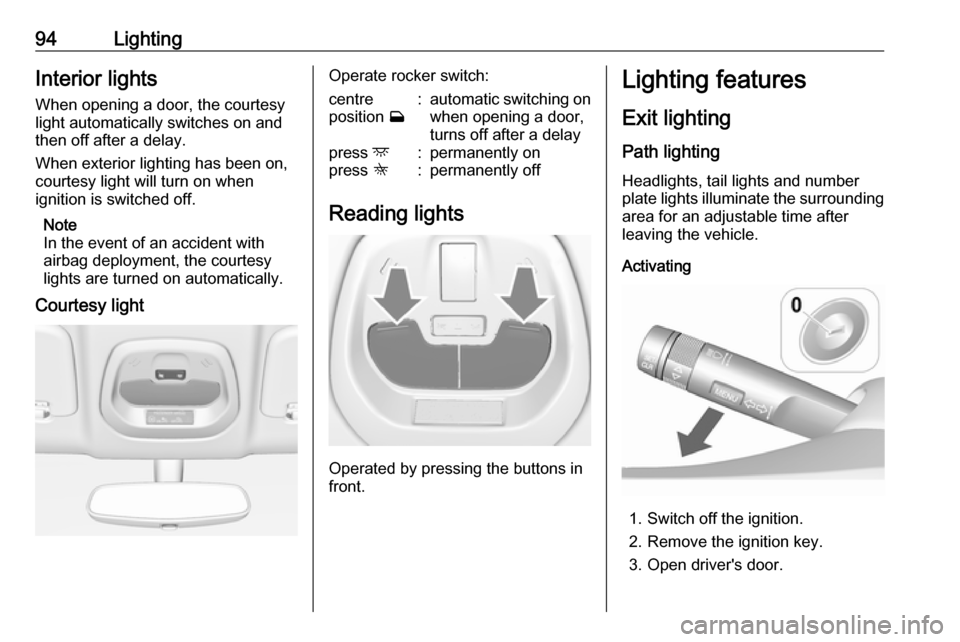
When opening a door, the courtesy
light automatically switches on and
then off after a delay.
When exterior lighting has been on,
courtesy light will turn on when
ignition is switched off.
Note
In the event of an accident with
airbag deployment, the courtesy lights are turned on automatically.
Courtesy lightOperate rocker switch:centre
position w:automatic switching on
when opening a door,
turns off after a delaypress d:permanently onpress K:permanently off
Reading lights
Operated by pressing the buttons in
front.
Lighting features
Exit lighting
Path lighting Headlights, tail lights and number
plate lights illuminate the surrounding area for an adjustable time after
leaving the vehicle.
Activating
1. Switch off the ignition.
2. Remove the ignition key.
3. Open driver's door.
Page 97 of 191

Lighting954. Pull the stalk.
5. Close the driver's door.
If the driver's door is not closed the
lights switch off after 2 minutes.
Exit lighting is switched off
immediately if the stalk is pulled while
the driver's door is open.
Activation, deactivation and duration of this function can be changed in the
Info Display.
Vehicle personalisation 3 83.
The settings can be saved for the key being used 3 22.
Battery discharge protection Switching off electric lights
To prevent discharge of the vehicle
battery when the ignition is switched
off, some interior lights are switched
off automatically after some time.
Page 98 of 191
96Climate controlClimate controlClimate control systems...............96
Heating and ventilation system . 96 Air conditioning system .............97
Electronic climate control system ...................................... 99
Air vents ..................................... 102
Adjustable air vents .................102
Fixed air vents ......................... 103
Maintenance .............................. 103
Air intake ................................. 103
Air conditioning regular operation ................................ 103
Service .................................... 103Climate control systems
Heating and ventilation system
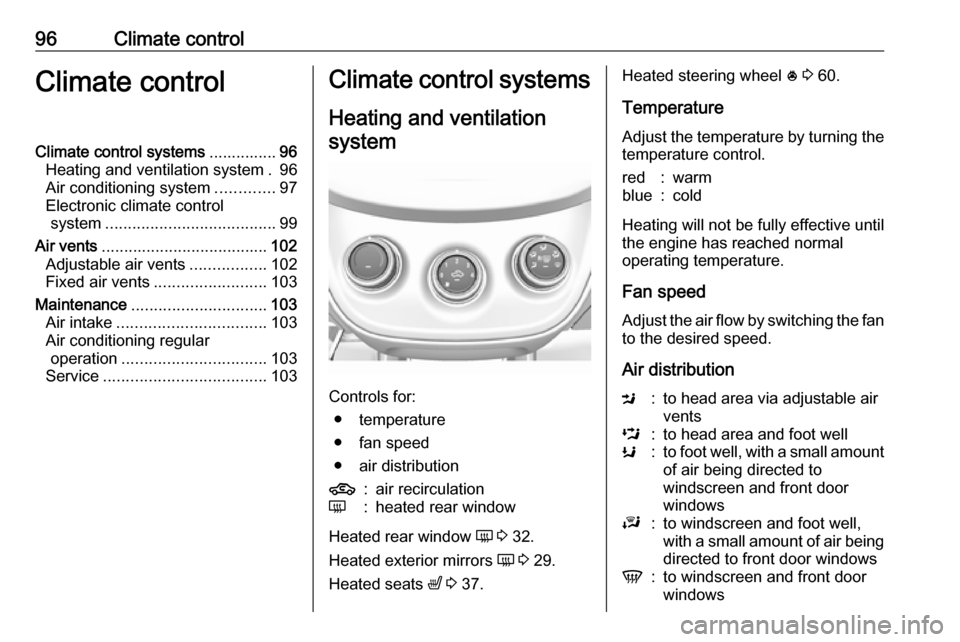
Controls for: ● temperature
● fan speed
● air distribution
4:air recirculationÜ:heated rear window
Heated rear window Ü 3 32.
Heated exterior mirrors Ü 3 29.
Heated seats ß 3 37.
Heated steering wheel * 3 60.
Temperature
Adjust the temperature by turning the
temperature control.red:warmblue:cold
Heating will not be fully effective until
the engine has reached normal
operating temperature.
Fan speed
Adjust the air flow by switching the fan
to the desired speed.
Air distribution
M:to head area via adjustable air
ventsL:to head area and foot wellK:to foot well, with a small amount of air being directed to
windscreen and front door
windowsJ:to windscreen and foot well,
with a small amount of air being
directed to front door windowsV:to windscreen and front door
windows
Page 99 of 191
Climate control97Intermediate settings are possible.Demisting and defrosting the
windows
● Set air distribution control to V.
● Set temperature control to warmest level.
● Set fan speed to highest speed.
● Switch on heated rear window Ü.
● Open side air vents as required and direct them towards door
windows.
● For simultaneous warming of the
foot well, set air distribution
control to J.Air conditioning system
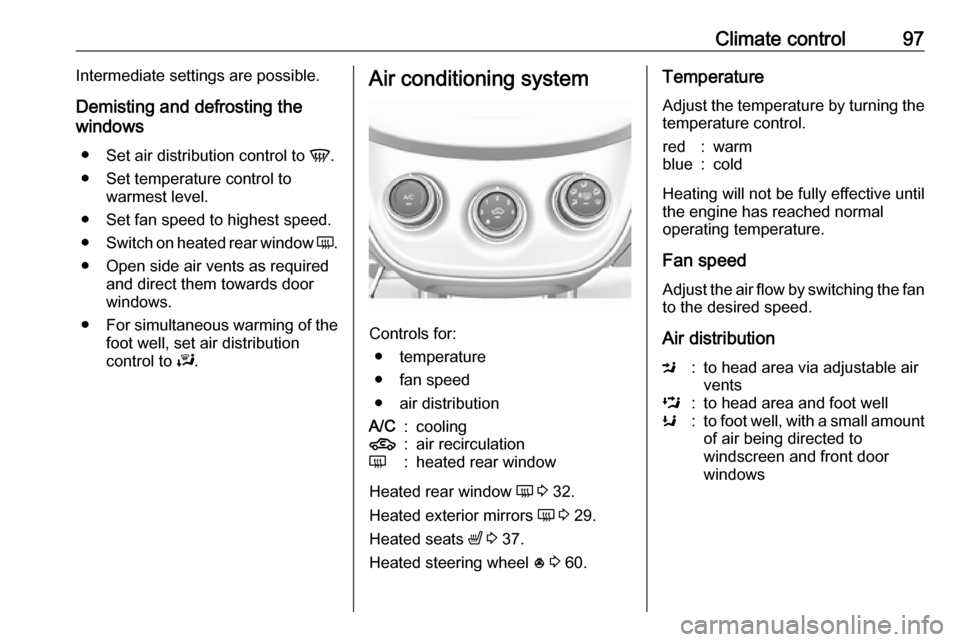
Controls for:
● temperature
● fan speed
● air distribution
A/C:cooling4:air recirculationÜ:heated rear window
Heated rear window Ü 3 32.
Heated exterior mirrors Ü 3 29.
Heated seats ß 3 37.
Heated steering wheel * 3 60.
Temperature
Adjust the temperature by turning the
temperature control.red:warmblue:cold
Heating will not be fully effective until
the engine has reached normal
operating temperature.
Fan speed
Adjust the air flow by switching the fan
to the desired speed.
Air distribution
M:to head area via adjustable air
ventsL:to head area and foot wellK:to foot well, with a small amount of air being directed to
windscreen and front door
windows
Page 100 of 191

98Climate controlJ:to windscreen and foot well,
with a small amount of air being directed to front door windowsV:to windscreen and front door
windows (air conditioning is
activated in the background to
help preventing windows from
fogging)
Intermediate settings are possible.
Cooling A/C
Press A/C to switch on cooling. The
LED in the button illuminates to
indicate activation. Cooling is only
functional when the engine is running
and climate control fan is switched on.
Press A/C again to switch off cooling.
The air conditioning system cools and
dehumidifies (dries) as soon as the
outside temperature is slightly above
the freezing point. Therefore
condensation may form and drip from under the vehicle.
If no cooling or drying is required,
switch off the cooling system for fuel
saving reasons.
Activated cooling may inhibit
Autostops.
Stop-start system 3 107.
Air recirculation system 4
Press 4 to activate air recirculation
mode. The LED in the button
illuminates to indicate activation.
Press 4 again to deactivate air
recirculation mode.9 Warning
Driving with recirculation mode for
a prolonged period of time can
make you sleepy. Periodically turn to the outside air mode for fresh
air.
The exchange of fresh air is
reduced in air recirculation mode.
In operation without cooling the air humidity increases, so the
windows may mist up. The quality
of the passenger compartment air
deteriorates, which may cause the
vehicle occupants to feel drowsy.
In warm and very humid ambient air
conditions, the windscreen may mist
up from outside, when cold air is
directed towards it. If windscreen
mists up from outside, activate
windscreen wiper and deactivate V.
Maximum cooling Briefly open the windows so that hot
air can disperse quickly.
● Switch on cooling A/C.
● Switch on Air recirculation system 4.
● Set temperature control to coldest level.
● Set fan speed to highest level.
● Set air distribution control to M.
● Open all vents.
Demisting and defrosting the
windows V
● Set air distribution control to V.
● Set temperature control to warmest level.
● Set fan speed to highest level.
● Switch on heated rear window Ü.
● Open side air vents as required and direct them towards the doorwindows.