window OPEL MERIVA 2009 Owner's Manual
[x] Cancel search | Manufacturer: OPEL, Model Year: 2009, Model line: MERIVA, Model: OPEL MERIVA 2009Pages: 248, PDF Size: 4.46 MB
Page 45 of 248

39
Keys, doors, windows, slide and tilt sunroof
Picture no: 13984s.tif
Automatic:Anti-dazzle interior mirror3
Dazzling at night is re duced automatically.
The interior mirror does not reduce dazzle
when:
z the ignition is switched off.
z reverse gear is engaged or selector lever
set to R.
z interior lighting has been switched on.
Picture no: 14137s.tif
Manual window operation The door windows can be operated using
window winders.
Electric windows
3
Operational readiness
Operable when the ignition key is in
position 1.
Button illumination indicates operational
readiness.
Operational readiness ends when the
driver’s door is opened.
9 Warning
Take care when oper ating the electric
windows. Risk of injury, particularly to
children.
If there are children on the rear seat,
switch on the child safety system 3 for
the electric windows.
Keep a close watch on the windows
when closing them. Ensure that nothing
becomes trapped in them as they move.
Page 46 of 248

40 Keys, doors, windows, slide and tilt sunroof
Picture no: 14804s.tif
Operation
To operate window in stages, tap
appropriate switch. For automatic opening
or closing, keep switch pressed for slightly
longer; to stop window movement, tap
switch again.
Safety function
If the window glass encounters resistance
above the middle of the window during
automatic closing, it is immediately
stopped and the wind ow opened again.
If the windows do not move easily (e.g. on
account of frost), repeatedly tap the switch
for the window in question until the window
has been closed in stages.
Picture no: 14140s.tif
Child safety system for rear windows 3
Switch between the rocker switches in the
handle on the driver’s door
z to left (red control indicator visible): rear
windows cannot be operated with the
rocker buttons in the rear doors,
z to right (green control indicator visible):
rear windows can be operated with the
rocker buttons in the rear doors.
Picture no: 17899s.tif
Closing windows 3 from outside
On vehicles with electric windows in all
doors, the windows can be closed from
outside:
Hold button p of the remote control
depressed until all of the windows have
closed completely.
Page 47 of 248

41
Keys, doors, windows, slide and tilt sunroof
Picture no: 13992s.tif
Heated rear window 3
Heating is activated or deactivated by
pressing the Ü button.
Picture no: 16502s.tif
On vehicles with electronic climate
control Ü appears on the climate control
display.
Heating works with the engine running and
is switched off automatically after a few
minutes.
The heated rear window automatically
switches on when the dies el particle filter is
being cleaned 3 depending on the engine.
Climate control 3114. Overload
If the windows are repeatedly operated at
short intervals, the power supply is briefly
cut off.
Fault
If the windows cannot be opened and
closed automatically, activate the window
electronics as follows:
1. Close doors.
2. Switch on ignition.
3. Close the window completely and hold
the rocker switch down at least
5 seconds longer.
4. Open the window completely and hold the rocker switch down at least 1 second
longer.
5. Repeat for each window.
Page 48 of 248
42 Keys, doors, windows, slide and tilt sunroof
Picture no: 14251s.tif
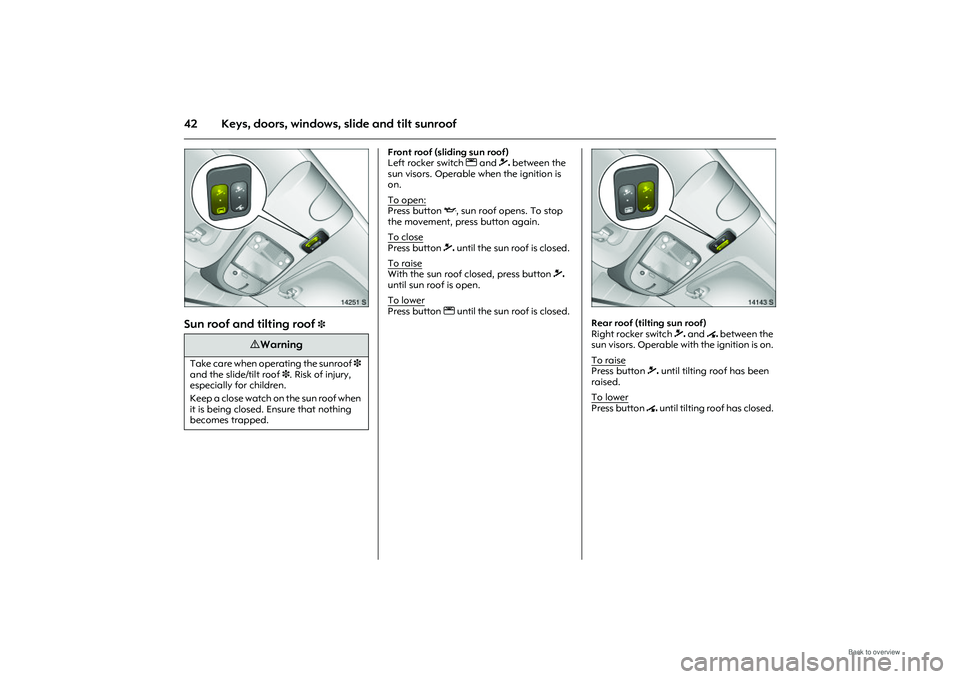
Sun roof and tilting roof
3
Front roof (sliding sun roof)
Left rocker switch l and \ between the
sun visors. Operable when the ignition is
on.
To open:Press button I, sun roof opens. To stop
the movement, press button again.
To close
Press button \ until the sun roof is closed.
To raise
With the sun roof closed, press button \
until sun roof is open.
To lower
Press button l until the sun roof is closed.
Picture no: 14143s.tif
Rear roof (tilting sun roof)
Right rocker switch \ and w between the
sun visors. Operable with the ignition is on.
To raise
Press button \ until tilting roof has been
raised.
To lower
Press button w until tilting roof has closed.
9 Warning
Take care when operating the sunroof 3
and the slide/tilt roof 3 . Risk of injury,
especially for children.
Keep a close watch on the sun roof when
it is being closed. Ensure that nothing
becomes trapped.
Page 49 of 248
43
Keys, doors, windows, slide and tilt sunroof
Sun shade
To reduce the sunlight in the interior with
the sliding roof closed or raised.
Open or close sun shade as required.
When the sun roof is opened, the sun shade
is also opened.
Note
zIf the top of the roof is wet, raise roof,
allow water to run off and then open
roof.
z When using a roof rack, check the
clearance of the sun roof to avoid
damage.
Picture no: 14802s.tif
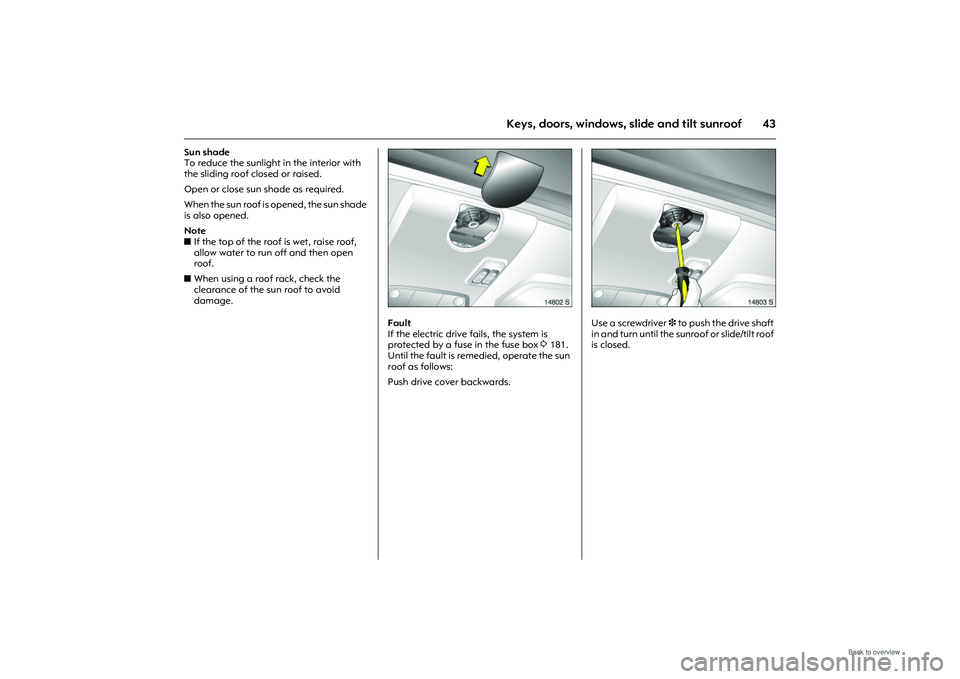
Fault
If the electric drive fails, the system is
protected by a fuse in the fuse box 3181.
Until the fault is remedied, operate the sun
roof as follows:
Push drive cover backwards.
Picture no: 14803s.tif
Use a screwdriver 3 to push the drive shaft
in and turn until the sunroof or slide/tilt roof
is closed.
Page 107 of 248
101
Instruments, Controls
Picture no: 14056h.tif
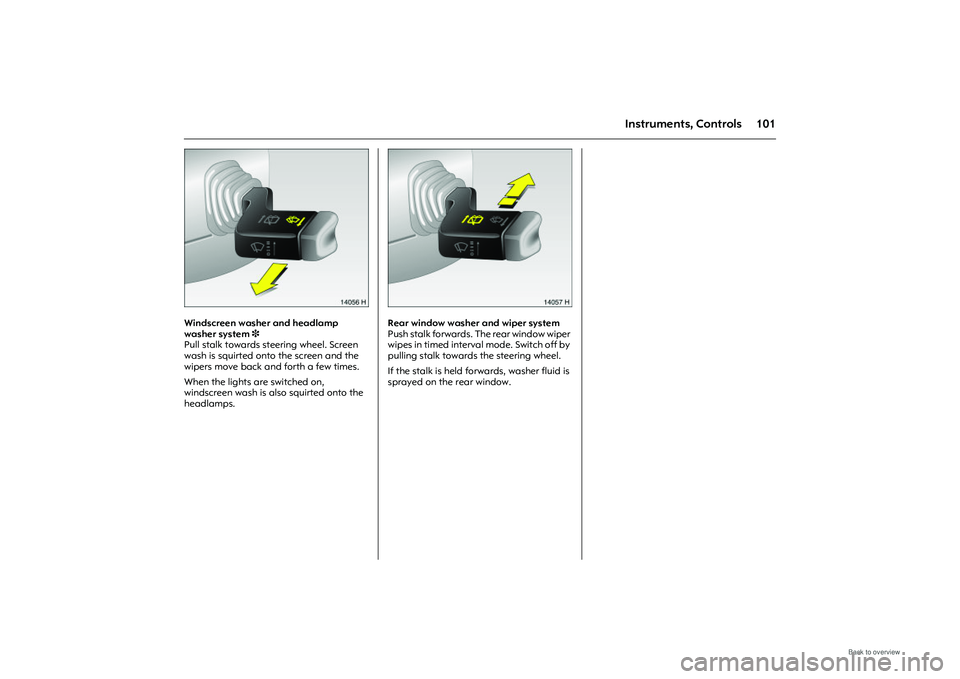
Windscreen washer and headlamp
washer system 3
Pull stalk towards steer ing wheel. Screen
wash is squirted onto the screen and the
wipers move back and forth a few times.
When the lights are switched on,
windscreen wash is al so squirted onto the
headlamps.
Picture no: 14057h.tif
Rear window washer and wiper system
Push stalk forwards. The rear window wiper
wipes in timed interval mode. Switch off by
pulling stalk towards the steering wheel.
If the stalk is held forwards, washer fluid is
sprayed on the rear window.
Page 121 of 248

115
Climate control
Picture no: 16112s.tif
Air vents At least one air vent must be open while
cooling 3 (air conditioning compressor) is
on in order to prevent the evaporator from
icing up due to lack of air movement.
Pleasant ventilation to the head area
controlled by the position of the
temperature switch.
To increase the air supply, set the fan to a
higher speed and set the air distribution
switch to M or L.
Picture no: 14576s.tif
Centre and side (1) air vents
To open vent: rotate wheel upwards.
Adjust the direction of air flow by rotating
the horizontal and vertical wheels.
To close the vents rotate the wheel fully
downwards. Windscreen defros
ter nozzles (2)
Air distribution switch set to V or J : Air is
directed onto the windscreen and door
windows.
Additional vents
are beneath the windscreen and side
windows and in the front footwell.
Page 122 of 248
116 Climate control
Picture no: 14144s.tif
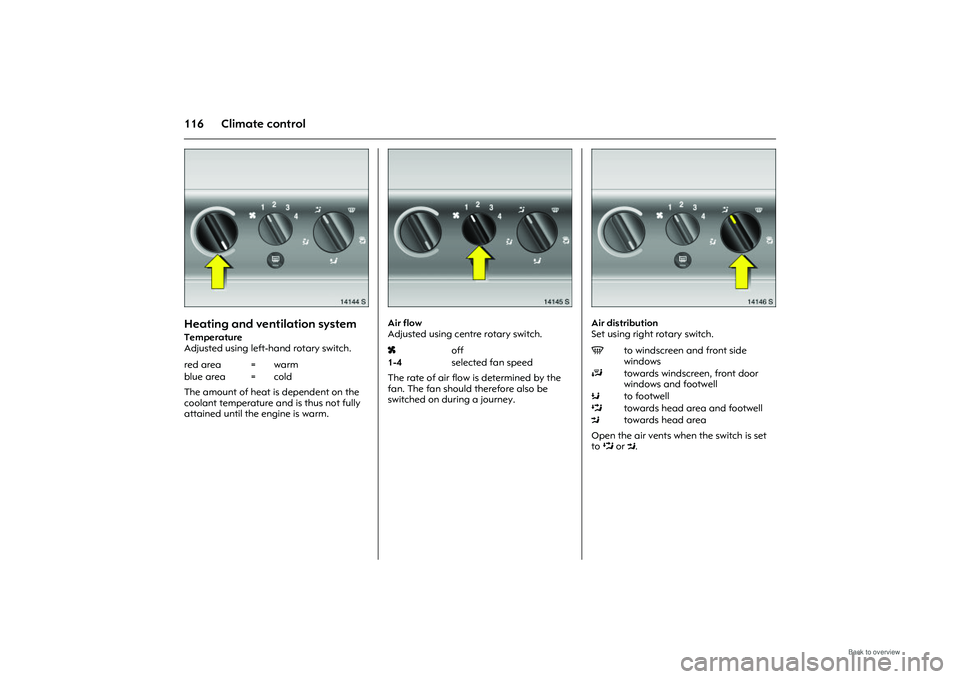
Heating and ventilation system Temperature
Adjusted using left-hand rotary switch.
The amount of heat is dependent on the
coolant temperature and is thus not fully
attained until the engine is warm.
Picture no: 14145s.tif
Air flow
Adjusted using centre rotary switch.
The rate of air flow is determined by the
fan. The fan should therefore also be
switched on during a journey.
Picture no: 14146s.tif
Air distribution
Set using right rotary switch.
Open the air vents when the switch is set
toL or M .
red area = warm
blue area = cold
x
off
1-4 selected fan speed
Vto windscreen and front side
windows
J towards windscreen, front door
windows and footwell
K to footwell
L towards head area and footwell
M towards head area
Page 124 of 248
118 Climate control
Picture no: 14151s.tif
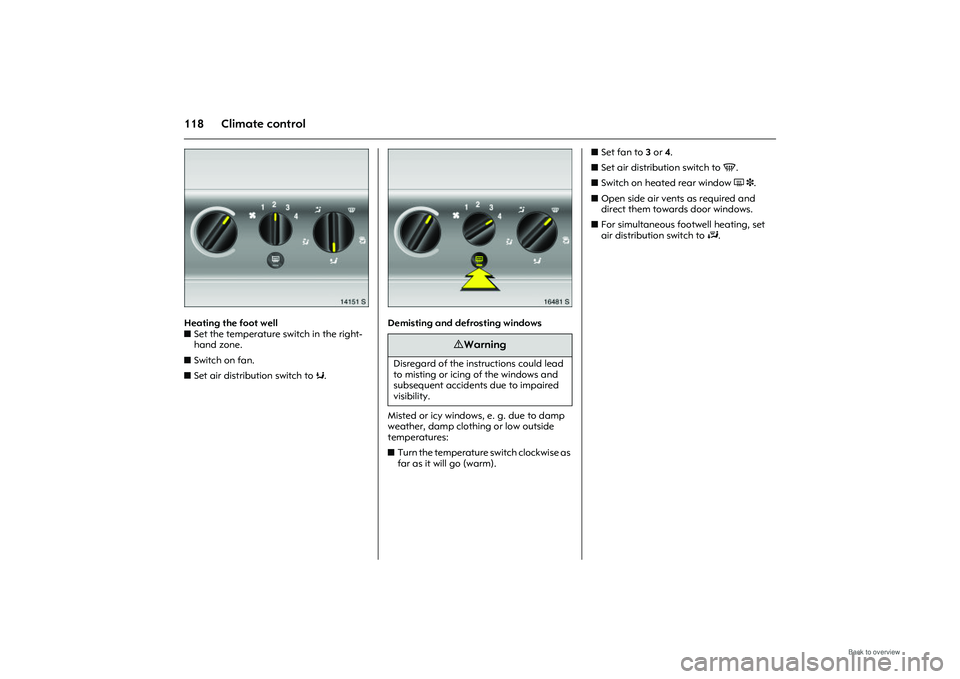
Heating the foot well
zSet the temperature switch in the right-
hand zone.
z Switch on fan.
z Set air distribution switch to K.
Picture no: 16481s.tif
Demisting and defrosting windows
Misted or icy windows, e. g. due to damp
weather, damp clothing or low outside
temperatures:
z Turn the temperature switch clockwise as
far as it will go (warm). z
Set fan to 3 or 4 .
z Set air distribution switch to V.
z Switch on heated rear window Ü 3.
z Open side air vents as required and
direct them towards door windows.
z For simultaneous footwell heating, set
air distribution switch to J.
9 Warning
Disregard of the instructions could lead
to misting or icing of the windows and
subsequent accidents due to impaired
visibility.
Page 126 of 248

120 Climate controlAir distribution to V: the air recirculation
system is automatically switched off to
speed up window demisting and prevent
fogging.
Picture no: 14160s.tif
Comfort setting
z Set cooling n as desired.
z Air recirculation system 4 off.
z Set temperature switch as desired.
z Switch on fan at desired speed.
z Set air distribution switch to M or L.
z Open or adjust vents as required. Temperature switch in centre of
adjustment range: warmer air will flow into
the foot well and cooler air into the upper
zone, with warmer air coming from the side
air vents and cooler air from the centre
vents.
9 Warning
The air recirculation system minimises
the entry of outside air. The humidity
increases, and the windows can mist up.
The quality of the passenger
compartment air deteriorates which
may cause the vehicle occupants to feel
drowsy.