tow bar OPEL MERIVA 2009 Owners Manual
[x] Cancel search | Manufacturer: OPEL, Model Year: 2009, Model line: MERIVA, Model: OPEL MERIVA 2009Pages: 248, PDF Size: 4.46 MB
Page 131 of 248
125
Climate control
Picture no: 16503s.tif
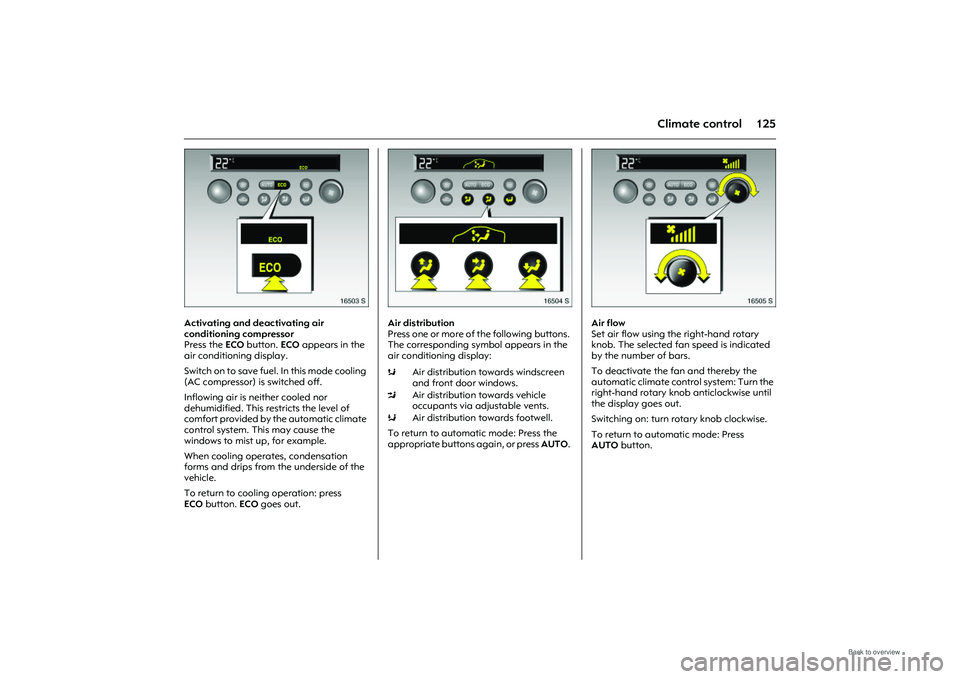
Activating and deactivating air
conditioning compressor
Press the ECO button. ECO appears in the
air conditioning display.
Switch on to sa ve fuel. In this m ode cooling
(AC compressor) is switched off.
Inflowing air is neither cooled nor
dehumidified. This restricts the level of
comfort provided by the automatic climate
control system. This may cause the
windows to mist up, for example.
When cooling operates, condensation
forms and drips from the underside of the
vehicle.
To return to cooling operation: press
ECO button. ECO goes out.
Picture no: 16504s.tif
Air distribution
Press one or more of the following buttons.
The corresponding symbol appears in the
air conditioning display:
To return to automatic mode: Press the
appropriate buttons again, or press AUTO.
Picture no: 16505s.tif
Air flow
Set air flow using the right-hand rotary
knob. The selected fan speed is indicated
by the number of bars.
To deactivate the fan and thereby the
automatic climate control system: Turn the
right-hand rotary knob anticlockwise until
the display goes out.
Switching on: turn rota ry knob clockwise.
To return to automatic mode: Press
AUTO button.
sAir distribution towards windscreen
and front door windows.
M Air distribution towards vehicle
occupants via adjustable vents.
K Air distribution towards footwell.
Page 135 of 248
129
Driving and operation
Driving and operation
Manual transmission
automated
3
The manual transmission automated
transmission 3 permits manual ( manual
mode ) or automatic gear shifting
(automatic mode ), both with automatic
clutch control.
Picture no: 17878s.tif
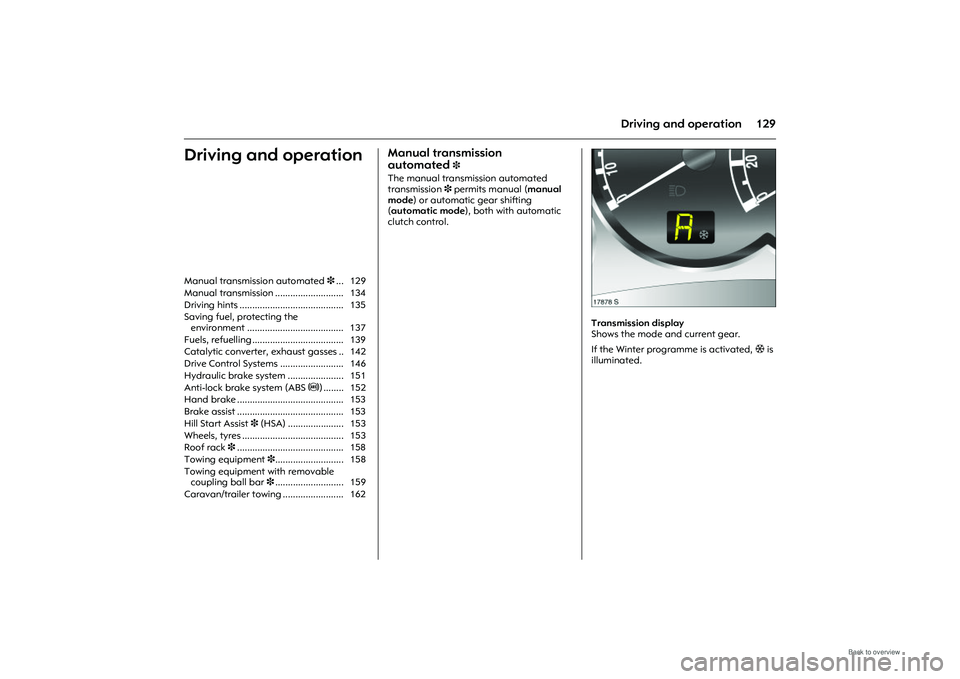
Transmission display
Shows the mode and current gear.
If the Winter programme is activated, T is
illuminated.
Manual transmission automated
3... 129
Manual transmission ........................... 134
Driving hints ......................................... 135
Saving fuel, protecting the environment ...................................... 137
Fuels, refuelling .................................... 139
Catalytic converter, exhaust gasses .. 142
Drive Control Systems ......................... 146
Hydraulic brake system ...................... 151
Anti-lock brake system (ABS u ) ........ 152
Hand brake .......................................... 153
Brake assist .......................................... 153
Hill Start Assist 3 (HSA) ...................... 153
Wheels, tyres ........................................ 153
Roof rack 3.......................................... 158
Towing equipment 3........................... 158
Towing equipment with removable coupling ball bar 3........................... 159
Caravan/trailer towing ........................ 162
Page 156 of 248
150 Driving and operationUltrasonic parking sensors 3
Park pilot makes reverse parking easier by
measuring the distance between the back
of the vehicle and obstacles to the rear. It is
the driver, however, who maintains full
responsibility for parking.
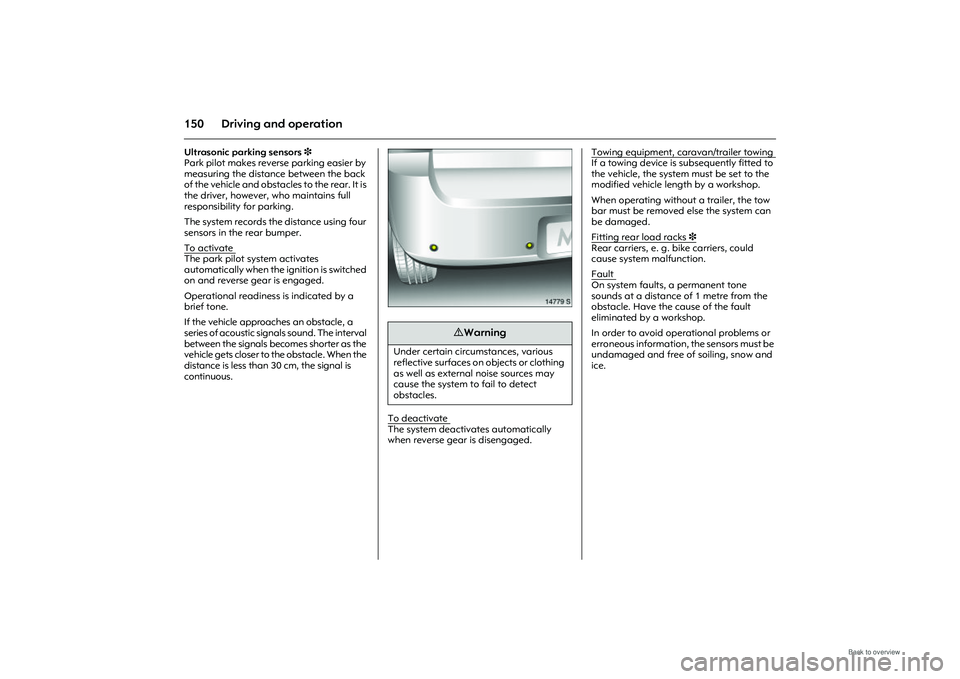
The system records the distance using four
sensors in the rear bumper.
To activate The park pilot system activates
automatically when the ignition is switched
on and reverse gear is engaged.
Operational readiness is indicated by a
brief tone.
If the vehicle approaches an obstacle, a
series of acoustic signals sound. The interval
between the signals be comes shorter as the
vehicle gets closer to the obstacle. When the
distance is less than 30 cm, the signal is
continuous.
Picture no: 14779s.tif
To deactivate The system deactivates automatically
when reverse gear is disengaged. Towing equipment, caravan/trailer towing
If a towing device is subsequently fitted to
the vehicle, the system must be set to the
modified vehicle length by a workshop.
When operating without a trailer, the tow
bar must be removed else the system can
be damaged.
Fitting rear load racks
3
Rear carriers, e. g. bike carriers, could
cause system malfunction.
Fault
On system faults, a permanent tone
sounds at a distance of 1 metre from the
obstacle. Have the cause of the fault
eliminated by a workshop.
In order to avoid operational problems or
erroneous information, the sensors must be
undamaged and free of soiling, snow and
ice.
9 Warning
Under certain circumstances, various
reflective surfaces on objects or clothing
as well as external noise sources may
cause the system to fail to detect
obstacles.
Page 165 of 248
159
Driving and operation
Picture no: 14195s.tif
Towing equipment with
removable coupling ball bar
3
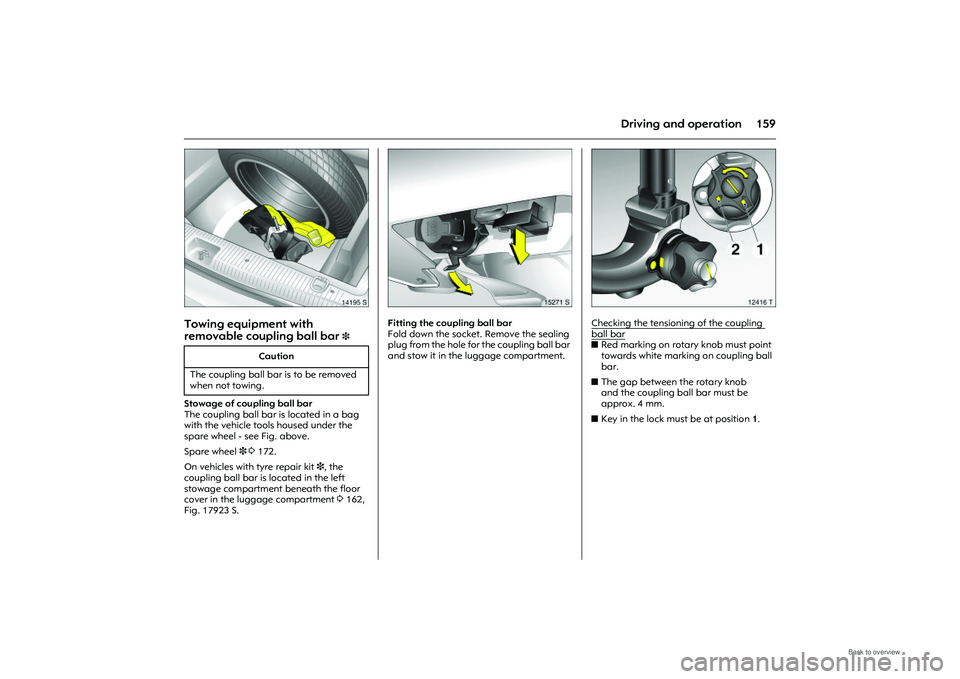
Stowage of coupling ball bar
The coupling ball bar is located in a bag
with the vehicle tools housed under the
spare wheel - see Fig. above.
Spare wheel 3 3172.
On vehicles with tyre repair kit 3, the
coupling ball bar is located in the left
stowage compartment beneath the floor
cover in the luggage compartment 3162,
Fig. 17923 S.
Picture no: 15271s.tif
Fitting the coupling ball bar
Fold down the socket. Remove the sealing
plug from the hole for the coupling ball bar
and stow it in the luggage compartment.
Picture no: 12416t.tif
Checking the tensioning of the coupling ball bar
z Red marking on rotary knob must point
towards white marking on coupling ball
bar.
z The gap between the rotary knob
and the coupling ball bar must be
approx. 4 mm.
z Key in the lock must be at position 1.
Caution
The coupling ball bar is to be removed
when not towing.
Page 167 of 248
161
Driving and operation
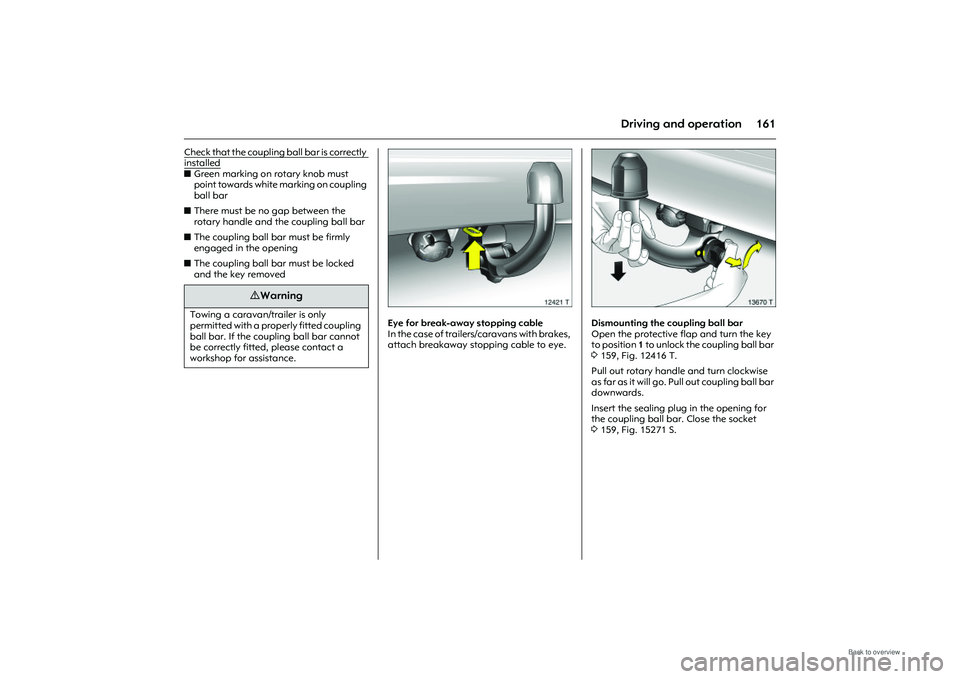
Check that the coupling ball bar is correctly installedzGreen marking on rotary knob must
point towards white ma rking on coupling
ball bar
z There must be no gap between the
rotary handle and the coupling ball bar
z The coupling ball bar must be firmly
engaged in the opening
z The coupling ball bar must be locked
and the key removed
Picture no: 12421t.tif
Eye for break-away stopping cable
In the case of trailers/caravans with brakes,
attach breakaway stopping cable to eye.
Picture no: 13670t.tif
Dismounting the coupling ball bar
Open the protective flap and turn the key
to position 1 to unlock the coupling ball bar
3 159, Fig. 12416 T.
Pull out rotary handle and turn clockwise
as far as it will go. Pull out coupling ball bar
downwards.
Insert the sealing plug in the opening for
the coupling ball bar. Close the socket
3 159, Fig. 15271 S.
9 Warning
Towing a caravan/trailer is only
permitted with a properly fitted coupling
ball bar. If the coupling ball bar cannot
be correctly fitted, please contact a
workshop for assistance.
Page 168 of 248
162 Driving and operation
Picture no: 17923s.tif
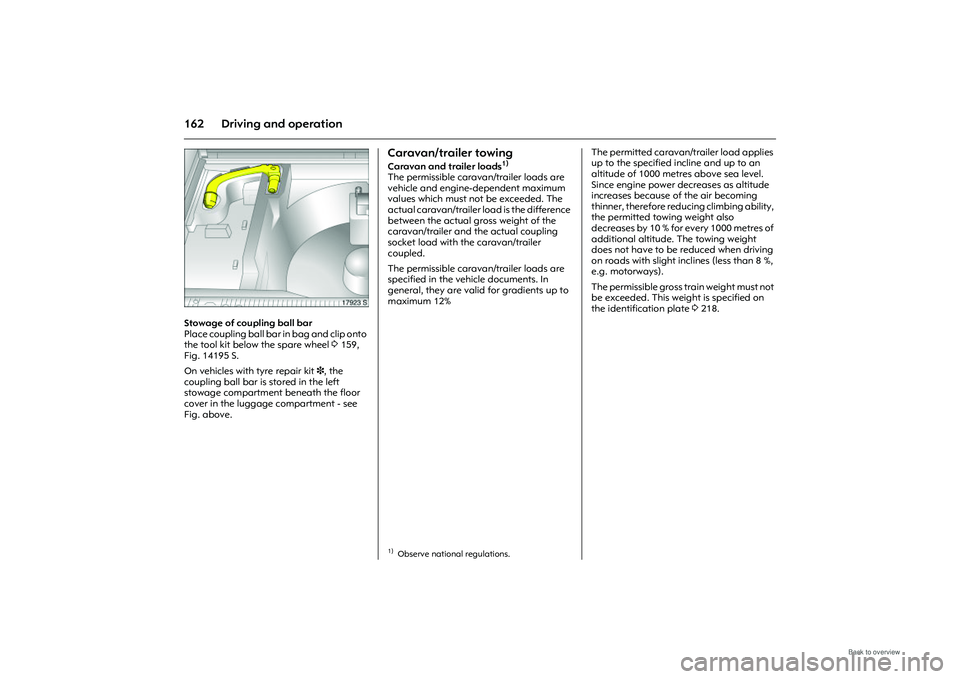
Stowage of coupling ball bar
Place coupling ball bar in bag and clip onto
the tool kit below the spare wheel 3159,
Fig. 14195 S.
On vehicles with tyre repair kit 3, the
coupling ball bar is stored in the left
stowage compartment beneath the floor
cover in the luggage compartment - see
Fig. above.
Caravan/trailer towingCaravan and trailer loads
1)
The permissible caravan/trailer loads are
vehicle and engine-dependent maximum
values which must not be exceeded. The
actual caravan/trailer load is the difference
between the actual gross weight of the
caravan/trailer and the actual coupling
socket load with the caravan/trailer
coupled.
The permissible caravan/trailer loads are
specified in the vehi cle documents. In
general, they are valid for gradients up to
maximum 12% The permitted caravan/trailer load applies
up to the specified incline and up to an
altitude of 1000 metres above sea level.
Since engine power decreases as altitude
increases because of the air becoming
thinner, therefore reducing climbing ability,
the permitted towing weight also
decreases by 10 % for
every 1000 metres of
additional altitude. The towing weight
does not have to be reduced when driving
on roads with slight inclines (less than 8 %,
e.g. motorways).
The permissible gross train weight must not
be exceeded. This weig ht is specified on
the identification plate 3218. 1)Observe national regulations.
Page 169 of 248
163
Driving and operation
Coupling socket load
The coupling socket load is the load
exerted by the trailer/caravan on the
coupling ball. It can be varied by changing
the weight distribution when loading the
trailer/caravan.
The maximum permissible coupling socket
load (55 kg) of the towing vehicle is
specified on the towing equipment
identification plate and in the vehicle
documents. This must always be complied
with, particularly in the case of heavy
caravans/trailers. The coupling socket load
should be no less than 25 kg.
When measuring the coupling socket load,
make sure that the drawbar of the loaded
trailer/caravan is at the same height as it
will be when the trailer/caravan is coupled
with the towing vehicle loaded. Particularly
important for trailers/caravans with
tandem axle. Rear axle load during towing
With the trailer connected and the towing
vehicle fully loaded including all
occupants, the permitted rear axle load
(specified on the identification plate and
vehicle documents) must be exceeded by
no more than 25 kg and the maximum
permitted gross vehicle weight by no more
than 30 kg. If the maximum permitted rear
axle load is exceeded, a maximum speed
of 100 km/h applies, and 80 km/h for
commercial vehicles.
Driving characteristics, towing tips
Before attaching th
e trailer/caravan,
lubricate the ball of the trailer/caravan
towing device. However, do not lubricate
the ball if a stabiliser, which acts on the
coupling ball, is being used to damp
hunting.
Check caravan/traile r lighting before
starting to drive. The fog tail lamps on the
vehicle are deactivated when towing a
caravan or trailer.
Trailers with LED turn signals must have a
provision enables lamp monitoring for
commercial bulbs.
Handling is greatly influenced by the
loading of the trailer/caravan. Loads
should therefore be secured so that they
cannot slip and be placed in the centre of
the trailer/caravan if possible, i.e. above
the axle.
In the case of trailers with low driving
stability, do not exceed a speed of 80 km/h;
the use of a friction-type stabiliser is
strongly recommended.
Page 186 of 248
180 Self-help, vehicle care
Picture no: 15797t.tif
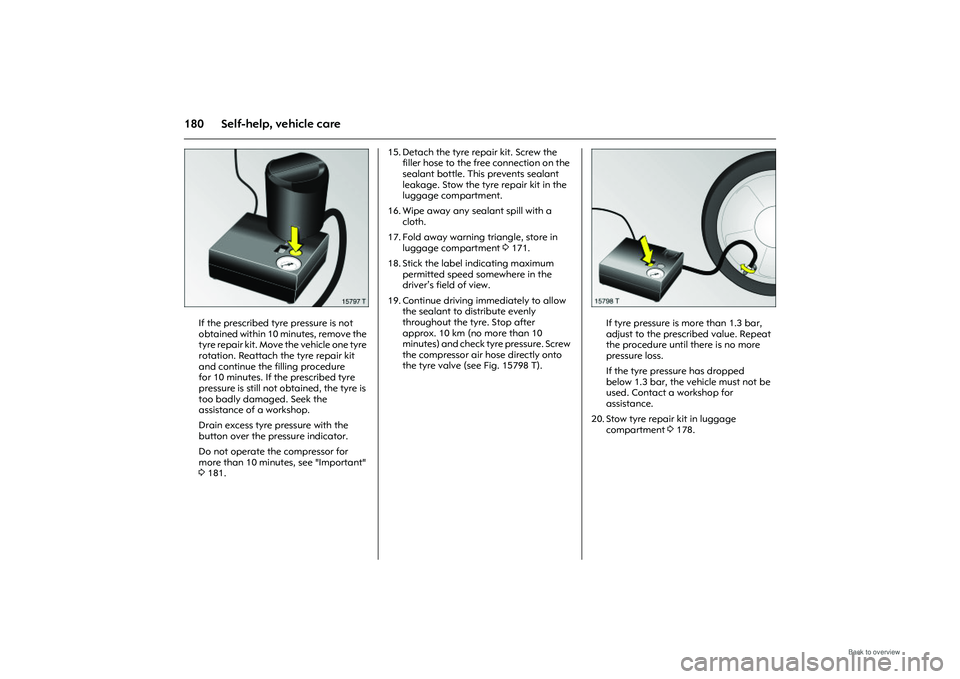
If the prescribed tyre pressure is not
obtained within 10 minutes, remove the
tyre repair kit. Move the vehicle one tyre
rotation. Reattach the tyre repair kit
and continue the filling procedure
for 10 minutes. If the prescribed tyre
pressure is still not obtained, the tyre is
too badly damaged. Seek the
assistance of a workshop.
Drain excess tyre pressure with the
button over the pressure indicator.
Do not operate the compressor for
more than 10 minutes, see "Important"
3181. 15. Detach the tyre repair kit. Screw the
filler hose to the free connection on the
sealant bottle. This prevents sealant
leakage. Stow the tyre repair kit in the
luggage compartment.
16. Wipe away any sealant spill with a cloth.
17. Fold away warning triangle, store in luggage compartment 3171.
18. Stick the label indicating maximum permitted speed somewhere in the
driver’s field of view.
19. Continue driving immediately to allow the sealant to distribute evenly
throughout the tyre. Stop after
approx. 10 km (no more than 10
minutes) and check tyre pressure. Screw
the compressor air hose directly onto
the tyre valve (see Fig. 15798 T).
Picture no: 15798t.tif
If tyre pressure is more than 1.3 bar,
adjust to the prescribed value. Repeat
the procedure until there is no more
pressure loss.
If the tyre pressure has dropped
below 1.3 bar, the vehicle must not be
used. Contact a workshop for
assistance.
20. Stow tyre repair kit in luggage compartment 3178.
Page 204 of 248
198 Self-help, vehicle careWindows and windscreen wiper blades
Use a soft lint-free cloth or chamois leather
together with window cleaner and insect
remover.
When cleaning the rear window, make sure
the heating element inside the window is
not damaged.
For mechanical removal of ice, use a sharp-
edged ice scraper. Pre ss the scraper firmly
against the glass so that no dirt can get
under it and scratch the glass.
Clean smearing wiper blades with a soft
cloth and window cleaner. Locks
The locks are lubricated with a high-quality
locking cylinder grease
in the factory. Only
use de-icer in urgent cases, since it has a
de-greasing effect and affects the
operation of the locks. Have the locks re-
greased in a workshop after using de-icer.
Engine compartment
Look after areas in the engine
compartment that are painted in the same
colour as the vehicle like any other
paintwork.
It is advisable to wash the engine
compartment before and after winter and
preserve it with wax. Cover alternator and
brake fluid reservoir with plastic sheets
before washing the engine.
When washing the engine with a steam-jet
cleaner, do not direct the steam jet at
components of the Anti-lock Braking
System 3, the automatic air conditioning
system 3 or the belt drive and its
components.
After an engine wash, have all engine room
components preserved thoroughly by a
workshop using protective wax.
Do not use high-pressure jet cleaners. Underbody
Some areas of the vehicle underbody have
a PVC undercoating while other critical
areas have a durable protective wax
coating.
After the underbody is washed, check the
underbody and have more protective wax
applied if necessary.
Bitumen/rubber materials could damage
the PVC coating. Have underbody work
carried out by a workshop.
Before and after winter, wash the
underbody and have the protective wax
coating checked.
Towing equipment
Do not clean the coupling ball bar with a
steam-jet or high-pressure jet cleaner.
Page 243 of 248
237
Index
KKeyextending .............................................. 26
ignition lock ..................................... 16, 27
Locking doors............................28, 30, 36
Starting .................................................. 27
Starting the engine ............................... 16
Keys ........................................................... 26LLanguage selection .................................. 95
Lashing eyes ............................................. 57
Leather trim ............................................ 197
Light switch ............................................... 11
Lighting ............................................. 11, 102 Driving abroad .................................... 110
Loading .....................................58, 162, 226
Loading the vehicle .................................. 58
Locking doors ...........................2, 28, 30, 36
Locking from the inside ............................ 30
Lubricants ............................................... 210
Luggage compartment Bulb replacement................................ 195
Cover...................................................... 55
Extension ......................................... 32, 53
Lighting ............................................... 109
Loading .................................58, 162, 226
Luggage compartment cover ................. 55
Lumbar support ........................................ 45
MMain beam ................................................ 11 Bulb replacement ....................... 187, 188
Control indicator ................................... 84
Maintenance Air conditioning system...................... 128
Antifreeze protection ......................... 212
Brake fluid ........................................... 214
Brakes .................................................. 213
Catalytic converter ............................. 145
Engine oil ............................................. 210
Fuel consumption ............................... 138
Tyre pressure............................... 154, 228
Tyres .................................................... 155
Manual transmission ........................ 14, 134
Mirrors ................................................... 4, 38
Misted windows ......................118, 121, 124
Mobile telephone.................................... 113
Muffler, see Exhaust system .................. 144NNumber plate lamps Bulb replacement ............................... 193
Number plate lighting............................ 193
Number plates ........................................ 217OOctane numbers ............................. 220, 221
Odometer .................................................. 87
Oil ............................................................ 207 Additives ............................................. 207
Top up ................................................. 207
Viscosity............................................... 207 Oil consumption ..................... 210, 220, 221
Oil level.................................................... 210
Oil pressure ............................................... 84
Opel Service ............................................ 199
Operating temperature ......................... 136
Outside temperature gauge ................... 91
Overrun ........................................... 136, 138
PPaintwork damage................................. 197
Park pilot ................................................. 150
Parking lamps........................................... 11
Bulb replacement ............................... 189
Pedals...................................................... 136
Performance ........................................... 222
Pollen filter .............................................. 127
Power assisted steering, see electronic power steering ................ 86
Power steering, see electronic power steering ........................................ 86
Preheating ................................................ 86
Pushing, towing .............................. 142, 166QQuickheat ............................................... 127RRadio ................................................. 24, 111
Radio equipment (CB) ........................... 113
Radio reception ...................................... 111
Radio remote control ............................... 28
Reading lamps ....................................... 109
Rear lamp cluster ................................... 102 Bulb replacement ............................... 191