manual transmission OPEL MERIVA 2017 Owners Manual
[x] Cancel search | Manufacturer: OPEL, Model Year: 2017, Model line: MERIVA, Model: OPEL MERIVA 2017Pages: 251, PDF Size: 8.14 MB
Page 13 of 251
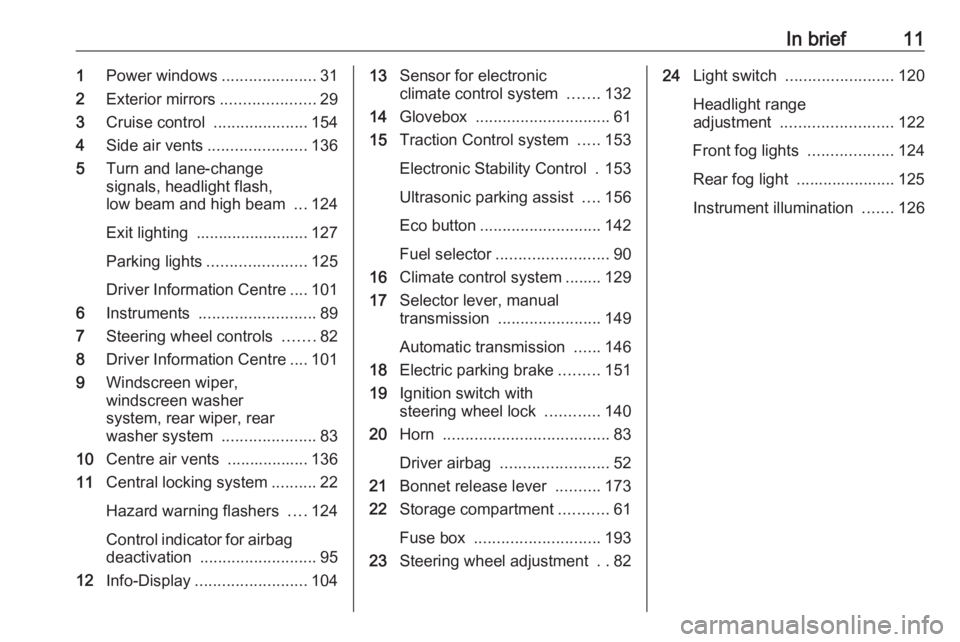
In brief111Power windows .....................31
2 Exterior mirrors .....................29
3 Cruise control .....................154
4 Side air vents ...................... 136
5 Turn and lane-change
signals, headlight flash,
low beam and high beam ...124
Exit lighting ......................... 127
Parking lights ...................... 125
Driver Information Centre .... 101
6 Instruments .......................... 89
7 Steering wheel controls .......82
8 Driver Information Centre .... 101
9 Windscreen wiper,
windscreen washer
system, rear wiper, rear
washer system .....................83
10 Centre air vents .................. 136
11 Central locking system ..........22
Hazard warning flashers ....124
Control indicator for airbag deactivation .......................... 95
12 Info-Display ......................... 10413Sensor for electronic
climate control system .......132
14 Glovebox .............................. 61
15 Traction Control system .....153
Electronic Stability Control . 153
Ultrasonic parking assist ....156
Eco button ........................... 142
Fuel selector ......................... 90
16 Climate control system ........ 129
17 Selector lever, manual
transmission ....................... 149
Automatic transmission ......146
18 Electric parking brake .........151
19 Ignition switch with
steering wheel lock ............140
20 Horn ..................................... 83
Driver airbag ........................ 52
21 Bonnet release lever ..........173
22 Storage compartment ...........61
Fuse box ............................ 193
23 Steering wheel adjustment ..8224 Light switch ........................ 120
Headlight range
adjustment ......................... 122
Front fog lights ...................124
Rear fog light ...................... 125 Instrument illumination .......126
Page 19 of 251
In brief17Transmission
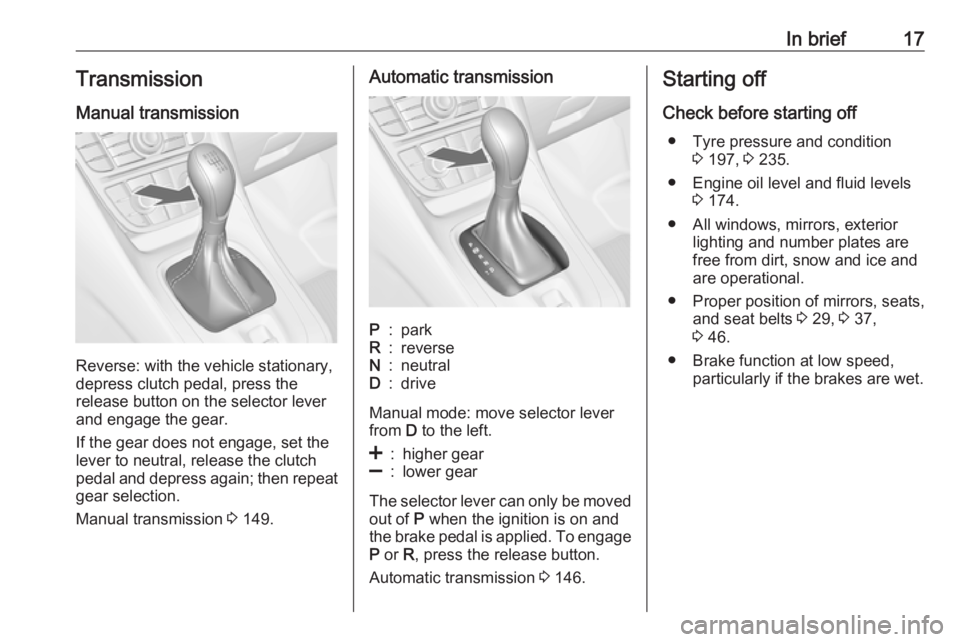
Manual transmission
Reverse: with the vehicle stationary,
depress clutch pedal, press the
release button on the selector lever
and engage the gear.
If the gear does not engage, set the
lever to neutral, release the clutch
pedal and depress again; then repeat
gear selection.
Manual transmission 3 149.
Automatic transmissionP:parkR:reverseN:neutralD:drive
Manual mode: move selector lever
from D to the left.
<:higher gear]:lower gear
The selector lever can only be moved
out of P when the ignition is on and
the brake pedal is applied. To engage
P or R, press the release button.
Automatic transmission 3 146.
Starting off
Check before starting off ● Tyre pressure and condition 3 197, 3 235.
● Engine oil level and fluid levels 3 174.
● All windows, mirrors, exterior lighting and number plates are
free from dirt, snow and ice and
are operational.
● Proper position of mirrors, seats, and seat belts 3 29, 3 37,
3 46.
● Brake function at low speed, particularly if the brakes are wet.
Page 141 of 251
Driving and operating139Driving and
operatingDriving hints ............................... 139
Control of the vehicle ...............139
Steering ................................... 140
Starting and operating ...............140
New vehicle running-in ............140
Ignition switch positions ...........140
Retained power off ..................140
Starting the engine ..................141
Overrun cut-off ........................ 142
Stop-start system ....................142
Parking .................................... 144
Engine exhaust .......................... 145
Diesel particle filter ..................145
Catalytic converter ...................146
Automatic transmission ..............146
Transmission display ...............146
Selector lever .......................... 147
Manual mode ........................... 148
Electronic driving programmes 148
Fault ........................................ 148
Interruption of power supply ....148
Manual transmission ..................149Brakes........................................ 150
Antilock brake system .............150
Parking brake .......................... 151
Brake assist ............................. 152
Hill start assist ......................... 152
Ride control systems .................153
Traction Control system ..........153
Electronic Stability Control ......153
Driver assistance systems .........154
Cruise control .......................... 154
Parking assist .......................... 156
Rear view camera ...................158
Fuel ............................................ 160
Fuel for petrol engines .............160
Fuel for diesel engines ............160
Fuel for liquid gas operation ....160
Refuelling ................................ 162
Fuel consumption - CO 2-
Emissions ............................... 165
Trailer hitch ................................ 166
General information .................166
Driving characteristics and towing tips .............................. 167
Trailer towing ........................... 167
Towing equipment ...................168Driving hints
Control of the vehicle
Never coast with engine not
running (except during Autostop)
Many systems will not function in this
situation (e.g. brake servo unit, power steering). Driving in this manner is a
danger to yourself and others. All
systems function during an Autostop,
but there will be a controlled reduction
in power steering assist and vehicle
speed is reduced.
Stop-start system 3 142.
Idle boost
If charging of the vehicle battery is
required due to vehicle battery
condition, the power output of the
generator must be increased. This will be achieved by an idle boost whichmay be audible.
On vehicles with Uplevel-Display or
Uplevel-Combi-Display, a message
appears in the Driver Information
Centre.
Page 143 of 251
Driving and operating141Power to the Infotainment system will
continue to operate for 30 minutes or until the key is removed from theignition, regardless of whether anydoor is opened.
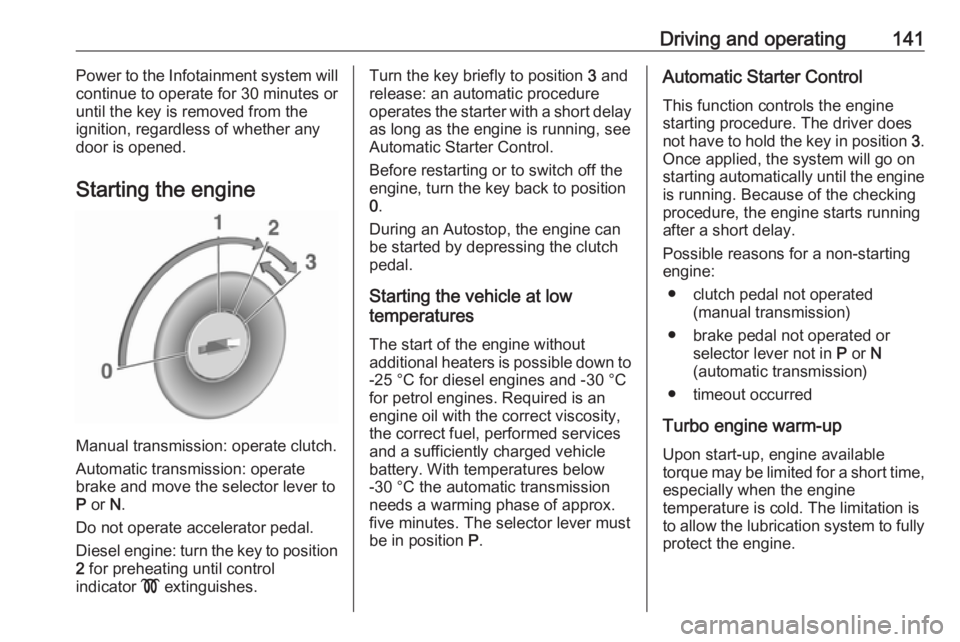
Starting the engine
Manual transmission: operate clutch.
Automatic transmission: operate
brake and move the selector lever to
P or N.
Do not operate accelerator pedal.
Diesel engine: turn the key to position 2 for preheating until control
indicator ! extinguishes.
Turn the key briefly to position 3 and
release: an automatic procedure operates the starter with a short delay
as long as the engine is running, see
Automatic Starter Control.
Before restarting or to switch off the
engine, turn the key back to position
0 .
During an Autostop, the engine can
be started by depressing the clutch
pedal.
Starting the vehicle at low
temperatures
The start of the engine without
additional heaters is possible down to
-25 °С for diesel engines and -30 °C
for petrol engines. Required is an
engine oil with the correct viscosity,
the correct fuel, performed services
and a sufficiently charged vehicle
battery. With temperatures below
-30 °C the automatic transmission
needs a warming phase of approx.
five minutes. The selector lever must
be in position P.Automatic Starter Control
This function controls the engine
starting procedure. The driver does
not have to hold the key in position 3.
Once applied, the system will go on starting automatically until the engine
is running. Because of the checking
procedure, the engine starts running
after a short delay.
Possible reasons for a non-starting
engine:
● clutch pedal not operated (manual transmission)
● brake pedal not operated or selector lever not in P or N
(automatic transmission)
● timeout occurred
Turbo engine warm-up
Upon start-up, engine available
torque may be limited for a short time, especially when the engine
temperature is cold. The limitation is
to allow the lubrication system to fully
protect the engine.
Page 146 of 251
144Driving and operating● The stop-start system ismanually deactivated.
● The bonnet is opened.
● The driver's seat belt is unfastened and the driver's door
is opened.
● The engine temperature is too low.
● The charging level of the vehicle battery is below a defined level.
● The brake vacuum is not sufficient.
● The vehicle is driven at least at walking speed.
● The climate control system requests an engine start.
● The air conditioning is manually switched on.
If the bonnet is not fully closed, a
warning message is displayed in the
Driver Information Centre.
If an electrical accessory, e.g. a
portable CD player, is connected to
the power outlet, a brief power drop
during the restart might be noticeable.Parking9 Warning
● Do not park the vehicle on an
easily ignitable surface. The
high temperature of the
exhaust system could ignite the
surface.
● Always apply parking brake. Pull switch m for approx.
one second.
The electric parking brake is
applied when control indicator
m illuminates 3 96.
● Switch off the engine. ● If the vehicle is on a level surface or uphill slope, engage
first gear or set the selector
lever to position P before
removing the ignition key. On
an uphill slope, turn the front
wheels away from the kerb.
If the vehicle is on a downhill
slope, engage reverse gear or
set the selector lever to position P before removing the ignition
key. Turn the front wheels
towards the kerb.
● Close the windows.
● Remove the ignition key from the ignition switch. Turn the
steering wheel until the
steering wheel lock is felt to
engage.
For vehicles with automatic
transmission, the key can only
be removed when the selector
lever is in position P.
Lock the vehicle and activate the anti-
theft alarm system.
Note
In the event of an accident with
airbag deployment, the engine is
turned off automatically if the vehicle comes to a standstill within a certain
time.
Page 148 of 251
146Driving and operatingControl indicator % extinguishes as
soon as the self-cleaning operation is
complete.
Catalytic converter
The catalytic converter reduces the
amount of harmful substances in the
exhaust gases.Caution
Fuel grades other than those listed on pages 3 160, 3 228 could
damage the catalytic converter or
electronic components.
Unburnt petrol will overheat and
damage the catalytic converter.
Therefore avoid excessive use of the starter, running the fuel tank
dry and starting the engine by
pushing or towing.
In the event of misfiring, uneven
engine running, a reduction in engine
performance or other unusual
problems, have the cause of the fault
rectified by a workshop as soon as
possible. In an emergency, driving
can be continued for a short period,
keeping vehicle speed and engine
speed low.Automatic transmission
The automatic transmission permits
automatic gearshifting (automatic
mode) or manual gearshifting
(manual mode).
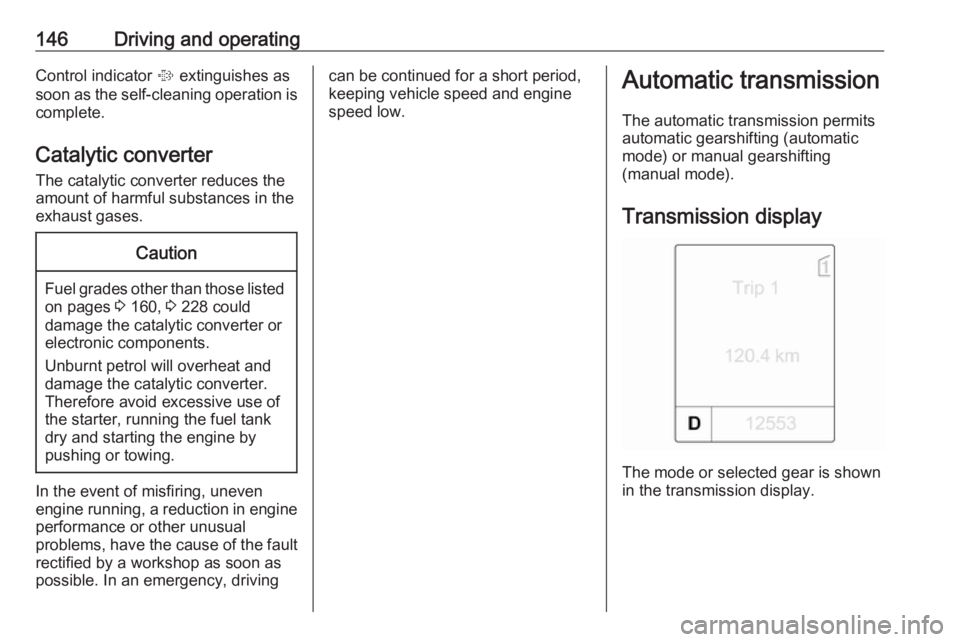
Transmission display
The mode or selected gear is shown
in the transmission display.
Page 150 of 251
![OPEL MERIVA 2017 Owners Manual 148Driving and operatingManual mode
Move selector lever out of position D
towards the left and then forwards or backwards.
<:shift to a higher gear]:shift to a lower gear
If a higher gear is selected OPEL MERIVA 2017 Owners Manual 148Driving and operatingManual mode
Move selector lever out of position D
towards the left and then forwards or backwards.
<:shift to a higher gear]:shift to a lower gear
If a higher gear is selected](/img/37/58232/w960_58232-149.png)
148Driving and operatingManual mode
Move selector lever out of position D
towards the left and then forwards or backwards.
<:shift to a higher gear]:shift to a lower gear
If a higher gear is selected when
vehicle speed is too low, or a lower
gear when vehicle speed is too high,
the shift is not executed. This can
cause a message in the Driver
Information Centre.
In manual mode, no automatic
shifting to a higher gear takes place
at high engine revolutions.
Electronic driving
programmes
● Following a cold start, the operating temperature
programme increases engine
speed to quickly bring the
catalytic converter to the required
temperature.
● The automatic neutral shift function automatically shifts to
idling when the vehicle is stopped with a forward gear engaged and
the brake pedal is pressed.
● Special programmes automatically adapt the shiftingpoints when driving up inclines or
down hills.
Kickdown If the accelerator pedal is pressed
down completely in automatic mode,
the transmission shifts to a lower gear
depending on engine speed.Fault
In the event of a fault, g illuminates.
Additionally a code number or a
vehicle message is displayed in the
Driver Information Centre. Vehicle
messages 3 106.
The transmission no longer shifts automatically. Continued travel is
possible with manual shifting.
Only the highest gear is available.
Depending on the fault, second gear
may also be available in manual
mode. Shift only when vehicle is at a
standstill.
Have the cause of the fault remedied
by a workshop.
Interruption of power supply
In the event of an interruption of
power supply, the selector lever
cannot be moved out of the P
position. The ignition key cannot be
removed from the ignition switch.
If the vehicle battery is discharged,
start the vehicle using jump leads
3 213.
Page 151 of 251
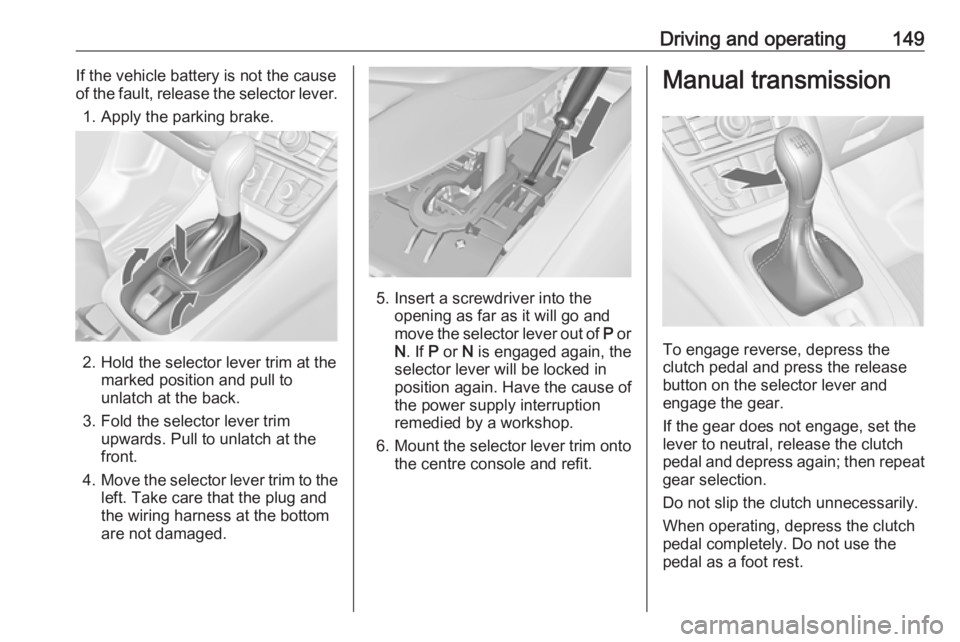
Driving and operating149If the vehicle battery is not the cause
of the fault, release the selector lever.
1. Apply the parking brake.
2. Hold the selector lever trim at the marked position and pull tounlatch at the back.
3. Fold the selector lever trim upwards. Pull to unlatch at the
front.
4. Move the selector lever trim to the
left. Take care that the plug and
the wiring harness at the bottom are not damaged.
5. Insert a screwdriver into the opening as far as it will go and
move the selector lever out of P or
N . If P or N is engaged again, the
selector lever will be locked in
position again. Have the cause of
the power supply interruption
remedied by a workshop.
6. Mount the selector lever trim onto
the centre console and refit.
Manual transmission
To engage reverse, depress the
clutch pedal and press the release button on the selector lever and
engage the gear.
If the gear does not engage, set the
lever to neutral, release the clutch
pedal and depress again; then repeat
gear selection.
Do not slip the clutch unnecessarily.
When operating, depress the clutch
pedal completely. Do not use the
pedal as a foot rest.
Page 153 of 251
Driving and operating151Fault9Warning
If there is a fault in the ABS, the
wheels may be liable to lock due
to braking that is heavier than
normal. The advantages of ABS are no longer available. During
hard braking, the vehicle can no longer be steered and may
swerve.
Have the cause of the fault remedied
by a workshop.
Parking brake
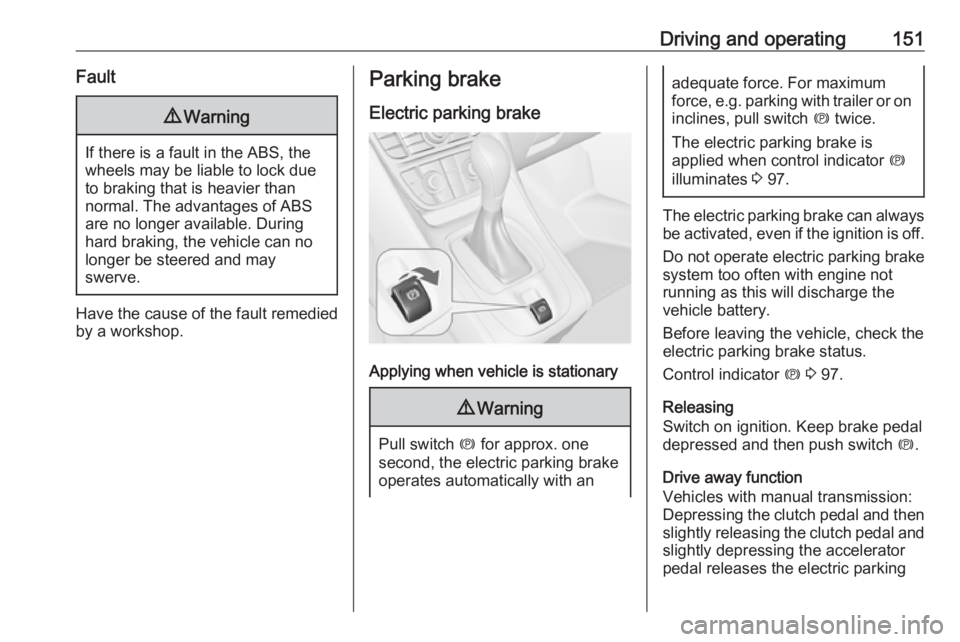
Electric parking brake
Applying when vehicle is stationary
9 Warning
Pull switch m for approx. one
second, the electric parking brake
operates automatically with an
adequate force. For maximum
force, e.g. parking with trailer or on
inclines, pull switch m twice.
The electric parking brake is
applied when control indicator m
illuminates 3 97.
The electric parking brake can always
be activated, even if the ignition is off.
Do not operate electric parking brake
system too often with engine not
running as this will discharge the
vehicle battery.
Before leaving the vehicle, check the electric parking brake status.
Control indicator m 3 97.
Releasing
Switch on ignition. Keep brake pedal
depressed and then push switch m.
Drive away function
Vehicles with manual transmission:
Depressing the clutch pedal and then
slightly releasing the clutch pedal and
slightly depressing the accelerator
pedal releases the electric parking
Page 202 of 251
200Vehicle care
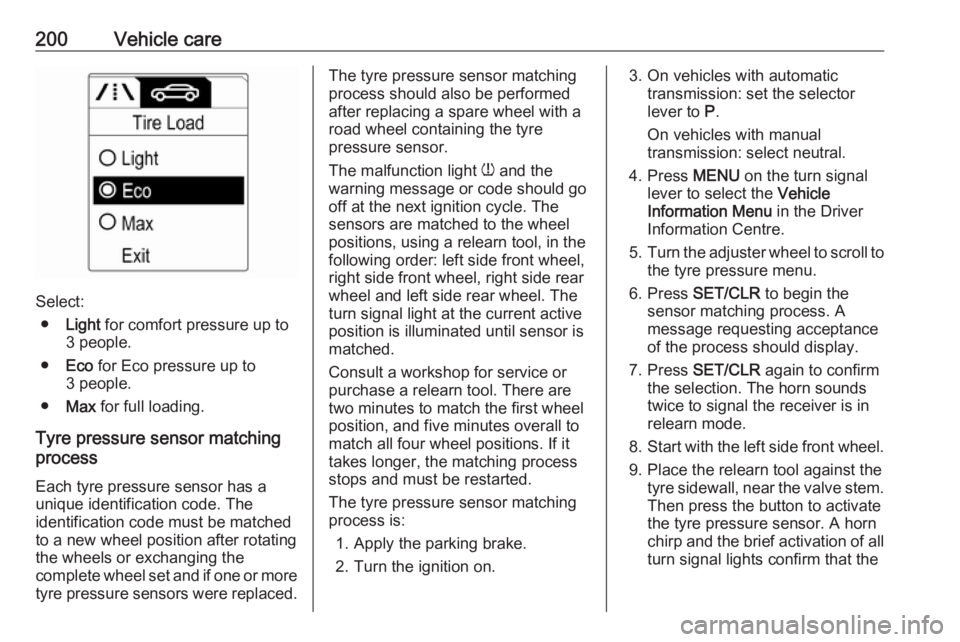
Select:● Light for comfort pressure up to
3 people.
● Eco for Eco pressure up to
3 people.
● Max for full loading.
Tyre pressure sensor matching
process
Each tyre pressure sensor has a
unique identification code. The
identification code must be matched
to a new wheel position after rotating the wheels or exchanging the
complete wheel set and if one or more tyre pressure sensors were replaced.
The tyre pressure sensor matching
process should also be performed
after replacing a spare wheel with a
road wheel containing the tyre
pressure sensor.
The malfunction light w and the
warning message or code should go
off at the next ignition cycle. The
sensors are matched to the wheel
positions, using a relearn tool, in the following order: left side front wheel,
right side front wheel, right side rear
wheel and left side rear wheel. The
turn signal light at the current active
position is illuminated until sensor is
matched.
Consult a workshop for service or
purchase a relearn tool. There are
two minutes to match the first wheel
position, and five minutes overall to
match all four wheel positions. If it
takes longer, the matching process stops and must be restarted.
The tyre pressure sensor matching
process is:
1. Apply the parking brake.
2. Turn the ignition on.3. On vehicles with automatic transmission: set the selector
lever to P.
On vehicles with manual
transmission: select neutral.
4. Press MENU on the turn signal
lever to select the Vehicle
Information Menu in the Driver
Information Centre.
5. Turn the adjuster wheel to scroll to
the tyre pressure menu.
6. Press SET/CLR to begin the
sensor matching process. A
message requesting acceptance
of the process should display.
7. Press SET/CLR again to confirm
the selection. The horn sounds
twice to signal the receiver is in
relearn mode.
8. Start with the left side front wheel.
9. Place the relearn tool against the tyre sidewall, near the valve stem.Then press the button to activate
the tyre pressure sensor. A horn
chirp and the brief activation of all turn signal lights confirm that the