reset OPEL MOKKA 2014 Manual user
[x] Cancel search | Manufacturer: OPEL, Model Year: 2014, Model line: MOKKA, Model: OPEL MOKKA 2014Pages: 217, PDF Size: 6 MB
Page 82 of 217

80Instruments and controlsWarning lights, gauges
and indicators
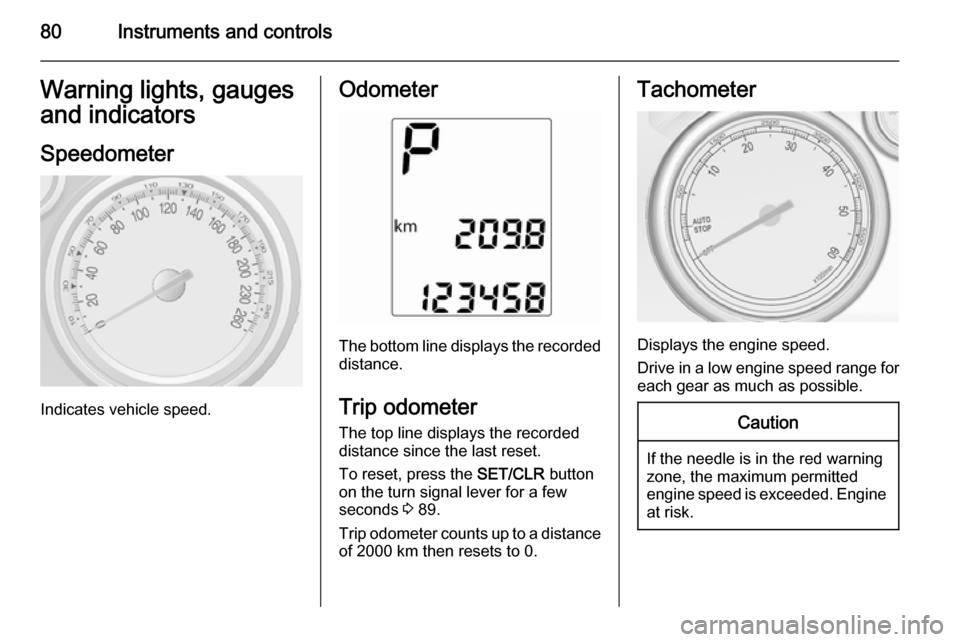
Speedometer
Indicates vehicle speed.
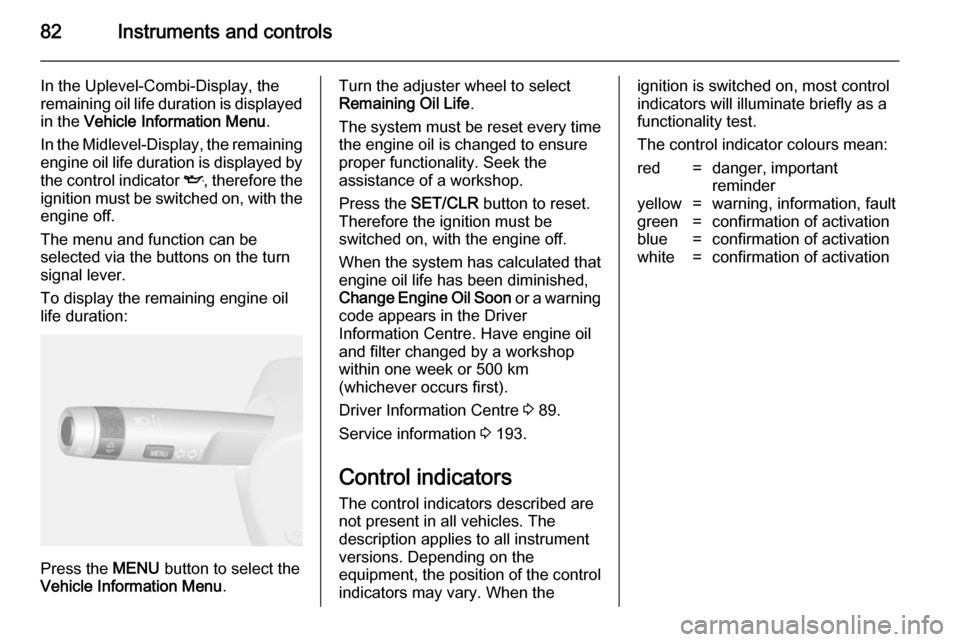
Odometer
The bottom line displays the recorded distance.
Trip odometer The top line displays the recorded
distance since the last reset.
To reset, press the SET/CLR button
on the turn signal lever for a few
seconds 3 89.
Trip odometer counts up to a distance
of 2000 km then resets to 0.
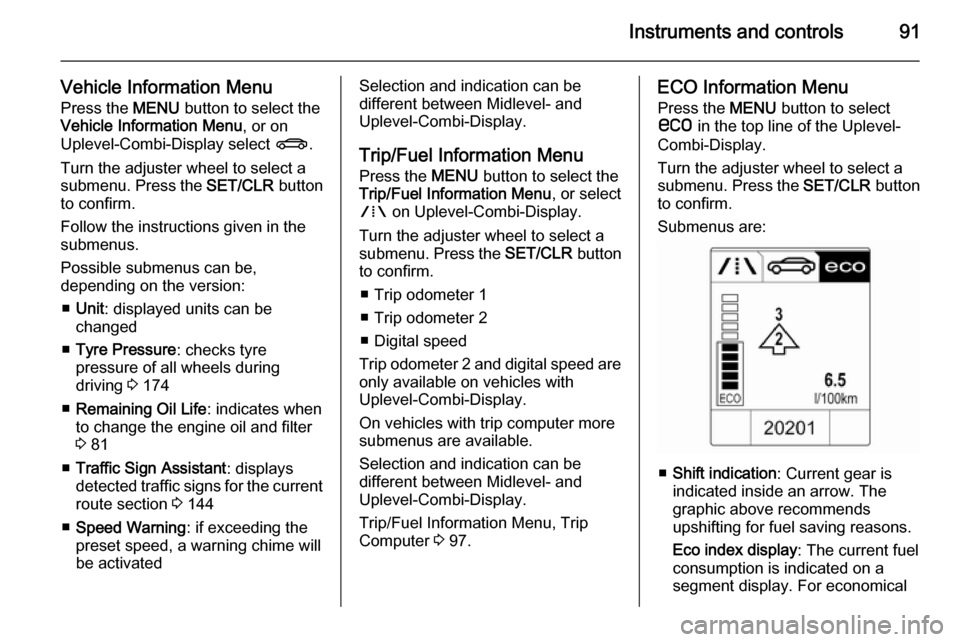
Tachometer
Displays the engine speed.
Drive in a low engine speed range for each gear as much as possible.
Caution
If the needle is in the red warning
zone, the maximum permitted
engine speed is exceeded. Engine at risk.
Page 84 of 217

82Instruments and controls
In the Uplevel-Combi-Display, the
remaining oil life duration is displayed
in the Vehicle Information Menu .
In the Midlevel-Display, the remaining
engine oil life duration is displayed by
the control indicator I, therefore the
ignition must be switched on, with the
engine off.
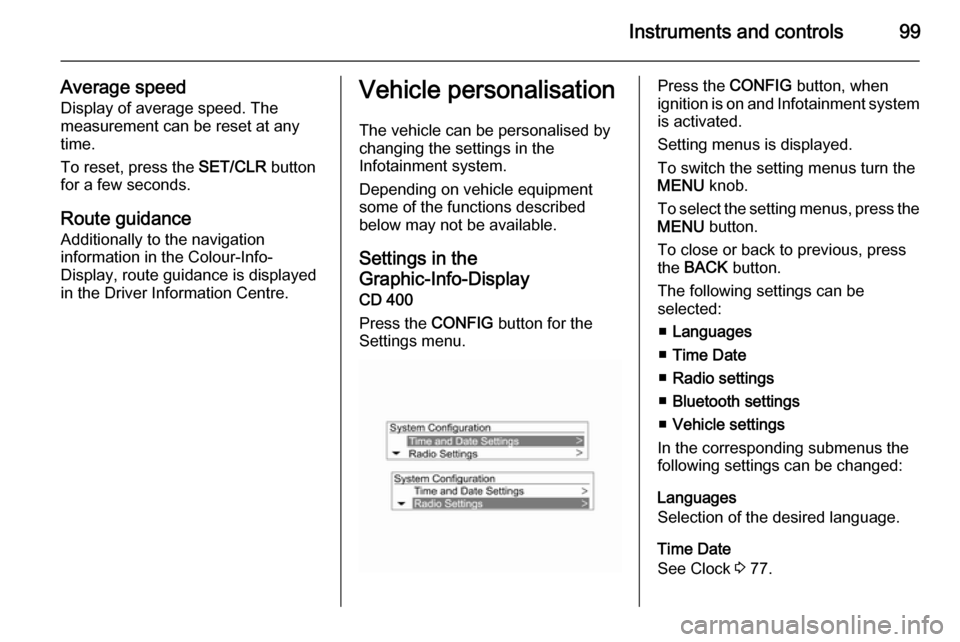
The menu and function can be
selected via the buttons on the turn
signal lever.
To display the remaining engine oil
life duration:
Press the MENU button to select the
Vehicle Information Menu .
Turn the adjuster wheel to select
Remaining Oil Life .
The system must be reset every time
the engine oil is changed to ensure
proper functionality. Seek the
assistance of a workshop.
Press the SET/CLR button to reset.
Therefore the ignition must be
switched on, with the engine off.
When the system has calculated that
engine oil life has been diminished,
Change Engine Oil Soon or a warning
code appears in the Driver
Information Centre. Have engine oil
and filter changed by a workshop
within one week or 500 km
(whichever occurs first).
Driver Information Centre 3 89.
Service information 3 193.
Control indicators The control indicators described are
not present in all vehicles. The
description applies to all instrument
versions. Depending on the
equipment, the position of the control
indicators may vary. When theignition is switched on, most control
indicators will illuminate briefly as a functionality test.
The control indicator colours mean:red=danger, important
reminderyellow=warning, information, faultgreen=confirmation of activationblue=confirmation of activationwhite=confirmation of activation
Page 93 of 217

Instruments and controls91
Vehicle Information MenuPress the MENU button to select the
Vehicle Information Menu , or on
Uplevel-Combi-Display select X.
Turn the adjuster wheel to select a
submenu. Press the SET/CLR button
to confirm.
Follow the instructions given in the
submenus.
Possible submenus can be,
depending on the version:
■ Unit : displayed units can be
changed
■ Tyre Pressure : checks tyre
pressure of all wheels during
driving 3 174
■ Remaining Oil Life : indicates when
to change the engine oil and filter
3 81
■ Traffic Sign Assistant : displays
detected traffic signs for the current route section 3 144
■ Speed Warning : if exceeding the
preset speed, a warning chime will
be activatedSelection and indication can be
different between Midlevel- and
Uplevel-Combi-Display.
Trip/Fuel Information Menu
Press the MENU button to select the
Trip/Fuel Information Menu , or select
W on Uplevel-Combi-Display.
Turn the adjuster wheel to select a
submenu. Press the SET/CLR button
to confirm.
■ Trip odometer 1
■ Trip odometer 2
■ Digital speed
Trip odometer 2 and digital speed are
only available on vehicles with
Uplevel-Combi-Display.
On vehicles with trip computer more
submenus are available.
Selection and indication can be
different between Midlevel- and
Uplevel-Combi-Display.
Trip/Fuel Information Menu, Trip
Computer 3 97.ECO Information Menu
Press the MENU button to select
s in the top line of the Uplevel-
Combi-Display.
Turn the adjuster wheel to select a
submenu. Press the SET/CLR button
to confirm.
Submenus are:
■ Shift indication : Current gear is
indicated inside an arrow. The
graphic above recommends
upshifting for fuel saving reasons.
Eco index display : The current fuel
consumption is indicated on a segment display. For economical
Page 100 of 217

98Instruments and controls
■ Trip odometer 2
■ Average consumption 2
■ Average speed 2
■ Route guidance
Digital speed
Digital display of the instantaneous
speed.
Range
Range is calculated from current fuel
tank content and current
consumption. The display shows
average values.
After refuelling, the range is updated
automatically after a brief delay.
When the fuel level in the tank is low,
a message appears on vehicles with
Uplevel-Combi-Display.
When the tank has to be refuelled
immediately, a warning code or
warning message is displayed on
vehicles with Midlevel- and Uplevel-
Combi-Display.
Additionally the control indicator i in
the fuel gauge illuminates or flashes
3 88.
Instantaneous consumption
Display of the instantaneous
consumption.
Trip computer 1 and 2The information of two trip computers
can be reset separately for odometer, average consumption and average
speed, making it possible to display
different trip information for different
drivers.
To reset, press the SET/CLR button
in each mode for a few seconds.
Trip odometer
Trip odometer displays the recorded
distance since a certain reset.
Trip odometer counts up to a distance
of 2000 km then resets to 0.
Average consumption
Display of average consumption. The measurement can be reset at any
time and starts with a default value.
To reset, press the SET/CLR button
for a few seconds.
Page 101 of 217

Instruments and controls99
Average speed
Display of average speed. The
measurement can be reset at any
time.
To reset, press the SET/CLR button
for a few seconds.
Route guidance
Additionally to the navigation
information in the Colour-Info-
Display, route guidance is displayed
in the Driver Information Centre.Vehicle personalisation
The vehicle can be personalised by
changing the settings in the
Infotainment system.
Depending on vehicle equipment
some of the functions described
below may not be available.
Settings in the
Graphic-Info-Display
CD 400
Press the CONFIG button for the
Settings menu.Press the CONFIG button, when
ignition is on and Infotainment system is activated.
Setting menus is displayed.
To switch the setting menus turn the
MENU knob.
To select the setting menus, press the
MENU button.
To close or back to previous, press
the BACK button.
The following settings can be
selected:
■ Languages
■ Time Date
■ Radio settings
■ Bluetooth settings
■ Vehicle settings
In the corresponding submenus the
following settings can be changed:
Languages
Selection of the desired language.
Time Date
See Clock 3 77.
Page 102 of 217

100Instruments and controls
Radio settings
See Infotainment system manual for
further information.
Bluetooth settings
See Infotainment system manual for
further information.
Vehicle settings ■ Climate and air quality
Auto fan speed : Modifies the fan
regulation. Changed setting will be active after switching the ignition off
and on again.
Climate control mode : Activate or
deactivate cooling.
Auto demist : Supports windscreen
dehumidification by automatically
selecting the necessary settings
and auto air conditioning mode.
Auto rear demist : Automatic
activation of rear heated window.
■ Comfort settings
Chime volume : Changes the
volume of warning chimes.Personalization by driver : Activates
or deactivates the personalisation
function.
Rear auto wipe in reverse :
Activates or deactivates automatic
switching on of the rear window
wiper when reverse gear is
engaged.
■ Exterior ambient lighting
Exterior lighting by unlocking :
Activate or deactivate the entry
lighting.
Duration upon exit of vehicle :
Activate or deactivate and change
the duration of exit lighting.
■ Power door locks
Auto door lock : Activates or
deactivates the automatic door unlocking function after switching
off ignition. Activates or deactivates the automatic door locking function after driving off.
Stop door lock if door open :
Activates or deactivates the
automatic door locking function
while a door is open.Delayed door lock : Activates or
deactivates the delayed door
locking function.
■ Remote locking, unlocking, starting
Remote unlock feedback :
Activate or deactivate the hazard warning flasher feedback whilst
unlocking.
Remote door unlock : Change the
configuration to unlock only the
driver's door or the whole vehicle
whilst unlocking.
■ Restore factory settings :
Reset all settings to the default
settings.
Settings in the
Colour-Info-Display Navi 600
Press the CONFIG button. The menu
Settings is displayed.
Page 104 of 217

102Instruments and controls
■Comfort settings
Chime volume : Change the volume
of warning chimes.
Rear auto wipe in reverse : Activate
or deactivate automatic switching
on of the rear window wiper when
reverse gear is engaged.
■ Park assist / Collision detection
Park assist : Activate or deactivate
the ultrasonic parking assist.
■ Exterior ambient lighting
Duration upon exit of vehicle :
Activate or deactivate and change the duration of exit lighting.
Exterior lighting by unlocking :
Activate or deactivate the welcome
lighting.
■ Power door locks
Auto door lock : Activates or
deactivates the automatic door
unlocking function after switching
off ignition. Activates or deactivates the automatic door locking function
after driving off.
Prevent doorlock while door open :
Activates or deactivates the
automatic door locking function
while a door is open.
■ Lock / Unlock / Start by remote
Remote unlock feedback : Activate
or deactivate the hazard warning flasher feedback whilst unlocking.
Remote door unlock : Change the
configuration to unlock only the driver's door or the whole vehicle
whilst unlocking.
Auto relock doors : Activate or
deactivate the automatic relockfunction after unlocking without
opening the vehicle.
■ Restore factory settings
Restore factory settings : Reset all
settings to the default settings.
Display settings
Selectable display settings:
■ Day mode : Optimisation for
daylight conditions.
■ Night mode : Optimisation for
darkness.
■ Automatic mode : The display
changes mode when the vehicle
lights are switched on/off.
■ Rear view camera : Changes the
settings for the rear view camera.
■ Picture frame : See description for
Infotainment system in the
Infotainment system manual.
Settings in the Colour-Info- Display
CD 600/Navi 650/Navi 950
Press the CONFIG button on the
Infotainment system faceplate to
enter the Configuration menu.
Page 106 of 217

104Instruments and controls
Personalisation by Driver:
Activates or deactivates the
personalisation function.
Auto Reverse Gear Wiper : Activate
or deactivate automatically
switching on of the rear window
wiper when reverse gear is
engaged.
■ Collision Detection Systems
Park Assist : Activate or deactivate
the ultrasonic sensors.
■ Lighting
Vehicle Locator Lights : Activate or
deactivate the entry lighting.
Exit Lighting : Activate or deactivate
and change the duration of exit lighting.
■ Power Door Locks
Open Door Anti Lock Out : Activate
or deactivate the automatic door
locking function while a door is
open.
Auto Door Lock : Activates or
deactivates the automatic door unlocking function after switching
off ignition. Activates or deactivatesthe automatic door locking function after driving-off.
Delay Door Lock : Activate or
deactivate the delayed door locking
function.
■ Remote Lock/Unlock/Start
Remote Lock Feedback : Activate
or deactivate the hazard warning light feedback whilst locking.
Remote Unlock Feedback : Activate
or deactivate the hazard warning
flasher feedback whilst unlocking.
Remote Door Unlock : Change the
configuration to unlock only the driver's door or the entire vehicle
whilst unlocking.
Relock Remotely Unlocked Doors :
Activates or deactivates the automatic relock function after
unlocking without opening the
vehicle.
■ Return to Factory Settings? : Reset
all settings to the default settings.
Page 111 of 217

Lighting109
Reversing functionIf the headlights are on and reverse
gear is engaged, both corner lights
are switched on. They remain
illuminated for 20 seconds after
disengaging reverse gear or until
driving faster than 17 km/h in a
forward gear.
High beam assist
This feature allows high beam as
main driving light by night and when
vehicle speed is faster than 40 km/h.
It switches to low beam when: ■ the camera in the windscreen detects the lights of oncoming or
preceding vehicles
■ the vehicle speed is slower than 20 km/h
■ it is foggy or snowy
■ driving in urban areasActivation
The high beam assist is activated by
pushing the indicator lever twice at a
speed above 40 km/h.
The green control indicator l
illuminates continuously when the
assist is activated, the blue one 7
illuminates when high beam is on.
Control indicator l 3 88.
Deactivation
Push indicator lever once. It is also
deactivated when front or rear fog
lights are switched on.
If a headlight flash is activated when
the high beam is on, the high beam
assist will be deactivated.
If a headlight flash is activated when
the high beam is off, the high beam
assist will remain activated.
High beam assist is always active
after the ignition is switched on.
Dynamic automatic headlight
levelling
To prevent oncoming traffic from dazzle, headlight levelling is
automatically adjusted based on
inclination information measured by
front and rear axle, acceleration or
deceleration and vehicle speed.
Fault in Adaptive forward
lighting system When the system detects a failure in
the Adaptive forward lighting system,
the system moves to a preset position to avoid dazzling of oncoming traffic.
Have the cause of the failure
remedied by a workshop as soon as
possible.
Page 139 of 217

Driving and operating137
ActivationAccelerate to the desired speed and
turn thumb wheel to SET/-: the
current speed is stored and
maintained. Control indicator m in
instrument cluster illuminates green.
Accelerator pedal can be released.
Vehicle speed can be increased by
depressing the accelerator pedal.
When the accelerator pedal is
released, the previously stored speed
is resumed.
Cruise control remains activated
while gearshifting.
Increase speed With cruise control active, hold thumb
wheel turned to RES/+ or briefly turn
to RES/+ repeatedly: speed
increases continuously or in small
increments.
Alternatively accelerate to the desired speed and store by turning to SET/-.Reduce speed
With cruise control active, hold thumb wheel turned to SET/- or briefly turn to
SET/- repeatedly: speed decreases
continuously or in small increments.
Deactivation
Press button y: control indicator m in
instrument cluster illuminates white.
Cruise control is deactivated. Last
used set speed is stored in memory
for later speed resume.
Automatic deactivation: ■ vehicle speed below approx. 30 km/h,
■ vehicle speed above approx. 200 km/h,
■ the brake pedal is depressed,
■ the clutch pedal is depressed for a few seconds,
■ selector lever in N,
■ engine speed in a very low range,
■ the Traction Control system or Electronic Stability Control is
operating.Resume stored speed
Turn thumb wheel to RES/+ at a
speed above 30 km/h. The stored
speed will be resumed.
Switching off
Press button m: control indicator m in
instrument cluster extinguishes. The
stored speed is deleted.
Pressing button L for activating
speed limiter or switching off the
ignition also switches off cruise
control and deletes the stored speed.
Speed limiter
The speed limiter prevents the
vehicle exceeding a preset maximum
speed.
The maximum speed can be set at a
speed above 25 km/h.
The driver can only accelerate up to
the preset speed. Deviations from the limited speed may occur when driving
downhill.
The preset speed limit is displayed in
the top line of the Driver Information
Centre when the system is active.