warning OPEL MOKKA 2014 Manual user
[x] Cancel search | Manufacturer: OPEL, Model Year: 2014, Model line: MOKKA, Model: OPEL MOKKA 2014Pages: 217, PDF Size: 6 MB
Page 6 of 217

4IntroductionDanger, Warnings and
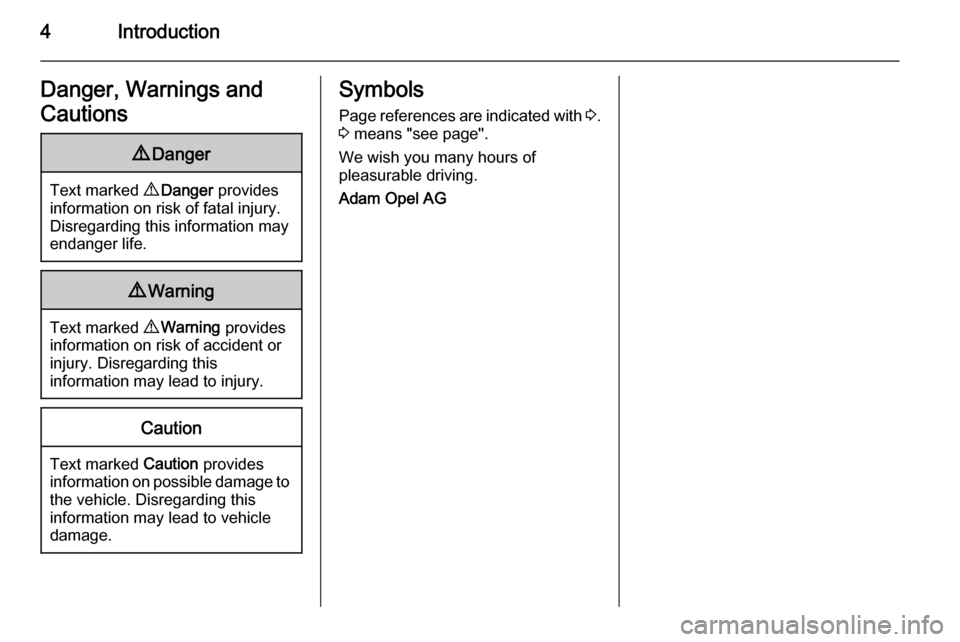
Cautions9 Danger
Text marked 9 Danger provides
information on risk of fatal injury.
Disregarding this information may
endanger life.
9 Warning
Text marked 9 Warning provides
information on risk of accident or
injury. Disregarding this
information may lead to injury.
Caution
Text marked Caution provides
information on possible damage to
the vehicle. Disregarding this
information may lead to vehicle
damage.
Symbols
Page references are indicated with 3.
3 means "see page".
We wish you many hours of
pleasurable driving.
Adam Opel AG
Page 13 of 217

In brief11
1Side air vents ...................... 119
2 Light switch ......................... 105
3 Turn and lane-change
signals ................................. 110
Headlight flash ....................106
Low beam and high beam ..106
4 Cruise control ...................... 136
Speed limiter ....................... 137
Forward collision alert .........139
5 Instruments ........................... 80
6 Horn ..................................... 74
Driver airbag ........................ 45
7 Steering wheel controls .......73
8 Windscreen wiper,
windscreen washer system ...74
Rear wiper, rear washer system ................................... 76
9 Centre air vents adjustment 119
10 Centre air vents ................... 119
11 Electronic Stability Control . 134
12 Hazard warning flashers ....11013 Control indicator for airbag
deactivation .......................... 84
14 Instrument panel storage
button .................................... 55
15 Passenger airbag
deactivation ........................... 47
16 Glovebox .............................. 56
17 Infotainment system
18 Eco button for stop-start
system ................................. 123
19 AUX input, USB input, SD
card slot
20 Selector lever, manual
transmission ....................... 131
Automatic transmission ......128
21 Parking brake ......................133
22 Power outlet .......................... 79
23 Parking assist ..................... 141
Descent control system ......... 86
24 Climate control system ........ 115
25 Accelerator pedal ................122
26 Ignition switch with
steering wheel lock ............122
27 Brake pedal ......................... 13228Clutch pedal ........................ 121
29 Steering wheel adjustment ..73
30 Instrument panel storage ......55
31 Bonnet release lever ..........155
Page 16 of 217

14In brief
Turn and lane-change signalslever up=right turn signallever down=left turn signal
Turn and lane-change signals
3 110.
Hazard warning flashers
Operated with the ¨ button.
Hazard warning flashers 3 110.
Horn
Press j.
Page 22 of 217

20Keys, doors and windowsKeys, doors and
windowsKeys, locks ................................... 20
Doors ........................................... 25
Vehicle security ............................ 25
Exterior mirrors ............................ 27
Interior mirrors ............................. 29
Windows ...................................... 29
Roof ............................................. 32Keys, locks
Keys Replacement keys
The key number is specified on a
detachable tag.
The key number must be quoted
when ordering replacement keys as it
is a component of the immobiliser
system.
Locks 3 190.
Key with foldaway key section
Press button to extend.
To fold the key, first press the button.
Radio remote control
Used to operate: ■ Central locking system
■ Anti-theft alarm system
The radio remote control has a range of approx. 30 metres. It can be
restricted by external influences. The
hazard warning flashers confirm
operation.
Handle with care, protect from
moisture and high temperatures and
avoid unnecessary operation.
Page 26 of 217

24Keys, doors and windows
Vehicle personalisation 3 99.
ON : When pressing the central
locking button, three chimes will
sound to signal delayed locking is in
use.
The doors will not lock until
five seconds after the last door is
closed. You can temporarily override
delayed locking by pressing the
central locking button or the locking
button on the radio remote control.
OFF : The doors will lock immediately
when pressing the power lock switch
or the button e on the radio remote
control.
Automatic locking
This security feature can be
configured to automatically lock all
doors, load compartment and fuel
filler flap as soon as a certain speed
is exceeded.
Additionally, it is configurable to
unlock the driver's door or all doors
after the ignition is switched off and
the ignition key is removed (manualtransmission) or the selector lever is
moved to position P (automatic
transmission).
Settings can be changed in the menu Settings in the Info-Display. Vehicle
personalisation 3 99.
The settings can be saved for the key being used 3 21.
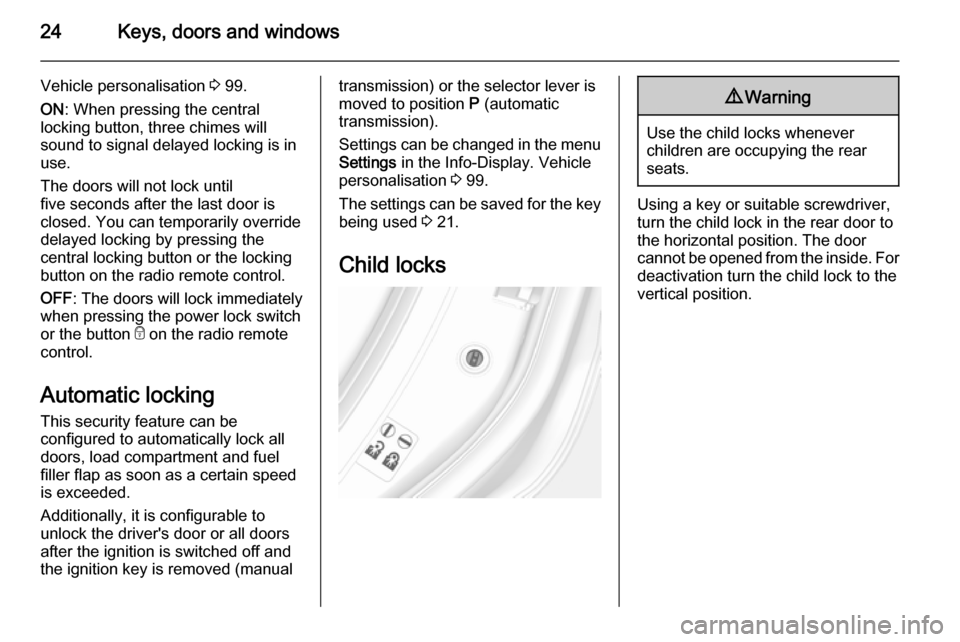
Child locks9 Warning
Use the child locks whenever
children are occupying the rear
seats.
Using a key or suitable screwdriver,
turn the child lock in the rear door to
the horizontal position. The door
cannot be opened from the inside. For
deactivation turn the child lock to the
vertical position.
Page 27 of 217

Keys, doors and windows25DoorsLoad compartment
Tailgate
Opening
After unlocking, push the touchpad
switch and open the tailgate.
Closing
Use one of the interior handles.
Do not push the touchpad switch or
the brand emblem whilst closing as
this will unlock the tailgate again.
Central locking system 3 22.
General hints for operating
tailgate9 Danger
Do not drive with the tailgate open
or ajar, e.g. when transporting
bulky objects, since toxic exhaust
gases, which cannot be seen or
smelled, could enter the vehicle.
This can cause unconsciousness
and even death.
Caution
Before opening the tailgate, check overhead obstructions, e.g. a
garage door, to avoid damage to
the tailgate. Always check the
moving area above and behind the
tailgate.
Note
The installation of certain heavy
accessories onto the tailgate may
affect its ability to remain open.
Vehicle security
Anti-theft locking system9 Warning
Do not use the system if there are
people in the vehicle! The doorscannot be unlocked from the
inside.
The system deadlocks all the doors.
All doors must be closed otherwise
the system cannot be activated.
If the ignition was on, the driver's door
must be opened and closed once so
that the vehicle can be secured.
Unlocking the vehicle disables the
mechanical anti-theft locking system.
This is not possible with the central
locking button.
Page 32 of 217

30Keys, doors and windows
payment must be attached in these
areas. Otherwise data recording
malfunctions may occur.
Windscreen stickers
Do not attach stickers such as toll
road stickers or similar on the
windscreen in the area of the interior
mirror. Otherwise the detection zone
of the sensor and the view area of the camera in the mirror housing could be restricted.
Manual windows The door windows can be opened or
closed with the window winders.
Power windows9 Warning
Take care when operating the
power windows. Risk of injury,
particularly to children.
If there are children on the rear seats, switch on the child safety
system for the power windows.
Keep a close watch on the
windows when closing them.
Ensure that nothing becomes
trapped in them as they move.
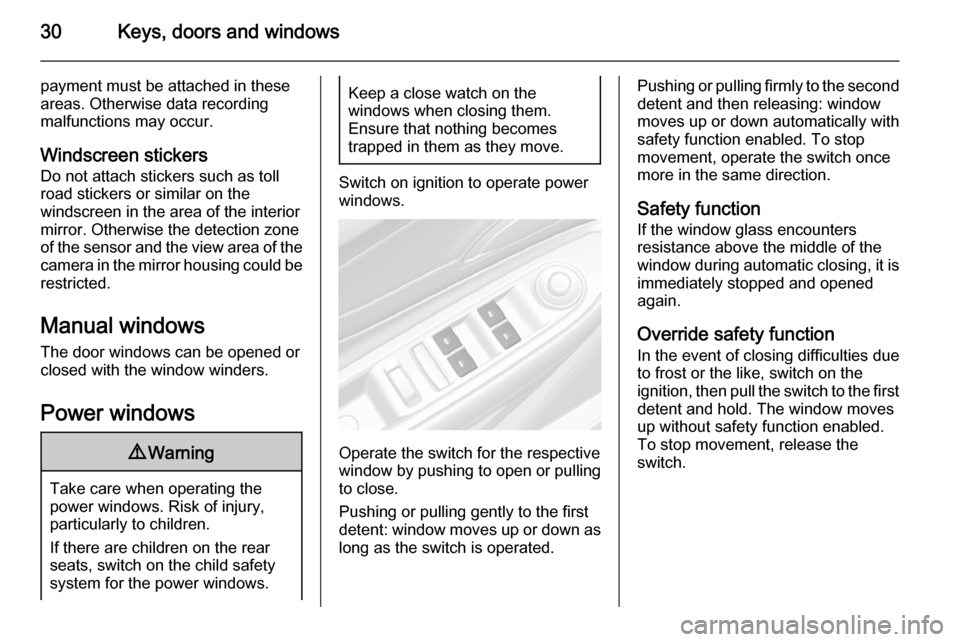
Switch on ignition to operate power
windows.
Operate the switch for the respective
window by pushing to open or pulling to close.
Pushing or pulling gently to the first
detent: window moves up or down as long as the switch is operated.
Pushing or pulling firmly to the second
detent and then releasing: window
moves up or down automatically with
safety function enabled. To stop
movement, operate the switch once
more in the same direction.
Safety function
If the window glass encounters
resistance above the middle of the
window during automatic closing, it is
immediately stopped and opened again.
Override safety function
In the event of closing difficulties due
to frost or the like, switch on the
ignition, then pull the switch to the first
detent and hold. The window moves
up without safety function enabled.
To stop movement, release the
switch.
Page 34 of 217

32Keys, doors and windowsRoof
Sunroof9 Warning
Take care when operating the
sunroof. Risk of injury, particularly to children.
Keep a close eye on the movable parts when operating them.
Ensure that nothing becomes
trapped in them as they move.
Switch on ignition to operate the
sunroof.
Open or close
Press switch 1 or switch 2 gently to
the first detent: sunroof is opened or
closed as long as the switch is
operated.
Press switch 1 or switch 2 firmly to the
second detent and then release: the
sunroof is opened or closed
automatically with safety function
enabled. To stop movement, operate
the switch once more.
Raise or close
Press switch 3 or switch 4: sunroof is
raised or closed automatically with
safety function enabled.
If the sunroof is raised, it can be
opened in one step by pressing
switch 1.
Sunblind The sunblind is operated manually.
Close or open the sunblind by sliding.
When the sunroof is open, the
sunblind is always open.Dirt and debris may collect on the
sunroof seal or in the track that could
cause an issue with sunroof
operation, noise or plug the water
drainage system. Periodically open
the sunroof and remove any
obstacles or loose debris. Wipe the
sunroof seal and roof sealing area
using a clean cloth, mild soap, and
water. Do not remove grease from the sunroof.
General hints Safety function
If the sunroof encounters resistance
during automatic closing, it is
immediately stopped and opened
again.
Override safety function
In the event of closing difficulties due
to frost or the like, press and hold
switch 2. The sunroof closes without
safety function enabled. To stop
movement, release the switch.
Page 36 of 217

34Seats, restraintsSeats, restraintsHead restraints............................ 34
Front seats ................................... 35
Seat belts ..................................... 39
Airbag system .............................. 42
Child restraints ............................. 48Head restraints
Position9 Warning
Only drive with the head restraint
set to the proper position.
The upper edge of the head restraint
should be at upper head level. If this
is not possible for extremely tall
people, set to highest position, and
set to lowest position for small people.
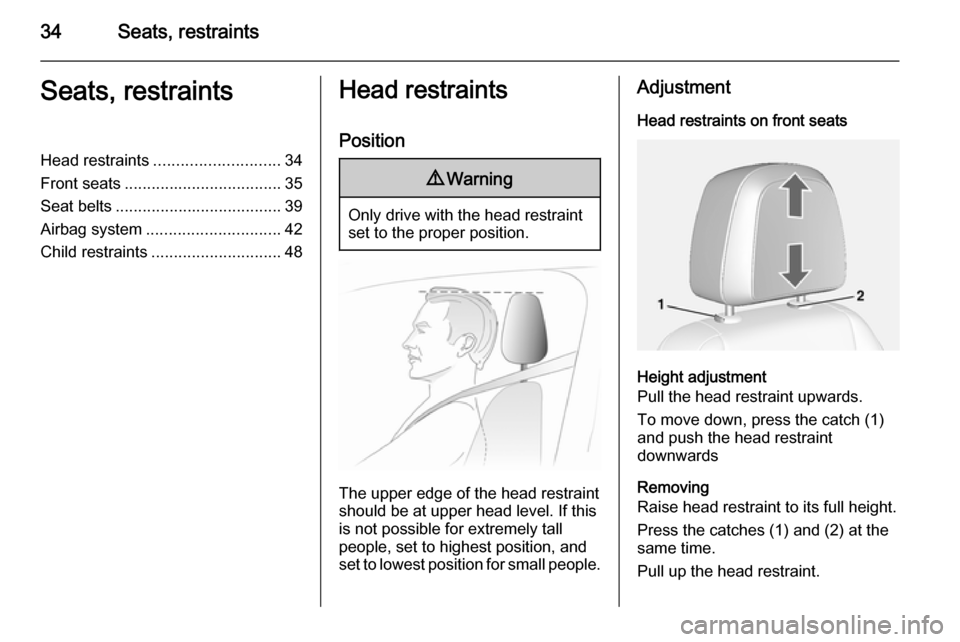
Adjustment
Head restraints on front seats
Height adjustment
Pull the head restraint upwards.
To move down, press the catch (1)
and push the head restraint
downwards
Removing
Raise head restraint to its full height.
Press the catches (1) and (2) at the
same time.
Pull up the head restraint.
Page 37 of 217

Seats, restraints35
Horizontal adjustment
To adjust horizontally, pull the head
restraint forwards. It engages in three
positions.
To return to its rearmost position, pull fully forwards and release.
Head restraints on rear seats
Height adjustment
Pull the head restraint upwards.
To move down, press the catch (1)
and push the head restraint
downwards.
Removal
Raise head restraint to its full height.
Press the catches (1) and (2) at the
same time.
Pull up the head restraint.
Front seats
Seat position9 Warning
Only drive with the seat correctly
adjusted.
■ Sit with buttocks as far back against
the backrest as possible. Adjust the distance between the seat and the
pedals so that legs are slightly
angled when pressing the pedals.
Slide the front passenger seat as
far back as possible.