check oil OPEL MOKKA X 2017 Manual user
[x] Cancel search | Manufacturer: OPEL, Model Year: 2017, Model line: MOKKA X, Model: OPEL MOKKA X 2017Pages: 247, PDF Size: 6.59 MB
Page 19 of 247
In brief17Transmission
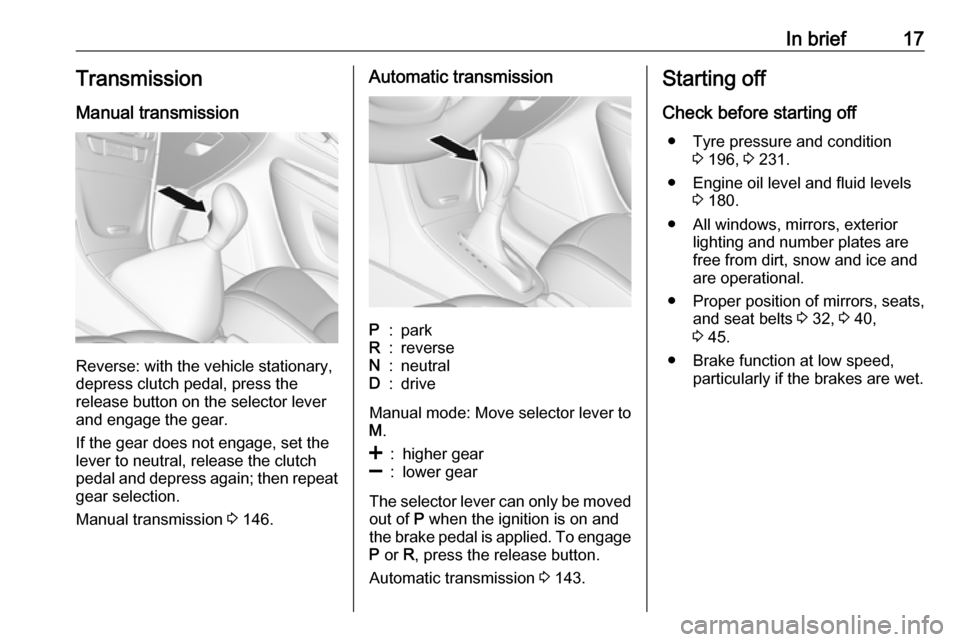
Manual transmission
Reverse: with the vehicle stationary,
depress clutch pedal, press the
release button on the selector lever
and engage the gear.
If the gear does not engage, set the
lever to neutral, release the clutch
pedal and depress again; then repeat
gear selection.
Manual transmission 3 146.
Automatic transmissionP:parkR:reverseN:neutralD:drive
Manual mode: Move selector lever to
M .
<:higher gear]:lower gear
The selector lever can only be moved
out of P when the ignition is on and
the brake pedal is applied. To engage P or R, press the release button.
Automatic transmission 3 143.
Starting off
Check before starting off ● Tyre pressure and condition 3 196, 3 231.
● Engine oil level and fluid levels 3 180.
● All windows, mirrors, exterior lighting and number plates are
free from dirt, snow and ice and
are operational.
● Proper position of mirrors, seats, and seat belts 3 32, 3 40,
3 45.
● Brake function at low speed, particularly if the brakes are wet.
Page 46 of 247
44Seats, restraintsSeat belts
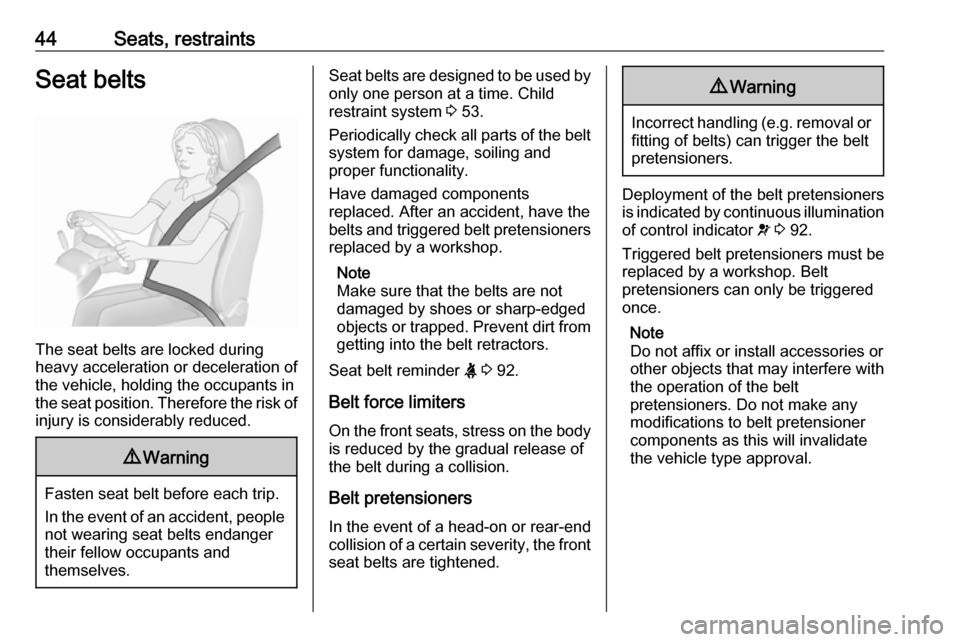
The seat belts are locked during
heavy acceleration or deceleration of
the vehicle, holding the occupants in
the seat position. Therefore the risk of injury is considerably reduced.
9 Warning
Fasten seat belt before each trip.
In the event of an accident, people
not wearing seat belts endanger their fellow occupants and
themselves.
Seat belts are designed to be used by only one person at a time. Child
restraint system 3 53.
Periodically check all parts of the belt
system for damage, soiling and
proper functionality.
Have damaged components
replaced. After an accident, have the
belts and triggered belt pretensioners replaced by a workshop.
Note
Make sure that the belts are not
damaged by shoes or sharp-edged
objects or trapped. Prevent dirt from
getting into the belt retractors.
Seat belt reminder X 3 92.
Belt force limiters
On the front seats, stress on the body is reduced by the gradual release of
the belt during a collision.
Belt pretensioners
In the event of a head-on or rear-end
collision of a certain severity, the front
seat belts are tightened.9 Warning
Incorrect handling ( e.g. removal or
fitting of belts) can trigger the belt
pretensioners.
Deployment of the belt pretensioners
is indicated by continuous illumination
of control indicator v 3 92.
Triggered belt pretensioners must be
replaced by a workshop. Belt
pretensioners can only be triggered
once.
Note
Do not affix or install accessories or
other objects that may interfere with
the operation of the belt
pretensioners. Do not make any
modifications to belt pretensioner
components as this will invalidate
the vehicle type approval.
Page 89 of 247
Instruments and controls87Caution
If engine coolant temperature is
too high, stop vehicle, switch off
engine. Danger to engine. Check
coolant level.
Service display
The engine oil life system informs
when to change the engine oil and
filter. Based on driving conditions, the interval at which an engine oil and
filter change will be indicated can vary
considerably.
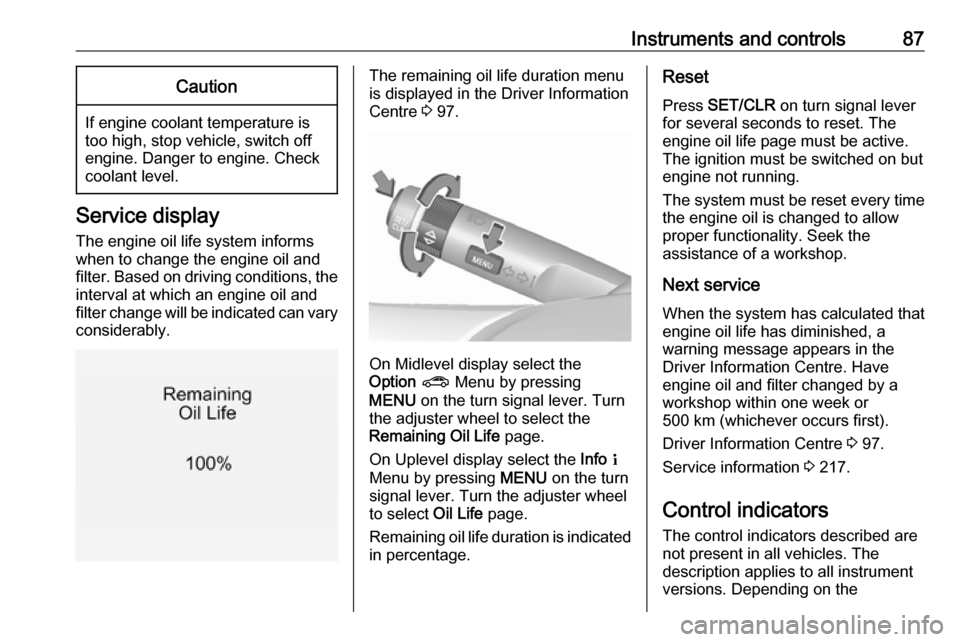
The remaining oil life duration menu
is displayed in the Driver Information
Centre 3 97.
On Midlevel display select the
Option ? Menu by pressing
MENU on the turn signal lever. Turn
the adjuster wheel to select the
Remaining Oil Life page.
On Uplevel display select the Info Q
Menu by pressing MENU on the turn
signal lever. Turn the adjuster wheel
to select Oil Life page.
Remaining oil life duration is indicated
in percentage.
Reset
Press SET/CLR on turn signal lever
for several seconds to reset. The
engine oil life page must be active.
The ignition must be switched on but
engine not running.
The system must be reset every time
the engine oil is changed to allow
proper functionality. Seek the
assistance of a workshop.
Next service When the system has calculated that
engine oil life has diminished, a
warning message appears in the
Driver Information Centre. Have
engine oil and filter changed by a
workshop within one week or
500 km (whichever occurs first).
Driver Information Centre 3 97.
Service information 3 217.
Control indicators
The control indicators described are
not present in all vehicles. The
description applies to all instrument
versions. Depending on the
Page 97 of 247
Instruments and controls95Tyre pressure monitoringsystem
w illuminates or flashes yellow.
Illuminates
Tyre pressure loss. Stop immediately
and check tyre pressure.
Flashes
Fault in system or tyre without pressure sensor mounted (e.g. spare wheel). After 60-90 seconds the
control indicator illuminates
continuously. Consult a workshop.
Tyre pressure monitor system
3 197.
Engine oil pressure
I illuminates red.
Illuminates when the ignition is
switched on and extinguishes shortly
after the engine starts.Illuminates when the engine is
runningCaution
Engine lubrication may be
interrupted. This may result in
damage to the engine and/or
locking of the drive wheels.
1. Depress clutch.
2. Select neutral gear, set selector lever to N.
3. Move out of the flow of traffic as quickly as possible without
impeding other vehicles.
4. Switch off ignition.
9 Warning
When the engine is off,
considerably more force is needed
to brake and steer. During an
Autostop the brake servo unit will still be operational.
Do not remove key until vehicle is
stationary, otherwise the steeringwheel lock could engage
unexpectedly.
Check oil level before seeking the
assistance of a workshop 3 180.
Low fuel
Y illuminates or flashes yellow.
Illuminates
Level in fuel tank is too low.
Flashes
Fuel used up. Refuel immediately.
Never run the tank dry.
Refuelling 3 169.
Catalytic converter 3 142.
Bleeding the diesel fuel system
3 184.
Immobiliser d flashes yellow.
Fault in the immobiliser system. The
engine cannot be started.
Page 101 of 247

Instruments and controls99On Midlevel display the pages
Remaining Oil Life, Tyre Pressure,
Traffic Sign Assistant and Following
Distance are displayed in the Vehicle
information menu, select ?.
Trip odometer 1/2 or A/B
Trip odometer displays the current
distance since a certain reset.
Trip odometer counts up to a distance
of 9,999 km then restarts at 0.
To reset press SET/CLR for a few
seconds.
The information of trip odometer page 1/A and 2/B can be reset separately
while the respective display is active.
Average Fuel Consumption
Display of average consumption. The measurement can be reset at any
time and starts with a default value.
To reset press SET/CLR for a few
seconds.
Average speed
Display of average speed. The
measurement can be reset at any
time.To reset press SET/CLR for a few
seconds.
Digital speed
Digital display of the instantaneous
speed.
Fuel range
Range is calculated from current fuel
level and current consumption. The
display shows average values.
After refuelling, the range is updated
automatically after a brief delay.
When the level in the fuel tank is low,
a message appears on the display
and the control indicator Y in the fuel
gauge illuminates.
When the fuel tank must be refuelled
immediately, a warning message
appears and remains on the display.
Additionally, the control indicator Y in
the fuel gauge flashes 3 95.
Instantaneous Fuel Consumption
Display of the instantaneous
consumption.Remaining Oil Life
Indicates an estimate of the oil's
useful life. The number in percentage means the remainder of current oil life
3 87.
Tyre Pressure
Checks tyre pressure of all wheels
during driving 3 197.
Traffic sign assistant
Displays the detected traffic signs for
the current route section 3 161.
Following Distance
Displays the distance in seconds to a preceding moving vehicle 3 157.
Timer
To start and stop follow the
instructions on the display. To reset,
press SET/CLR .
Eco information menu, @
● Top consumers
● Economy trend
● Eco index
Page 113 of 247

Instruments and controls111To connect a mobile device with the
Wi-Fi hotspot:
1. Press j and then select Wi-Fi
settings on the Info-Display. The
settings displayed include the Wi- Fi hotspot name (SSID),
password and connection type.
2. Start a Wi-Fi network search on your mobile device.
3. Select your vehicle hotspot (SSID) when listed.
4. When prompted, enter the password on your mobile device.
Note
To change the SSID or password,
press Z and talk to an advisor or log
in to your account.
To switch off the Wi-Fi hotspot
functionality, press Z to call an
advisor.
Smartphone app
With the myOpel smartphone app,
some vehicle functions can be
operated remotely.The following functions are available:
● Lock or unlock vehicle.
● Honk horn or flash lights.
● Check fuel level, engine oil life and tyre pressure (only with tyre
pressure monitoring system).
● Send navigation destination to the vehicle, if equipped with a
built-in navigation system.
● Locate vehicle on a map.
● Manage Wi-Fi settings.
To operate these functions, download the app from App Store ®
or
Google Play™ Store.
Remote control
If desired, use any phone to call an
advisor, who can remotely operate
specific vehicle functions. Find the respective OnStar phone number on
our country-specific website.
The following functions are available: ● Lock or unlock vehicle.
● Provide information on the vehicle location.
● Honk horn or flash lights.Stolen vehicle assistance
If the vehicle is stolen, report the theft to the authorities and request OnStar
stolen vehicle assistance. Use any
phone to call an advisor. Find the respective OnStar phone number on
our country-specific website.
OnStar can provide support in
locating and recovering the vehicle.Theft alert
When the anti-theft alarm system is triggered, a notification is sent to
OnStar. You are then informed about
this event by text message or email.Restart prevention
By sending remote signals, OnStar can prevent the vehicle from
restarting once it has been turned off.
On-demand diagnostics
At any time e.g. if the vehicle displays a vehicle message, press Z to
contact an advisor and ask to
complete a real-time diagnostic check
to directly determine the issue.
Depending on the results, the advisor
will provide further support.
Page 140 of 247

138Driving and operatingStarting the vehicle at low
temperatures
Starting the engine without additional
heaters is possible down to -25 °С for diesel engines and -30 °C for petrol
engines. Required is an engine oil
with the correct viscosity, the correct
fuel, performed services and a
sufficiently charged vehicle battery.
With temperatures below -30 °C, the
automatic transmission requires a
warming phase of approx.
five minutes. The selector lever must
be in position P.
Automatic Starter Control
This function controls the engine
starting procedure. The driver does
not need to hold the key in position 3
or to hold Engine Start/Stop pressed.
Once applied, the system will go on starting automatically until the engine
is running. Because of the checking
procedure, the engine starts running
after a short delay.Possible reasons for a non-starting
engine:
● Clutch pedal not depressed (manual transmission).
● Brake pedal not depressed or selector lever not in P or N
(automatic transmission).
● Timeout occurred
Turbo engine warm-up
Upon start-up, engine available
torque may be limited for a short time,
especially when the engine
temperature is cold. The limitation is
to allow the lubrication system to fully protect the engine.
Overrun cut-off The fuel supply is automatically cut off
during overrun, i.e. when the vehicle
is driven with a gear engaged but
accelerator pedal is released.
Depending on driving conditions, the
overrun cut-off may be deactivated.Stop-start system
The stop-start system helps to save
fuel and to reduce the exhaust
emissions. When conditions allow, it
switches off the engine as soon as the
vehicle is at a low speed or at a
standstill, e.g. at a traffic light or in a traffic jam. It starts the engine
automatically as soon as the clutch is depressed. A battery sensor ensures
that an Autostop is only performed if
the battery is sufficiently charged for
a restart.
Activation The stop-start system is available as
soon as the engine is started, the
vehicle starts-off and the conditions
as stated below in this section are
fulfilled.
Page 169 of 247
Driving and operating167Caution
Use of fuel that does not comply toEN 590 or similar can lead to
engine powerloss, increased wear
or engine damage.
Do not use marine diesel oils, heating
oils, Aquazole and similar diesel-
water emulsions. Diesel fuels must
not be diluted with fuels for petrol
engines.
Fuel for liquid gas operation Liquid gas is known as LPG
(Liquefied Petroleum Gas) or under its French name GPL (Gaz de Pétrole
Liquéfié). LPG is also known as
Autogas.
LPG consists mainly of propane and
butane. The octane rating is between 105 and 115, depending on the
butane proportion. LPG is stored as a
liquid at a pressure of approx. five to
ten bar.
The boiling point depends on the
pressure and the mixing ratio. At
ambient pressure, it is between
-42 °C (pure propane) and -0.5 °C
(pure butane).Caution
The system works at an ambient
temperature of approx. -8 °C to
100 °C.
Full functioning of the LPG system can only be guaranteed with liquid
gas which complies with the minimum
requirements of DIN EN 589.
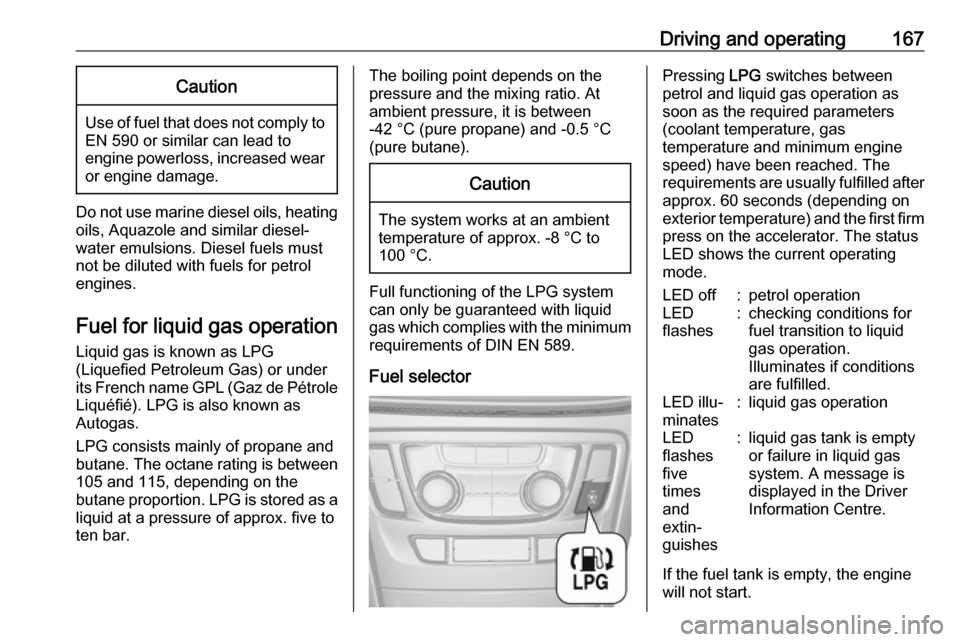
Fuel selector
Pressing LPG switches between
petrol and liquid gas operation as
soon as the required parameters (coolant temperature, gas
temperature and minimum engine
speed) have been reached. The
requirements are usually fulfilled after
approx. 60 seconds (depending on
exterior temperature) and the first firm press on the accelerator. The status
LED shows the current operating
mode.LED off:petrol operationLED
flashes:checking conditions for
fuel transition to liquid
gas operation.
Illuminates if conditions
are fulfilled.LED illu‐
minates:liquid gas operationLED
flashes
five
times
and
extin‐
guishes:liquid gas tank is empty
or failure in liquid gas
system. A message is
displayed in the Driver
Information Centre.
If the fuel tank is empty, the engine
will not start.
Page 179 of 247

Vehicle care177Vehicle careGeneral Information...................177
Accessories and vehicle modifications .......................... 177
Vehicle storage ........................178
End-of-life vehicle recovery .....178
Vehicle checks ........................... 179
Performing work ......................179
Bonnet ..................................... 179
Engine oil ................................. 180
Engine coolant ......................... 181
Power steering fluid .................181
Washer fluid ............................ 182
Brakes ..................................... 182
Brake fluid ............................... 182
Vehicle battery ......................... 183
Diesel fuel system bleeding .....184
Wiper blade replacement ........185
Bulb replacement .......................186
Halogen headlights ..................186
Fog lights ................................. 187
Tail lights ................................. 188
Number plate light ...................189
Electrical system ........................190
Fuses ....................................... 190
Engine compartment fuse box . 190Instrument panel fuse box .......192
Load compartment fuse box ....194
Vehicle tools .............................. 195
Tools ........................................ 195
Wheels and tyres .......................196
Winter tyres ............................. 196
Tyre designations ....................196
Tyre pressure .......................... 196
Tyre pressure monitoring system .................................... 197
Tread depth ............................. 201
Changing tyre and wheel size . 202
Wheel covers ........................... 202
Tyre chains .............................. 202
Tyre repair kit .......................... 203
Wheel changing .......................206
Spare wheel ............................ 208
Jump starting ............................. 210
Towing ....................................... 212
Towing the vehicle ...................212
Towing another vehicle ...........213
Appearance care .......................214
Exterior care ............................ 214
Interior care ............................. 216General Information
Accessories and vehicle modifications
We recommend the use of genuine
parts and accessories and factory
approved parts specific for your
vehicle type. We cannot assess or
guarantee reliability of other products
- even if they have a regulatory or
otherwise granted approval.
Any modification, conversion or other
changes made to standard vehicle
specifications (including, without
limitation, software modifications,
modifications of the electronic control units) may invalidate the warrantyoffered by Opel. Furthermore, such
changes may impact fuel
consumption, CO 2 emissions and
other emissions of the vehicle and
cause the vehicle to no longer
conform to the type approval,
impacting the validity of your vehicle
registration.
Page 180 of 247

178Vehicle careCaution
When transporting the vehicle on
a train or on a recovery vehicle, the
mud flaps might be damaged.
Vehicle storage
Storage for a long period of time
If the vehicle is to be stored for several months:
● Wash and wax the vehicle.
● Have the wax in the engine compartment and underbody
checked.
● Clean and preserve the rubber seals.
● Fill up fuel tank completely.
● Change the engine oil.
● Drain the washer fluid reservoir.
● Check the coolant antifreeze and
corrosion protection.
● Adjust tyre pressure to the value specified for full load.
● Park the vehicle in a dry, wellventilated place. Engage first or
reverse gear or set selector lever
to P. Prevent the vehicle from
rolling.
● Do not apply the parking brake.
● Open the bonnet, close all doors and lock the vehicle.
● Disconnect the clamp from the negative terminal of the vehicle
battery. Beware that all systems
are not functional, e.g. anti-theft
alarm system.
Putting back into operation
When the vehicle is to be put back into
operation:
● Connect the clamp to the negative terminal of the vehicle
battery. Activate the electronics
of the power windows.
● Check tyre pressure.
● Fill up the washer fluid reservoir.
● Check the engine oil level.
● Check the coolant level.
● Fit the number plate if necessary.End-of-life vehicle recovery
Information on end-of-life vehicle
recovery centres and the recycling of
end-of-life vehicles is available on our website, where legally required. Only
entrust this work to an authorised
recycling centre.
Gas vehicles must be recycled by a
service centre authorised for gas
vehicles.