ECU OPEL MOKKA X 2018.5 Infotainment system
[x] Cancel search | Manufacturer: OPEL, Model Year: 2018.5, Model line: MOKKA X, Model: OPEL MOKKA X 2018.5Pages: 255, PDF Size: 6.79 MB
Page 68 of 255

66Storage
Use the short accessory mounting
bracket to attach the third bicycle.
The bracket must be fixed
between the frames of the second and third bicycle.
6. Additionally, secure both bicycle wheels of the third bicycle to the
wheel recesses using the
tensioning straps.
It is recommended to attach a
warning sign to the rearmost bicycle,
to increase visibility.
Fold the rear carrier system
backwards
The rear carrier system can be folded
backwards to gain access to the load compartment.
● Without attached adapter:
Push the lever ( 1) to disengage
and hold it.
Pull the rack ( 2) backwards to
fold the rear carrier system.
● With attached adapter:9 Warning
Take care when disengaging the
rear carrier system as it will tilt
backwards. Risk of injury.
Hold frame ( 1) of rearmost
bicycle with one hand and pull the
loop ( 2) to disengage.
Hold rearmost bicycle with both
hands and fold the rear carrier
system backwards.
Page 69 of 255

Storage67To increase visibility, the tail lights of
the vehicle are activated when the
rear carrier system is folded back.9 Warning
When folding the rear carrier
system forwards again, ensure
that the system is engaged
securely.
Removing bicycles
Undo strap retainers on both bicycle
tyres.
Turn knob anticlockwise and remove
mounting brackets.
Detaching adapter
Detach the adapter before removing
the bicycle on the rear carrier system.
1. Fold in wheel recesses.
2. Unbutton the strap.
3. Turn the lever ( 1) forwards and
hold it.
4. Lift the adapter ( 2) at the rear and
remove.
Disassembling the bicycle rack
Press button ( 1) and remove upper
part of rack ( 2).
Press button ( 1) and reinstall rack ( 2).
Page 73 of 255

Storage71To return the backrest to the original
position, pull out the seat belt from the
belt guides and lift backrest up.
Push backrest firmly into place.9 Warning
When folding up, ensure that
backrests are securely engaged in position before driving. Failure to
do so may result in personal injury or damage to the load or vehicle in
the event of hard braking or a
collision.
Ensure the seat belts are not pinched by the latch.
The centre rear seat belt may lock
when you raise the backrest. If this
happens, allow the belt go back all the
way and repeat operation.
If the seat belt is still locked, fold down the seat cushion and try again.
To return the rear seat cushion, put
the rear part of the seat cushion in its original position ensuring that the
seat belt buckle straps are not twisted
or caught under the seat cushion,
then push the front part of the seat
cushion firmly down until it latches.Caution
When returning rear seat backrest
to the upright position, place the
rear seat belt and buckles
between the rear seat backrest
and one cushion. Make sure the
rear seat belt and buckles do not
get pinched under the rear seat
cushion.
Ensure the seat belts are not twisted or caught in the seat
backrest and are arranged in their proper position.
Load compartment cover
Do not place any objects on the cover.
Removing Unhook retaining straps from tailgate. Lift cover at the rear and push it
upwards at the front.
Remove the cover.
Fitting Engage cover in side guides and fold
downwards.
Attach retaining straps to tailgate.
Page 74 of 255

72StorageRear floor storage coverRear floor cover
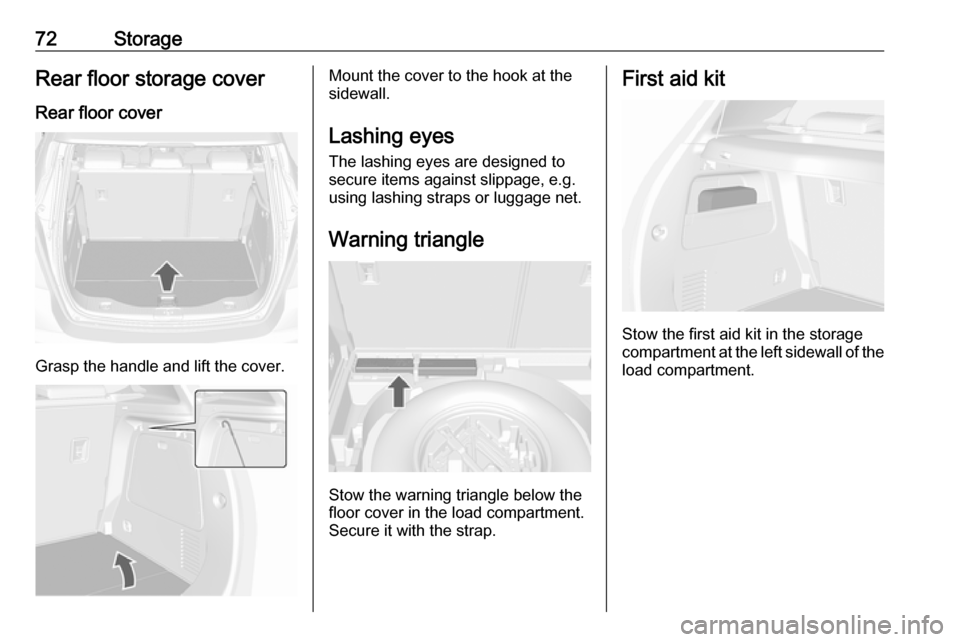
Grasp the handle and lift the cover.
Mount the cover to the hook at the
sidewall.
Lashing eyes The lashing eyes are designed to
secure items against slippage, e.g.
using lashing straps or luggage net.
Warning triangle
Stow the warning triangle below the
floor cover in the load compartment. Secure it with the strap.
First aid kit
Stow the first aid kit in the storage
compartment at the left sidewall of the load compartment.
Page 75 of 255

Storage73Roof rack system
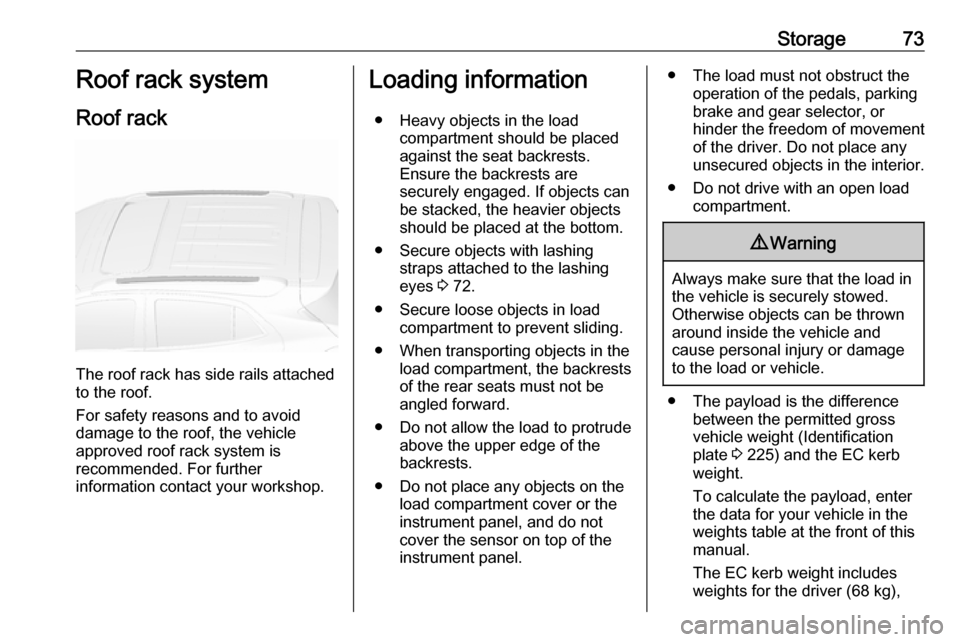
Roof rack
The roof rack has side rails attached
to the roof.
For safety reasons and to avoid
damage to the roof, the vehicle
approved roof rack system is
recommended. For further
information contact your workshop.
Loading information
● Heavy objects in the load compartment should be placed
against the seat backrests.
Ensure the backrests are
securely engaged. If objects can
be stacked, the heavier objects
should be placed at the bottom.
● Secure objects with lashing straps attached to the lashing
eyes 3 72.
● Secure loose objects in load compartment to prevent sliding.
● When transporting objects in the load compartment, the backrests
of the rear seats must not be
angled forward.
● Do not allow the load to protrude above the upper edge of the
backrests.
● Do not place any objects on the load compartment cover or the
instrument panel, and do not
cover the sensor on top of the instrument panel.● The load must not obstruct the operation of the pedals, parking
brake and gear selector, or
hinder the freedom of movement
of the driver. Do not place any
unsecured objects in the interior.
● Do not drive with an open load compartment.9Warning
Always make sure that the load in
the vehicle is securely stowed.
Otherwise objects can be thrown
around inside the vehicle and
cause personal injury or damage
to the load or vehicle.
● The payload is the difference between the permitted gross
vehicle weight (Identification
plate 3 225) and the EC kerb
weight.
To calculate the payload, enter
the data for your vehicle in the
weights table at the front of this
manual.
The EC kerb weight includes
weights for the driver (68 kg),
Page 76 of 255

74Storageluggage (7 kg) and all fluids (fuel
tank 90% full).
Optional equipment and
accessories increase the kerb
weight.
● Driving with a roof load increases
the sensitivity of the vehicle to
cross-winds and has a
detrimental effect on vehicle
handling due to the vehicle’s
higher centre of gravity.
Distribute the load evenly and
secure it properly with retaining
straps. Adjust the tyre pressure
and vehicle speed according to
the load conditions. Check and
retighten the straps frequently.
Do not drive faster than
120 km/h.
● The permissible roof load is 75 kg. The roof load is the
combined weight of the roof rack
and the load.
Page 106 of 255

104Instruments and controlsThe warning message or warning
code will disappear after the engine
has been started twice consecutively
without a voltage drop.
If the battery cannot be recharged,
have the cause of the fault remedied
by a workshop.Vehicle personalisation
The vehicle's behaviour can be
personalised by changing the settings in the Info Display.
Depending on vehicle equipment and
country-specific regulations some of
the functions described below may
not be available.
Some functions are only displayed or
active when the engine is running.
Personal settings Graphic Info Display
Press MENU to open the respective
menu.
Select Settings , scroll through the list
and select Vehicle Settings
In the corresponding submenus the
following settings can be changed:
Vehicle Settings
● Climate and Air Quality
Auto Fan Max Speed : Modifies
the level of the cabin airflow of the climate control in automatic
mode.
Auto Heated Seats :
Automatically activates the seat
heating.
Auto Demist : Activates or
deactivates auto demist.
Auto Rear Demist : Activates the
heated rear window
automatically.
● Park Assist / Collision Detection
Park Assist : Activates or
deactivates the ultrasonic
sensors.
● Comfort Settings
Chime Volume : Changes the
volume of warning chimes.
Personalisation by Driver :
Activates or deactivates the
personalisation function.
Rear Auto Wipe in Reverse :
Activates or deactivates
automatic switching on of the
Page 114 of 255

112Instruments and controlsmaintenance items and tyre pressure(only with tyre pressure monitoring
system).
To look at the information in greater
detail, select the link within the email and log in to your account.
Destination download
A desired destination can be directly
downloaded to the navigation system.
Press Z to call an advisor and
describe the destination or point of
interest.
The advisor can look up any address
or point of interest and directly send
the destination to the built-in
navigation system.
OnStar settings
OnStar PIN
To have full access to all OnStar
services, a four-digit PIN is required. The PIN has to be personalised when first talking to an advisor.
To change the PIN, press Z to call an
advisor.Account data
An OnStar subscriber has an account
where all the data is stored. To
request a change of the account
information, press Z and talk to an
advisor or log in to your account.
If the OnStar service is used on
another vehicle, press Z and request
that the account be transferred to the
new vehicle.
Note
In any case, if the vehicle is disposed of, sold or otherwise transferred,
immediately inform OnStar about
the changes and terminate the
OnStar service on this vehicle.
Vehicle location
The vehicle location is transmitted to OnStar when service is requested ortriggered. A message on the Info
Display informs about this
transmission.
To activate or deactivate the
transmission of the vehicle location,
press and hold j until an audio
message is heard.The deactivation is indicated by the
status light flashing red and green for a short period of time and each time
the vehicle is started.
Note
If the transmission of the vehicle
location is deactivated, some
services are no longer available.
Note
The vehicle location always remains
accessible to OnStar in the case of
an emergency.
Find the privacy policy in your
account.
Software updates
OnStar may remotely carry out
software updates without further
notice or consent. These updates are
to enhance or maintain safety and
security or the operation of the
vehicle.
These updates may concern privacy
issues. Find the privacy policy in your account.
Page 149 of 255

Driving and operating147When a gear is engaged, the vehicle
slowly begins to creep when the
brake is released.
Engine braking To utilise the engine braking effect,select a lower gear in good time when
driving downhill, see manual mode.
Rocking the vehicle
Rocking the vehicle is only
permissible if the vehicle is stuck in
sand, mud or snow. Move the selector
lever between D and R in a repeat
pattern. Do not race the engine and
avoid sudden acceleration.
Parking
Apply the parking brake and engage
P .
The ignition key can only be removed
when the selector lever is in position
P .Manual mode
Move selector lever to position M.
Press button on the selector lever:
<:shift to a higher gear]:shift to a lower gear
If a higher gear is selected when
vehicle speed is too low, or a lower
gear when vehicle speed is too high,
the shift is not executed. This can
cause a message in the Driver
Information Centre.
In manual mode no automatic shifting to a higher gear takes place at high
engine revolutions.
Gear shift indication
The symbol R with a number beside
it is indicated when gearshifting is
recommended for fuel saving
reasons.
Shift indication appears only in
manual mode.
Electronic driving programmes
● Following a cold start, the operating temperature
programme increases engine
speed to quickly bring the
catalytic converter to the required
temperature.
● The automatic neutral shift function automatically shifts to
idling when the vehicle is stopped with a forward gear engaged and
the brake pedal is pressed.
● Special programmes automatically adapt the shifting
points when driving up inclines or down hills.
Page 179 of 255

Driving and operating177The permissible gross train weight
must not be exceeded. This weight is
specified on the identification plate
3 225.
Vertical coupling load
The vertical coupling load is the load
exerted by the trailer on the coupling
ball. It can be varied by changing the
weight distribution when loading the
trailer.
The maximum permissible vertical
coupling load (75 kg) is specified on
the towing equipment identification
plate and in the vehicle documents.
Always aim for the maximum load,
especially in the case of heavy
trailers. The vertical coupling load
should never fall below 25 kg.
Rear axle load
The permissible axle loads (see
identification plate or vehicle
documents) must not be exceeded.Towing equipmentCaution
When operating without a trailer,
remove the coupling ball bar.
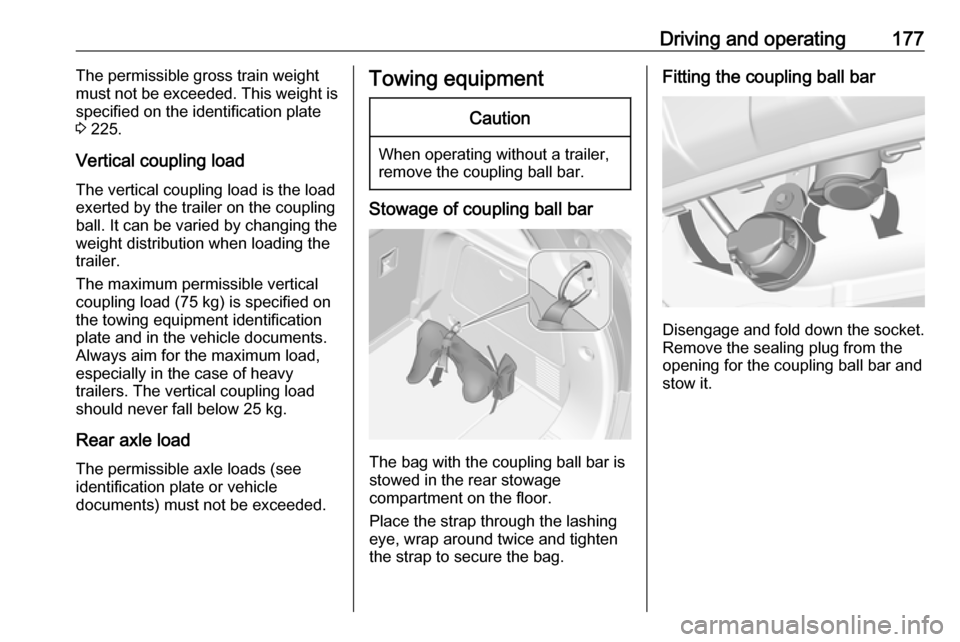
Stowage of coupling ball bar
The bag with the coupling ball bar is
stowed in the rear stowage
compartment on the floor.
Place the strap through the lashing
eye, wrap around twice and tighten
the strap to secure the bag.
Fitting the coupling ball bar
Disengage and fold down the socket. Remove the sealing plug from the
opening for the coupling ball bar and
stow it.