warning OPEL MOKKA X 2018 Infotainment system
[x] Cancel search | Manufacturer: OPEL, Model Year: 2018, Model line: MOKKA X, Model: OPEL MOKKA X 2018Pages: 251, PDF Size: 6.61 MB
Page 163 of 251

Driving and operating161Note
The parking assist system
automatically detects factory-fitted
towing equipment. It is deactivated
when the connector is plugged in.
The sensor may detect a non-
existent object (echo disturbance)
caused by external acoustic or
mechanical disturbances.
Note
The parking assist is deactivated
when the rear carrier system is
extended.
Rear view camera
The rear view camera assists the
driver when reversing by displaying a view of the area behind the vehicle.
The view of the camera is displayed
in the Info-Display.9 Warning
The rear view camera does not
replace driver vision. Note that
objects that are outside the
camera's field of view and the
advanced parking assist sensors,
e.g. below the bumper or
underneath the vehicle, are not
displayed.
Do not reverse the vehicle by only looking at the Info-Display and
check the surrounding area
behind and around the vehicle
before reversing.
Activation
Rear view camera is automatically
activated when reverse gear is
engaged.
Functionality
The camera is mounted in the tailgate handle and has a viewing angle of
130°.
Due to the high position of the
camera, the rear bumper can be seen on the display as a guide to position.
The area displayed by the camera is
limited. The distance of the image that
appears on the display differs from
the actual distance.
Guiding lines
Dynamic guiding lines are horizontal
lines at one metre intervals projected
on the picture to define the distance
to displayed objects.
Page 164 of 251

162Driving and operating
Trajectory lane of the vehicle is
shown in accordance with the
steering angle.
Warning symbols
Warning symbols are indicated as
triangles 9 on the picture which show
obstacles detected by the rear
sensors of the advanced parking
assist.
Additionally 9 appears on the top line
of the Info-Display with the warning to check the vehicle surrounding.
Deactivation
The camera is deactivated when a
certain forward speed is exceeded or
if reverse gear is not engaged for
approx. 10 seconds.
Rear view camera can be manually
deactivated in the vehicle
personalisation menu in the Info-
Display. Select the relevant setting in
Settings .
Vehicle personalisation 3 106.
Deactivation of guiding lines and
warning symbols7'' Colour-Info-Display: Activation or
deactivation of the visual guiding lines and the warning symbols can be
changed via touch buttons in the
lower zone of the display.
8'' Colour-Info-Display: Activation or
deactivation of the visual guiding lines
and the warning symbols can be
changed in the Settings menu in the
Info-Display.
Info-Display 3 102.
Vehicle personalisation 3 106.
Fault
Fault messages are displayed with a
9 on the top line of the Info-Display.
The rear view camera may not
operate properly when:
● The surrounding is dark.
● The sun or the beam of headlights is shining directly into
the camera lens.
● Ice, snow, mud, or anything else covers the camera lens. Clean
the lens, rinse it with water, and
wipe it with a soft cloth.
● The vehicle is towing a trailer.
Page 165 of 251

Driving and operating163● The vehicle had a rear endaccident.
● There are extreme temperature changes.
Traffic sign assistant Functionality
The traffic sign assistant system
detects designated traffic signs via a
front camera and displays them in the
Driver Information Centre.
Traffic signs which will be detected
are:
Limit and no passing signs ● speed limit
● no passing
● end of speed limit
● end of no passingRoad signs
Beginning and end of:
● city regions (country specific)
● motorways
● A-roads
● play streetsAdd-on signs ● additional hints to traffic signs
● restriction of trailer towing
● tractor constraints
● wet warning
● ice warning
● direction arrows
Speed limit signs are displayed in the
Driver Information Centre until the
next speed limit sign or end of speed
limit is detected or up to a defined sign timeout.
Combinations of multiple signs in the
display are possible.
An exclamation mark in a frame
indicates that there is an additional
sign detected which is not recognised
by the system.
The system operates without loss of
performance up to a speed of
200 km/h depending on the lighting
conditions. At night the system is
active up to a speed of 160 km/h.
Page 168 of 251

166Driving and operatingReasons for signs being cleared:● A predefined distance was driven
or time has elapsed (differs for
each sign type)
● Vehicle drives through a turn
● The speed becomes slower than 52 km/h (city entry detection)
Fault
The traffic sign assistant system may
not operate correctly if:
● The area of the windscreen, where the front camera is
located, is not clean or affected
by foreign items, e.g. stickers.
● Traffic signs are completely or partially covered or difficult to
discern.
● There are adverse environmental
conditions, e.g. heavy rain, snow,direct sunlight or shadows.
● Traffic signs are incorrectly mounted or damaged.
● Traffic signs do not comply with the Vienna Convention on traffic
signs (Wiener Übereinkommen
über Straßenverkehrszeichen).Caution
The system is intended to help the driver within a defined speed
range to discern certain traffic
signs. Do not ignore traffic signs
which are not displayed by the
system.
The system does not discern any other than the conventional traffic
signs that might give or end a
speed limit.
Do not let this special feature
tempt you into taking risks when
driving.
Always adapt speed to the road
conditions.
The driver assistance systems do not relieve the driver from full
responsibility for vehicle
operation.
Lane departure warning
The lane departure warning system
observes the lane markings between
which the vehicle is driving via a front camera. The system detects lane
changes and warns the driver in the
event of an unintended lane change
via visual and acoustic signals.
Criteria for the detection of an
unintended lane change are:
● no operation of turn signals
● no brake pedal operation
● no active accelerator operation or
speeding-up
● no active steering
If the driver is active, no warning will
be issued.
Activation
Page 169 of 251

Driving and operating167The lane departure warning system is
activated by pressing ). The
illuminated LED in the button
indicates that the system is switched
on.
When the control indicator ) in the
instrument cluster illuminates green,
the system is ready to operate.
The system is only operable at
vehicle speeds above 56 km/h and if
lane markings are available.
When the system recognises an
unintended lane change, the control
indicator ) changes to yellow and
flashes. Simultaneously a chime
sound is activated.
Deactivation
The system is deactivated by
pressing ), the LED in the button
extinguishes.
At speeds below 56 km/h the system
is inoperable.
Fault
The lane departure warning system
may not operate properly when:
● the windscreen is not clean
● there are adverse environmental conditions like heavy rain, snow,
direct sunlight or shadows
The system can not operate when no
lane marking is detected.Fuel
Fuel for petrol engines
Only use unleaded fuel that complies
with European standard EN 228 or
equivalent.
The engine is capable of running with fuel that contains up to 10% ethanol(e.g. named E10).
Use fuel with the recommended
octane rating. A lower octane rating
can reduce engine power and torque
and slightly increases fuel
consumption.Caution
Do not use fuel or fuel additives
that contain metallic compounds
such as manganese-based
additives. This may cause engine
damage.
Page 173 of 251

Driving and operating171
Unscrew protective cap from the filler
neck.
Screw the required adapter hand-
tight onto the filler neck.
ACME Adapter: Screw the nut of the
filling nozzle onto the adapter. Press
locking lever on filler nozzle down.
DISH filler neck: Place the filler nozzle
into the adapter. Press locking lever
on filler nozzle down.
Bayonet filler neck: Place filler nozzle
on the adapter and turn clockwise or
anticlockwise through one quarter
turn. Pull locking lever of filler nozzle
fully.
EURO filler neck: Press the filler
nozzle onto the adapter until it
engages.
Press the button at the liquid gas
supply point. The filling system stops
or begins to run slowly when 80% of
the tank volume is reached
(maximum fill level).
Release button on filling system and
the filling process stops. Release the
locking lever and remove the filler
nozzle. A small quantity of liquid gas
may escape.
Remove adapter and stow in vehicle. Fit protective cap to prevent the
penetration of foreign bodies into the
filler opening and the system.9 Warning
Due to the system design, an
escape of liquid gas after
releasing the locking lever is
unavoidable. Avoid inhaling.
9 Warning
The liquid gas tank should only be
filled to 80% capacity, for safety
reasons.
Page 178 of 251

176Driving and operating
● Pull out rotary knob and turnclockwise as far as it will go.
Inserting the coupling ball bar
Insert the tensioned coupling ball bar
in the opening and push firmly
upwards until it audibly engages.
The rotary handle snaps back into its
original position resting against the
coupling ball bar without a gap.9 Warning
Do not touch rotary handle during
insertion.
Lock the coupling ball bar by turning
the key to position e. Remove the key
and close the protective flap.
Eye for break-away stopping cable
Attach breakaway stopping cable to
eye.
Check that the coupling ball bar is correctly installed
● Green marking on rotary knob must point towards green
marking on coupling ball bar.
● There must be no gap between the rotary handle and the
coupling ball bar.
● The coupling ball bar must be firmly engaged in the opening.
● The coupling ball bar must be locked and the key removed.9Warning
Towing a trailer is permitted only
when a coupling ball bar is fitted correctly. If the coupling ball bardoes not engage correctly, seekthe assistance of a workshop.
Page 182 of 251

180Vehicle careVehicle checks
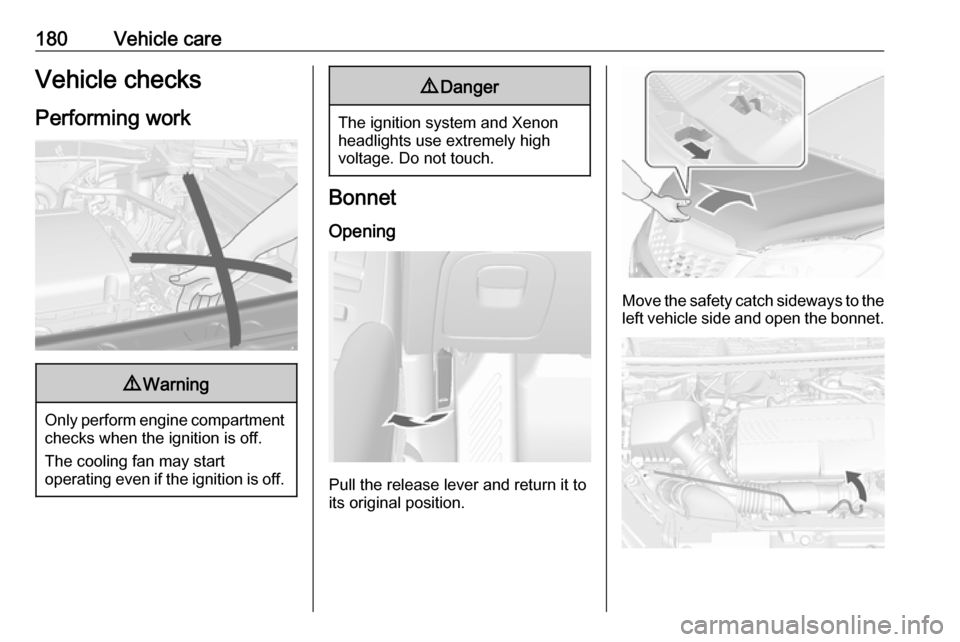
Performing work9 Warning
Only perform engine compartment
checks when the ignition is off.
The cooling fan may start
operating even if the ignition is off.
9 Danger
The ignition system and Xenon
headlights use extremely high
voltage. Do not touch.
Bonnet
Opening
Pull the release lever and return it to
its original position.
Move the safety catch sideways to the left vehicle side and open the bonnet.
Page 184 of 251

182Vehicle careThe engine oil filler cap is located on
the camshaft cover.Caution
Overfilled engine oil must be
drained or suctioned out.
Capacities 3 232.
Fit the cap on straight and tighten it.
Engine coolant The coolant provides freeze
protection down to approx. -30 °C. In
northern countries with very low
temperatures the factory filled coolant
provides frost protection down to
approx. -40 °C.
Caution
Only use approved antifreeze.
Coolant and antifreeze 3 219.
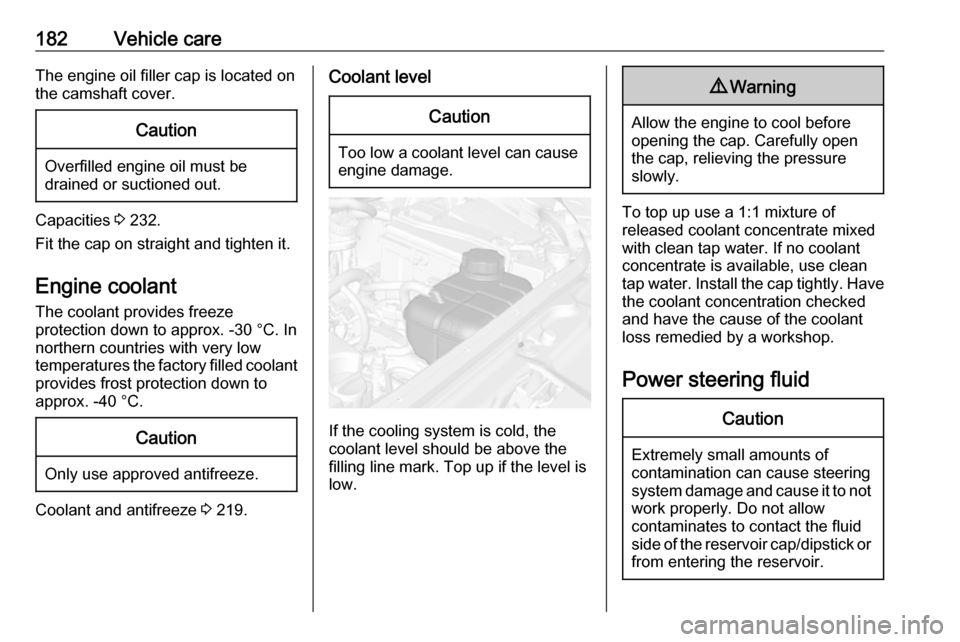
Coolant levelCaution
Too low a coolant level can cause
engine damage.
If the cooling system is cold, the
coolant level should be above the
filling line mark. Top up if the level is
low.
9 Warning
Allow the engine to cool before
opening the cap. Carefully open
the cap, relieving the pressure
slowly.
To top up use a 1:1 mixture of
released coolant concentrate mixed
with clean tap water. If no coolant
concentrate is available, use clean
tap water. Install the cap tightly. Have
the coolant concentration checked
and have the cause of the coolant
loss remedied by a workshop.
Power steering fluid
Caution
Extremely small amounts of
contamination can cause steering
system damage and cause it to not work properly. Do not allow
contaminates to contact the fluid
side of the reservoir cap/dipstick or
from entering the reservoir.
Page 185 of 251

Vehicle care183
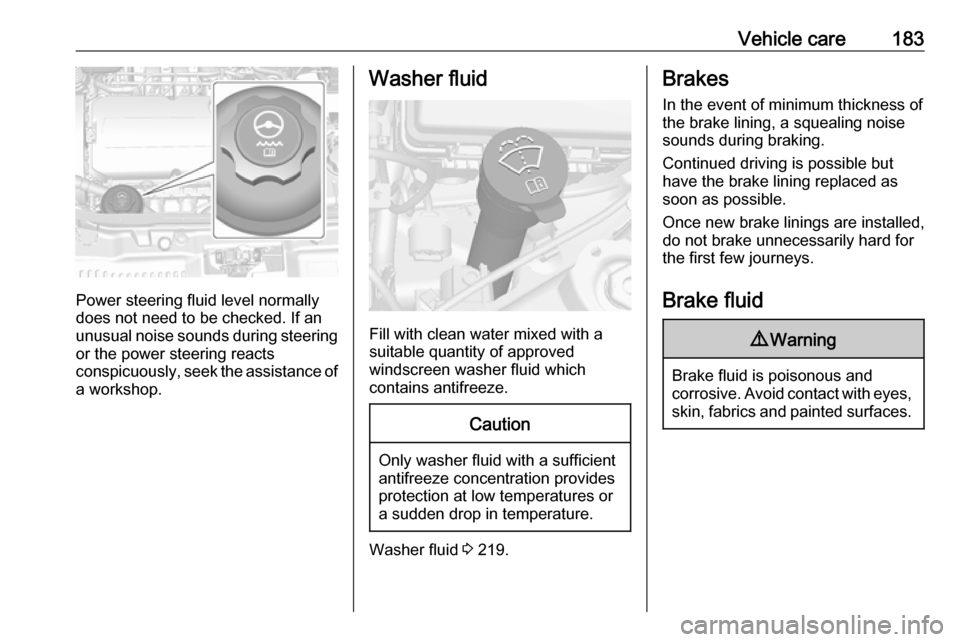
Power steering fluid level normally
does not need to be checked. If an
unusual noise sounds during steering or the power steering reacts
conspicuously, seek the assistance of a workshop.
Washer fluid
Fill with clean water mixed with a
suitable quantity of approved
windscreen washer fluid which
contains antifreeze.
Caution
Only washer fluid with a sufficient
antifreeze concentration provides
protection at low temperatures or
a sudden drop in temperature.
Washer fluid 3 219.
Brakes
In the event of minimum thickness of
the brake lining, a squealing noise
sounds during braking.
Continued driving is possible but
have the brake lining replaced as
soon as possible.
Once new brake linings are installed,
do not brake unnecessarily hard for
the first few journeys.
Brake fluid9 Warning
Brake fluid is poisonous and
corrosive. Avoid contact with eyes, skin, fabrics and painted surfaces.