fuel OPEL MOKKA X 2018 Infotainment system
[x] Cancel search | Manufacturer: OPEL, Model Year: 2018, Model line: MOKKA X, Model: OPEL MOKKA X 2018Pages: 251, PDF Size: 6.61 MB
Page 13 of 251

In brief111Central locking system ..........24
2 Power windows .....................34
3 Exterior mirrors .....................32
4 Light switch ......................... 116
5 Cruise control ...................... 153
Speed limiter ....................... 155
Forward collision alert .........156
6 Side air vents ...................... 132
7 Turn and lane-change
signals ................................. 123
Headlight flash ....................118
Low beam and high beam ..117
Buttons for Driver
Information Centre ................98
8 Instruments ........................... 85
9 Steering wheel controls .......78
10 Windscreen wiper,
windscreen washer system ...79
Rear window wiper, rear
window washer system .........81
11 Centre air vents ................... 132
12 Anti-theft alarm system
status LED ........................... 3013Info-Display ........................ 102
14 Controls for Info-Display
operation ............................. 102
15 Glovebox .............................. 60
16 Descent control system ......... 95
Fuel selector ......................... 87
Stop-start system ................139
17 Climate control system ........ 127
18 Electronic Stability Control
(ESC) .................................. 151
19 Control indicator for airbag
deactivation .......................... 94
20 Front storage ......................... 61
Power outlet .......................... 84
USB port, AUX input
21 Selector lever, manual
transmission ....................... 147
Selector lever, automatic
transmission ....................... 144
22 Parking brake ......................149
23 Hazard warning flashers ....122
24 Parking assist ..................... 159
Lane departure warning ......16625Ignition switch with
steering wheel lock ............136
Power button ....................... 136
26 Horn ..................................... 79
Driver airbag ........................ 49
27 Steering wheel adjustment ..78
28 Bonnet release lever ..........180
29 Front storage ......................... 61
Fuse box ............................ 193
Page 26 of 251
24Keys, doors and windowsMemorised settings
Whenever the ignition is switched off,
the following settings may be
automatically memorised by the
remote control unit or the electronic
key:
● lighting
● Infotainment system
● central locking system
● comfort settings
A precondition is that Personalization
by driver is activated in the personal
settings of the Info-Display. This must
be set for each remote control unit or
electronic key which is used.
Vehicle personalisation 3 106.
Central locking system
Unlocks and locks doors, load
compartment and fuel filler flap.
A pull on an interior door handle
unlocks the respective door. Pulling
the handle again opens the door.Note
In the event of an accident in which
airbags or belt pretensioners are
deployed, the vehicle is
automatically unlocked.
Note
A short time after unlocking with the
remote control the doors are locked
automatically if no door has been
opened. A precondition is that the
setting is activated in the vehicle
personalisation 3 106.
Remote control operation
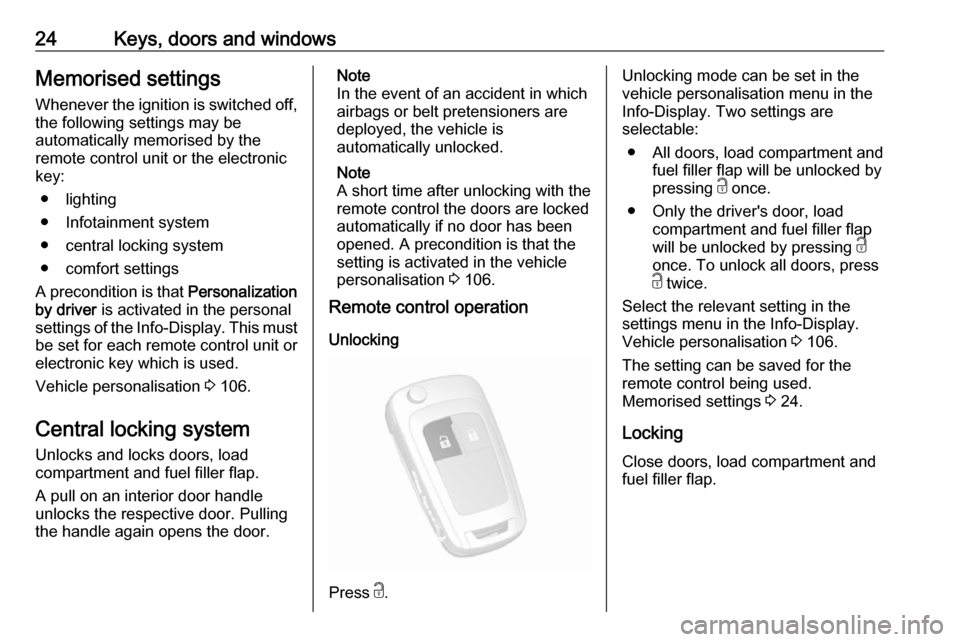
Unlocking
Press c.
Unlocking mode can be set in the
vehicle personalisation menu in the
Info-Display. Two settings are
selectable:
● All doors, load compartment and fuel filler flap will be unlocked by
pressing c once.
● Only the driver's door, load compartment and fuel filler flap
will be unlocked by pressing c
once. To unlock all doors, press
c twice.
Select the relevant setting in the settings menu in the Info-Display.
Vehicle personalisation 3 106.
The setting can be saved for the
remote control being used.
Memorised settings 3 24.
Locking Close doors, load compartment and
fuel filler flap.
Page 27 of 251
Keys, doors and windows25
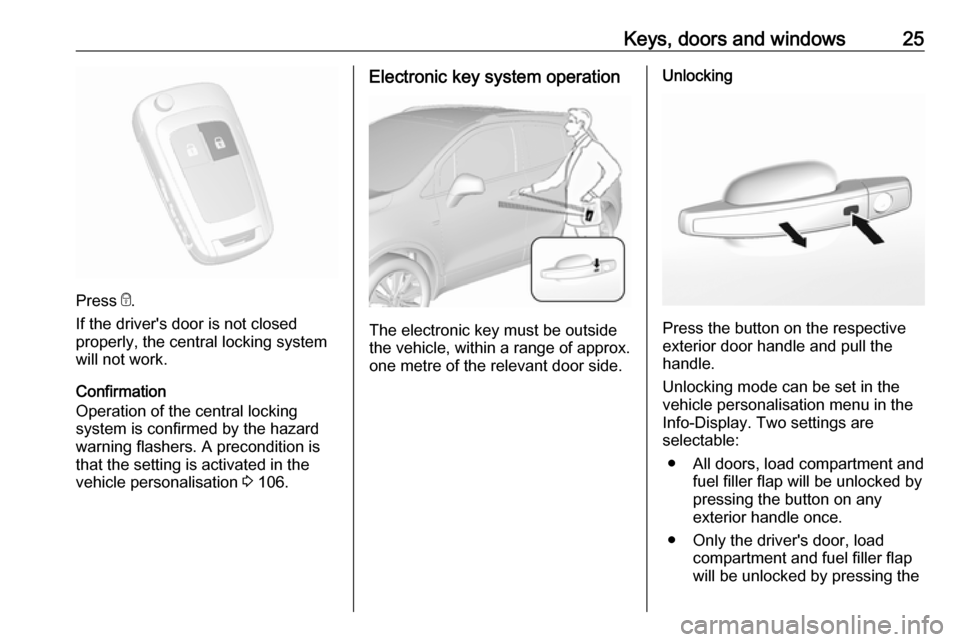
Press e.
If the driver's door is not closed
properly, the central locking system will not work.
Confirmation
Operation of the central locking
system is confirmed by the hazard
warning flashers. A precondition is
that the setting is activated in the
vehicle personalisation 3 106.
Electronic key system operation
The electronic key must be outside
the vehicle, within a range of approx. one metre of the relevant door side.
Unlocking
Press the button on the respective
exterior door handle and pull the
handle.
Unlocking mode can be set in the
vehicle personalisation menu in the
Info-Display. Two settings are
selectable:
● All doors, load compartment and fuel filler flap will be unlocked by
pressing the button on any
exterior handle once.
● Only the driver's door, load compartment and fuel filler flap
will be unlocked by pressing the
Page 28 of 251

26Keys, doors and windowsbutton on the driver`s door
exterior handle once. To unlock
all doors, press button twice.
The setting can be changed in the
settings menu in the Info-Display.
Vehicle personalisation 3 106.
Locking
Press the button on any exterior door
handle.
All doors, load compartment and fuel
filler flap will be locked.
The system locks if any of the
following occurs:
● It has been more than five seconds since unlocking.
● The button on an exterior handle has been pressed twice within
five seconds to unlock the
vehicle.
● Any door has been opened and all doors are now closed.
If the driver's door is not closed
properly, the electronic key remains in the vehicle or the ignition is still on,
locking will not be permitted.
If there have been two or more
electronic keys in the vehicle and the
ignition was on once, the doors will be
locked even if just one electronic key
is taken out of the vehicle.
Unlocking and opening the tailgate
The tailgate and the doors can be
unlocked by pressing the button
under the tailgate moulding when the electronic key is in range.Operation with buttons on the
electronic key
The central locking system can also
be operated with the buttons on the
electronic key.
Press c to unlock.
Press e to lock.
Remote control operation 3 24.
Passive locking
Automatic locking 3 28.
Page 29 of 251
Keys, doors and windows27Confirmation
Operation of central locking system is
confirmed by the hazard warning
flashers. A precondition is that the
setting is activated in the vehicle
personalisation 3 106.
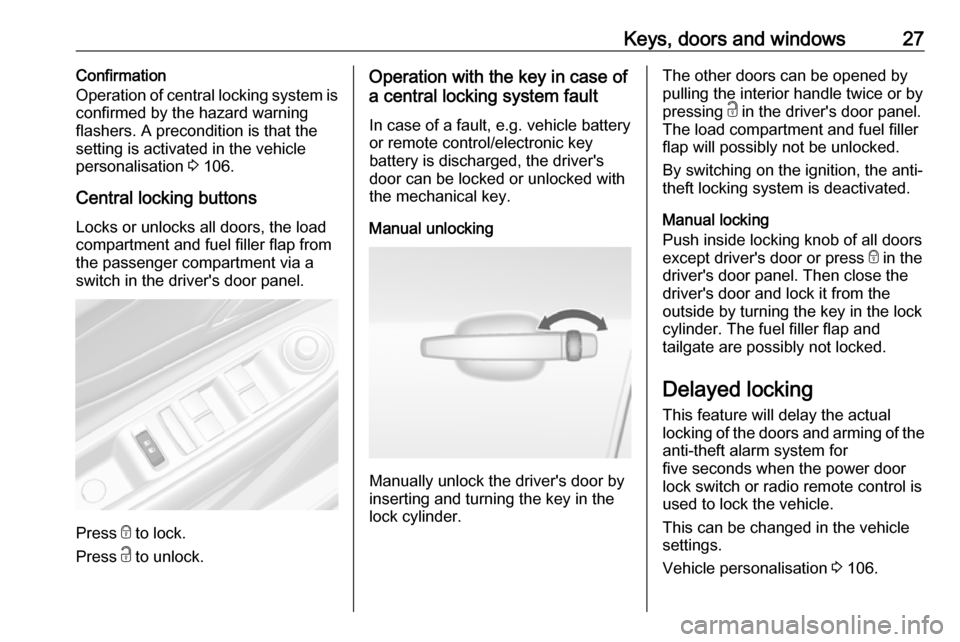
Central locking buttons
Locks or unlocks all doors, the load
compartment and fuel filler flap from
the passenger compartment via a
switch in the driver's door panel.
Press e to lock.
Press c to unlock.
Operation with the key in case of
a central locking system fault
In case of a fault, e.g. vehicle battery
or remote control/electronic key
battery is discharged, the driver's
door can be locked or unlocked with
the mechanical key.
Manual unlocking
Manually unlock the driver's door by
inserting and turning the key in the
lock cylinder.
The other doors can be opened by
pulling the interior handle twice or by
pressing c in the driver's door panel.
The load compartment and fuel filler
flap will possibly not be unlocked.
By switching on the ignition, the anti-
theft locking system is deactivated.
Manual locking
Push inside locking knob of all doors
except driver's door or press e in the
driver's door panel. Then close the driver's door and lock it from the
outside by turning the key in the lock
cylinder. The fuel filler flap and
tailgate are possibly not locked.
Delayed locking
This feature will delay the actual
locking of the doors and arming of the
anti-theft alarm system for
five seconds when the power door
lock switch or radio remote control is
used to lock the vehicle.
This can be changed in the vehicle
settings.
Vehicle personalisation 3 106.
Page 30 of 251

28Keys, doors and windowsON: When pressing the central
locking button, three chimes will
sound to signal delayed locking is
activated.
The doors will not lock until
five seconds after the last door is
closed. You can temporarily override
delayed locking by pressing the
central locking button or the locking
button on the radio remote control.
OFF : The doors will lock immediately
when pressing the power lock switch
or e on the radio remote control.
Automatic locking Automatic locking after driving off
This security feature can be
configured to automatically lock all
doors, load compartment and fuel
filler flap after driving off and
exceeding a certain speed.
When at a standstill after driving, the
vehicle will be unlocked automatically
as soon as the key is removed from
the ignition switch, or with electronic
key system when the ignition is
switched off.Activation or deactivation of
automatic locking can be set in the
settings menu in the Info-Display.
Info-Display 3 102.
Vehicle personalisation 3 106.
The setting can be saved for the remote control or electronic key being used 3 24.
Automatic relock after unlocking
This feature can be configured to
automatically lock all doors, load
compartment and fuel filler flap a
short time after unlocking with the
remote control or electronic key,
provided no door has been opened.
Activation or deactivation of
automatic relock can be set in the
settings menu in the Info-Display.
Info-Display 3 102.
Vehicle personalisation 3 106.
The setting can be saved for the
remote control or electronic key being used 3 24.Passive locking
On vehicles with electronic key
system, this feature locks the vehicle
automatically after several seconds if an electronic key has been
recognised previously inside the
vehicle, all doors have then been
closed and the electronic key does
not remain within the vehicle.
If the electronic key remains in the
vehicle or the ignition is still on,
passive locking will not be permitted.
If there have been two or more
electronic keys in the vehicle and the
ignition was on once, the feature
locks the vehicle if just one electronic key is taken out of the vehicle.
Passive locking can be disabled by
pressing c for a few seconds while
one door is open. It remains disabled
until e is pressed or the ignition is
switched on.
Activation or deactivation of passive
locking can be set in the settings
menu in the Info-Display.
Info-Display 3 102.
Vehicle personalisation 3 106.
Page 78 of 251

76Storageluggage (7 kg) and all fluids (fuel
tank 90% full).
Optional equipment and
accessories increase the kerb
weight.
● Driving with a roof load increases
the sensitivity of the vehicle to
cross-winds and has a
detrimental effect on vehicle
handling due to the vehicle’s
higher centre of gravity.
Distribute the load evenly and
secure it properly with retaining
straps. Adjust the tyre pressure
and vehicle speed according to
the load conditions. Check and
retighten the straps frequently.
Do not drive faster than
120 km/h.
● The permissible roof load is 75 kg. The roof load is the
combined weight of the roof rack
and the load.
Page 79 of 251

Instruments and controls77Instruments and
controlsControls ....................................... 78
Steering wheel adjustment ........78
Steering wheel controls .............78
Heated steering wheel ...............78
Horn ........................................... 79
Windscreen wiper/washer .........79
Rear window wiper/washer .......81
Outside temperature ..................81
Clock ......................................... 82
Power outlets ............................. 84
Warning lights, gauges and indi‐
cators ........................................... 85
Speedometer ............................. 85
Odometer .................................. 85
Trip odometer ............................ 85
Tachometer ............................... 86
Fuel gauge ................................ 86
Fuel selector .............................. 87
Engine coolant temperature gauge ....................................... 88
Service display .......................... 88
Control indicators ......................89
Turn signal ................................. 92
Seat belt reminder .....................93Airbag and belt tensioners .........93
Airbag deactivation ....................94
Charging system .......................94
Malfunction indicator light ..........94
Brake and clutch system ...........94
Antilock brake system (ABS) .....94
Gear shifting .............................. 95
Descent control system .............95
Lane departure warning ............95
Electronic Stability Control off ...95
Electronic Stability Control and Traction Control system ...........95
Traction Control system off .......95
Preheating ................................. 95
Tyre pressure monitoring system ...................................... 96
Engine oil pressure ....................96
Low fuel ..................................... 96
Immobiliser ................................ 96
Exterior light .............................. 97
High beam ................................. 97
High beam assist .......................97
Adaptive forward lighting ...........97
Fog light ..................................... 97
Rear fog light ............................. 97
Cruise control ............................ 97
Vehicle detected ahead .............97
Speed limiter ............................. 97
Traffic sign assistant ..................98
Door open .................................. 98Information displays.....................98
Driver Information Centre ..........98
Info display .............................. 102
Vehicle messages ......................104
Warning chimes .......................105
Battery voltage ........................ 105
Vehicle personalisation ..............106
Telematics service .....................110
OnStar ..................................... 110
ERA GLONASS .......................114
Page 88 of 251
86Instruments and controlsUplevel instrument cluster
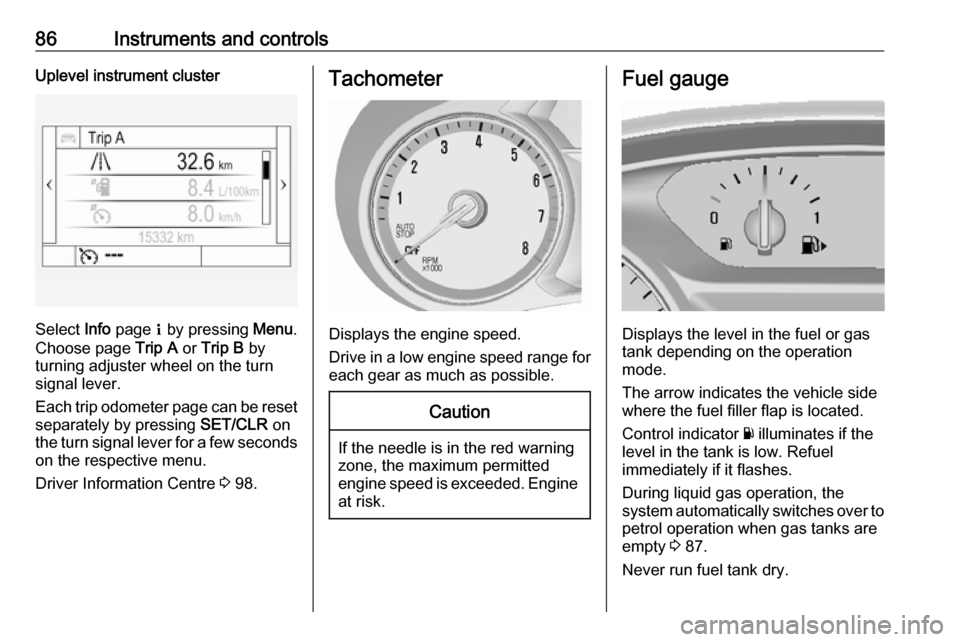
Select Info page Q by pressing Menu.
Choose page Trip A or Trip B by
turning adjuster wheel on the turn
signal lever.
Each trip odometer page can be reset separately by pressing SET/CLR on
the turn signal lever for a few seconds
on the respective menu.
Driver Information Centre 3 98.
Tachometer
Displays the engine speed.
Drive in a low engine speed range for each gear as much as possible.
Caution
If the needle is in the red warning
zone, the maximum permitted
engine speed is exceeded. Engine at risk.
Fuel gauge
Displays the level in the fuel or gas
tank depending on the operation mode.
The arrow indicates the vehicle side
where the fuel filler flap is located.
Control indicator Y illuminates if the
level in the tank is low. Refuel
immediately if it flashes.
During liquid gas operation, the
system automatically switches over to
petrol operation when gas tanks are
empty 3 87.
Never run fuel tank dry.
Page 89 of 251
Instruments and controls87Because of the fuel remaining in the
tank, the top-up quantity may be less
than the specified tank capacity.
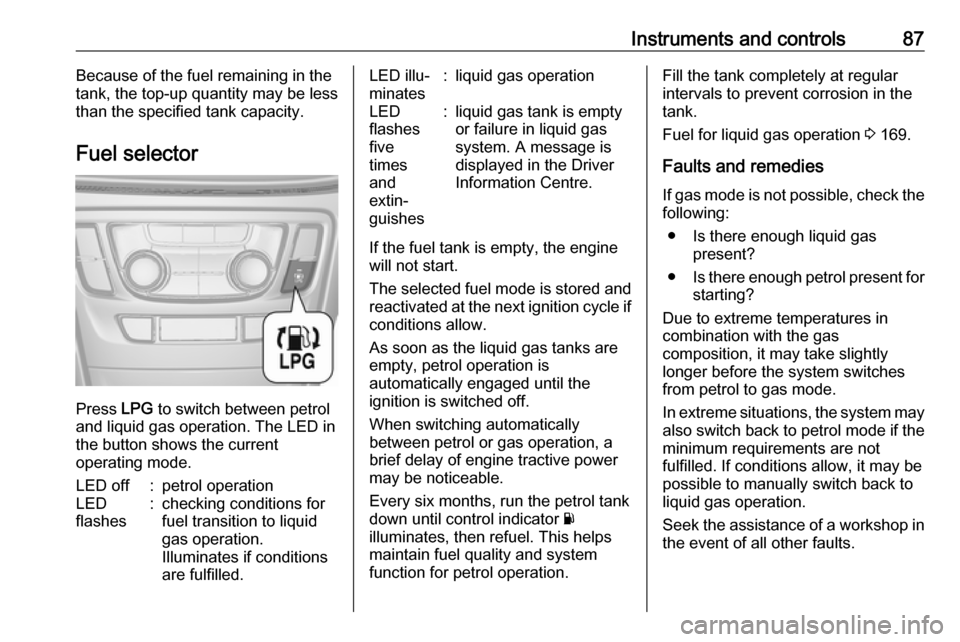
Fuel selector
Press LPG to switch between petrol
and liquid gas operation. The LED in
the button shows the current
operating mode.
LED off:petrol operationLED
flashes:checking conditions for
fuel transition to liquid
gas operation.
Illuminates if conditions
are fulfilled.LED illu‐
minates:liquid gas operationLED
flashes
five
times
and
extin‐
guishes:liquid gas tank is empty
or failure in liquid gas
system. A message is
displayed in the Driver
Information Centre.
If the fuel tank is empty, the engine
will not start.
The selected fuel mode is stored and reactivated at the next ignition cycle if
conditions allow.
As soon as the liquid gas tanks are
empty, petrol operation is
automatically engaged until the
ignition is switched off.
When switching automatically
between petrol or gas operation, a
brief delay of engine tractive power
may be noticeable.
Every six months, run the petrol tank
down until control indicator Y
illuminates, then refuel. This helps
maintain fuel quality and system
function for petrol operation.
Fill the tank completely at regular
intervals to prevent corrosion in the
tank.
Fuel for liquid gas operation 3 169.
Faults and remedies
If gas mode is not possible, check the following:
● Is there enough liquid gas present?
● Is there enough petrol present for
starting?
Due to extreme temperatures in
combination with the gas
composition, it may take slightly
longer before the system switches
from petrol to gas mode.
In extreme situations, the system may
also switch back to petrol mode if the minimum requirements are not
fulfilled. If conditions allow, it may be possible to manually switch back to
liquid gas operation.
Seek the assistance of a workshop in
the event of all other faults.