display OPEL MOKKA X 2019.5 Manual user
[x] Cancel search | Manufacturer: OPEL, Model Year: 2019.5, Model line: MOKKA X, Model: OPEL MOKKA X 2019.5Pages: 247, PDF Size: 6.86 MB
Page 143 of 247

Driving and operating1412. Close all doors to avoid ammoniafumes entering the interior of the
vehicle.
3. Release the fuel filler flap by pushing the flap 3 167.
4. Unscrew protective cap from the
filler neck.
5. Open AdBlue canister.
6. Mount one end of the hose on the
canister and screw the other end
on the filler neck.
7. Lift the canister until it is empty, or
until the flow from the canister has stopped. This can take up to
5 minutes.
8. Place the canister on the ground to empty the hose, wait
15 seconds.
9. Unscrew the hose from the filler neck.
10. Mount the protective cap and turn
clockwise until it engages.
Note
Dispose of AdBlue canister
according to environmental
requirements. To reuse the hose
flush it with clear water after usage.Automatic transmission
The automatic transmission permits
automatic gearshifting (automatic
mode) or manual gearshifting
(manual mode).
Transmission display
The mode or selected gear is shown
in the Driver Information Centre.
In automatic mode, the driving
programme is indicated by D.
In manual mode, M and the number
of the selected gear is indicated.
R indicates reverse gear.
Page 145 of 247
![OPEL MOKKA X 2019.5 Manual user Driving and operating143Manual mode
Move selector lever to position M.
Press button on the selector lever:
<:shift to a higher gear]:shift to a lower gear
If a higher gear is selected when
vehicle spe OPEL MOKKA X 2019.5 Manual user Driving and operating143Manual mode
Move selector lever to position M.
Press button on the selector lever:
<:shift to a higher gear]:shift to a lower gear
If a higher gear is selected when
vehicle spe](/img/37/18898/w960_18898-144.png)
Driving and operating143Manual mode
Move selector lever to position M.
Press button on the selector lever:
<:shift to a higher gear]:shift to a lower gear
If a higher gear is selected when
vehicle speed is too low, or a lower
gear when vehicle speed is too high,
the shift is not executed. This can
cause a message in the Driver
Information Centre.
In manual mode no automatic shifting to a higher gear takes place at high
engine revolutions.
Gear shift indication
The symbol R with a number beside
it is indicated when gearshifting is
recommended for fuel saving
reasons.
Shift indication appears only in
manual mode.
Electronic driving programmes
Special programmes automatically
adapt the shifting points when driving up inclines or down hills.
Automatic transmission
adaptation feature
This feature adapts transmission
operation during constant driving or
gear shifting. It increases durability
and keeps best shift quality over the
life cycle. You may perceive shifting
at initial mileage as uncomfortable,
but this is normal. Shift quality will be
improved gradually by constant
driving at each gear and gear shifting.Kickdown
Pressing down the accelerator pedal
beyond the kickdown detent will lead to maximum acceleration
independent of selected driving
mode. The transmission shifts to a lower gear depending on enginespeed.
Fault
In the event of a fault, a vehicle
message is displayed in the Driver
Information Centre. Vehicle
messages 3 104.
The transmission no longer shifts
automatically. Continued travel is possible with manual shifting.
Only the highest gear is available.
Depending on the fault, second gear
may also be available in manual
mode. Shift only when vehicle is at a
standstill.
Have the cause of the fault remedied
by a workshop.
Page 147 of 247

Driving and operating145Caution
It is not advisable to drive with thehand resting on the selector lever.
Gear shift indication 3 94.
Stop-start system 3 134.
Drive systems
All-wheel drive
The All-Wheel Drive (AWD) system
enhances driving characteristics and
stability, and helps to achieve the best
possible driveability regardless of
ground surface. The system is always
active and cannot be deactivated.
The torque is distributed steplessly
between the wheels of the front and rear axle, depending on the driving
conditions. Additionally the torque
between the rear wheels is distributed depending on the surface.
For optimum system performance,
the vehicle's tyres should not have
varying degrees of wear.
When using a temporary spare
wheel, the AWD system is
automatically disabled.
The AWD system will also be
temporarily disabled to protect the
system from overheating if there is
excessive wheel spin. When the
system cools down, AWD will be
restored.The deactivation of the AWD system
will be indicated by a message on the
Driver Information Centre.
If a service message or warning
code S73 is displayed on the Driver
Information Centre, there is a
malfunction in the AWD system. Seek
the assistance of a workshop.
Vehicle messages 3 104.
Towing the vehicle 3 211.
Page 153 of 247

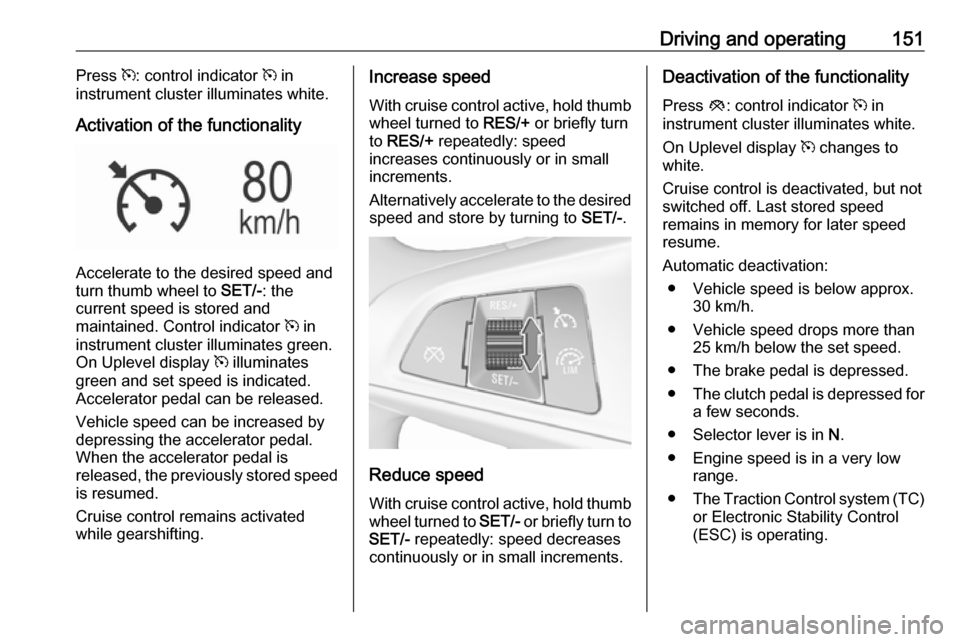
Driving and operating151Press m: control indicator m in
instrument cluster illuminates white.
Activation of the functionality
Accelerate to the desired speed and
turn thumb wheel to SET/-: the
current speed is stored and
maintained. Control indicator m in
instrument cluster illuminates green.
On Uplevel display m illuminates
green and set speed is indicated.
Accelerator pedal can be released.
Vehicle speed can be increased by depressing the accelerator pedal.
When the accelerator pedal is
released, the previously stored speed
is resumed.
Cruise control remains activated
while gearshifting.
Increase speed
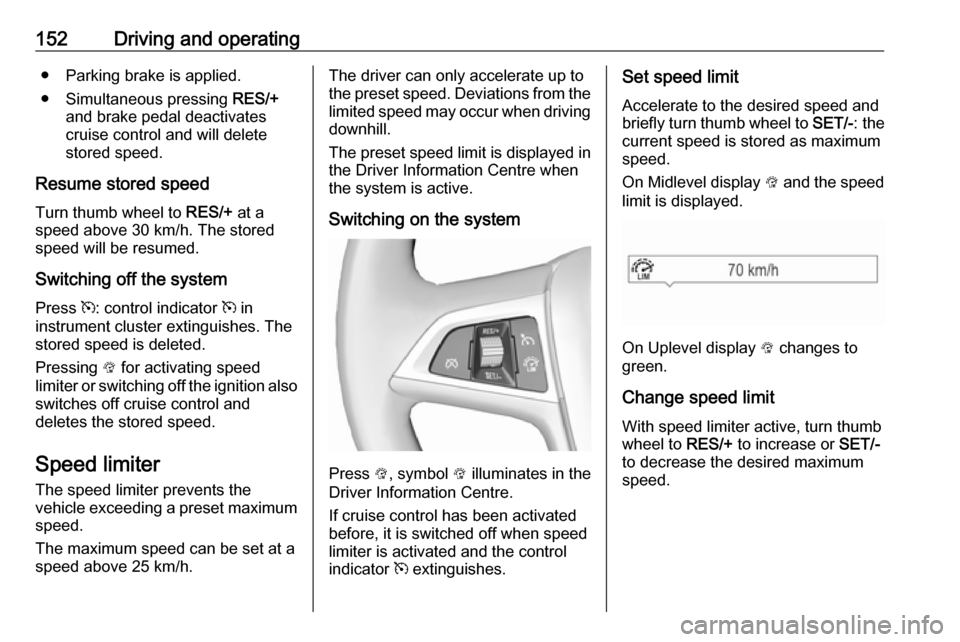
With cruise control active, hold thumb
wheel turned to RES/+ or briefly turn
to RES/+ repeatedly: speed
increases continuously or in small
increments.
Alternatively accelerate to the desired speed and store by turning to SET/-.
Reduce speed
With cruise control active, hold thumb
wheel turned to SET/- or briefly turn to
SET/- repeatedly: speed decreases
continuously or in small increments.
Deactivation of the functionality
Press y: control indicator m in
instrument cluster illuminates white.
On Uplevel display m changes to
white.
Cruise control is deactivated, but not
switched off. Last stored speed
remains in memory for later speed
resume.
Automatic deactivation: ● Vehicle speed is below approx. 30 km/h.
● Vehicle speed drops more than 25 km/h below the set speed.
● The brake pedal is depressed.
● The clutch pedal is depressed for
a few seconds.
● Selector lever is in N.
● Engine speed is in a very low range.
● The Traction Control system (TC)
or Electronic Stability Control
(ESC) is operating.
Page 154 of 247

152Driving and operating● Parking brake is applied.
● Simultaneous pressing RES/+
and brake pedal deactivates
cruise control and will delete stored speed.
Resume stored speed
Turn thumb wheel to RES/+ at a
speed above 30 km/h. The stored
speed will be resumed.
Switching off the system
Press m: control indicator m in
instrument cluster extinguishes. The
stored speed is deleted.
Pressing L for activating speed
limiter or switching off the ignition also
switches off cruise control and
deletes the stored speed.
Speed limiter
The speed limiter prevents the
vehicle exceeding a preset maximum speed.
The maximum speed can be set at a
speed above 25 km/h.The driver can only accelerate up to
the preset speed. Deviations from the
limited speed may occur when driving
downhill.
The preset speed limit is displayed in
the Driver Information Centre when
the system is active.
Switching on the system
Press L, symbol L illuminates in the
Driver Information Centre.
If cruise control has been activated
before, it is switched off when speed
limiter is activated and the control
indicator m extinguishes.
Set speed limit
Accelerate to the desired speed and
briefly turn thumb wheel to SET/-: the
current speed is stored as maximum speed.
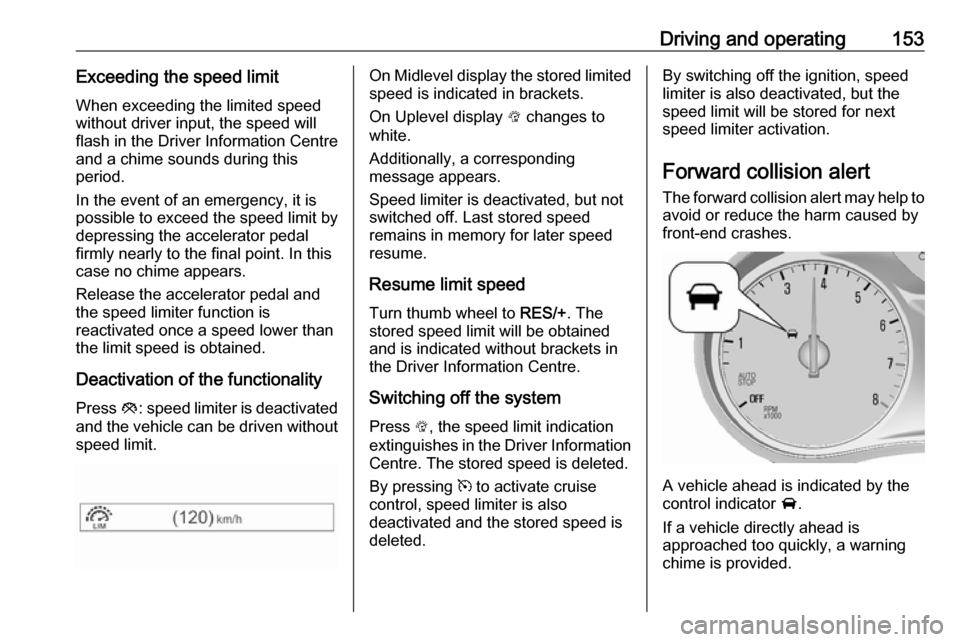
On Midlevel display L and the speed
limit is displayed.
On Uplevel display L changes to
green.
Change speed limit With speed limiter active, turn thumb
wheel to RES/+ to increase or SET/-
to decrease the desired maximum
speed.
Page 155 of 247

Driving and operating153Exceeding the speed limit
When exceeding the limited speed
without driver input, the speed will
flash in the Driver Information Centre
and a chime sounds during this
period.
In the event of an emergency, it is possible to exceed the speed limit by
depressing the accelerator pedal
firmly nearly to the final point. In this
case no chime appears.
Release the accelerator pedal and
the speed limiter function is
reactivated once a speed lower than
the limit speed is obtained.
Deactivation of the functionality
Press y: speed limiter is deactivated
and the vehicle can be driven without
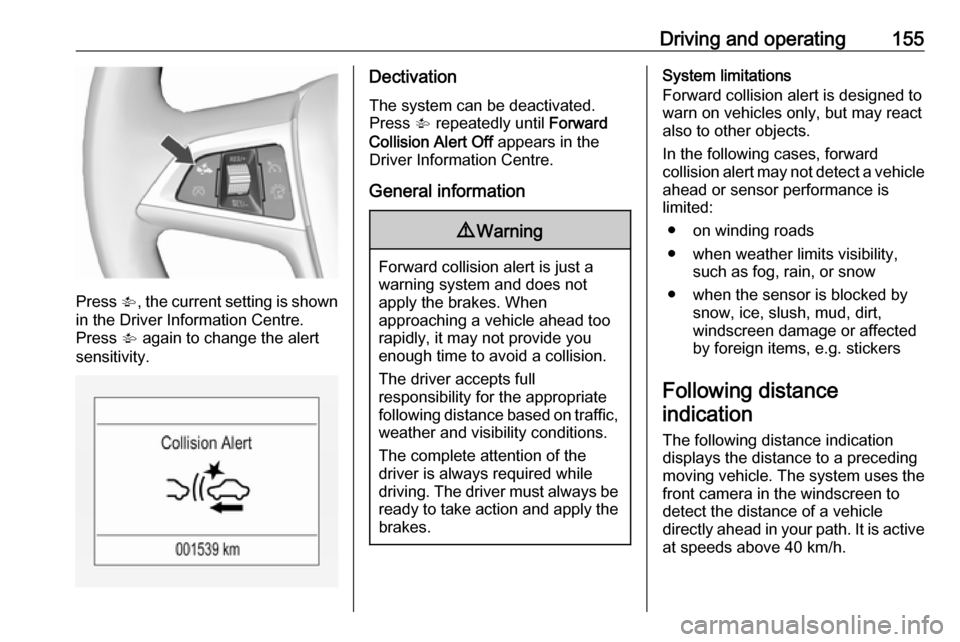
speed limit.On Midlevel display the stored limited
speed is indicated in brackets.
On Uplevel display L changes to
white.
Additionally, a corresponding
message appears.
Speed limiter is deactivated, but not
switched off. Last stored speed
remains in memory for later speed
resume.
Resume limit speed Turn thumb wheel to RES/+. The
stored speed limit will be obtained
and is indicated without brackets in the Driver Information Centre.
Switching off the system
Press L, the speed limit indication
extinguishes in the Driver Information Centre. The stored speed is deleted.
By pressing m to activate cruise
control, speed limiter is also
deactivated and the stored speed is
deleted.By switching off the ignition, speed
limiter is also deactivated, but the
speed limit will be stored for next
speed limiter activation.
Forward collision alert
The forward collision alert may help to avoid or reduce the harm caused by
front-end crashes.
A vehicle ahead is indicated by the
control indicator A.
If a vehicle directly ahead is
approached too quickly, a warning
chime is provided.
Page 157 of 247

Driving and operating155
Press V, the current setting is shown
in the Driver Information Centre.
Press V again to change the alert
sensitivity.
Dectivation
The system can be deactivated.
Press V repeatedly until Forward
Collision Alert Off appears in the
Driver Information Centre.
General information9 Warning
Forward collision alert is just a
warning system and does not
apply the brakes. When
approaching a vehicle ahead too
rapidly, it may not provide you
enough time to avoid a collision.
The driver accepts full
responsibility for the appropriate
following distance based on traffic, weather and visibility conditions.
The complete attention of the
driver is always required while
driving. The driver must always be
ready to take action and apply the
brakes.
System limitations
Forward collision alert is designed to warn on vehicles only, but may reactalso to other objects.
In the following cases, forward
collision alert may not detect a vehicle ahead or sensor performance is
limited:
● on winding roads
● when weather limits visibility, such as fog, rain, or snow
● when the sensor is blocked by snow, ice, slush, mud, dirt,
windscreen damage or affected
by foreign items, e.g. stickers
Following distance indication
The following distance indication
displays the distance to a preceding
moving vehicle. The system uses the
front camera in the windscreen to
detect the distance of a vehicle
directly ahead in your path. It is active
at speeds above 40 km/h.
Page 158 of 247

156Driving and operatingWhen a preceding vehicle is detected
ahead, the distance is indicated in
seconds, displayed on a page in the
Driver Information Centre 3 97 . Press
MENU on the turn signal lever to
select Vehicle Information
Menu ? and turn the adjuster
wheel to choose following distance
indication page.
The minimum indicated distance is
0.5 s.
If there is no vehicle ahead or the vehicle ahead is out of range, two
dashes will be displayed: -.- s.
Parking assist
The parking assist makes parking
easier by measuring the distance between the vehicle and obstacles,
and giving acoustic signals. It is the
driver, however, who bears full
responsibility for the parking
manoeuvre.
The system consists of four ultrasonic parking sensors in the rear bumper. If
the vehicle is equipped with a front
parking assist the system consists of
four additional ultrasonic parking
sensors in the front bumper.
Activation
After ignition is switched on, the rear
parking assist is activated.
The front parking assist can also be activated at a low speed by pressing
r .
An illuminated LED in the parking
assist button indicates that the
system is ready to operate.
An obstacle is indicated by a buzzing
sound. The interval between the sounds becomes shorter as the
vehicle gets closer to the obstacle.
When the distance is less than
30 cm, the buzzing is continuous.
Page 159 of 247

Driving and operating157If r is pressed once within an
ignition cycle, the front parking assist
is reactivated if the vehicle speed
goes below a certain value and if the
vehicle speed has not exceeded
25 km/h beforehand.
Deactivation
Deactivate the system by pressing r .
The LED in the button will go out and
a message will be displayed in the
Driver Information Centre.
If the parking assist is deactivated manually, it will be reactivated
automatically the next time the
ignition is switched on.
The system is deactivated
automatically at a certain speed.
Fault
In the event of a fault in the system, a vehicle message is displayed in theDriver Information Centre.
Additionally, a vehicle message is
displayed in the Driver Information
Centre if a malfunction of the system
due to temporary conditions, e.g.
snow covered sensors is detected.Vehicle messages 3 104.
Important hints for using the
parking assist systems9 Warning
Under certain circumstances,
various reflective surfaces on
objects or clothing as well as
external noise sources may cause the system to fail to detect
obstacles.
Special attention has to be paid to
low obstacles which can damage
the lower part of the bumper. If
such obstacles leave the detection area of the sensors during
approach of the vehicle, a
continuous warning tone will
sound.
Caution
Performance of the system can be reduced when sensors are
covered, e.g. by ice or snow.
Performance of the parking assist
system can be reduced due to
heavy loading.
Special conditions apply if there
are taller vehicles in the vicinity
(e.g. off-road vehicles, mini vans,
vans). Object identification and correct distance indication in the
upper part of these vehicles
cannot be guaranteed.
Objects with a very small reflection
cross-section, e.g. objects of
narrow size or soft materials, may
not be detected by the system.
Parking assist systems do not
detect objects outside the
detection range.
Note
The parking assist system
automatically detects factory-fitted
towing equipment. It is deactivated
when the connector is plugged in.
The sensor may detect a non-
existent object (echo disturbance)
caused by external acoustic or
mechanical disturbances.
Page 160 of 247

158Driving and operatingNote
The parking assist is deactivated
when the rear carrier system is
extended.
Rear view camera
The rear view camera assists the
driver when reversing by displaying a view of the area behind the vehicle.
The view of the camera is displayed
in the Info Display.9 Warning
The rear view camera does not
replace driver vision. Note that
objects that are outside the
camera's field of view and the
parking assist sensors, e.g. below
the bumper or underneath the
vehicle, are not displayed.
Do not reverse or park the vehicle
using only the rear view camera.
Always check the surrounding of
the vehicle before driving.
Activation
Rear view camera is automatically
activated when reverse gear is
engaged.
Functionality
The camera is mounted in the tailgate handle and has a viewing angle of
130°.
Due to the high position of the
camera, the rear bumper can be seen
on the display as a guide to position.
The area displayed by the camera is
limited. The distance of the image that
appears on the display differs from
the actual distance.
Guiding lines
Dynamic guiding lines are horizontal
lines at 1 m intervals projected on the
picture to define the distance to
displayed objects.