buttons OPEL MOKKA X 2019.5 Manual user
[x] Cancel search | Manufacturer: OPEL, Model Year: 2019.5, Model line: MOKKA X, Model: OPEL MOKKA X 2019.5Pages: 247, PDF Size: 6.86 MB
Page 13 of 247

In brief111Central locking system ..........25
2 Power windows .....................35
3 Exterior mirrors .....................33
4 Light switch ......................... 111
5 Cruise control ...................... 150
Speed limiter ....................... 152
Forward collision alert .........153
6 Side air vents ...................... 126
7 Turn lights ........................... 118
Headlight flash ....................113
Low beam and high beam ..112
Buttons for Driver
Information Centre ................97
8 Instruments ........................... 84
9 Steering wheel controls .......77
10 Windscreen wiper,
windscreen washer system ...78
Rear window wiper, rear
window washer system .........80
11 Centre air vents ................... 126
12 Anti-theft alarm system
status LED ........................... 31
13 Info Display ........................ 10214Controls for Info Display
operation ............................. 102
15 Glovebox .............................. 59
16 Descent control system ......... 94
Fuel selector ......................... 86
Stop-start system ................134
17 Climate control system ........ 122
18 Electronic Stability Control
(ESC) .................................. 148
19 Control indicator for airbag
deactivation .......................... 93
20 Front storage ......................... 60
Power outlet .......................... 83
USB port, AUX input
21 Selector lever, manual
transmission ....................... 144
Selector lever, automatic
transmission ....................... 141
22 Parking brake ......................146
23 Hazard warning flashers ....117
24 Parking assist ..................... 156
Lane departure warning ......16325Ignition switch with
steering wheel lock ............130
Power button ....................... 131
26 Horn ..................................... 78
Driver airbag ........................ 50
27 Steering wheel adjustment ..77
28 Bonnet release lever ..........177
29 Front storage ......................... 60
Fuse box ............................ 190
Page 24 of 247
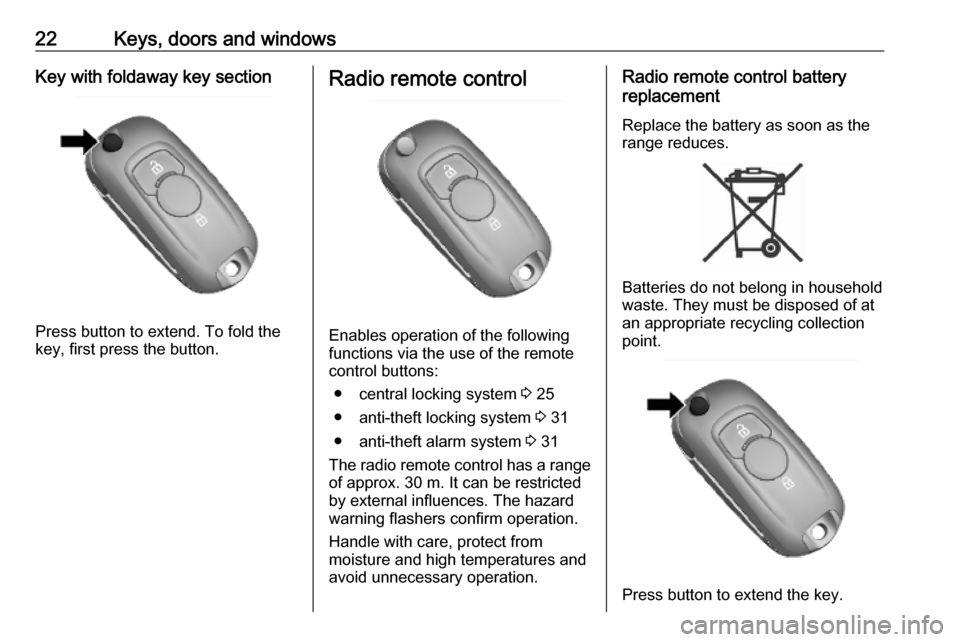
22Keys, doors and windowsKey with foldaway key section
Press button to extend. To fold the
key, first press the button.
Radio remote control
Enables operation of the following
functions via the use of the remote control buttons:
● central locking system 3 25
● anti-theft locking system 3 31
● anti-theft alarm system 3 31
The radio remote control has a range of approx. 30 m. It can be restricted
by external influences. The hazard
warning flashers confirm operation.
Handle with care, protect from
moisture and high temperatures and
avoid unnecessary operation.
Radio remote control battery
replacement
Replace the battery as soon as the
range reduces.
Batteries do not belong in household
waste. They must be disposed of at
an appropriate recycling collection
point.
Press button to extend the key.
Page 29 of 247
Keys, doors and windows27once. To unlock all doors and
load compartment, press button
twice.
The setting can be changed in the
settings menu in the Info Display.
Vehicle personalisation 3 106.
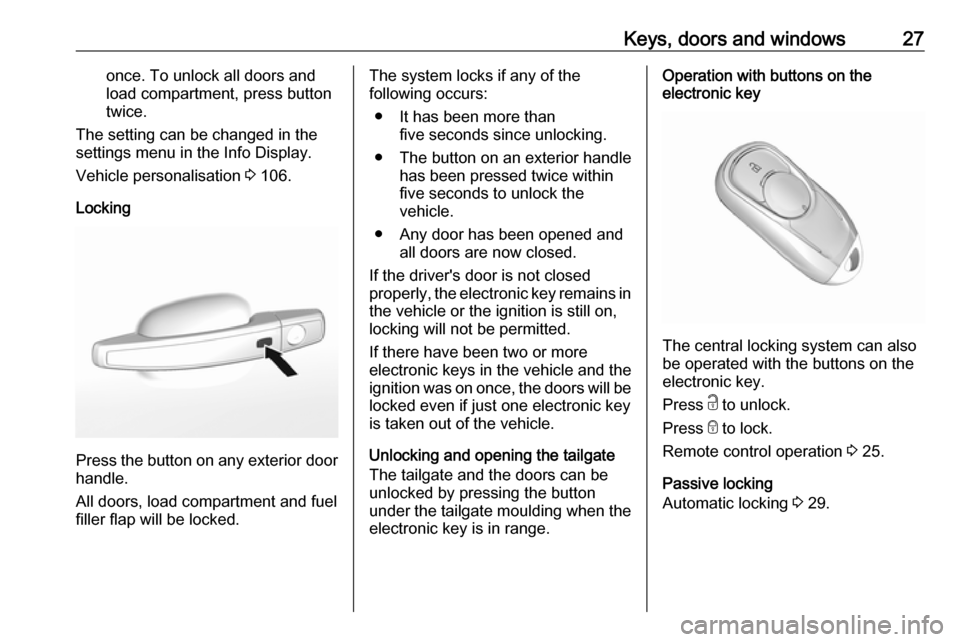
Locking
Press the button on any exterior door
handle.
All doors, load compartment and fuel
filler flap will be locked.
The system locks if any of the
following occurs:
● It has been more than five seconds since unlocking.
● The button on an exterior handle has been pressed twice within
five seconds to unlock the
vehicle.
● Any door has been opened and all doors are now closed.
If the driver's door is not closed
properly, the electronic key remains in the vehicle or the ignition is still on,
locking will not be permitted.
If there have been two or more
electronic keys in the vehicle and the
ignition was on once, the doors will be
locked even if just one electronic key
is taken out of the vehicle.
Unlocking and opening the tailgate
The tailgate and the doors can be
unlocked by pressing the button
under the tailgate moulding when the electronic key is in range.Operation with buttons on the
electronic key
The central locking system can also
be operated with the buttons on the
electronic key.
Press c to unlock.
Press e to lock.
Remote control operation 3 25.
Passive locking
Automatic locking 3 29.
Page 30 of 247
28Keys, doors and windowsConfirmation
Operation of central locking system is confirmed by the hazard warning
flashers. A precondition is that the
setting is activated in the vehicle
personalisation 3 106.
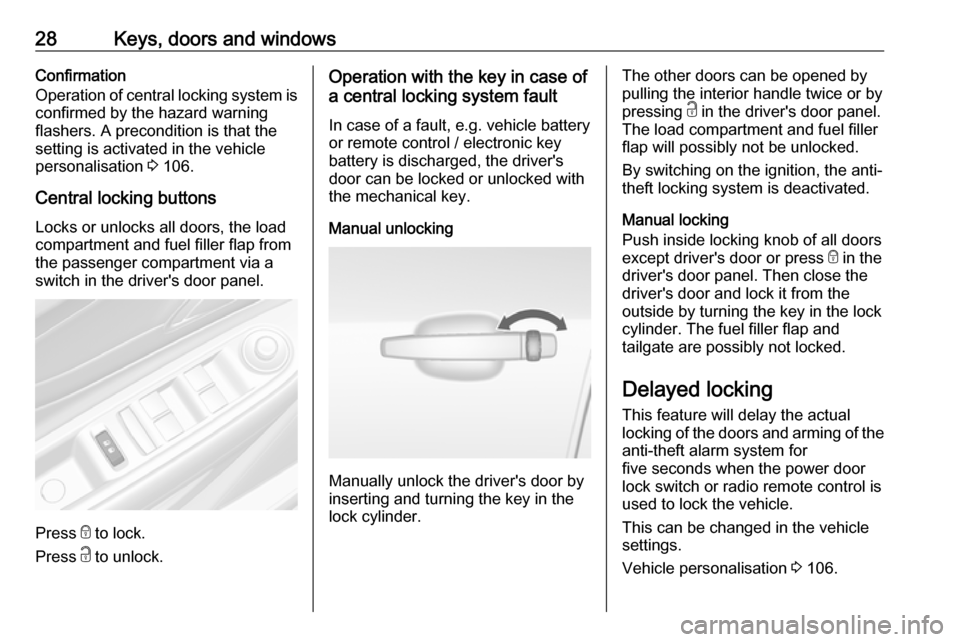
Central locking buttons Locks or unlocks all doors, the load
compartment and fuel filler flap from
the passenger compartment via a
switch in the driver's door panel.
Press e to lock.
Press c to unlock.
Operation with the key in case of
a central locking system fault
In case of a fault, e.g. vehicle battery
or remote control / electronic key
battery is discharged, the driver's
door can be locked or unlocked with
the mechanical key.
Manual unlocking
Manually unlock the driver's door by
inserting and turning the key in the
lock cylinder.
The other doors can be opened by
pulling the interior handle twice or by
pressing c in the driver's door panel.
The load compartment and fuel filler
flap will possibly not be unlocked.
By switching on the ignition, the anti-
theft locking system is deactivated.
Manual locking
Push inside locking knob of all doors
except driver's door or press e in the
driver's door panel. Then close the driver's door and lock it from the
outside by turning the key in the lock
cylinder. The fuel filler flap and
tailgate are possibly not locked.
Delayed locking
This feature will delay the actual
locking of the doors and arming of the
anti-theft alarm system for
five seconds when the power door
lock switch or radio remote control is
used to lock the vehicle.
This can be changed in the vehicle
settings.
Vehicle personalisation 3 106.
Page 83 of 247

Instruments and controls81If outside temperature drops to
0.5 °C, a warning message is
displayed in the Driver Information
Centre.9 Warning
The road surface may already be
icy even though the display
indicates a few degrees above
0 °C.
Clock
Date and time are shown in the
Info Display.
Info Display 3 102.
Graphic Info Display
Press MENU to open the respective
audio menu.
Select Time and Date .
Set Time
Select Set Time to enter the
respective submenu.
Select Auto Set at the bottom of the
screen. Activate either On - RDS or
Off (Manual) .
If Off (Manual) is selected, adjust
hours and minutes.
Repeatedly select 12-24 HR at the
bottom of the screen to choose a time mode.
If the 12-hour mode is selected, a
third column for AM and PM selection
is displayed. Select the desired
option.
Set Date
Select Set Date to enter the
respective submenu.
Select Auto Set at the bottom of the
screen. Activate either On - RDS or
Off (Manual) .
If Off (Manual) is selected, adjust the
date settings.
7'' Colour Info Display
Press ; and then select Settings.Select Time and Date to display the
respective submenu.
Set Time Format
To select the desired time format,
touch the screen buttons 12 h or 24 h .
Set Date Format
To select the desired date format,
select Set Date Format and choose
between the available options in the
submenu.
Auto Set
To choose whether time and date are
to be set automatically or manually,
select Auto Set .
Page 100 of 247

98Instruments and controlsMidlevel display
Selecting menus and functions
The menus and functions can be
selected via the buttons on the turn signal lever.
Press MENU to switch between the
main menus or to return from a
submenu to the next higher menu
level.
Turn the adjuster wheel to select a
submenu of the main menu or to set
a numeric value.
Press SET/CLR to select and confirm
a function.
Vehicle and service messages are
popped up in the Driver Information
Centre if required. Confirm messages
by pressing SET/CLR.
Vehicle messages 3 104.
Main menu
Main menus are:
● Trip / fuel information, displayed by ; , see description below.
● Vehicle information, displayed by ? , see description below.
● Eco information, displayed by @ , see description below.
Some of the displayed functions differ when the vehicle is being driven or at
a standstill and some functions are
only active when the vehicle is being
driven.
Uplevel display
Page 101 of 247
Instruments and controls99Selecting menus and functions
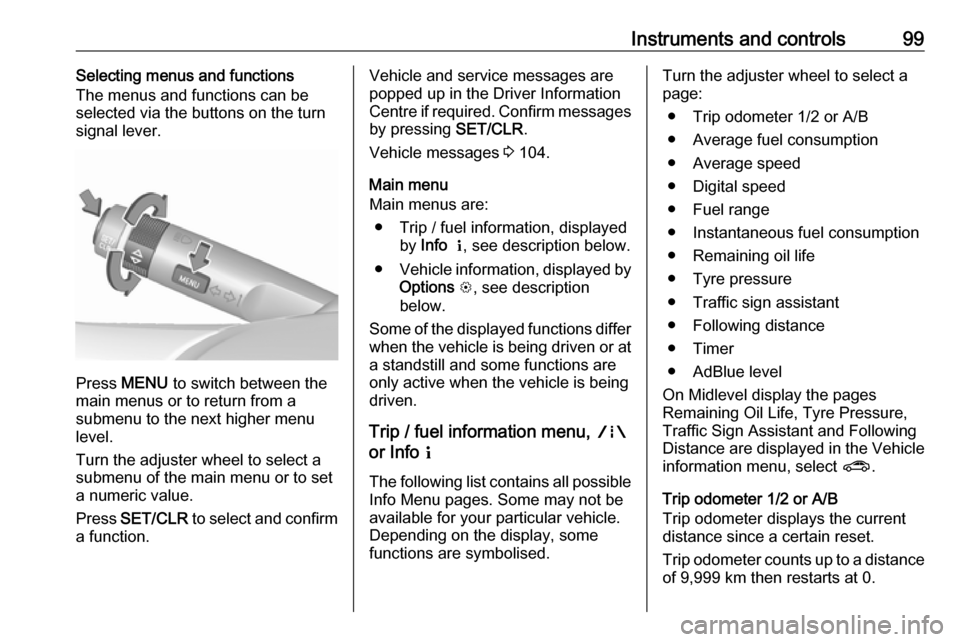
The menus and functions can be
selected via the buttons on the turn signal lever.
Press MENU to switch between the
main menus or to return from a
submenu to the next higher menu
level.
Turn the adjuster wheel to select a
submenu of the main menu or to set
a numeric value.
Press SET/CLR to select and confirm
a function.
Vehicle and service messages are
popped up in the Driver Information
Centre if required. Confirm messages
by pressing SET/CLR.
Vehicle messages 3 104.
Main menu
Main menus are:
● Trip / fuel information, displayed by Info Q , see description below.
● Vehicle information, displayed by
Options L, see description
below.
Some of the displayed functions differ when the vehicle is being driven or at
a standstill and some functions are
only active when the vehicle is being
driven.
Trip / fuel information menu, ;
or Info Q
The following list contains all possible Info Menu pages. Some may not be
available for your particular vehicle.
Depending on the display, some
functions are symbolised.Turn the adjuster wheel to select a
page:
● Trip odometer 1/2 or A/B
● Average fuel consumption
● Average speed
● Digital speed
● Fuel range
● Instantaneous fuel consumption
● Remaining oil life
● Tyre pressure
● Traffic sign assistant
● Following distance
● Timer
● AdBlue level
On Midlevel display the pages
Remaining Oil Life, Tyre Pressure,
Traffic Sign Assistant and Following
Distance are displayed in the Vehicle information menu, select ?.
Trip odometer 1/2 or A/B
Trip odometer displays the current
distance since a certain reset.
Trip odometer counts up to a distance
of 9,999 km then restarts at 0.
Page 105 of 247

Instruments and controls103Press MENU to select main menu
page.
Turn MENU to select a menu page.
Press MENU to confirm a selection.
Press BACK to exit a menu without
changing a setting.
7'' Colour Info Display
Selecting menus and settings
Menus and settings are accessed via the display.
Press X to switch on the display.
Press ; to display the homepage.
Touch required menu display icon
with the finger.
Touch a respective icon to confirm a
selection.
Touch 9 to return to the next higher
menu level.
Press ; to return to the homepage.
For further information, see Infotainment manual.
Vehicle personalisation 3 106.
8'' Colour Info Display
Selecting menus and settings
There are three options to operate the
display:
● via buttons below the display
● by touching the touchscreen with
the finger
● via speech recognitionButton operation
Press X to switch on the display.
Press ; to display the homepage.
Turn MENU to select a menu display
icon or a function or to scroll a
submenu list.
Press MENU to confirm a selection.
Press BACK to exit a menu without
changing a setting.
Press ; to return to the homepage.
For further information, see
Infotainment manual.
Page 127 of 247

Climate control125Temperature preselection
Temperatures can be set to the
desired value.
If the minimum temperature is set, the climate control system runs at
maximum cooling.
If the maximum temperature is set,
the climate control system runs at
maximum heating.
Note
If the temperature is to be reduced
for climate comfort reasons, an
Autostop may be inhibited or the
engine will restart automatically
when cooling is switched on.
Stop-start system 3 134.
The temperature can be adjusted separately for driver and front
passenger side.
Demisting and defrosting the
windows V
● Press V.
● Temperature and air distribution are set automatically and the fan
runs at high speed.● Switch on heated rear window Ü.
● To return to previous mode: press V, to return to automatic
mode: press AUTO.
Note
If V is pressed while the engine is
running, an Autostop will be inhibited
until V is pressed again.
If l is pressed with the fan switched
on and the engine running, an
Autostop will be inhibited until l is
pressed again or until the fan is
switched off.
If V is pressed while the engine is
in an Autostop, the engine will restart
automatically.
If l is pressed with the fan switched
on while the engine is in an
Autostop, the engine will restart
automatically.
Stop-start system 3 134.Manual settings
Climate control system settings canbe changed by activating the buttons
and rotary knobs as follows.
Changing a setting will deactivate the
automatic mode.
Fan speed Z
The selected fan speed is indicated
with x and a number in the display. If
the fan is switched off, the air
conditioning is also deactivated.
To return to automatic mode: Press
AUTO .
Air distribution l,
M ,
K
Press appropriate button for desired
adjustment. The LED in the button
illuminates to indicate activation.l:to windscreen and front door
windows (air conditioning is
activated in the background to
help prevent windows from
fogging)M:to head areaK:to foot well and windscreen
Combination of settings are possible.
Page 134 of 247
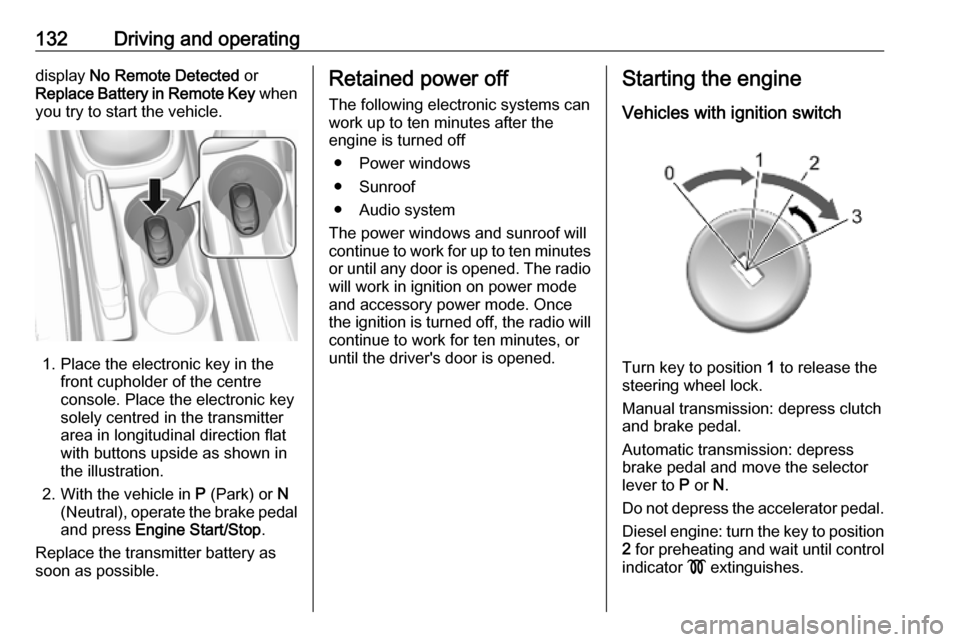
132Driving and operatingdisplay No Remote Detected or
Replace Battery in Remote Key when
you try to start the vehicle.
1. Place the electronic key in the front cupholder of the centreconsole. Place the electronic key
solely centred in the transmitter
area in longitudinal direction flat
with buttons upside as shown in
the illustration.
2. With the vehicle in P (Park) or N
(Neutral), operate the brake pedal
and press Engine Start/Stop .
Replace the transmitter battery as
soon as possible.
Retained power off
The following electronic systems can
work up to ten minutes after the
engine is turned off
● Power windows
● Sunroof
● Audio system
The power windows and sunroof will
continue to work for up to ten minutes or until any door is opened. The radio
will work in ignition on power mode
and accessory power mode. Once
the ignition is turned off, the radio will
continue to work for ten minutes, or
until the driver's door is opened.Starting the engine
Vehicles with ignition switch
Turn key to position 1 to release the
steering wheel lock.
Manual transmission: depress clutch and brake pedal.
Automatic transmission: depress
brake pedal and move the selector
lever to P or N.
Do not depress the accelerator pedal. Diesel engine: turn the key to position2 for preheating and wait until control
indicator ! extinguishes.