run flat OPEL MOKKA X 2019.5 Manual user
[x] Cancel search | Manufacturer: OPEL, Model Year: 2019.5, Model line: MOKKA X, Model: OPEL MOKKA X 2019.5Pages: 247, PDF Size: 6.86 MB
Page 197 of 247

Vehicle care195tread life. After changing to winter
tyres, be alert for changes in vehicle
handling and braking.
If using winter tyres, make sure to use ● tyres of the same brand and tread
type on all four wheel positions.
● only radial ply tyres of the same size, load range and speed ratingas the tyres originally fitted at the factory.
Winter tyres with the same speed
rating as the tyres originally fitted at
the factory may not be available for H,
V, W, Y and ZR speed rated tyres. If
using winter tyres with a lower speed
rating, never exceed the tyre's
maximum speed capability.
Tyre designations
E.g. 215/60 R 16 95 H215:tyre width, mm60:cross-section ratio (tyre height
to tyre width), percentageR:belt type: RadialRF:type: RunFlat16:wheel diameter, inches95:load index e.g. 95 is equivalent
to 690 kgH:speed code letter
Speed code letter:
Q:up to 160 km/hS:up to 180 km/hT:up to 190 km/hH:up to 210 km/hV:up to 240 km/hW:up to 270 km/h
Choose a tyre appropriate for the
maximum speed of your vehicle.
The maximum speed is achievable at kerb weight with driver (75 kg) plus125 kg payload. Optional equipment
could reduce the maximum speed of
the vehicle.
Performance 3 226.
Directional tyres
Fit directional tyres such that they roll in the direction of travel. The rolling
direction is indicated by a symbol
(e.g. an arrow) on the sidewall.
Tyre pressure
Check the pressure of cold tyres at
least every 14 days and before any
long journey. Do not forget the spare
wheel. This also applies to vehicles
with tyre pressure monitoring system.
Tyre pressure 3 230.
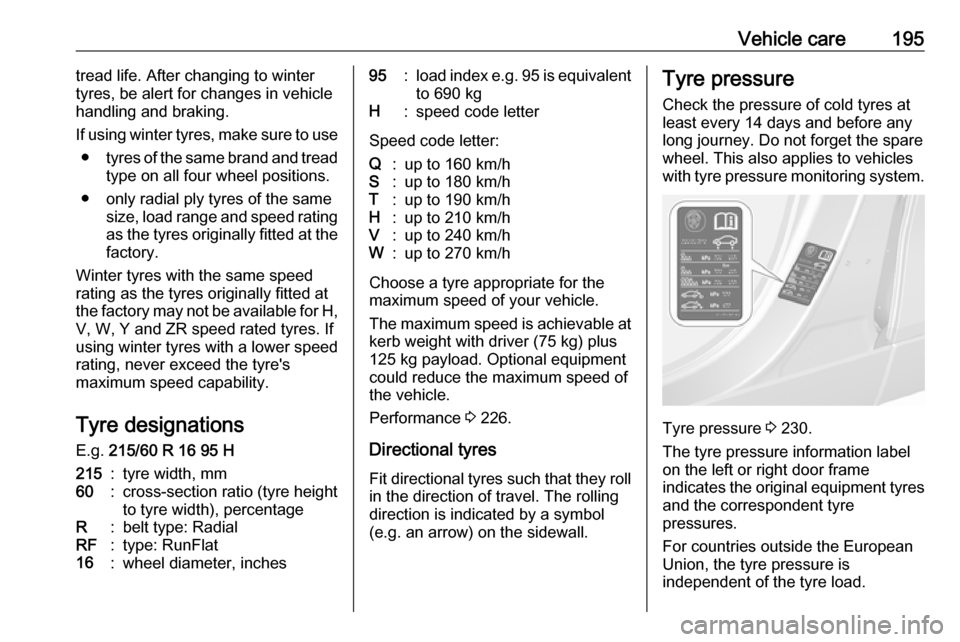
The tyre pressure information label
on the left or right door frame
indicates the original equipment tyres
and the correspondent tyre
pressures.
For countries outside the European
Union, the tyre pressure is
independent of the tyre load.
Page 205 of 247

Vehicle care2034.Screw the compressor air hose to
the connection on the sealant
bottle.
5. Fit the sealant bottle into the retainer on the compressor.
Set the compressor near the tyre
in such a way that the sealant
bottle is upright.
6. Unscrew valve cap from defective
tyre.
7. Screw the filler hose to the tyre valve.
8. The switch on the compressor must be set to J.
9. Connect the compressor plug to
the power outlet or cigarette
lighter socket.
To avoid discharging the battery,
we recommend running the
engine.
10. Set the rocker switch on the compressor to I. The tyre is filled
with sealant.
11. The compressor pressure gauge briefly indicates up to 6 bar whilstthe sealant bottle is emptying
(approx. 30 s ). Then the pressure
starts to drop.
12. All of the sealant is pumped into the tyre. Then the tyre is inflated.
13. The prescribed tyre pressureshould be obtained within 10 min.
Tyre pressure 3 230. When the
correct pressure is obtained,
switch off the compressor.
If the prescribed tyre pressure is
not obtained within 10 min,
remove the tyre repair kit. Move
the vehicle one tyre rotation.
Reattach the tyre repair kit and
continue the filling procedure for
10 min. If the prescribed tyre
pressure is still not obtained, the
tyre is too badly damaged. Seek
the assistance of a workshop.
Page 206 of 247

204Vehicle careDrain excess tyre pressure with
the button over the pressure indicator.
Depending on version the button
can be located on the air hose.
Do not run the compressor longer
than 10 min.
14. Detach the tyre repair kit. Push catch on bracket to remove
sealant bottle from bracket. Screw the tyre inflation hose to the free
connection of the sealant bottle.
This prevents sealant from
escaping. Stow tyre repair kit in
load compartment.
15. Remove any excess sealant using a cloth.
16. Take the label indicatingmaximum permitted speed from
the sealant bottle and affix in the
driver's field of view.
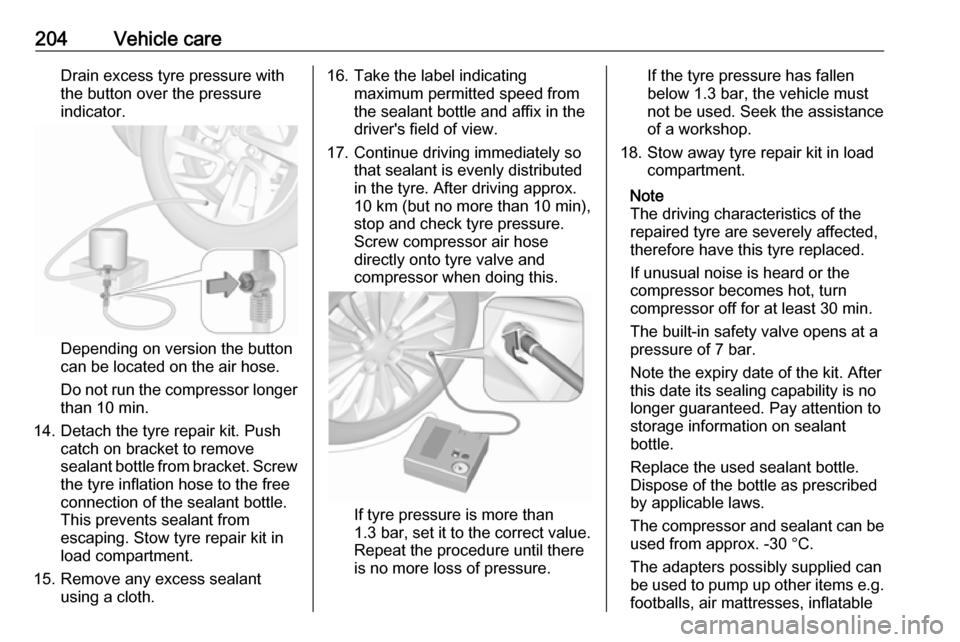
17. Continue driving immediately so that sealant is evenly distributedin the tyre. After driving approx.
10 km (but no more than 10 min),
stop and check tyre pressure.
Screw compressor air hose
directly onto tyre valve and
compressor when doing this.
If tyre pressure is more than
1.3 bar , set it to the correct value.
Repeat the procedure until there
is no more loss of pressure.
If the tyre pressure has fallen
below 1.3 bar, the vehicle must
not be used. Seek the assistance
of a workshop.
18. Stow away tyre repair kit in load compartment.
Note
The driving characteristics of the
repaired tyre are severely affected,
therefore have this tyre replaced.
If unusual noise is heard or the
compressor becomes hot, turn
compressor off for at least 30 min.
The built-in safety valve opens at a
pressure of 7 bar.
Note the expiry date of the kit. After
this date its sealing capability is no
longer guaranteed. Pay attention to
storage information on sealant
bottle.
Replace the used sealant bottle. Dispose of the bottle as prescribed
by applicable laws.
The compressor and sealant can be used from approx. -30 °C.
The adapters possibly supplied can
be used to pump up other items e.g. footballs, air mattresses, inflatable
Page 213 of 247

Vehicle care211Towing
Towing the vehicle
Wrap a cloth around the tip of a flat
screwdriver to prevent paint damage.
Insert the screwdriver in the slot at the
lower part of the cap. Release the cap by carefully moving the screwdriver
downwards.
The towing eye is stowed with the
vehicle tools 3 194.
Screw in the towing eye as far as it will
go until it stops in a horizontal
position.
Attach a tow rope – or better still a tow
rod – to the towing eye.
The towing eye must only be used for
towing and not for recovering the
vehicle.
Switch on ignition to release steering wheel lock and to permit operation of
brake lights, horn and windscreen
wiper.
Switch the selector lever to neutral.
Release the parking brake.
Caution
Never tow a vehicle equipped with All Wheel Drive (AWD) with the
front or rear tyres on the road. If
you tow a vehicle equipped with
AWD while the front or rear tyres
are rolling on the road, the drive
system in the vehicle could be
severely damaged. When towing
vehicles equipped with AWD, all
four tyres must not be in contact
with the road.
Caution
Drive slowly. Do not drive jerkily.
Excessive tractive force can
damage the vehicle.
When the engine is not running,
considerably more force is needed to
brake and steer.
To prevent the entry of exhaust gases from the towing vehicle, switch on the
air recirculation system 3 123 and
close the windows.