stop start OPEL MOKKA X 2019 Manual user
[x] Cancel search | Manufacturer: OPEL, Model Year: 2019, Model line: MOKKA X, Model: OPEL MOKKA X 2019Pages: 253, PDF Size: 6.86 MB
Page 142 of 253

140Driving and operatingThe engine will be switched off while
the ignition stays on.
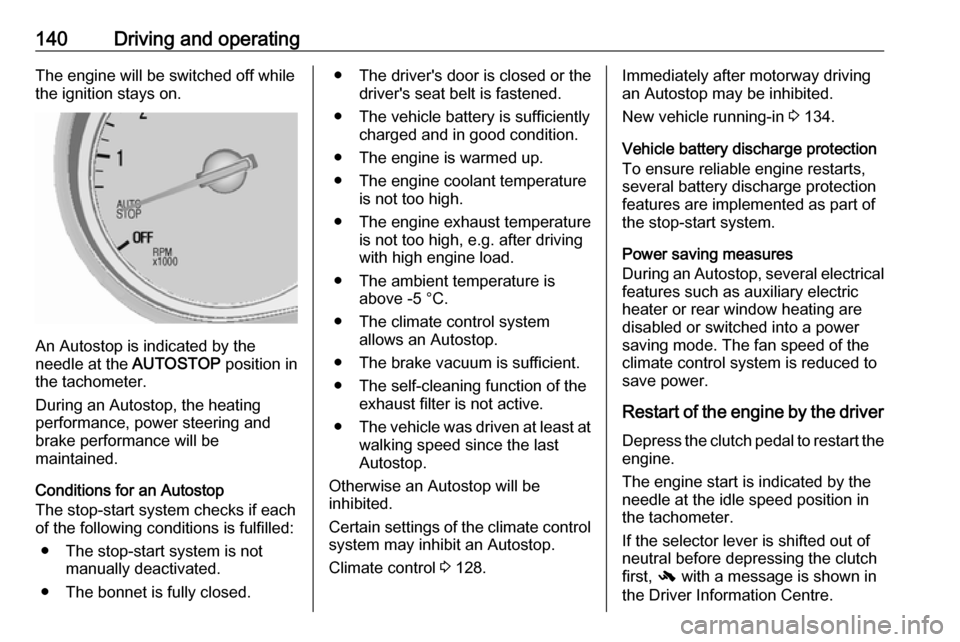
An Autostop is indicated by the
needle at the AUTOSTOP position in
the tachometer.
During an Autostop, the heating
performance, power steering and
brake performance will be
maintained.
Conditions for an Autostop
The stop-start system checks if each
of the following conditions is fulfilled:
● The stop-start system is not manually deactivated.
● The bonnet is fully closed.
● The driver's door is closed or the driver's seat belt is fastened.
● The vehicle battery is sufficiently charged and in good condition.
● The engine is warmed up.
● The engine coolant temperature is not too high.
● The engine exhaust temperature is not too high, e.g. after driving
with high engine load.
● The ambient temperature is above -5 °C.
● The climate control system allows an Autostop.
● The brake vacuum is sufficient.
● The self-cleaning function of the exhaust filter is not active.
● The vehicle was driven at least at
walking speed since the last
Autostop.
Otherwise an Autostop will be
inhibited.
Certain settings of the climate control
system may inhibit an Autostop.
Climate control 3 128.Immediately after motorway driving
an Autostop may be inhibited.
New vehicle running-in 3 134.
Vehicle battery discharge protection To ensure reliable engine restarts,
several battery discharge protection
features are implemented as part of
the stop-start system.
Power saving measures
During an Autostop, several electrical
features such as auxiliary electric
heater or rear window heating are
disabled or switched into a power
saving mode. The fan speed of the
climate control system is reduced to
save power.
Restart of the engine by the driver Depress the clutch pedal to restart the
engine.
The engine start is indicated by the
needle at the idle speed position in
the tachometer.
If the selector lever is shifted out of
neutral before depressing the clutch
first, - with a message is shown in
the Driver Information Centre.
Page 143 of 253

Driving and operating141Restart of the engine by the stop-start system
The selector lever must be in neutral
to enable an automatic restart.
If one of the following conditions
occurs during an Autostop, the
engine will be restarted automatically by the stop-start system:
● The stop-start system is manually deactivated.
● The bonnet is opened.
● The driver's seat belt is unfastened and the driver's door
is opened.
● The engine temperature is too low.
● The charging level of the vehicle battery is below a defined level.
● The brake vacuum is not sufficient.
● The vehicle is driven at least at walking speed.
● The climate control system requests an engine start.
● The air conditioning is manually switched on.If the bonnet is not fully closed, a
warning message is displayed in the
Driver Information Centre.
If an electrical accessory, e.g. a
portable CD player, is connected to
the power outlet, a brief power drop
during engine restart might be
noticeable.
Parking9 Warning
● Do not park the vehicle on an
easily ignitable surface. The
high temperature of the
exhaust system could ignite the
surface.
● Always apply the parking brake. Activate the parking
brake without pressing the
release button. Apply as firmly
as possible on a downhill slope
or uphill slope. Depress brake
pedal at the same time to
reduce operating force.
● Switch off the engine.
● If the vehicle is on a level surface or uphill slope, engage
first gear or set the selector
lever to position P before
removing the ignition key. On
an uphill slope, turn the front
wheels away from the kerb.
If the vehicle is on a downhill
slope, engage reverse gear or
set the selector lever to position P before removing the ignition
key. Turn the front wheels
towards the kerb.
● Close the windows and the sunroof.
● Remove the ignition key from the ignition switch. For vehicles
with automatic transmission,
the key can only be removed
when the selector lever is in
position P.
Turn the steering wheel until
the steering wheel lock is felt to engage.
● Lock the vehicle.
● Activate the anti-theft alarm system.
Page 152 of 253

150Driving and operatingCaution
It is not advisable to drive with thehand resting on the selector lever.
Gear shift indication 3 94.
Stop-start system 3 139.
Drive systems
All-wheel drive
The All-Wheel Drive (AWD) system
enhances driving characteristics and
stability, and helps to achieve the best
possible driveability regardless of
ground surface. The system is always
active and cannot be deactivated.
The torque is distributed steplessly
between the wheels of the front and rear axle, depending on the driving
conditions. Additionally the torque
between the rear wheels is distributed depending on the surface.
For optimum system performance,
the vehicle's tyres should not have
varying degrees of wear.
When using a temporary spare
wheel, the AWD system is
automatically disabled.
The AWD system will also be
temporarily disabled to protect the
system from overheating if there is
excessive wheel spin. When the
system cools down, AWD will be
restored.The deactivation of the AWD system
will be indicated by a message on the
Driver Information Centre.
If a service message or warning
code S73 is displayed on the Driver
Information Centre, there is a
malfunction in the AWD system. Seek
the assistance of a workshop.
Vehicle messages 3 104.
Towing the vehicle 3 216.
Page 154 of 253

152Driving and operating9Warning
Always apply parking brake firmly
without operating the release
button, and apply as firmly as
possible on a downhill or uphill
slope.
To release the parking brake, pull
the lever up slightly, press the
release button and fully lower the
lever.
To reduce the operating forces of
the parking brake, depress the
brake pedal at the same time.
Control indicator R 3 93.
Brake assist
If the brake pedal is depressed
quickly and forcefully, maximum
brake force is automatically applied
(full braking).
Maintain steady pressure on the
brake pedal for as long as full braking is required. Maximum brake force is
automatically reduced when the
brake pedal is released.
Hill start assist
The system helps prevent unintended movement when driving away on
inclines.
When releasing the brake pedal after
stopping on an incline, the brakes
remain on for a further two seconds.
The brakes release automatically as
soon as the vehicle begins to
accelerate.
The hill start assist is not active during
an Autostop.
Stop-start system 3 139.Ride control systems
Traction Control system The Traction Control system (TC) is a component of the Electronic Stability
Control (ESC) 3 153.
TC improves driving stability when necessary, regardless of the type of
road surface or tyre grip, by
preventing the drive wheels from
spinning.
As soon as the drive wheels starts to spin, engine output is reduced and
the wheel spinning the most is braked
individually. This considerably
improves the driving stability of the
vehicle on slippery road surfaces.
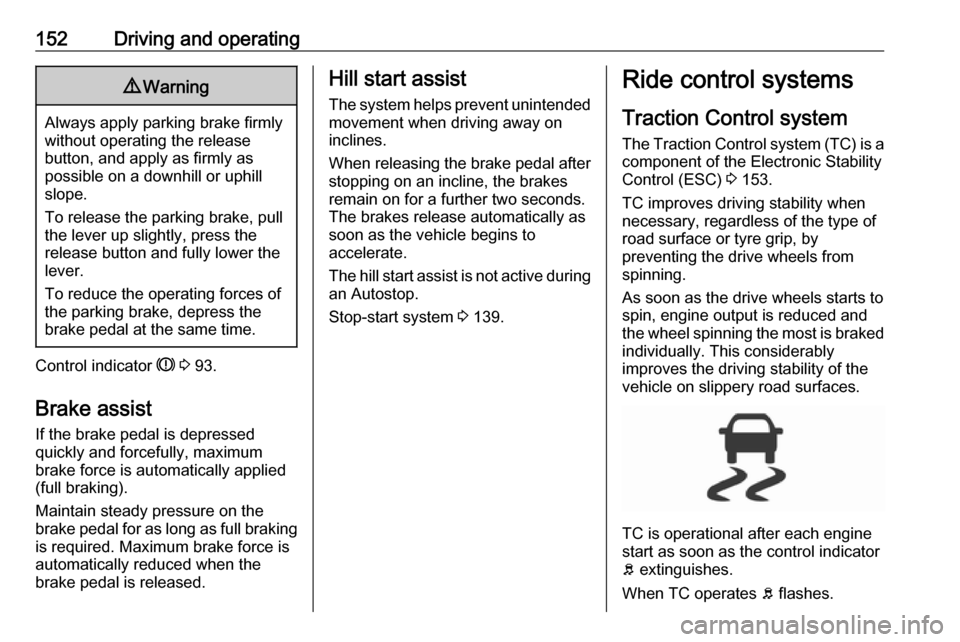
TC is operational after each engine
start as soon as the control indicator
b extinguishes.
When TC operates b flashes.
Page 185 of 253

Vehicle care183Pull up the support rod lightly from the
holder. And then secure it at the left
side hook on the bonnet.
If the bonnet is opened during an
Autostop, the engine will be restarted automatically for safety reasons.
Closing
Before closing the bonnet, press the
support into the holder.
Lower the bonnet and allow it to fall
into the latch from a low height
(20-25 cm). Check that the bonnet is engaged.Caution
Do not press the bonnet into the
latch, to avoid dents.
Engine oil
Check the engine oil level manually
on a regular basis to prevent damage
to the engine. Ensure that the correct specification of oil is used.
Recommended fluids and lubricants
3 222.
The maximum engine oil
consumption is 0.6 l per 1000 km.
Check with the vehicle on a level
surface. The engine must be at
operating temperature and switched
off for at least 5 min.
Pull out the dipstick, wipe it clean, insert it to the stop on the handle, pull
out and read the engine oil level.
Insert dipstick to the stop on the
handle.
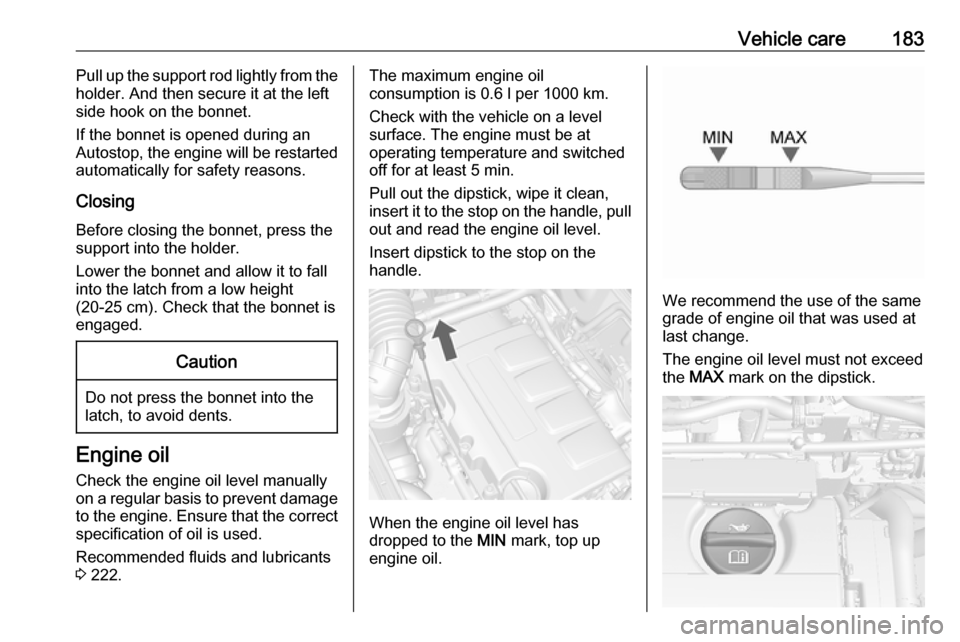
When the engine oil level has
dropped to the MIN mark, top up
engine oil.
We recommend the use of the same
grade of engine oil that was used at
last change.
The engine oil level must not exceed
the MAX mark on the dipstick.
Page 188 of 253

186Vehicle care
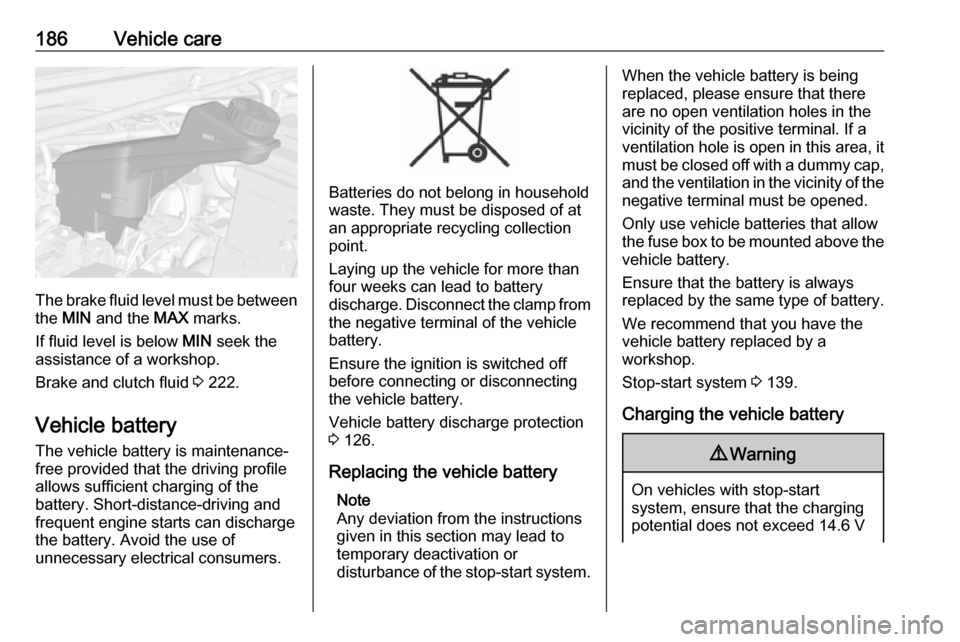
The brake fluid level must be betweenthe MIN and the MAX marks.
If fluid level is below MIN seek the
assistance of a workshop.
Brake and clutch fluid 3 222.
Vehicle battery
The vehicle battery is maintenance-
free provided that the driving profile
allows sufficient charging of the
battery. Short-distance-driving and
frequent engine starts can discharge
the battery. Avoid the use of
unnecessary electrical consumers.
Batteries do not belong in household
waste. They must be disposed of at
an appropriate recycling collection
point.
Laying up the vehicle for more than
four weeks can lead to battery
discharge. Disconnect the clamp from the negative terminal of the vehicle
battery.
Ensure the ignition is switched off
before connecting or disconnecting
the vehicle battery.
Vehicle battery discharge protection
3 126.
Replacing the vehicle battery Note
Any deviation from the instructions
given in this section may lead to
temporary deactivation or
disturbance of the stop-start system.
When the vehicle battery is being
replaced, please ensure that there
are no open ventilation holes in the
vicinity of the positive terminal. If a
ventilation hole is open in this area, it
must be closed off with a dummy cap,
and the ventilation in the vicinity of the negative terminal must be opened.
Only use vehicle batteries that allow the fuse box to be mounted above the
vehicle battery.
Ensure that the battery is always replaced by the same type of battery.
We recommend that you have the
vehicle battery replaced by a
workshop.
Stop-start system 3 139.
Charging the vehicle battery9 Warning
On vehicles with stop-start
system, ensure that the charging
potential does not exceed 14.6 V
Page 206 of 253

204Vehicle care●Light for comfort pressure up to
three people.
● Eco for Eco pressure up to three
people.
● Max for full loading.
Tyre pressure sensor matching process
Each tyre pressure sensor has a
unique identification code. The
identification code must be matched
to a new wheel position after rotating
the wheels or exchanging the
complete wheel set and if one or more tyre pressure sensors were replaced.The tyre pressure sensor matching
process should also be performed
after replacing a spare wheel with a
road wheel containing a tyre pressure
sensor.
The malfunction light w and the
warning message should extinguish
at the next ignition cycle. The sensors
are matched to the wheel positions,
using a relearn tool, in the following
order: left side front wheel, right side
front wheel, right side rear wheel andleft side rear wheel. The turn signal
light at the current active position is
illuminated until sensor is matched.
Consult a workshop for service. There are two minutes to match the first
wheel position, and five minutes
overall to match all four wheel
positions. If it takes longer, the
matching process stops and must be
restarted.
The tyre pressure sensor matching
process is:
1. Apply the parking brake.
2. Turn the ignition on.
3. On vehicles with automatic transmission: set the selector
lever to P.
On vehicles with manual
transmission: select neutral.
4. Press MENU on the turn signal
lever to select the Vehicle
Information Menu in the Driver
Information Centre.
5. Turn the adjuster wheel to scroll to
the tyre pressure menu.
Midlevel display:
Uplevel display:
Page 223 of 253

Service and maintenance221Service and
maintenanceGeneral information ...................221
Service information ..................221
Recommended fluids, lubricants and parts .................................... 222
Recommended fluids and lubricants ................................ 222General information
Service information In order to ensure economical and
safe vehicle operation and to
maintain the value of your vehicle, it
is of vital importance that all
maintenance work is carried out at the proper intervals as specified.
The detailed, up-to-date service
schedule for your vehicle is available
at the workshop.
Service display 3 87.
European service intervals
Maintenance of your vehicle is
required every 30,000 km or after one year, whichever occurs first, unless
otherwise indicated in the service
display.
A shorter service interval can be valid for severe driving behaviour, e.g. for
taxis and police vehicles.
The European service intervals are
valid for the following countries:Andorra, Austria, Belgium, Bosnia-
Herzegovina, Bulgaria, Croatia,
Cyprus, Czech Republic, Denmark,
Estonia, Finland, France, Germany,
Greece, Greenland, Hungary,
Iceland, Ireland, Italy, Latvia,
Liechtenstein, Lithuania,
Luxembourg, Macedonia, Malta,
Monaco, Montenegro, Netherlands,
Norway, Poland, Portugal, Romania,
San Marino, Serbia, Slovakia,
Slovenia, Spain, Sweden,
Switzerland, United Kingdom.
Service display 3 87.
International service intervals
Maintenance of your vehicle is
required every 15,000 km or after one
year, whichever occurs first.
Additional engine oil and filter change is indicated by the engine oil life
system, when required earlier than
maintenance.
Severe operating conditions exist if
one or more of the following
circumstances occur frequently: Cold
starting, stop and go operation, trailer operation, mountain driving, driving
on poor and sandy road surfaces,
Page 251 of 253

249Rear view camera ...................... 163
Rear window wiper and washer ..80
Recommended fluids and lubricants ........................ 222, 226
Refuelling ................................... 172
Registered trademarks ...............241
Retained power off .....................137
Reversing lights .........................123
Ride control systems ..................152
Roof .............................................. 37
Roof load ...................................... 74
Roof rack ..................................... 74
S Seat adjustment ....................... 6, 41
Seat belt ........................................ 8
Seat belt reminder .......................92
Seat belts ..................................... 44
Seat heating ................................. 43
Seat position ................................ 40
Selective catalytic reduction .......144
Selector lever ............................. 147
Service ....................................... 132
Service display ............................ 87
Service information ....................221
Side airbag system ......................51
Software acknowledgement .......240
Spare wheel ............................... 211
Speed limiter......................... 97, 157
Speedometer ............................... 84Starting and operating ................134
Starting off ................................... 17
Starting the engine ....................137
Steering ...................................... 134
Steering wheel adjustment ......9, 77
Steering wheel controls ...............77
Stop-start system........................ 139
Storage compartments .................59
Sunroof ........................................ 37
Sunvisor lights ........................... 125
Sun visors .................................... 37
Symbols ......................................... 4
T
Tachometer ................................. 85
Tail lights ................................... 191
Three-point seat belt .................... 45
Tools .......................................... 199
Tow bar....................................... 176
Towing ................................ 176, 216
Towing another vehicle .............217
Towing equipment .....................177
Towing the vehicle .....................216
Traction Control system ............. 152
Traction Control system off........... 95
Traffic sign assistant .............97, 165
Trailer towing ............................. 177
Transmission ............................... 17
Transmission display .................146
Tread depth ............................... 205Trip odometer .............................. 84
Turn lights ............................ 92, 123
Tyre chains ................................ 206
Tyre designations ......................200
Tyre pressure ............................ 200
Tyre pressure monitoring system ............................... 95, 201
Tyre pressures ........................... 235
Tyre repair kit ............................. 207
U Ultrasonic parking assist............. 161
Underseat storage .......................60
Upholstery .................................. 220
Uplevel display ............................. 97
Using this manual ..........................3
V Valet mode ................................. 102
Vehicle battery ........................... 186
Vehicle checks............................ 182
Vehicle data ................................ 226
Vehicle data recording and privacy ..................................... 242
Vehicle detected ahead ................97
Vehicle dimensions .................... 233
Vehicle Identification Number ....224
Vehicle jack ................................ 199
Vehicle messages .....................104
Vehicle personalisation .............106
Vehicle security ............................ 31