warning OPEL MOKKA X 2019 Manual user
[x] Cancel search | Manufacturer: OPEL, Model Year: 2019, Model line: MOKKA X, Model: OPEL MOKKA X 2019Pages: 253, PDF Size: 6.86 MB
Page 55 of 253

Seats, restraints53
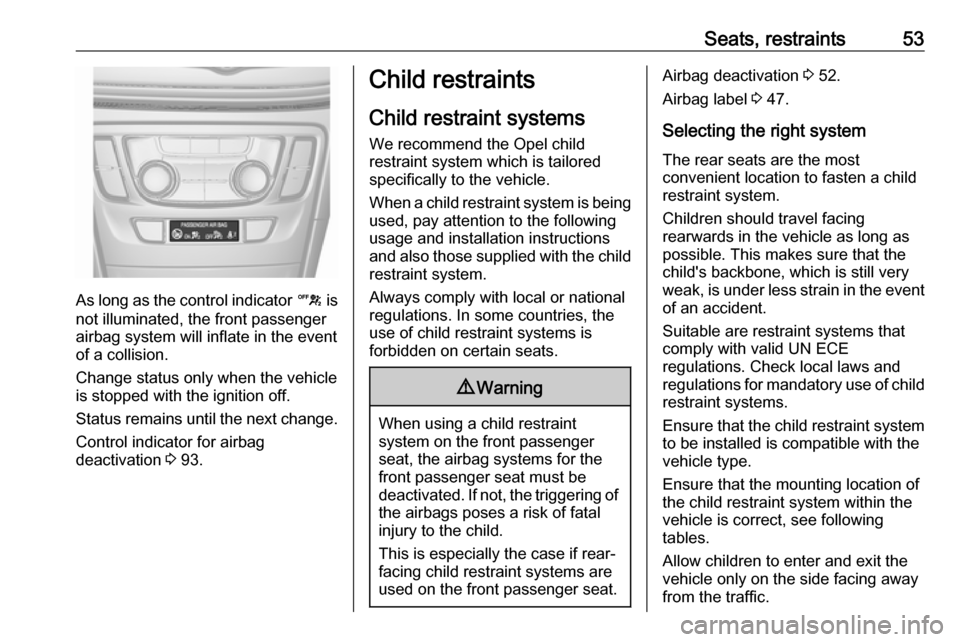
As long as the control indicator c is
not illuminated, the front passenger
airbag system will inflate in the event
of a collision.
Change status only when the vehicle is stopped with the ignition off.
Status remains until the next change.
Control indicator for airbag
deactivation 3 93.
Child restraints
Child restraint systems
We recommend the Opel child
restraint system which is tailored
specifically to the vehicle.
When a child restraint system is being
used, pay attention to the following
usage and installation instructions
and also those supplied with the child restraint system.
Always comply with local or national
regulations. In some countries, the
use of child restraint systems is
forbidden on certain seats.9 Warning
When using a child restraint
system on the front passenger
seat, the airbag systems for the
front passenger seat must be
deactivated. If not, the triggering of the airbags poses a risk of fatal
injury to the child.
This is especially the case if rear-
facing child restraint systems are
used on the front passenger seat.
Airbag deactivation 3 52.
Airbag label 3 47.
Selecting the right system The rear seats are the most
convenient location to fasten a child
restraint system.
Children should travel facing
rearwards in the vehicle as long as
possible. This makes sure that the
child's backbone, which is still very
weak, is under less strain in the event
of an accident.
Suitable are restraint systems that
comply with valid UN ECE
regulations. Check local laws and
regulations for mandatory use of child restraint systems.
Ensure that the child restraint system to be installed is compatible with the
vehicle type.
Ensure that the mounting location of
the child restraint system within the
vehicle is correct, see following
tables.
Allow children to enter and exit the
vehicle only on the side facing away
from the traffic.
Page 61 of 253

Storage59StorageStorage compartments................59
Glovebox ................................... 59
Cupholders ................................ 59
Front storage ............................. 60
Underseat storage .....................60
Centre console storage .............61
Rear carrier system ...................61
Load compartment .......................71
Load compartment cover ...........72
Rear floor storage cover ............73
Lashing eyes ............................. 73
Warning triangle ........................73
First aid kit ................................. 73
Roof rack system .........................74
Roof rack ................................... 74
Loading information .....................74Storage compartments9Warning
Do not store heavy or sharp
objects in the storage
compartments. Otherwise, the
storage compartment lid could
open and vehicle occupants could be injured by objects being thrown
around in the event of hard
braking, a sudden change in
direction or an accident.
Glovebox
To open, pull the handle.
The glovebox should be closed while
driving.
Cupholders
The cupholders are located in the
centre console and rear part of the
centre console.
Page 64 of 253

62StorageCaution
Consult your bicycle dealer before
attaching bicycles with carbon
frames. The bicycles may get
damaged.
Note
The tail lights of the vehicle will be
deactivated if the tail lights of the rear carrier system are installed.
Extending
Open the tailgate.
9 Warning
No-one should be in the extension
zone of the rear carrier system,
risk of injury.
Pull release lever up. The rear carrier system disengages and travels
quickly out of the rear bumper.
Completely pull out the rear carrier
system until you hear it engage.
Ensure that it is not possible to push in the rear carrier system without
pulling the release lever again.9 Warning
It is only permissible to fit objects
to the rear carrier system if the
system has been correctly
engaged. If the rear carrier system
will not engage correctly, do not fit
objects to the system and slide the system back. Seek the assistance
of a workshop.
Page 69 of 253

Storage67
Use the short accessory mounting
bracket to attach the third bicycle.
The bracket must be fixed
between the frames of the second and third bicycle.
6. Additionally, secure both bicycle wheels of the third bicycle to the
wheel recesses using the
tensioning straps.
It is recommended to attach a
warning sign to the rearmost bicycle,
to increase visibility.
Fold the rear carrier system
backwards
The rear carrier system can be folded
backwards to gain access to the load compartment.
● Without attached adapter:
Push the lever ( 1) to disengage
and hold it.
Pull the rack ( 2) backwards to
fold the rear carrier system.
● With attached adapter:9 Warning
Take care when disengaging the
rear carrier system as it will tilt
backwards. Risk of injury.
Hold frame ( 1) of rearmost
bicycle with one hand and pull the
loop ( 2) to disengage.
Hold rearmost bicycle with both
hands and fold the rear carrier
system backwards.
Page 70 of 253

68StorageTo increase visibility, the tail lights of
the vehicle are activated when the
rear carrier system is folded back.9 Warning
When folding the rear carrier
system forwards again, ensure
that the system is engaged
securely.
Removing bicycles
Undo strap retainers on both bicycle
tyres.
Turn knob anticlockwise and remove
mounting brackets.
Detaching adapter
Detach the adapter before removing
the bicycle on the rear carrier system.
1. Fold in wheel recesses.
2. Unbutton the strap.
3. Turn the lever ( 1) forwards and
hold it.
4. Lift the adapter ( 2) at the rear and
remove.
Disassembling the bicycle rack
Press button ( 1) and remove upper
part of rack ( 2).
Press button ( 1) and reinstall rack ( 2).
Page 72 of 253

70Storage
Push the tail lights into the retainer
(1). Insert pins into the designated
holes of the retainer and the tail lights (2).
Note
Check that the tail lights of the
vehicle are working properly.
Fold in number plate holder
Lift the number plate holder and fold
it forwards.
Retracting the rear carrier systemCaution
Ensure that all foldable parts, e.g.
wheel recesses and mounting
brackets, are stowed correctly.
Otherwise the rear carrier system may get damaged when trying to
retract it.
Push the release lever up and hold it. Lift the system slightly and push it into
the bumper until it engages.
Release lever must return to original
position.
9 Warning
If the system cannot be correctly
engaged, seek the assistance of a workshop.
Page 74 of 253

72StorageTo return the backrest to the original
position, pull out the seat belt from the
belt guides and lift backrest up.
Push backrest firmly into place.9 Warning
When folding up, ensure that
backrests are securely engaged in position before driving. Failure to
do so may result in personal injury or damage to the load or vehicle in
the event of hard braking or a
collision.
Ensure the seat belts are not pinched by the latch.
The centre rear seat belt may lock
when you raise the backrest. If this
happens, allow the belt go back all the
way and repeat operation.
If the seat belt is still locked, fold down the seat cushion and try again.
To return the rear seat cushion, put
the rear part of the seat cushion in its original position ensuring that the
seat belt buckle straps are not twisted
or caught under the seat cushion,
then push the front part of the seat
cushion firmly down until it latches.Caution
When returning rear seat backrest
to the upright position, place the
rear seat belt and buckles
between the rear seat backrest
and one cushion. Make sure the
rear seat belt and buckles do not
get pinched under the rear seat
cushion.
Ensure the seat belts are not twisted or caught in the seat
backrest and are arranged in their proper position.
Load compartment cover
Do not place any objects on the cover.
Removing Unhook retaining straps from tailgate. Lift cover at the rear and push it
upwards at the front.
Remove the cover.
Fitting Engage cover in side guides and fold
downwards.
Attach retaining straps to tailgate.
Page 75 of 253

Storage73Rear floor storage coverRear floor cover
Grasp the handle and lift the cover.
Mount the cover to the hook at the
sidewall.
Lashing eyes The lashing eyes are designed to
secure items against slippage, e.g.
using lashing straps or luggage net.
Warning triangle
Stow the warning triangle below the
floor cover in the load compartment. Secure it with the strap.
First aid kit
Stow the first aid kit in the storage
compartment at the left sidewall of the load compartment.
Page 76 of 253

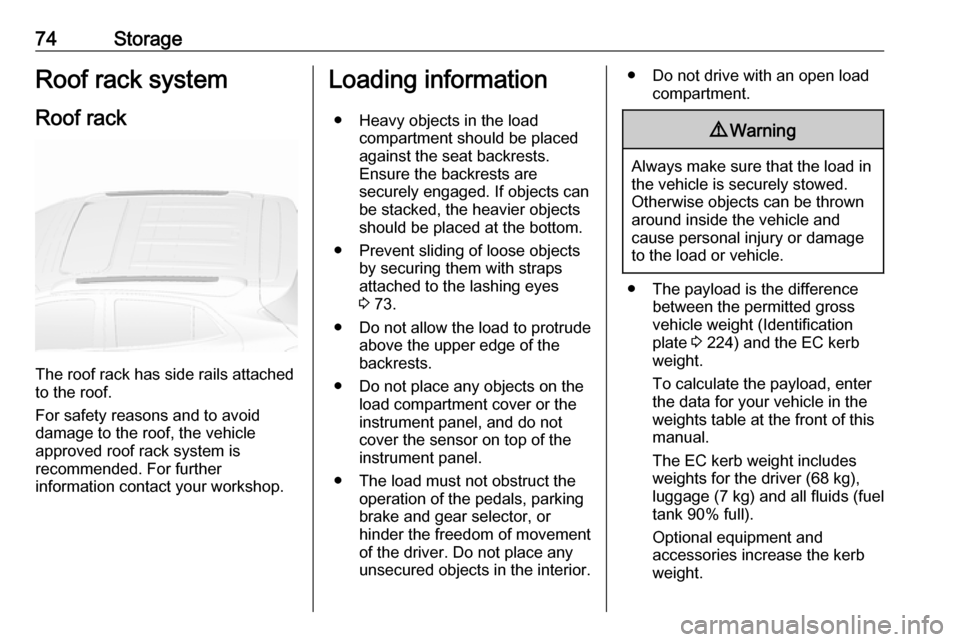
74StorageRoof rack systemRoof rack
The roof rack has side rails attached
to the roof.
For safety reasons and to avoid
damage to the roof, the vehicle
approved roof rack system is
recommended. For further
information contact your workshop.
Loading information
● Heavy objects in the load compartment should be placed
against the seat backrests.
Ensure the backrests are
securely engaged. If objects can
be stacked, the heavier objects
should be placed at the bottom.
● Prevent sliding of loose objects by securing them with straps
attached to the lashing eyes
3 73.
● Do not allow the load to protrude above the upper edge of the
backrests.
● Do not place any objects on the load compartment cover or theinstrument panel, and do notcover the sensor on top of the
instrument panel.
● The load must not obstruct the operation of the pedals, parking
brake and gear selector, or
hinder the freedom of movement
of the driver. Do not place any
unsecured objects in the interior.● Do not drive with an open load compartment.9Warning
Always make sure that the load in
the vehicle is securely stowed.
Otherwise objects can be thrown
around inside the vehicle and
cause personal injury or damage
to the load or vehicle.
● The payload is the difference between the permitted gross
vehicle weight (Identification
plate 3 224) and the EC kerb
weight.
To calculate the payload, enter
the data for your vehicle in the
weights table at the front of this
manual.
The EC kerb weight includes
weights for the driver (68 kg),
luggage (7 kg) and all fluids (fuel
tank 90% full).
Optional equipment and
accessories increase the kerb
weight.
Page 78 of 253

76Instruments and controlsInstruments and
controlsControls ....................................... 77
Steering wheel adjustment ........77
Steering wheel controls .............77
Heated steering wheel ...............77
Horn ........................................... 78
Windscreen wiper and washer ..78
Rear window wiper and washer ...................................... 80
Outside temperature ..................80
Clock ......................................... 81
Power outlets ............................. 83
Warning lights, gauges and indi‐ cators ........................................... 84
Speedometer ............................. 84
Odometer .................................. 84
Trip odometer ............................ 84
Tachometer ............................... 85
Fuel gauge ................................ 85
Fuel selector .............................. 86
Engine coolant temperature gauge ....................................... 87
Service display .......................... 87
Control indicators ......................88
Turn lights .................................. 92Seat belt reminder.....................92
Airbag and belt tensioners .........92
Airbag deactivation ....................93
Charging system .......................93
Malfunction indicator light ..........93
Brake and clutch system ...........93
Antilock brake system (ABS) .....94
Gear shifting .............................. 94
Descent control system .............94
Lane departure warning ............94
Electronic Stability Control off ...94
Electronic Stability Control and Traction Control system ...........94
Traction Control system off .......95
Preheating ................................. 95
AdBlue ....................................... 95
Tyre pressure monitoring system ...................................... 95
Engine oil pressure ....................95
Low fuel ..................................... 95
Immobiliser ................................ 96
Exterior light .............................. 96
High beam ................................. 96
High beam assist .......................96
Adaptive forward lighting ...........96
Front fog lights ........................... 96
Rear fog light ............................. 96
Cruise control ............................ 96
Vehicle detected ahead .............97
Speed limiter ............................. 97Traffic sign assistant ..................97
Door open .................................. 97
Displays ....................................... 97
Driver Information Centre ..........97
Info Display .............................. 102
Vehicle messages ......................104
Warning chimes .......................105
Battery voltage ........................ 105
Vehicle personalisation ..............106
Telematics service .....................110
OnStar ..................................... 110
ERA GLONASS .......................114