ECO mode OPEL MOKKA X 2019 Manual user
[x] Cancel search | Manufacturer: OPEL, Model Year: 2019, Model line: MOKKA X, Model: OPEL MOKKA X 2019Pages: 253, PDF Size: 6.86 MB
Page 5 of 253

Introduction3Vehicle specific dataPlease enter your vehicle's data on
the previous page to keep it easily
accessible. This information is
available in the sections "Service and
maintenance" and "Technical data"
as well as on the identification plate.
Introduction
Your vehicle is a designed
combination of advanced technology, safety, environmental friendliness
and economy.
This Owner's Manual provides you
with all the necessary information to
enable you to drive your vehicle
safely and efficiently.
Make sure your passengers are
aware of the possible risk of accident
and injury which may result from
improper use of the vehicle.
You must always comply with the
specific laws and regulations of the
country that you are in. These laws
may differ from the information in this Owner's Manual.
Disregarding the description given in
this manual may affect your warranty.When this Owner's Manual refers to a
workshop visit, we recommend your
Opel Service Partner. For gas
vehicles we recommend an Opel
Repairer authorised for servicing gas
vehicles.
All Opel Service Partners provide first-class service at reasonable
prices. Experienced mechanics
trained by Opel work according to
specific Opel instructions.
The customer literature pack should
always be kept ready to hand in the
vehicle.
Using this manual ● This manual describes all options
and features available for this
model. Certain descriptions,
including those for display and
menu functions, may not apply to
your vehicle due to model
variant, country specifications,
special equipment or
accessories.
● The "In brief" section will give you
an initial overview.● The table of contents at the beginning of this manual and
within each section shows where the information is located.
● The index will enable you to search for specific information.
● This Owner's Manual depicts left-
hand drive vehicles. Operation is similar for right-hand drive
vehicles.
● The Owner's Manual uses the engine identifier code. The
corresponding sales designation
and engineering code can be
found in the section "Technical
data".
● Directional data, e.g. left or right, or front or back, always relate to
the direction of travel.
● Displays may not support your specific language.
● Display messages and interior labelling are written in bold
letters.
Page 27 of 253
Keys, doors and windows25Memorised settings
Whenever the ignition is switched off, some functions of the following
settings may be automatically
memorised by the remote control unit
or the electronic key:
● lighting
● Infotainment system
● central locking system
● comfort settings
A precondition is that Personalization
by driver is activated in the personal
settings of the Info Display. This must
be set for each remote control unit or
electronic key which is used.
Vehicle personalisation 3 106.
Central locking system Unlocks and locks doors, load
compartment and fuel filler flap.
A pull on an interior door handle
unlocks the respective door. Pulling the handle again opens the door.Note
In the event of an accident in which
airbags or belt pretensioners are
deployed, the vehicle is
automatically unlocked.
Note
A short time after unlocking with the
remote control the doors are locked
automatically if no door has been
opened. A precondition is that the
setting is activated in the vehicle
personalisation 3 106.
Remote control operation
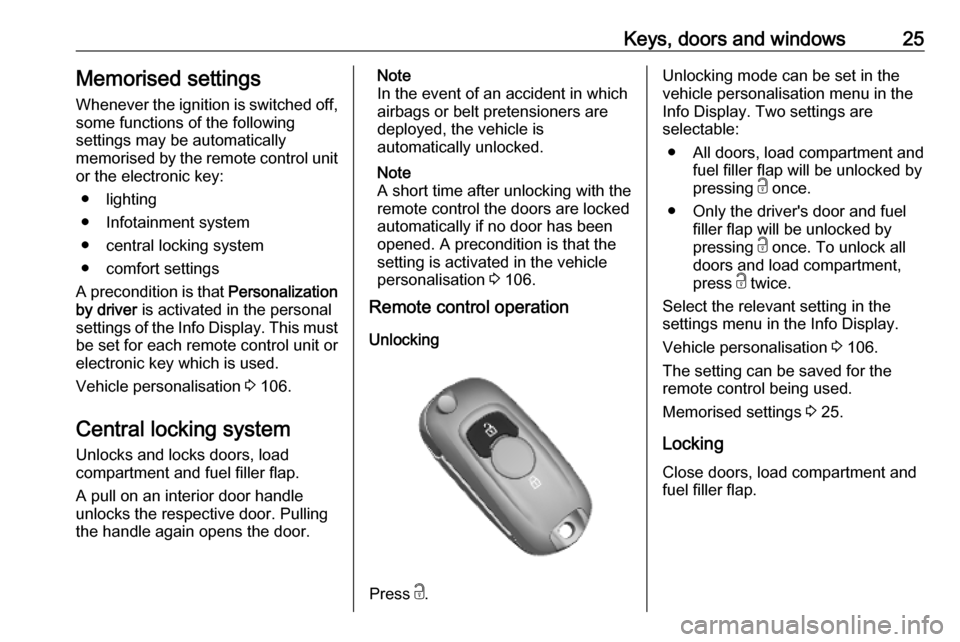
Unlocking
Press c.
Unlocking mode can be set in the
vehicle personalisation menu in the
Info Display. Two settings are
selectable:
● All doors, load compartment and fuel filler flap will be unlocked by
pressing c once.
● Only the driver's door and fuel filler flap will be unlocked by
pressing c once. To unlock all
doors and load compartment,
press c twice.
Select the relevant setting in the
settings menu in the Info Display.
Vehicle personalisation 3 106.
The setting can be saved for the
remote control being used.
Memorised settings 3 25.
Locking Close doors, load compartment and
fuel filler flap.
Page 28 of 253
26Keys, doors and windows
Press e.
If the driver's door is not closed
properly, the central locking system will not work.
Confirmation
Operation of the central locking
system is confirmed by the hazard
warning flashers. A precondition is
that the setting is activated in the
vehicle personalisation 3 106.
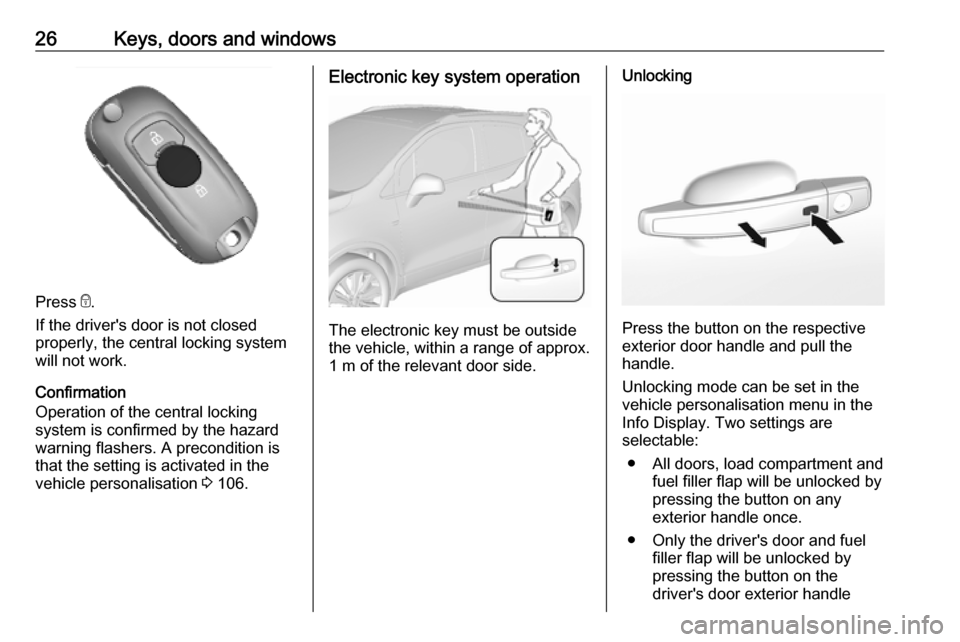
Electronic key system operation
The electronic key must be outside
the vehicle, within a range of approx. 1 m of the relevant door side.
Unlocking
Press the button on the respective
exterior door handle and pull the
handle.
Unlocking mode can be set in the
vehicle personalisation menu in the
Info Display. Two settings are
selectable:
● All doors, load compartment and fuel filler flap will be unlocked by
pressing the button on any
exterior handle once.
● Only the driver's door and fuel filler flap will be unlocked by
pressing the button on the
driver's door exterior handle
Page 84 of 253
82Instruments and controlsFor time and date to be set
automatically, select On - RDS.
For time and date to be set manually, select Off - Manual . If Auto Set is set
to Off - Manual , the submenu items
Set Time and Set Date become
available.
Set time and date
To adjust the time and date settings, select Set Time or Set Date .
Touch + or - to adjust the settings.
8'' Colour Info Display Press ; and then select the
Settings icon.
Select Time and Date .
Set time
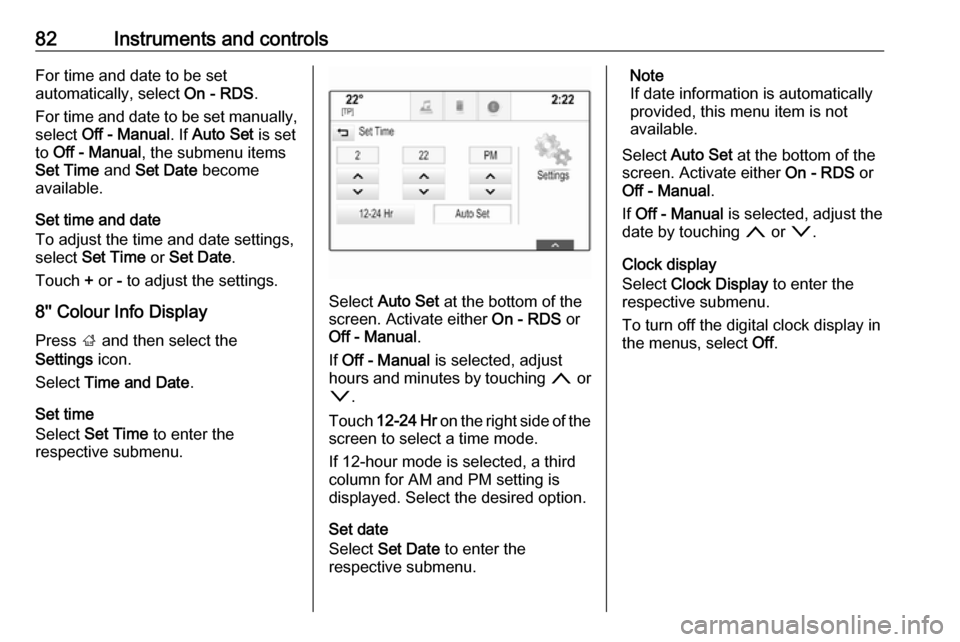
Select Set Time to enter the
respective submenu.
Select Auto Set at the bottom of the
screen. Activate either On - RDS or
Off - Manual .
If Off - Manual is selected, adjust
hours and minutes by touching n or
o .
Touch 12-24 Hr on the right side of the
screen to select a time mode.
If 12-hour mode is selected, a third
column for AM and PM setting is
displayed. Select the desired option.
Set date
Select Set Date to enter the
respective submenu.
Note
If date information is automatically
provided, this menu item is not
available.
Select Auto Set at the bottom of the
screen. Activate either On - RDS or
Off - Manual .
If Off - Manual is selected, adjust the
date by touching n or o.
Clock display
Select Clock Display to enter the
respective submenu.
To turn off the digital clock display in
the menus, select Off.
Page 87 of 253

Instruments and controls85Uplevel instrument cluster
Select Info page Q by pressing Menu.
Choose page Trip A or Trip B by
turning adjuster wheel on the turn
signal lever.
Each trip odometer page can be reset separately by pressing SET/CLR on
the turn signal lever for a few seconds
on the respective menu.
Driver Information Centre 3 97.
Tachometer
Displays the engine speed.
Drive in a low engine speed range for each gear as much as possible.
Caution
If the needle is in the red warning
zone, the maximum permitted
engine speed is exceeded. Engine at risk.
Fuel gauge
Displays the level in the fuel or gas
tank depending on the operation mode.
The arrow indicates the vehicle side
where the fuel filler flap is located.
Control indicator Y illuminates if the
level in the tank is low. Refuel
immediately if it flashes.
During liquid gas operation, the
system automatically switches over to
petrol operation when gas tanks are
empty 3 86.
Never run fuel tank dry.
Page 88 of 253
86Instruments and controlsBecause of the fuel remaining in the
tank, the top-up quantity may be less
than the specified tank capacity.
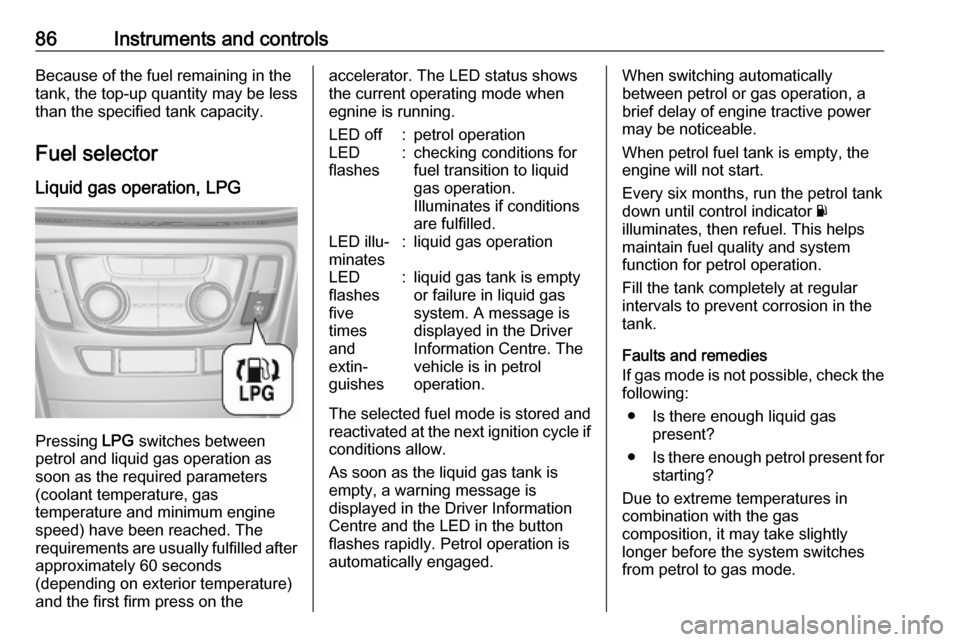
Fuel selector Liquid gas operation, LPG
Pressing LPG switches between
petrol and liquid gas operation as
soon as the required parameters (coolant temperature, gas
temperature and minimum engine
speed) have been reached. The
requirements are usually fulfilled after
approximately 60 seconds
(depending on exterior temperature)
and the first firm press on the
accelerator. The LED status shows
the current operating mode when
egnine is running.LED off:petrol operationLED
flashes:checking conditions for
fuel transition to liquid
gas operation.
Illuminates if conditions
are fulfilled.LED illu‐
minates:liquid gas operationLED
flashes
five
times
and
extin‐
guishes:liquid gas tank is empty
or failure in liquid gas
system. A message is
displayed in the Driver
Information Centre. The
vehicle is in petrol
operation.
The selected fuel mode is stored and reactivated at the next ignition cycle if
conditions allow.
As soon as the liquid gas tank is
empty, a warning message is
displayed in the Driver Information
Centre and the LED in the button
flashes rapidly. Petrol operation is
automatically engaged.
When switching automatically
between petrol or gas operation, a
brief delay of engine tractive power
may be noticeable.
When petrol fuel tank is empty, the
engine will not start.
Every six months, run the petrol tank
down until control indicator Y
illuminates, then refuel. This helps
maintain fuel quality and system
function for petrol operation.
Fill the tank completely at regular
intervals to prevent corrosion in the
tank.
Faults and remedies
If gas mode is not possible, check the following:
● Is there enough liquid gas present?
● Is there enough petrol present for
starting?
Due to extreme temperatures in
combination with the gas
composition, it may take slightly
longer before the system switches
from petrol to gas mode.
Page 106 of 253
104Instruments and controlsTouchscreen operation
Display must be switched on by
pressing X. Press ; to select
homepage.
Touch required menu display icon or a function with the finger.
Scroll a longer submenu list with the
finger up or down.
Confirm a required function or
selection by touching.
Touch q on the display to exit a
menu without changing a setting.
Press ; to return to the homepage.
For further information, see Infotainment manual.Speech recognition
Description see Infotainment manual.
Vehicle personalisation 3 106.
Valet mode
Some functions of the Driver
Information Centre and the Info
Display can be limited for some
drivers.
Activation or deactivation of valet
mode can be set in the menu
Settings in the vehicle personalisation
menu.
Vehicle personalisation 3 106.
For more information see
Infotainment manual.Vehicle messages
Messages are indicated mainly in the
Driver Information Centre, in some
cases together with a warning chime.
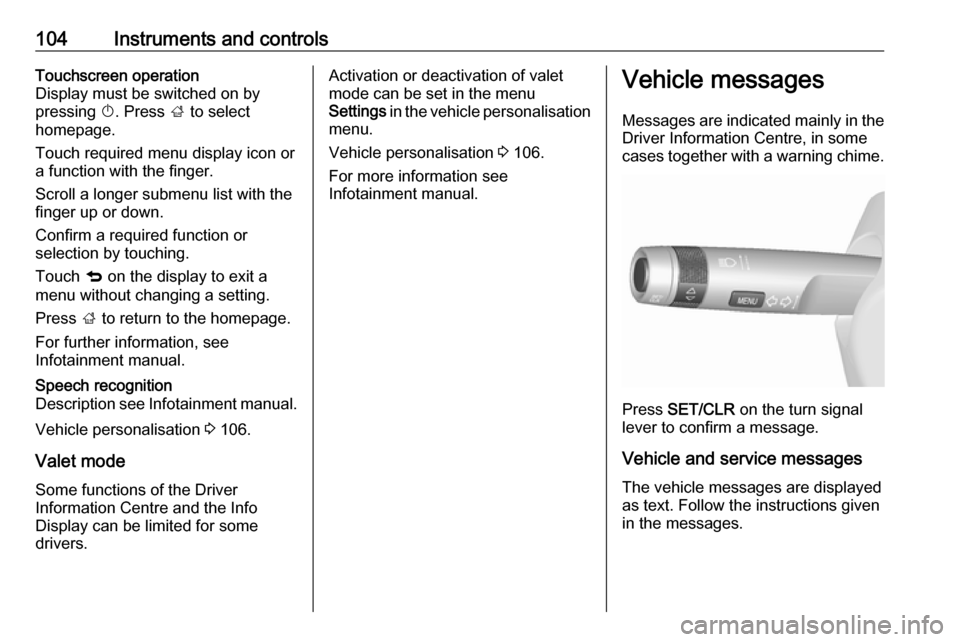
Press SET/CLR on the turn signal
lever to confirm a message.
Vehicle and service messages The vehicle messages are displayed
as text. Follow the instructions given
in the messages.
Page 109 of 253

Instruments and controls107Delayed Door Lock: Activates or
deactivates the delayed door locking function.
● Remote Lock, Unlock, and Start
Remote Unlock Feedback :
Activates or deactivates the
hazard warning flasher feedback
whilst unlocking.
Remote Lock Feedback :
Changes what kind of feedback
is given when locking the vehicle.
Remote Door Unlock : Changes
the configuration to unlock only
the driver's door or the whole
vehicle whilst unlocking.
Auto Relock Doors : Activates or
deactivates the automatic relock
function after unlocking without
opening the vehicle.
Remote Window Operation :
Activates or deactivates the
operation of power windows with remote control.
Passive Door Unlock : Changes
the configuration to unlock only
the driver's door or the whole
vehicle whilst unlocking.Passive Door Lock : Activates or
deactivates the passive locking
function. This feature locks the
vehicle automatically after
several seconds if all doors have been closed and an electronic
key has been removed from the
vehicle.
Remote Left in Vehicle Alarm :
Activates or deactivates the
warning chime when the
electronic key remains in the
vehicle.
● Restore Factory Settings :
Resets all settings to the default settings.
● Valet Mode :
See infotainment manual.
Personal settings 7" Colour Info Display
Press ;, select Settings and then
Vehicle on the Info Display.
In the corresponding submenus the
following settings can be changed:
Vehicle ● Climate & Air Quality
Auto Fan Max Speed : Modifies
the level of the cabin airflow of the climate control in automatic
mode.
Auto Heated Seats :
Automatically activates the seat heating.
Auto Defog : Activates or
deactivates auto demist.
Page 117 of 253
Instruments and controls115Note
In order to be available and
operational, the system requires
functioning vehicle electrics, mobile service and GLONASS satellite link.
Depending on equipment, a backup
battery is used.
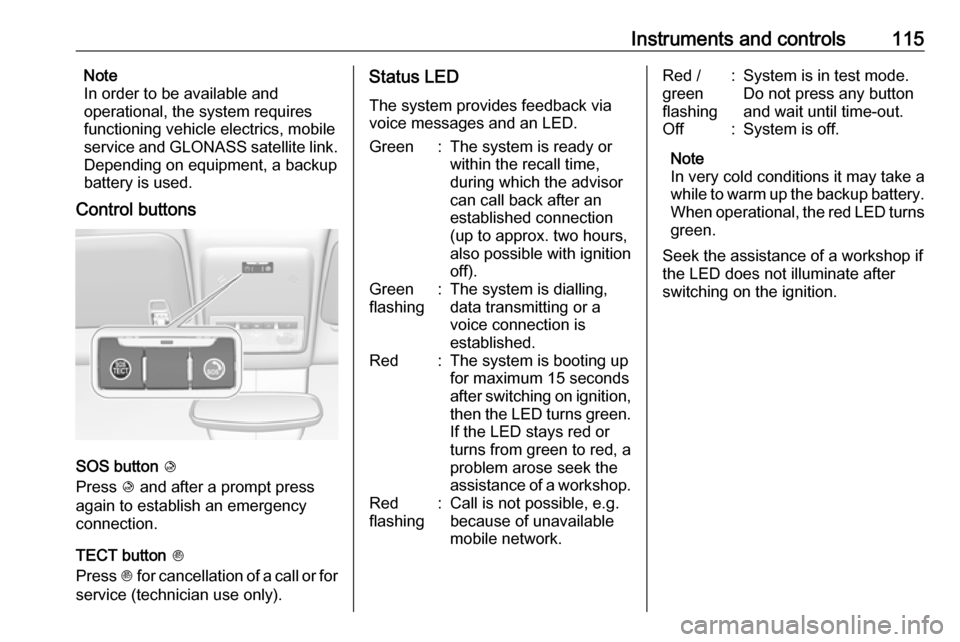
Control buttons
SOS button K
Press K and after a prompt press
again to establish an emergency
connection.
TECT button J
Press J for cancellation of a call or for
service (technician use only).
Status LED
The system provides feedback via
voice messages and an LED.Green:The system is ready or
within the recall time,
during which the advisor
can call back after an
established connection
(up to approx. two hours,
also possible with ignition
off).Green
flashing:The system is dialling,
data transmitting or a
voice connection is
established.Red:The system is booting up
for maximum 15 seconds
after switching on ignition,
then the LED turns green. If the LED stays red or
turns from green to red, a
problem arose seek the
assistance of a workshop.Red
flashing:Call is not possible, e.g.
because of unavailable
mobile network.Red /
green
flashing:System is in test mode.
Do not press any button
and wait until time-out.Off:System is off.
Note
In very cold conditions it may take a
while to warm up the backup battery.
When operational, the red LED turns green.
Seek the assistance of a workshop if
the LED does not illuminate after
switching on the ignition.
Page 121 of 253
Lighting119Headlight range adjustment
Manual headlight range
adjustment
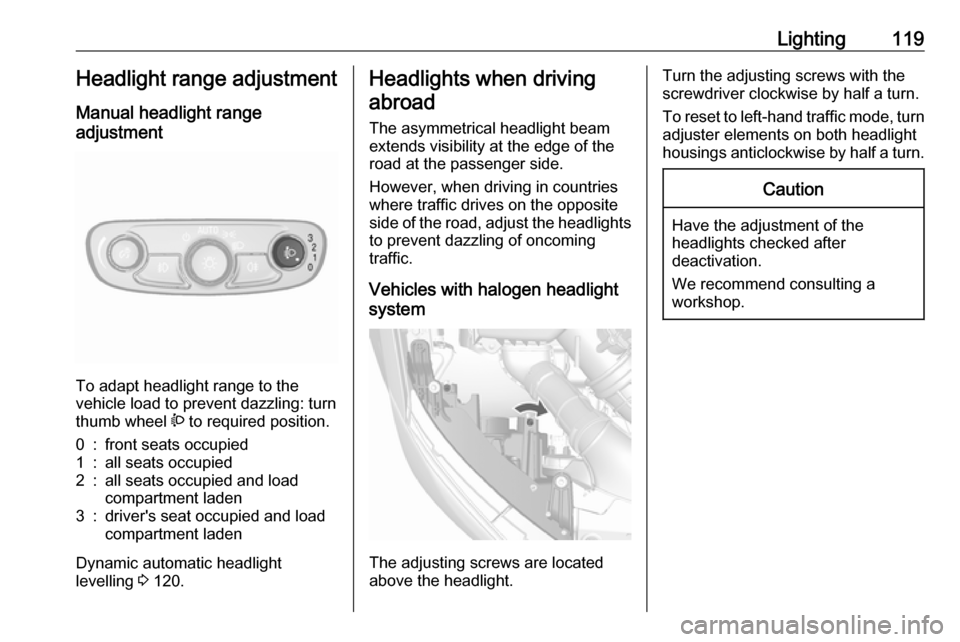
To adapt headlight range to the
vehicle load to prevent dazzling: turn
thumb wheel ? to required position.
0:front seats occupied1:all seats occupied2:all seats occupied and load
compartment laden3:driver's seat occupied and load
compartment laden
Dynamic automatic headlight
levelling 3 120.
Headlights when driving
abroad
The asymmetrical headlight beam
extends visibility at the edge of the
road at the passenger side.
However, when driving in countries
where traffic drives on the opposite
side of the road, adjust the headlights to prevent dazzling of oncoming
traffic.
Vehicles with halogen headlight
system
The adjusting screws are located
above the headlight.
Turn the adjusting screws with the
screwdriver clockwise by half a turn.
To reset to left-hand traffic mode, turn
adjuster elements on both headlight
housings anticlockwise by half a turn.Caution
Have the adjustment of the
headlights checked after
deactivation.
We recommend consulting a
workshop.