wiring OPEL MOVANO_B 2017.5 Owner's Manual
[x] Cancel search | Manufacturer: OPEL, Model Year: 2017.5, Model line: MOVANO_B, Model: OPEL MOVANO_B 2017.5Pages: 261, PDF Size: 6.26 MB
Page 187 of 261
Vehicle care185Bulb replacement
Ensure the ignition is switched off
completely (the vehicle must not be in
an Autostop 3 136) and turn off the
relevant switch or close the doors.
Only hold a new bulb at the base. Do not touch the bulb glass with bare
hands.
Use only the same bulb type for
replacement.
Bulb check
After a bulb replacement, switch on
the ignition, operate and check the
lights.
Performing work 3 176.Headlights
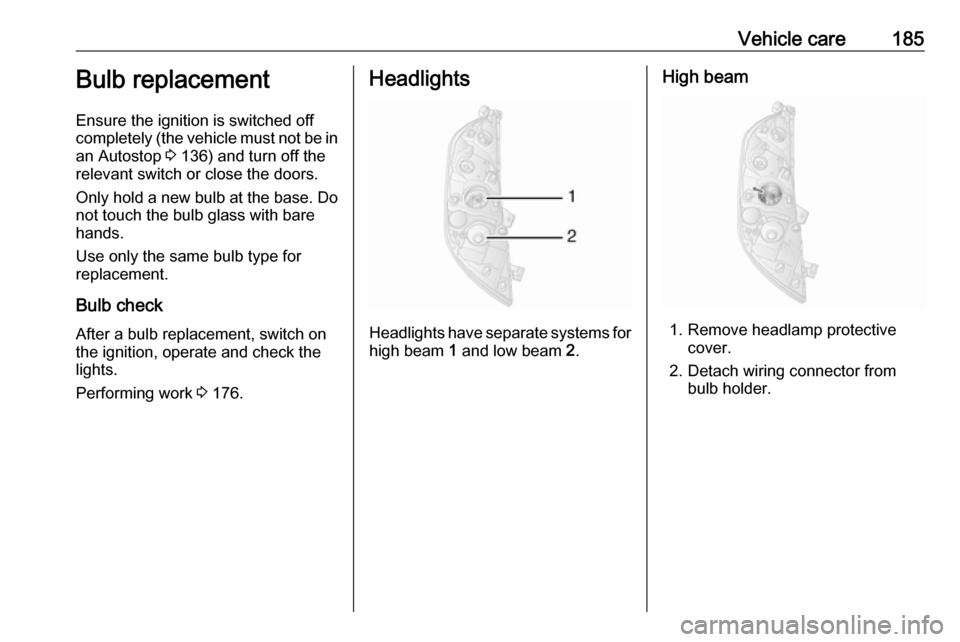
Headlights have separate systems for
high beam 1 and low beam 2.
High beam
1. Remove headlamp protective
cover.
2. Detach wiring connector from bulb holder.
Page 188 of 261
186Vehicle care
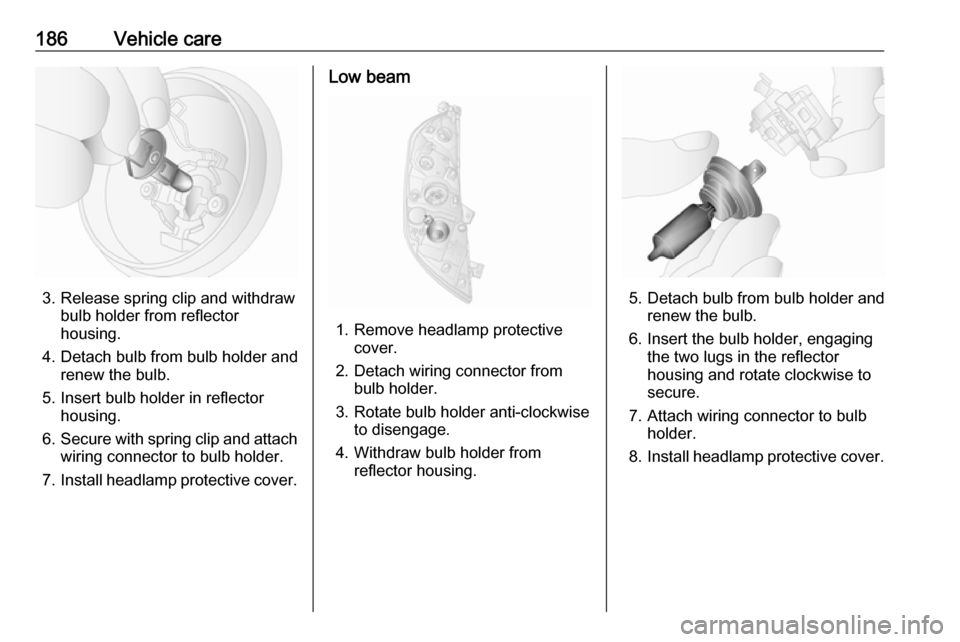
3. Release spring clip and withdrawbulb holder from reflector
housing.
4. Detach bulb from bulb holder and renew the bulb.
5. Insert bulb holder in reflector housing.
6. Secure with spring clip and attach
wiring connector to bulb holder.
7. Install headlamp protective cover.
Low beam
1. Remove headlamp protective
cover.
2. Detach wiring connector from bulb holder.
3. Rotate bulb holder anti-clockwise to disengage.
4. Withdraw bulb holder from reflector housing.
5. Detach bulb from bulb holder andrenew the bulb.
6. Insert the bulb holder, engaging the two lugs in the reflectorhousing and rotate clockwise to
secure.
7. Attach wiring connector to bulb holder.
8. Install headlamp protective cover.
Page 189 of 261
Vehicle care187Sidelights
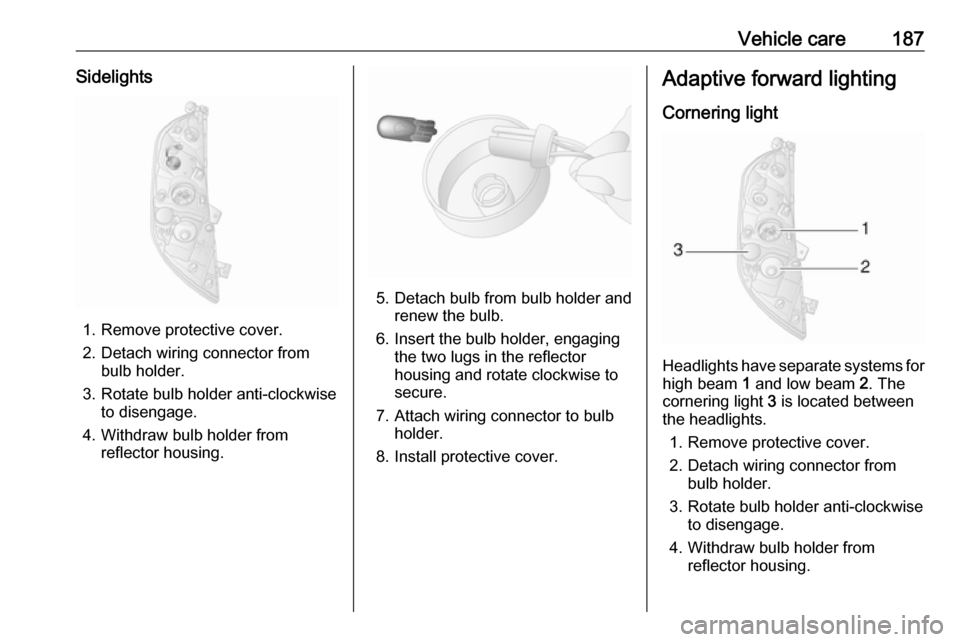
1. Remove protective cover.
2. Detach wiring connector from bulb holder.
3. Rotate bulb holder anti-clockwise to disengage.
4. Withdraw bulb holder from reflector housing.
5. Detach bulb from bulb holder andrenew the bulb.
6. Insert the bulb holder, engaging the two lugs in the reflectorhousing and rotate clockwise to
secure.
7. Attach wiring connector to bulb holder.
8. Install protective cover.
Adaptive forward lighting
Cornering light
Headlights have separate systems for high beam 1 and low beam 2. The
cornering light 3 is located between
the headlights.
1. Remove protective cover.
2. Detach wiring connector from bulb holder.
3. Rotate bulb holder anti-clockwise to disengage.
4. Withdraw bulb holder from reflector housing.
Page 190 of 261
188Vehicle care
5. Detach bulb from bulb holder andrenew the bulb.
6. Insert the bulb holder, engaging the two lugs in the reflectorhousing and rotate clockwise to
secure.
7. Attach wiring connector to bulb holder.
8. Install protective cover.
Fog lights
Have the front fog light bulbs replaced by a workshop.
Front turn signal lights
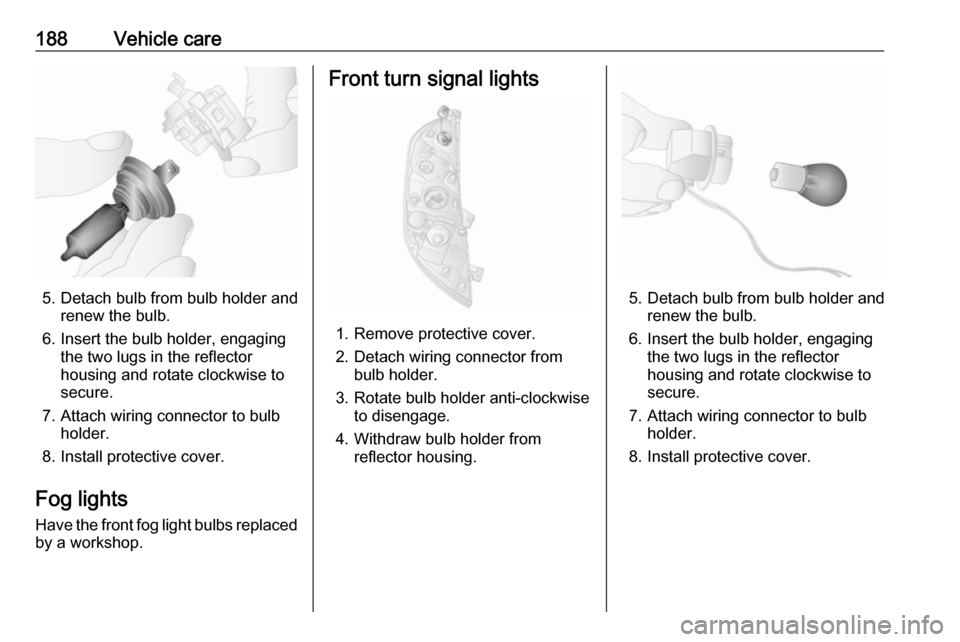
1. Remove protective cover.
2. Detach wiring connector from bulb holder.
3. Rotate bulb holder anti-clockwise to disengage.
4. Withdraw bulb holder from reflector housing.
5. Detach bulb from bulb holder andrenew the bulb.
6. Insert the bulb holder, engaging the two lugs in the reflectorhousing and rotate clockwise to
secure.
7. Attach wiring connector to bulb holder.
8. Install protective cover.
Page 191 of 261
Vehicle care189Tail lights
Rear brake, tail, turn signal,
reverse and fog tail lights
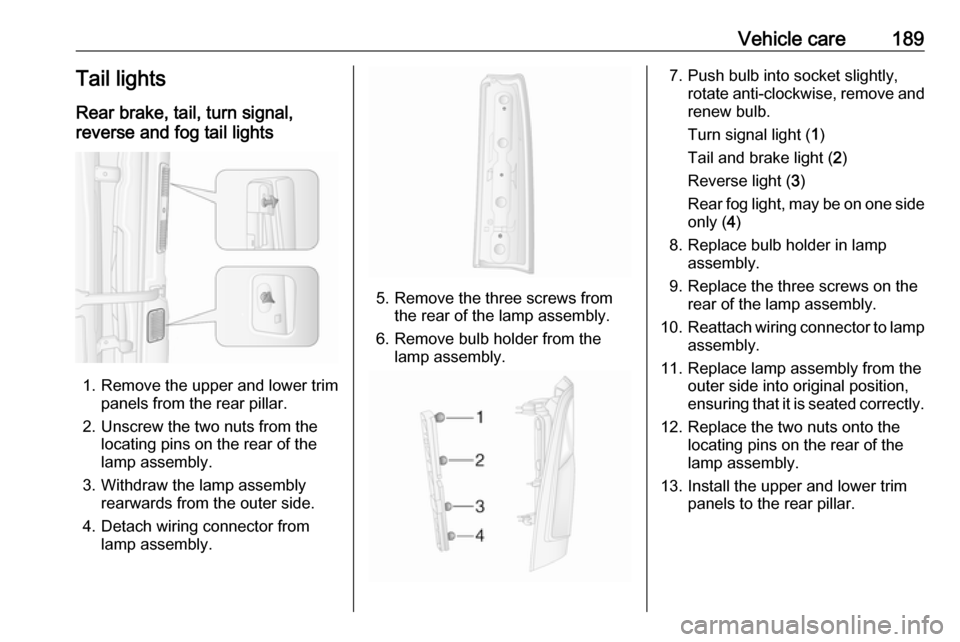
1. Remove the upper and lower trim panels from the rear pillar.
2. Unscrew the two nuts from the locating pins on the rear of the
lamp assembly.
3. Withdraw the lamp assembly rearwards from the outer side.
4. Detach wiring connector from lamp assembly.
5. Remove the three screws from the rear of the lamp assembly.
6. Remove bulb holder from the lamp assembly.
7. Push bulb into socket slightly, rotate anti-clockwise, remove and
renew bulb.
Turn signal light ( 1)
Tail and brake light ( 2)
Reverse light ( 3)
Rear fog light, may be on one side only ( 4)
8. Replace bulb holder in lamp assembly.
9. Replace the three screws on the rear of the lamp assembly.
10. Reattach wiring connector to lamp
assembly.
11. Replace lamp assembly from the outer side into original position,
ensuring that it is seated correctly.
12. Replace the two nuts onto the locating pins on the rear of the
lamp assembly.
13. Install the upper and lower trim panels to the rear pillar.
Page 192 of 261
190Vehicle careCrew Cab, Chassis CabRear brake, tail, turn signal, reverse
and fog tail lights
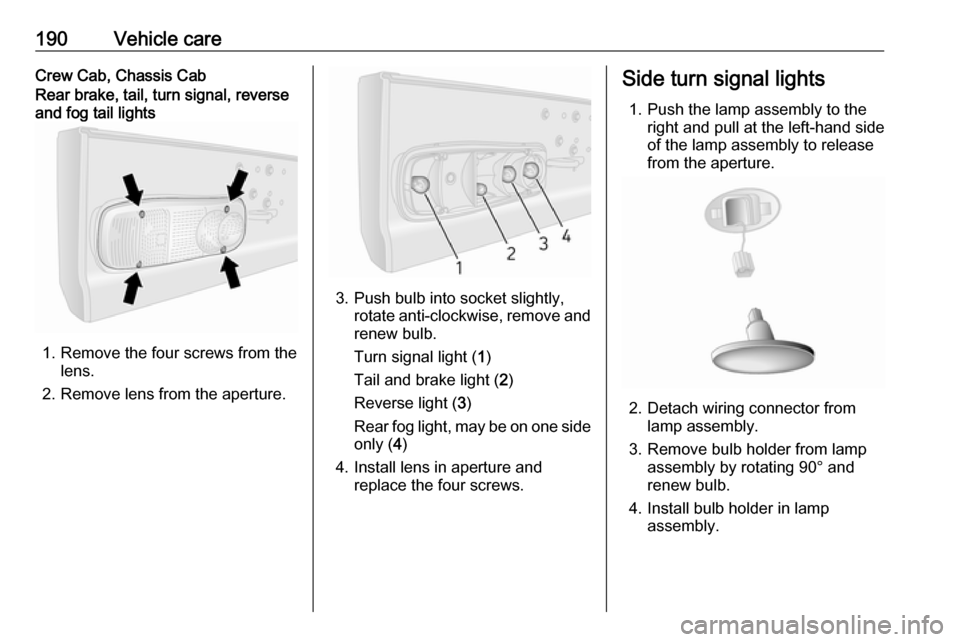
1. Remove the four screws from the lens.
2. Remove lens from the aperture.
3. Push bulb into socket slightly, rotate anti-clockwise, remove and
renew bulb.
Turn signal light ( 1)
Tail and brake light ( 2)
Reverse light ( 3)
Rear fog light, may be on one side only ( 4)
4. Install lens in aperture and replace the four screws.
Side turn signal lights
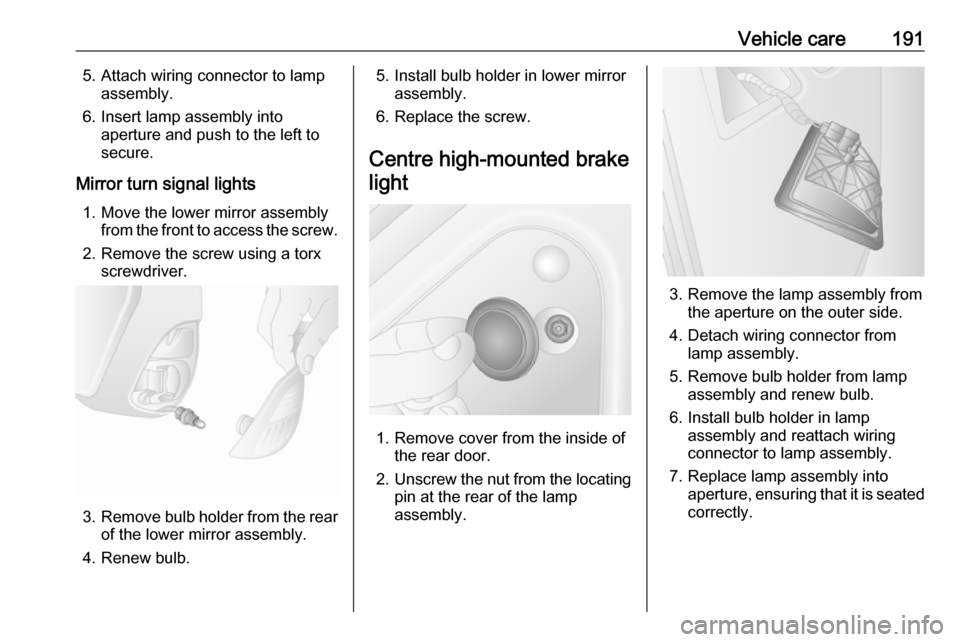
1. Push the lamp assembly to the right and pull at the left-hand side
of the lamp assembly to release
from the aperture.
2. Detach wiring connector from lamp assembly.
3. Remove bulb holder from lamp assembly by rotating 90° and
renew bulb.
4. Install bulb holder in lamp assembly.
Page 193 of 261
Vehicle care1915. Attach wiring connector to lampassembly.
6. Insert lamp assembly into aperture and push to the left to
secure.
Mirror turn signal lights 1. Move the lower mirror assembly from the front to access the screw.
2. Remove the screw using a torx screwdriver.
3.Remove bulb holder from the rear
of the lower mirror assembly.
4. Renew bulb.
5. Install bulb holder in lower mirror assembly.
6. Replace the screw.
Centre high-mounted brake light
1. Remove cover from the inside of the rear door.
2. Unscrew the nut from the locating
pin at the rear of the lamp
assembly.
3. Remove the lamp assembly from the aperture on the outer side.
4. Detach wiring connector from lamp assembly.
5. Remove bulb holder from lamp assembly and renew bulb.
6. Install bulb holder in lamp assembly and reattach wiring
connector to lamp assembly.
7. Replace lamp assembly into aperture, ensuring that it is seated
correctly.
Page 194 of 261
192Vehicle care8. Replace the nut onto the locatingpin on the rear of the lamp
assembly.
9. Install cover on the inside of the rear door.
Number plate light
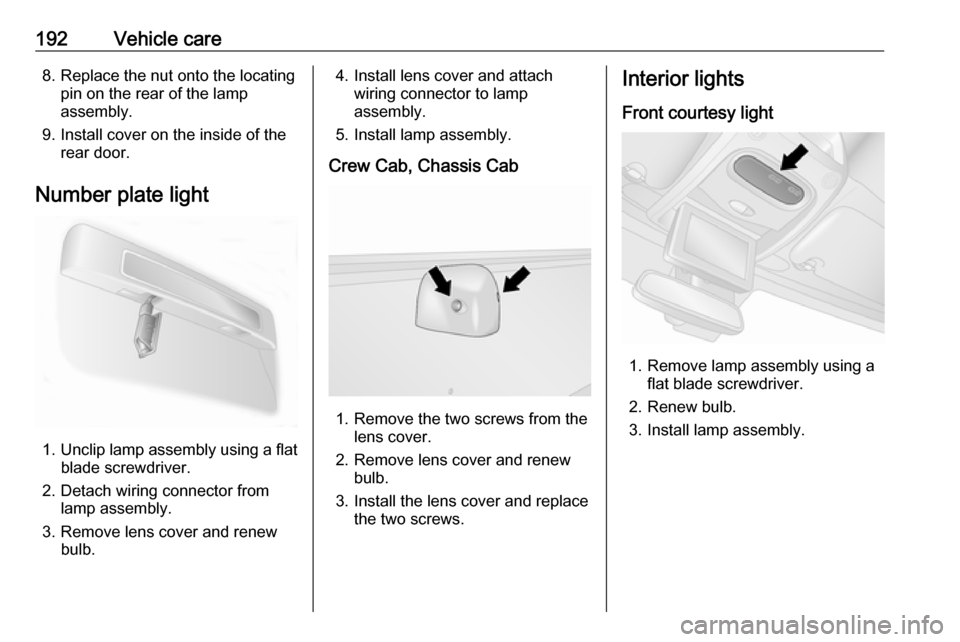
1. Unclip lamp assembly using a flat
blade screwdriver.
2. Detach wiring connector from lamp assembly.
3. Remove lens cover and renew bulb.
4. Install lens cover and attachwiring connector to lamp
assembly.
5. Install lamp assembly.
Crew Cab, Chassis Cab
1. Remove the two screws from the lens cover.
2. Remove lens cover and renew bulb.
3. Install the lens cover and replace the two screws.
Interior lights
Front courtesy light
1. Remove lamp assembly using a flat blade screwdriver.
2. Renew bulb.
3. Install lamp assembly.
Page 195 of 261
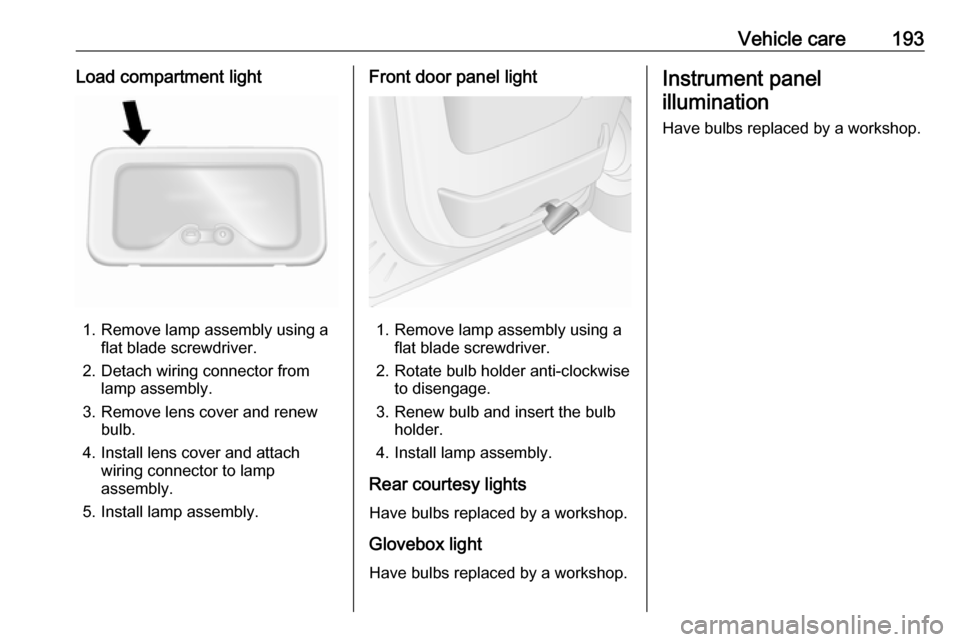
Vehicle care193Load compartment light
1. Remove lamp assembly using aflat blade screwdriver.
2. Detach wiring connector from lamp assembly.
3. Remove lens cover and renew bulb.
4. Install lens cover and attach wiring connector to lamp
assembly.
5. Install lamp assembly.
Front door panel light
1. Remove lamp assembly using a flat blade screwdriver.
2. Rotate bulb holder anti-clockwise to disengage.
3. Renew bulb and insert the bulb holder.
4. Install lamp assembly.
Rear courtesy lights
Have bulbs replaced by a workshop.
Glovebox light
Have bulbs replaced by a workshop.
Instrument panel illumination
Have bulbs replaced by a workshop.