belt OPEL MOVANO_B 2017 Manual user
[x] Cancel search | Manufacturer: OPEL, Model Year: 2017, Model line: MOVANO_B, Model: OPEL MOVANO_B 2017Pages: 255, PDF Size: 6.12 MB
Page 10 of 255
8In briefHead restraint adjustment
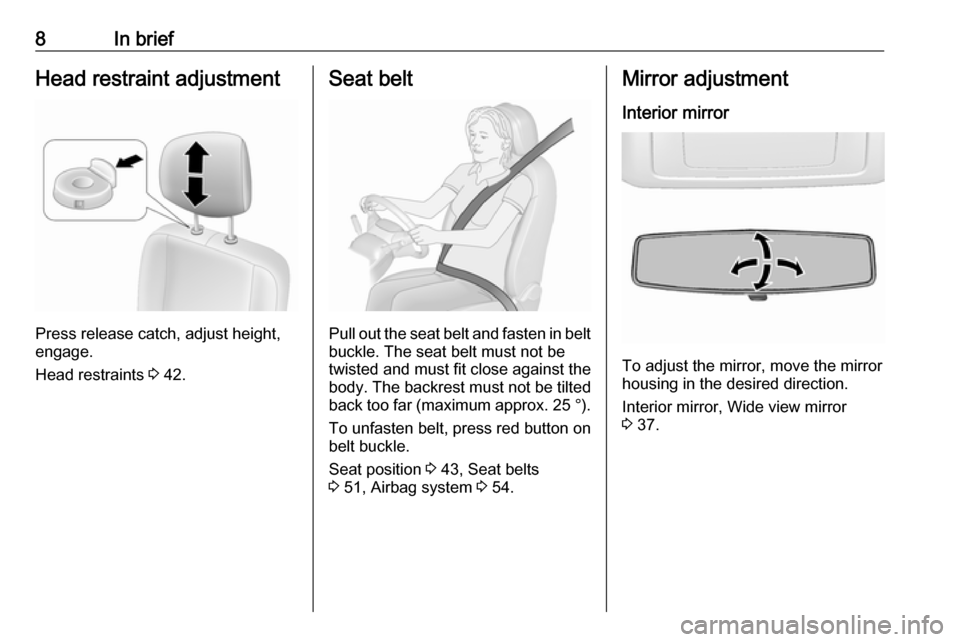
Press release catch, adjust height,
engage.
Head restraints 3 42.
Seat belt
Pull out the seat belt and fasten in belt
buckle. The seat belt must not be
twisted and must fit close against the
body. The backrest must not be tilted back too far (maximum approx. 25 °).
To unfasten belt, press red button on belt buckle.
Seat position 3 43, Seat belts
3 51, Airbag system 3 54.
Mirror adjustment
Interior mirror
To adjust the mirror, move the mirror
housing in the desired direction.
Interior mirror, Wide view mirror
3 37.
Page 13 of 255

In brief111Fixed air vents .................... 126
2 Headlight range
adjustment ......................... 106
Ultrasonic parking assist .....158
Traction control system ......151
Electronic Stability
Program ............................. 152
3 Side air vents .....................125
4 Light switch ........................ 104
Turn and lane-change
signals ................................ 107
High beam and low beam,
headlight flash ....................105
Sidelights ............................ 104
Automatic light control .......104
Exit lighting ......................... 111
Front fog lights ...................108
Rear fog light ...................... 108
High beam assist ................105
5 Instruments .......................... 85
Transmission display ............88Driver Information Centre ...... 98
Trip computer ...................... 100
6 Horn ..................................... 80
Driver airbag ........................ 57
7 Remote control on
steering wheel .......................80
Cruise control .....................154
8 Windscreen wiper,
windscreen washer system ..81
Trip computer ...................... 100
9 Coin tray ............................... 70
10 Power outlet, USB slot ..........83
11 Centre air vents .................. 125
12 Storage compartment ...........70
13 Info-display ............................ 98
14 Front passenger airbag .........57
15 Storage compartment ..........70
16 Glovebox .............................. 71
17 Seat belt reminder ................. 92
Front passenger airbag
deactivation ........................... 58
18 Cupholders ........................... 7119Climate control system ....... 112
Electronic climate control
system ................................. 114
20 Cigarette lighter .................... 84
Power outlet ......................... 83
21 Gear lever, Manual
transmission ........................ 145
Manual transmission
automated ........................... 145
22 Cruise control and speed
limiter ................................. 154
Manual transmission
automated,
Winter and Laden modes ....147
Idle speed control ...............131
Stop-start system ................132
ECO mode .......................... 129
23 Ignition switch with
steering wheel lock ............130
24 Steering column controls .....80
25 Steering wheel adjustment ..80
26 Bonnet release lever ..........171
27 Auxiliary heater ...................119
Page 20 of 255
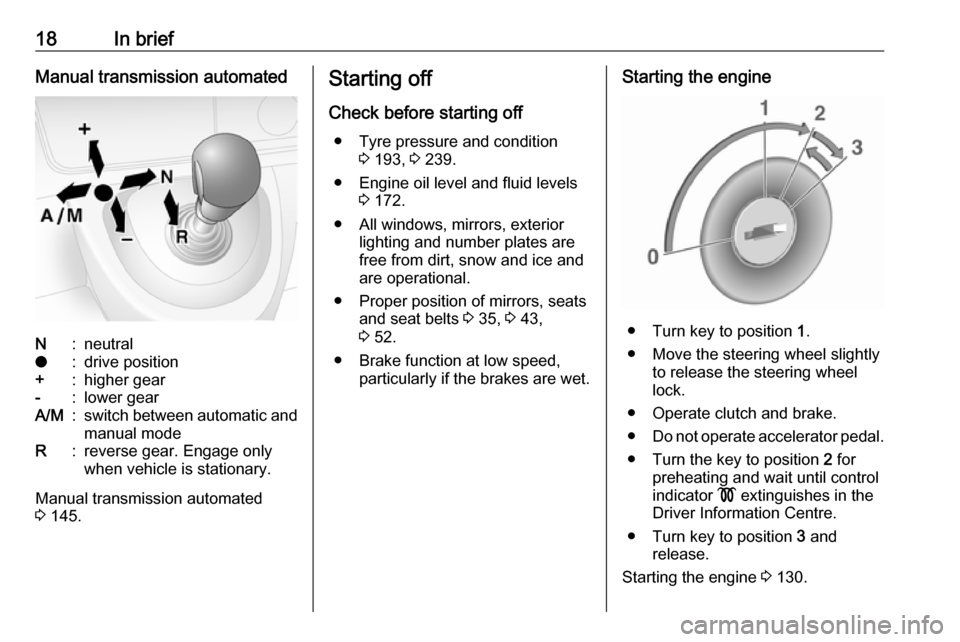
18In briefManual transmission automatedN:neutralo:drive position+:higher gear-:lower gearA/M:switch between automatic and
manual modeR:reverse gear. Engage only
when vehicle is stationary.
Manual transmission automated
3 145.
Starting off
Check before starting off ● Tyre pressure and condition 3 193, 3 239.
● Engine oil level and fluid levels 3 172.
● All windows, mirrors, exterior lighting and number plates are
free from dirt, snow and ice and
are operational.
● Proper position of mirrors, seats and seat belts 3 35, 3 43,
3 52.
● Brake function at low speed, particularly if the brakes are wet.Starting the engine
● Turn key to position 1.
● Move the steering wheel slightly to release the steering wheel
lock.
● Operate clutch and brake.
● Do not operate accelerator pedal.
● Turn the key to position 2 for
preheating and wait until control
indicator ! extinguishes in the
Driver Information Centre.
● Turn key to position 3 and
release.
Starting the engine 3 130.
Page 32 of 255
30Keys, doors and windowsilluminates in the instrument panel.
Then press the button (1) on the
relevant handle.
Move the handle back and forth to ensure the door actuator motor
operates, then press and hold the
switch on the instrument panel to fully close the door; the warning light
extinguishes when the system is
reset correctly.
Maintenance
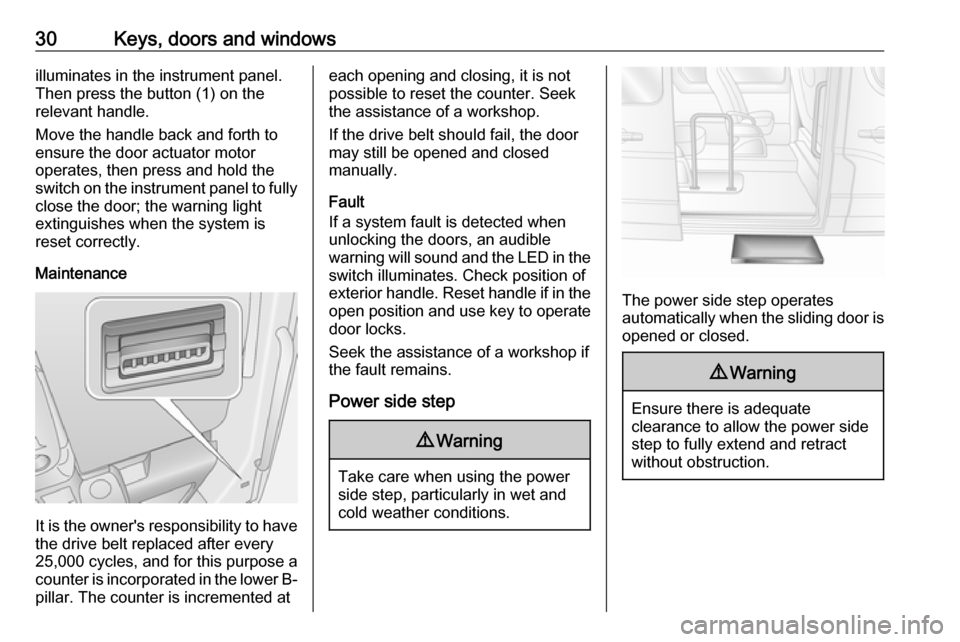
It is the owner's responsibility to have
the drive belt replaced after every
25,000 cycles, and for this purpose a
counter is incorporated in the lower B- pillar. The counter is incremented at
each opening and closing, it is not
possible to reset the counter. Seek
the assistance of a workshop.
If the drive belt should fail, the door
may still be opened and closed
manually.
Fault
If a system fault is detected when
unlocking the doors, an audible
warning will sound and the LED in the switch illuminates. Check position of
exterior handle. Reset handle if in the
open position and use key to operate door locks.
Seek the assistance of a workshop if
the fault remains.
Power side step9 Warning
Take care when using the power
side step, particularly in wet and
cold weather conditions.
The power side step operates
automatically when the sliding door is opened or closed.
9 Warning
Ensure there is adequate
clearance to allow the power side
step to fully extend and retract
without obstruction.
Page 44 of 255
42Seats, restraintsSeats, restraintsHead restraints............................ 42
Front seats ................................... 43
Seat position .............................. 43
Seat adjustment ........................44
Armrest ...................................... 48
Heating ...................................... 48
Rear seats ................................... 49
Seat belts ..................................... 51
Three-point seat belt .................52
Airbag system .............................. 54
Front airbag system ...................57
Side airbag system ....................58
Airbag deactivation ....................58
Child restraints ............................. 60
Child restraint systems ..............60
Child restraint installation locations ................................... 63Head restraints
Position9 Warning
Only drive with the head restraint
set to the proper position.
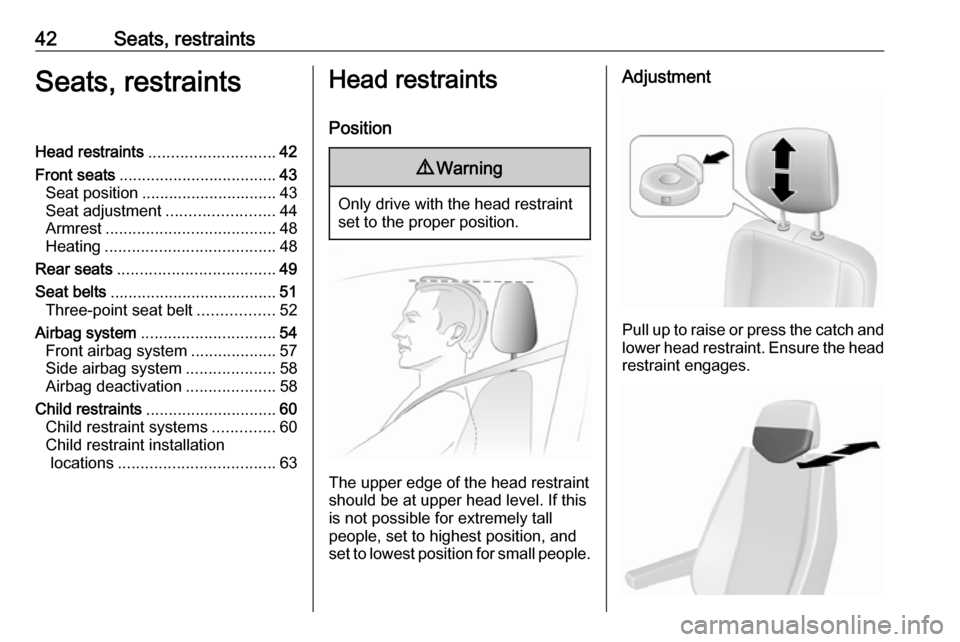
The upper edge of the head restraint
should be at upper head level. If this
is not possible for extremely tall
people, set to highest position, and
set to lowest position for small people.
Adjustment
Pull up to raise or press the catch and
lower head restraint. Ensure the head restraint engages.
Page 46 of 255
44Seats, restraints● Sit with shoulders as far backagainst the backrest as possible.
Set the backrest rake so that it is possible to reach the steering
wheel with arms slightly bent.
Maintain contact between
shoulders and the backrest when turning the steering wheel. Do
not angle the backrest too far
back. We recommend a
maximum rake of approx. 25°.
● Adjust seat and steering wheel in
a way that the wrist rests on top
of the steering wheel while the
arm is fully extended and
shoulders on the backrest.
● Adjust the steering wheel 3 80.
● Adjust the head restraint 3 42.
● Adjust the height of the seat belt 3 52.
● Adjust the lumbar support so that
it supports the natural shape of
the spine 3 44.
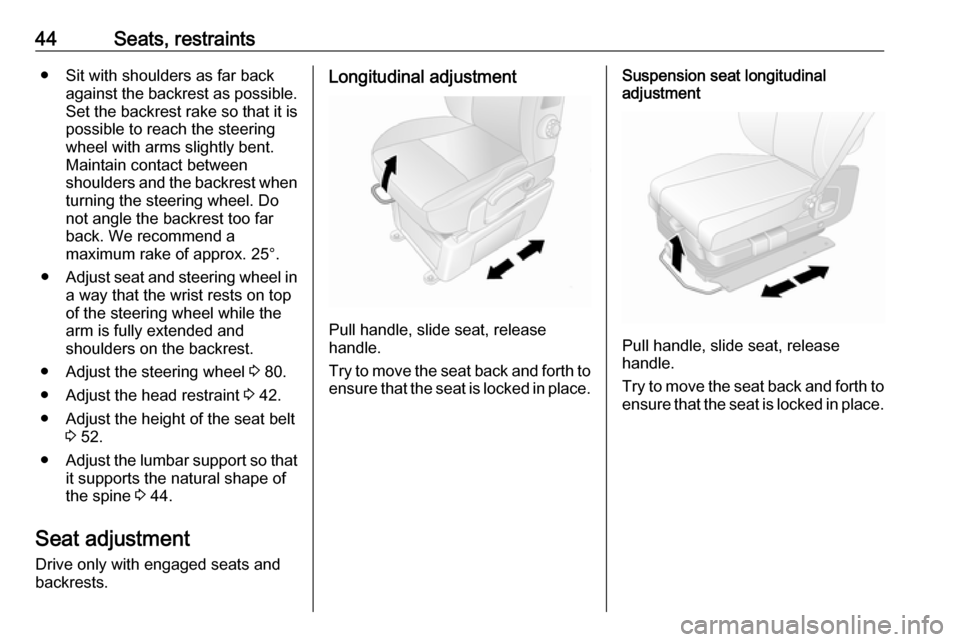
Seat adjustment Drive only with engaged seats and
backrests.Longitudinal adjustment
Pull handle, slide seat, release
handle.
Try to move the seat back and forth to ensure that the seat is locked in place.
Suspension seat longitudinal
adjustment
Pull handle, slide seat, release
handle.
Try to move the seat back and forth to ensure that the seat is locked in place.
Page 50 of 255
48Seats, restraintsSwivelling the seat
The driver's seat can be swivelled up
to 180° from the forward-facing
position, e.g. for easier access to the
load compartment area when the
vehicle is stationary and the engine is switched off.
Before swivelling the seat, make the
following preparations:
● Unfasten seat belt.
● Fold up the armrests.
● Slide seat as far back as possible.
● Set seat base angle to its lowest position.
● Adjust backrest inclination to vertical position.
● Open the driver's door.
Lift handle 6, swivel seat from the
forward-facing position, release
handle.
Always return the seat to the forward-
facing position before driving and
ensure the seat is locked in place
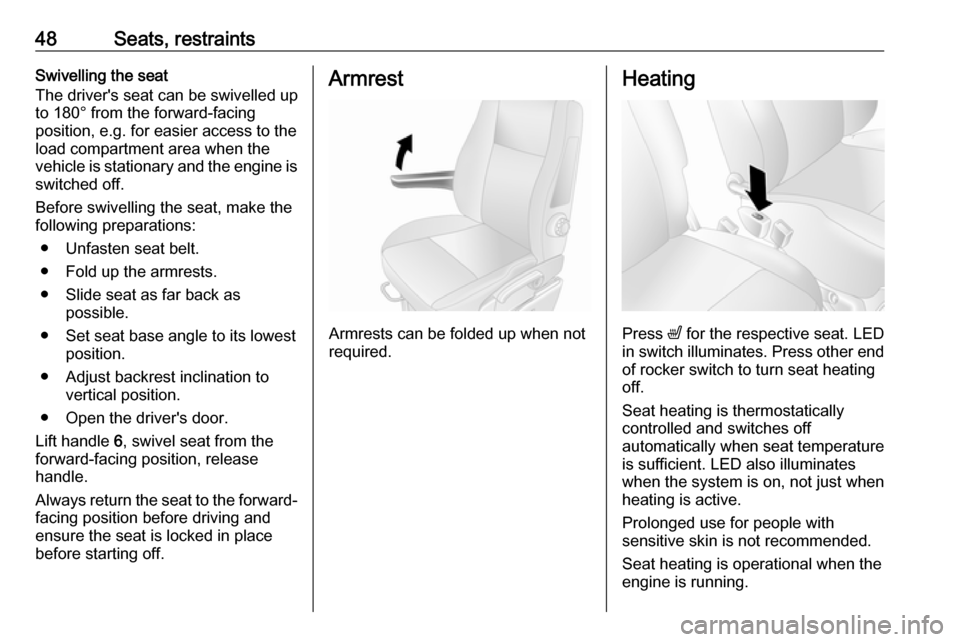
before starting off.Armrest
Armrests can be folded up when not
required.
Heating
Press ß for the respective seat. LED
in switch illuminates. Press other end of rocker switch to turn seat heating
off.
Seat heating is thermostatically
controlled and switches off
automatically when seat temperature
is sufficient. LED also illuminates
when the system is on, not just when
heating is active.
Prolonged use for people with
sensitive skin is not recommended.
Seat heating is operational when the
engine is running.
Page 51 of 255
Seats, restraints49Rear seats
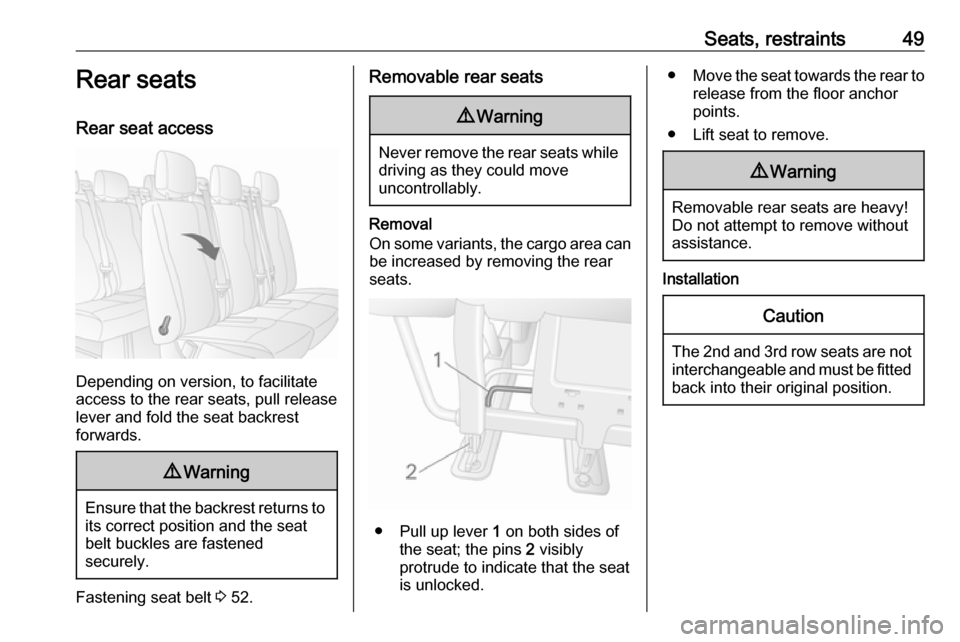
Rear seat access
Depending on version, to facilitate
access to the rear seats, pull release lever and fold the seat backrest
forwards.
9 Warning
Ensure that the backrest returns to
its correct position and the seat
belt buckles are fastened
securely.
Fastening seat belt 3 52.
Removable rear seats9 Warning
Never remove the rear seats while
driving as they could move
uncontrollably.
Removal
On some variants, the cargo area can be increased by removing the rear
seats.
● Pull up lever 1 on both sides of
the seat; the pins 2 visibly
protrude to indicate that the seat
is unlocked.
● Move the seat towards the rear to
release from the floor anchor
points.
● Lift seat to remove.9 Warning
Removable rear seats are heavy!
Do not attempt to remove without assistance.
Installation
Caution
The 2nd and 3rd row seats are not
interchangeable and must be fitted
back into their original position.
Page 53 of 255
Seats, restraints51Seat belts
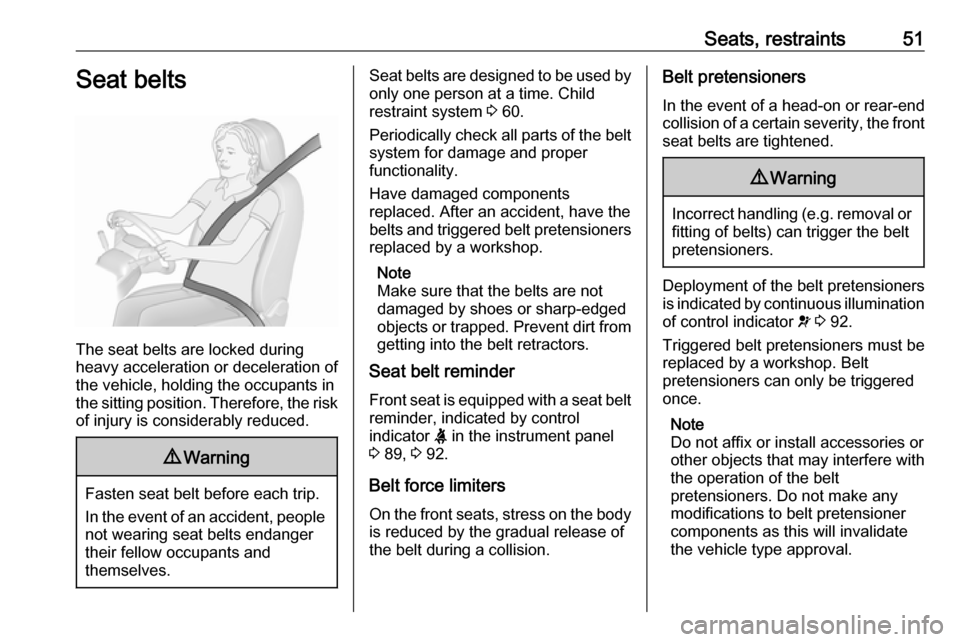
The seat belts are locked during
heavy acceleration or deceleration of
the vehicle, holding the occupants in
the sitting position. Therefore, the risk of injury is considerably reduced.
9 Warning
Fasten seat belt before each trip.
In the event of an accident, people
not wearing seat belts endanger their fellow occupants and
themselves.
Seat belts are designed to be used by only one person at a time. Child
restraint system 3 60.
Periodically check all parts of the belt
system for damage and proper
functionality.
Have damaged components
replaced. After an accident, have the
belts and triggered belt pretensioners replaced by a workshop.
Note
Make sure that the belts are not
damaged by shoes or sharp-edged
objects or trapped. Prevent dirt from
getting into the belt retractors.
Seat belt reminder
Front seat is equipped with a seat belt
reminder, indicated by control
indicator X in the instrument panel
3 89, 3 92.
Belt force limiters
On the front seats, stress on the body is reduced by the gradual release of
the belt during a collision.Belt pretensioners
In the event of a head-on or rear-end
collision of a certain severity, the front
seat belts are tightened.9 Warning
Incorrect handling (e.g. removal or
fitting of belts) can trigger the belt
pretensioners.
Deployment of the belt pretensioners
is indicated by continuous illumination
of control indicator v 3 92.
Triggered belt pretensioners must be replaced by a workshop. Belt
pretensioners can only be triggered
once.
Note
Do not affix or install accessories or
other objects that may interfere with
the operation of the belt
pretensioners. Do not make any
modifications to belt pretensioner components as this will invalidate
the vehicle type approval.
Page 54 of 255
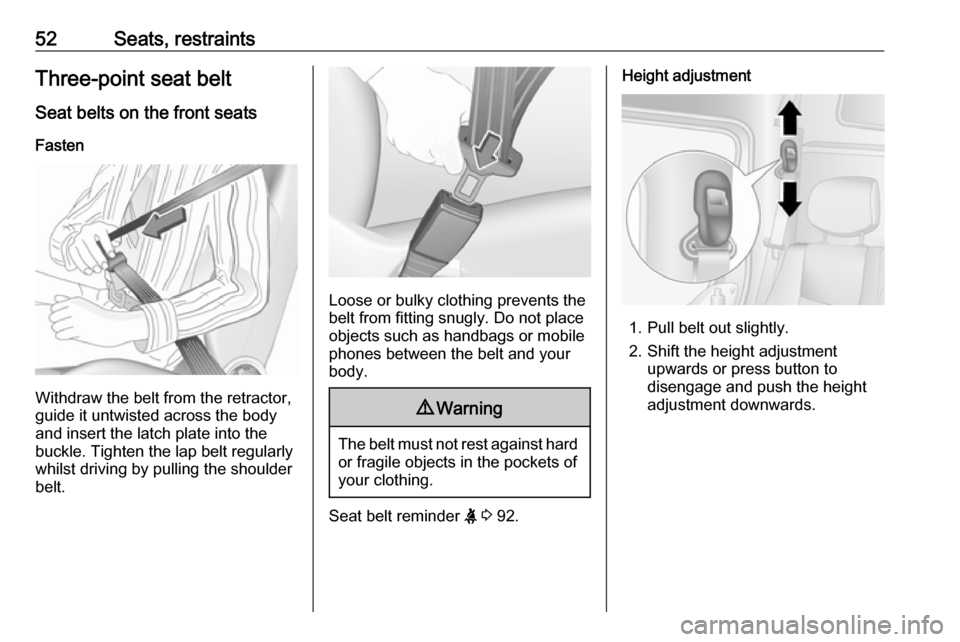
52Seats, restraintsThree-point seat beltSeat belts on the front seats
Fasten
Withdraw the belt from the retractor,
guide it untwisted across the body
and insert the latch plate into the
buckle. Tighten the lap belt regularly
whilst driving by pulling the shoulder
belt.
Loose or bulky clothing prevents the
belt from fitting snugly. Do not place
objects such as handbags or mobile
phones between the belt and your body.
9 Warning
The belt must not rest against hard
or fragile objects in the pockets of
your clothing.
Seat belt reminder X 3 92.
Height adjustment
1. Pull belt out slightly.
2. Shift the height adjustment upwards or press button to
disengage and push the height
adjustment downwards.