change time OPEL MOVANO_B 2017 Manual user
[x] Cancel search | Manufacturer: OPEL, Model Year: 2017, Model line: MOVANO_B, Model: OPEL MOVANO_B 2017Pages: 255, PDF Size: 6.12 MB
Page 36 of 255
34Keys, doors and windowsIf the hazard warning lights do not
flash upon activation, a door or the
bonnet is not fully closed.
Note
Changes to the vehicle interior, e.g.
the use of seat covers, and open
windows, could impair the function
of passenger compartment
monitoring.
Deactivation
Unlocking the vehicle or switching on
the ignition deactivates the anti-theft
alarm system. Hazard warning lights
flash once to confirm deactivation.
Note
If the alarm has been triggered,
unlocking the vehicle with the key
will not stop the alarm siren. To stop the siren, switch on the ignition. The
hazard warning lights will not flash
upon deactivation if the alarm has
been triggered.
Activation without monitoring of
passenger compartment
Switch off monitoring of the
passenger compartment when
people or animals are being left in thevehicle, or if the auxiliary heater
3 119 is set for a timed or remote
controlled start.
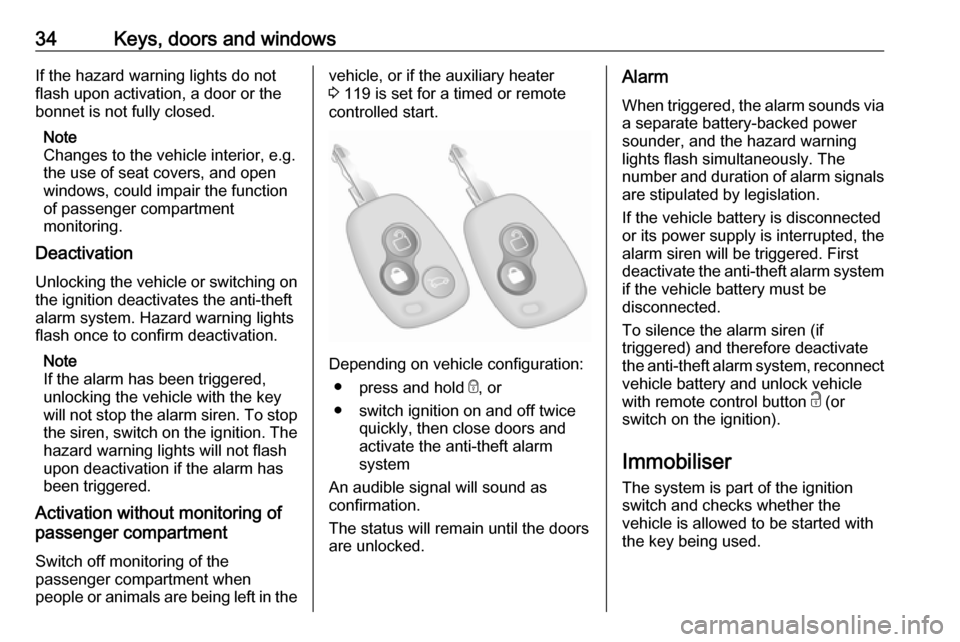
Depending on vehicle configuration:
● press and hold e, or
● switch ignition on and off twice quickly, then close doors and
activate the anti-theft alarm
system
An audible signal will sound as
confirmation.
The status will remain until the doors
are unlocked.
Alarm
When triggered, the alarm sounds via a separate battery-backed power
sounder, and the hazard warning
lights flash simultaneously. The
number and duration of alarm signals
are stipulated by legislation.
If the vehicle battery is disconnected
or its power supply is interrupted, the
alarm siren will be triggered. First
deactivate the anti-theft alarm system if the vehicle battery must be
disconnected.
To silence the alarm siren (if
triggered) and therefore deactivate
the anti-theft alarm system, reconnect vehicle battery and unlock vehicle
with remote control button c (or
switch on the ignition).
Immobiliser
The system is part of the ignition
switch and checks whether the
vehicle is allowed to be started with
the key being used.
Page 85 of 255
Instruments and controls839Warning
The road surface may already be
icy even though the display
indicates a few degrees above
0 °C.
Clock
Depending on vehicle, the current
time and/or date may appear in the information display 3 98 or the
Driver Information Centre 3 98.
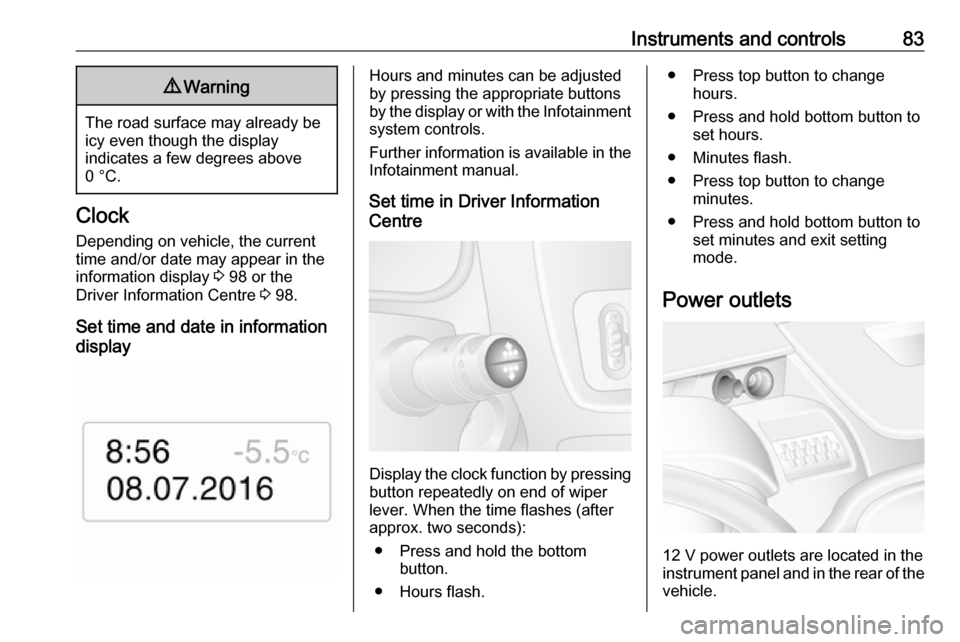
Set time and date in information
display
Hours and minutes can be adjusted
by pressing the appropriate buttons
by the display or with the Infotainment
system controls.
Further information is available in the
Infotainment manual.
Set time in Driver Information
Centre
Display the clock function by pressing button repeatedly on end of wiper
lever. When the time flashes (after
approx. two seconds):
● Press and hold the bottom button.
● Hours flash.
● Press top button to change hours.
● Press and hold bottom button to set hours.
● Minutes flash.
● Press top button to change minutes.
● Press and hold bottom button to set minutes and exit setting
mode.
Power outlets
12 V power outlets are located in the instrument panel and in the rear of the
vehicle.
Page 106 of 255
104LightingLightingExterior lighting.......................... 104
Light switch .............................. 104
Automatic light control .............104
High beam ............................... 105
High beam assist .....................105
Headlight flash ......................... 106
Headlight range adjustment ....106
Headlights when driving abroad .................................... 106
Daytime running lights .............106
Adaptive forward lighting .........107
Hazard warning flashers ..........107
Turn and lane-change signals . 107
Front fog lights ......................... 108
Rear fog lights ......................... 108
Reversing lights .......................108
Misted light covers ...................108
Interior lighting ........................... 109
Interior lights ............................ 109
Load compartment lighting ......109
Reading lights .......................... 110
Lighting features ........................111
Exit lighting .............................. 111
Battery discharge protection ....111Exterior lighting
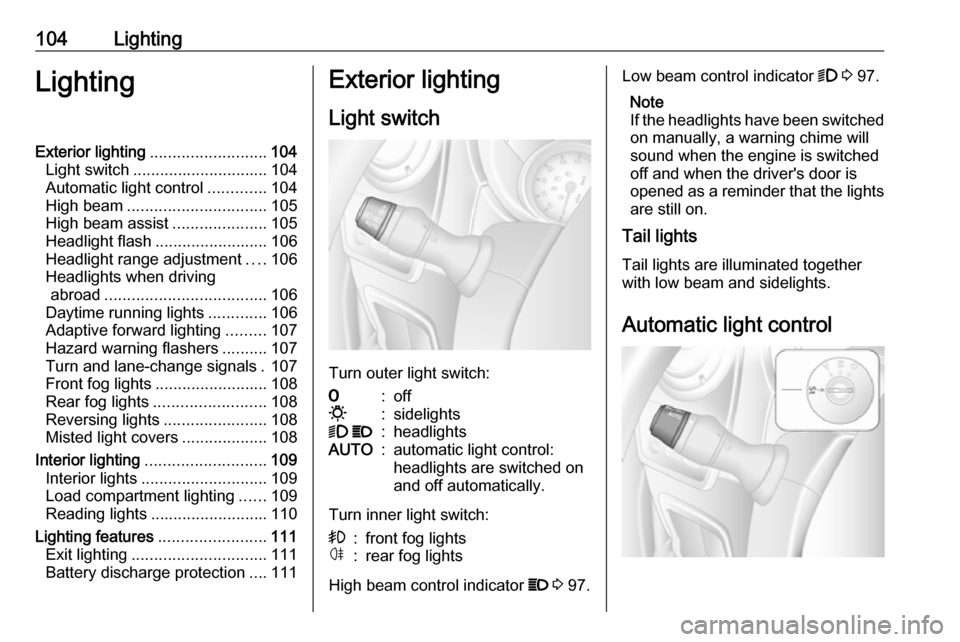
Light switch
Turn outer light switch:
7:off0:sidelights9 P:headlightsAUTO:automatic light control:
headlights are switched on
and off automatically.
Turn inner light switch:
>:front fog lightsø:rear fog lights
High beam control indicator P 3 97.
Low beam control indicator 9 3 97.
Note
If the headlights have been switched on manually, a warning chime will
sound when the engine is switched
off and when the driver's door is
opened as a reminder that the lights
are still on.
Tail lights
Tail lights are illuminated togetherwith low beam and sidelights.
Automatic light control
Page 107 of 255
Lighting105When the automatic light control
function is switched on and the
engine is running, the system
switches between daytime running
lights (where fitted) and headlights,
depending on the lighting conditions.
For reasons of safety, the light switch
should always remain in the AUTO
position.
Daytime running lights 3 106.
Automatic headlight activation During poor lighting conditions the
headlights are switched on.
High beamTo change between low and high
beam, pull lever until a click is felt.
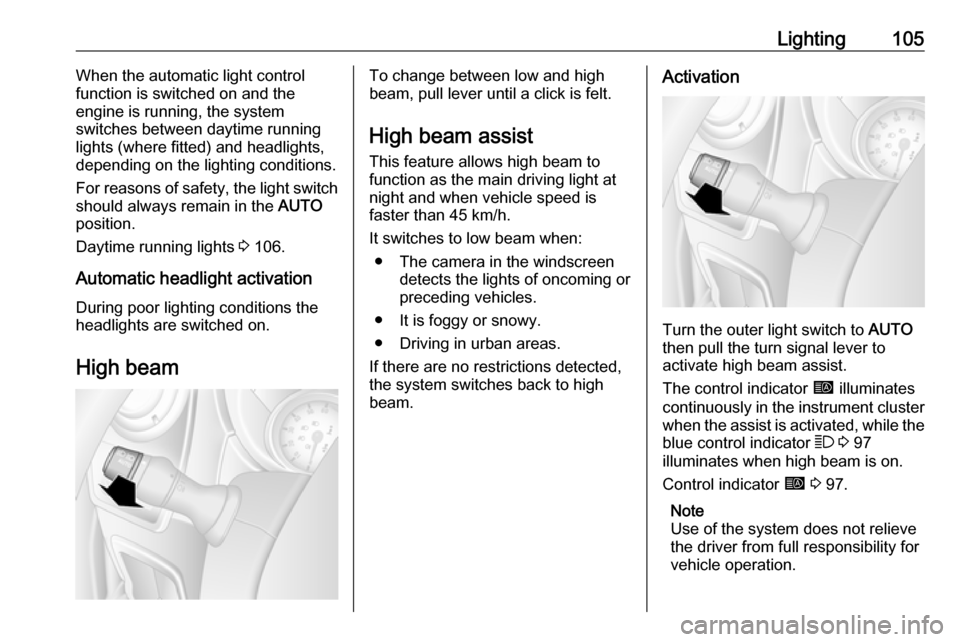
High beam assist This feature allows high beam to
function as the main driving light at
night and when vehicle speed is
faster than 45 km/h.
It switches to low beam when: ● The camera in the windscreen detects the lights of oncoming or
preceding vehicles.
● It is foggy or snowy.
● Driving in urban areas.
If there are no restrictions detected,
the system switches back to high
beam.Activation
Turn the outer light switch to AUTO
then pull the turn signal lever to activate high beam assist.
The control indicator í illuminates
continuously in the instrument cluster when the assist is activated, while the
blue control indicator 7 3 97
illuminates when high beam is on.
Control indicator í 3 97.
Note
Use of the system does not relieve
the driver from full responsibility for
vehicle operation.
Page 109 of 255
Lighting107The lights operate automatically
when the ignition is switched on.
If the vehicle is equipped with the
automatic light control function, the
system switches between daytime running lights and headlights
automatically depending on the
lighting conditions. Automatic light
control 3 104.
Adaptive forward lighting
Cornering light
Depending on the steering angle,
vehicle speed and gear selected
when cornering, an additional light
will illuminate the corner of the road
on the respective side.
The cornering light is switched off
automatically after prolonged use and at vehicle speeds above 40 km/h.Hazard warning flashers
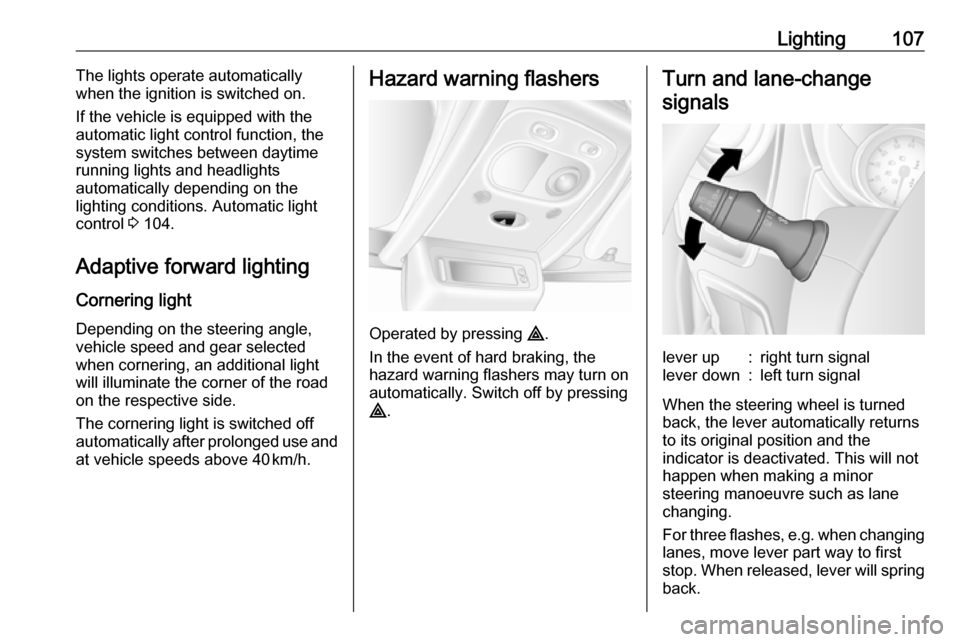
Operated by pressing ¨.
In the event of hard braking, the
hazard warning flashers may turn on automatically. Switch off by pressing
¨ .
Turn and lane-change
signalslever up:right turn signallever down:left turn signal
When the steering wheel is turned
back, the lever automatically returns
to its original position and the
indicator is deactivated. This will not happen when making a minor
steering manoeuvre such as lane
changing.
For three flashes, e.g. when changing lanes, move lever part way to first
stop. When released, lever will spring
back.
Page 118 of 255

116Climate controlCoolingThe air conditioning system cools and
dehumidifies (dries) when outside
temperature is above a specific level.
Therefore condensation may form
and drip from under the vehicle.
If no cooling or drying is required
press A/C OFF to switch the cooling
system off, thus saving fuel.
" A/C OFF " appears in the display.
Manual air recirculation mode Press u. LED illuminates and u
appears in the display.9 Warning
The exchange of fresh air is
reduced in air recirculation mode.
In operation without cooling the air humidity increases, so the
windows may mist up. The quality
of the passenger compartment air
deteriorates, which may cause the vehicle occupants to feel drowsy.
To return to automatic mode: press
u or AUTO .
Rear heating system
If the engine is switched off, the rear
compartment can be heated by the
additional heating, through low level
vents.
By programming values using the
control panel, the user can adjust the
time, day and temperature settings.
Heating will cease to operate if the
vehicle fuel level drops too low.
During operation, power from the
vehicle battery is used. For short
journey times, check the vehicle
battery regularly and recharge if
necessary.
Note
If the rear heating system is
activated while the engine is
running, an Autostop will be
inhibited.
To ensure efficient performance, the
low level air vents in the rear
passenger compartment must not be
obstructed.9 Warning
Do not operate the system when
refuelling, when dust or
combustible vapours are present
or in enclosed spaces (e.g.
garage).
Page 119 of 255

Climate control117Timer1 Display:Displays preset,
weekday or preset
day, current time or preset time,
temperature, Z and
Y2 Temperature:Selects
temperature3 l:Adjusts values up4 k:Adjusts values
down5 Y:Selects heat
settings6 P:Selects preset
settings7 Þ:Selects time and
weekday settings
Operation
Heating Y
Press Y, the predetermined heating
duration, e.g. 30 is displayed.
To temporarily adjust the heating
duration, adjust using k or l. The
value can be set from 10 to
120 minutes. Due to the power
consumption, note the heating
duration.
To switch off, press Y.
To change the default predetermined heating duration, ensure the heater is switched off, press and hold k until
the display flashes and adjust using
k or l.
Programming P
Up to three preset departure times during one day, or one preset
departure time over one week can be programmed.
● Press P once to select preset
memory number 1.
● Press P twice to select preset
memory number 2.
● Press P three times to select
preset memory number 3.
● Press P again to exit the preset
memory.
Start heating within 24 hours ● Press P to select desired preset
memory number 1, 2 or 3.
● Briefly press k or l; the preset
time flashes.
● Adjust the preset time using k or
l .
● Press P to confirm and exit the
preset memory.
Start heating up to seven days ● Press P to select desired preset
memory number 1, 2 or 3.
● Briefly press k or l; the preset
time flashes.
● Adjust the preset time using k or
l .
Page 120 of 255
118Climate control● After five seconds the preset day
flashes.
● Adjust the preset day using k or
l .
● The preset time and day are set once the display changes to the
current time.
Set time and weekday Þ
If the vehicle battery is disconnected or its voltage is too low, the unit will
need to be reset.
● Press Þ until the time flashes.
● Press k or l to change the
current time.
● Time is stored when the display stops flashing.
● Wait for weekday to flash.
● Press k or l to change the
weekday.
● Weekday is stored when the display stops flashing.
Heating level
The preferred heating level for
programmed departure times can be
set between 10 to 30℃.To adjust the temperature of the heating, turn the rotary knob located
on the control panel.turn clockwise:increase
temperatureturn anti-clock‐
wise:decrease
temperature
Rear air conditioning
system
The rear air conditioning system is
actuated in conjunction with the front
passenger compartment air
conditioning system.
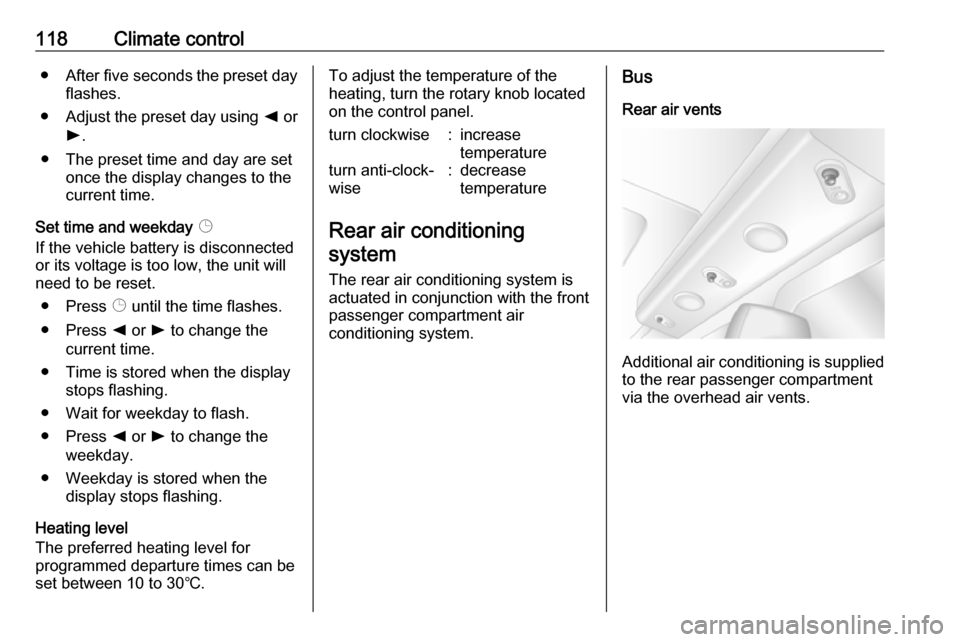
Bus
Rear air vents
Additional air conditioning is supplied
to the rear passenger compartment
via the overhead air vents.
Page 122 of 255
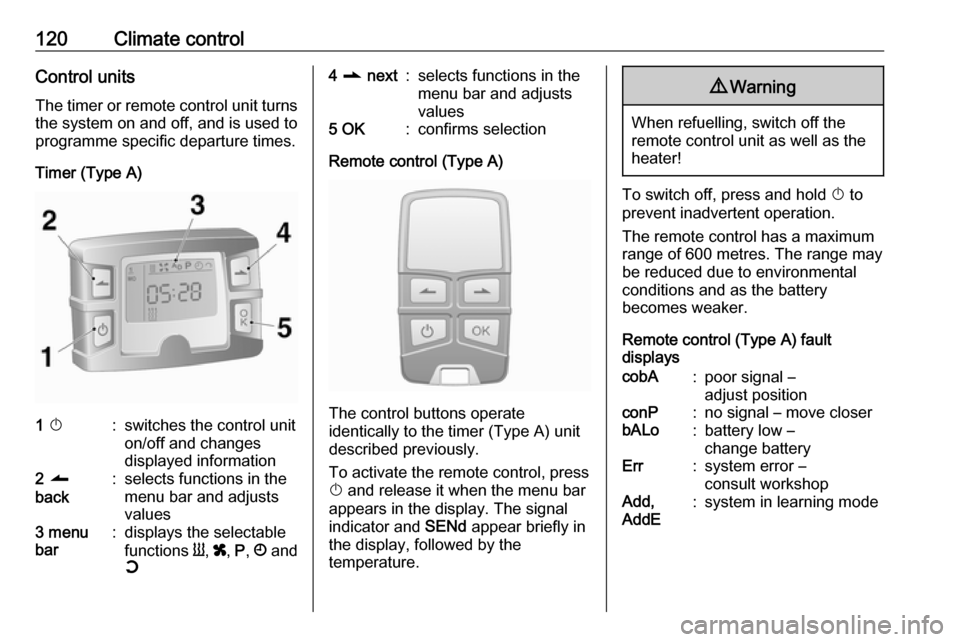
120Climate controlControl unitsThe timer or remote control unit turns
the system on and off, and is used to
programme specific departure times.
Timer (Type A)1 X:switches the control unit
on/off and changes
displayed information2 q
back:selects functions in the
menu bar and adjusts
values3 menu
bar:displays the selectable
functions Y, x , P , Ö and
Y4 r next:selects functions in the
menu bar and adjusts
values5 OK:confirms selection
Remote control (Type A)
The control buttons operate
identically to the timer (Type A) unit
described previously.
To activate the remote control, press X and release it when the menu bar
appears in the display. The signal
indicator and SENd appear briefly in
the display, followed by the
temperature.
9 Warning
When refuelling, switch off the
remote control unit as well as the
heater!
To switch off, press and hold X to
prevent inadvertent operation.
The remote control has a maximum
range of 600 metres. The range may
be reduced due to environmental
conditions and as the battery
becomes weaker.
Remote control (Type A) fault
displays
cobA:poor signal –
adjust positionconP:no signal – move closerbALo:battery low –
change batteryErr:system error –
consult workshopAdd,
AddE:system in learning mode
Page 125 of 255

Climate control123To temporarily adjust the heating
duration, adjust with q or r and
confirm. The value can be set from
ten to 120 minutes. Due to the power
consumption, note the heating
duration.
To switch off, select Y in the menu bar
again and confirm.
Ventilation x
Select x in the menu bar and confirm.
The ventilation duration can be
accepted or adjusted. The duration
shown is accepted without
confirmation.
To switch off, select x in the menu bar
again and confirm.
Programming P
Up to three preset departure times can be programmed, either during
one day or over one week.
● Select P in the menu bar and
confirm.
● Select desired preset memory number 1, 2 or 3 and confirm.
● Select day and confirm.
● Select hour and confirm.● Select minutes and confirm.
● Select Y or x and confirm.
● If necessary, adjust the runtime duration prior to departure and
confirm.
The next preset memory number to
be activated is underlined and the
weekday is displayed. Repeat the
procedure to programme the other
preset memory numbers.
Pressing X during the procedure will
exit without storing programme
adjustments.
To delete a preset departure time,
follow the steps for programming until
heating symbol Y flashes. Press q
or r until oFF appears in the display
and confirm.
Heating stops automatically
five minutes after the programmed
departure time.
Note
The remote control system features a temperature sensor which
calculates the runtime according to the ambient temperature and thedesired heating level (ECO or
HIGH). The system startsautomatically between five and
60 minutes prior to the programmed
departure time.
Set weekday, time and heating
duration Ö
If the vehicle battery is disconnected
or its voltage is too low, the unit will
need to be reset.
● Select Ö and confirm.
● Select weekday and confirm.
● Change hours and confirm.
● Change minutes and confirm. ● Change the default heating duration and confirm.
Heating level Y
The preferred heating level for
programmed departure times can be set to either ECO or HIGH.
Select Y and confirm. ECO or HIGH
flashes in the display. Adjust using
q or r and confirm.
Operation (Type D)
Heating Y or Ventilation x
Select the operating mode Y or x, if
necessary.