window OPEL MOVANO_B 2018 Owner's Guide
[x] Cancel search | Manufacturer: OPEL, Model Year: 2018, Model line: MOVANO_B, Model: OPEL MOVANO_B 2018Pages: 265, PDF Size: 6.39 MB
Page 121 of 265
Climate control119● Cooling A/C on.
● Air recirculation system u on.
● Set air distribution control to M.
● Set temperature control to coldest level.
● Set fan speed to highest level.
● Open all air vents.
Demisting and defrosting the
windows
● Switch cooling A/C on.
● Set temperature control to warmest level.
● Set fan speed to highest level.
● Set air distribution control to V.
● Switch on heated rear window Ü.
● Open side air vents as required and direct them towards door
windows.
● For simultaneous warming of the
foot well, set air distribution
control to J.Note
If V is pressed while the engine is
running, an Autostop will be inhibited
until V is pressed again.
If V is pressed while the engine is
in an Autostop, the engine will restart
automatically.
Stop-start system 3 137.
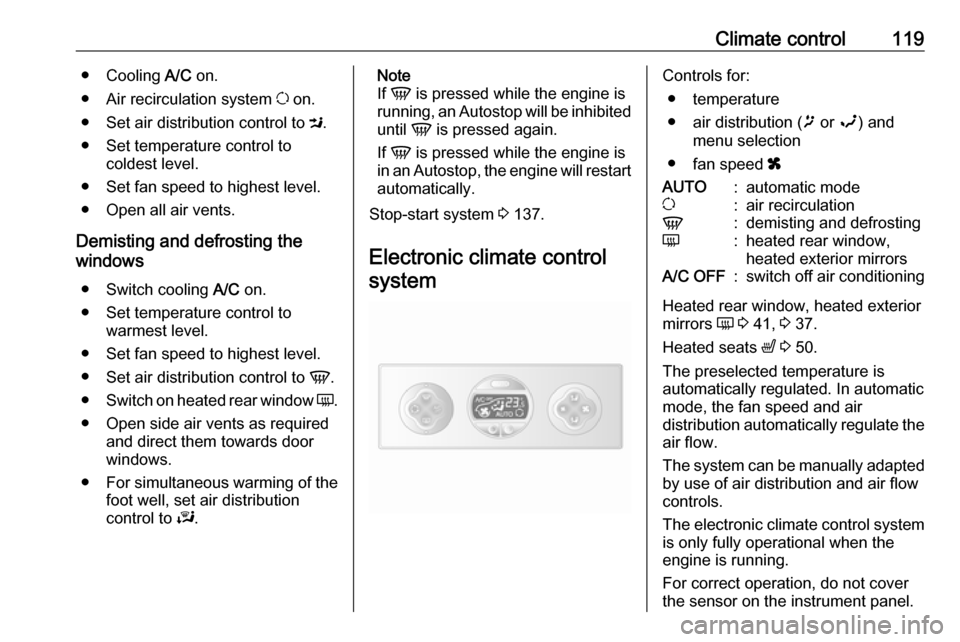
Electronic climate control systemControls for: ● temperature
● air distribution ( ï or î) and
menu selection
● fan speed xAUTO:automatic modeu:air recirculationV:demisting and defrostingÜ:heated rear window,
heated exterior mirrorsA/C OFF:switch off air conditioning
Heated rear window, heated exterior
mirrors Ü 3 41, 3 37.
Heated seats ß 3 50.
The preselected temperature is
automatically regulated. In automatic
mode, the fan speed and air
distribution automatically regulate the
air flow.
The system can be manually adapted by use of air distribution and air flowcontrols.
The electronic climate control system
is only fully operational when the
engine is running.
For correct operation, do not cover
the sensor on the instrument panel.
Page 122 of 265

120Climate controlAutomatic mode
Basic setting for maximum comfort: ● Press AUTO ("AUTO" appears in
the display).
● Set desired temperature (the temperature appears in the
display).
● Open all air vents.
During automatic mode, the settings
for fan speed, air distribution, air
conditioning and air recirculation are
automatically regulated by the system and are not shown on the display.
Temperature preselection
Temperatures can be set to the
desired value with the two buttons
below the display.
For reasons of comfort, change
temperature only in small increments.red:warmblue:cold
Heating will not be fully effective until
the engine has reached normal
operating temperature.
If the minimum temperature of 15 ℃
is set, the electronic climate control
system runs at maximum cooling.
If the maximum temperature of 27 ℃
is set, the electronic climate control
system runs at maximum heating.
Note
If the temperature is to be reduced
for climate comfort reasons, an
Autostop can be inhibited or the
engine will restart automatically
when cooling is switched on.
Stop-start system 3 137.
Fan speed
Fan speed can be increased or
decreased with the x buttons.
The selected fan speed is indicated
with x in the display.
If the fan is switched off, the air
conditioning is also deactivated.
To return to automatic mode: Press
AUTO .
Demisting and defrosting the
windows
Press V; LED illuminates.Temperature and air distribution are
set automatically, air conditioning is
switched on and the fan runs at a high
speed.
Heated rear window, heated exterior
mirrors are also switched on
automatically. Press Ü to switch off
without deactivating demisting/
defrosting of the windows. The fan
speed can also be decreased.
To return to automatic mode: press
V or AUTO .
Note
If V is pressed while the engine is
running, an Autostop will be inhibited
until V is pressed again.
If V is pressed while the engine is
in an Autostop, the engine will restart automatically.
Stop-start system 3 137.
Air distribution
Press ï or î repeatedly.
Page 123 of 265
Climate control121Arrows shown in the display indicate
the distribution settings:ï:to windscreen and front door
windows™:to windscreen, front door
windows and foot well²:to head area³:to head area and foot wellî:to foot well
To return to automatic mode: Press AUTO .
Cooling
The air conditioning system cools and
dehumidifies (dries) when outside
temperature is above a specific level. Therefore condensation may form
and drip from under the vehicle.
If no cooling or drying is required,
press A/C OFF to switch the cooling
system off, thus saving fuel.
" A/C OFF " appears in the display.
Manual air recirculation mode Press u to switch on air recirculation;
u appears in the display.
9
Warning
The exchange of fresh air is
reduced in air recirculation mode.
In operation without cooling the air humidity increases, so the
windows may mist up. The quality
of the passenger compartment air
deteriorates, which may cause the vehicle occupants to feel drowsy.
To return to automatic mode: press
u or AUTO .
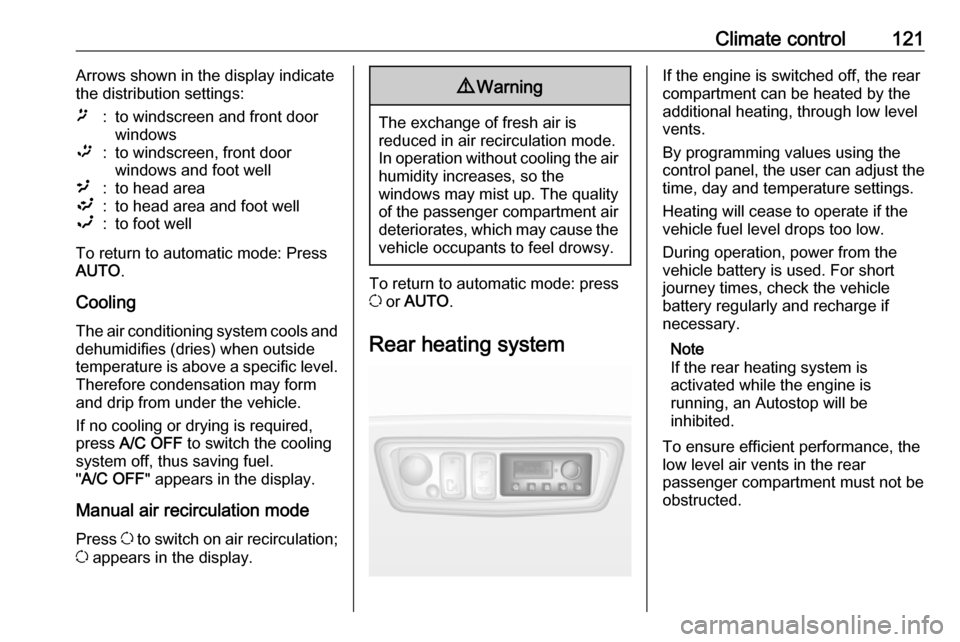
Rear heating system
If the engine is switched off, the rear
compartment can be heated by the
additional heating, through low level
vents.
By programming values using the
control panel, the user can adjust the
time, day and temperature settings.
Heating will cease to operate if the
vehicle fuel level drops too low.
During operation, power from the
vehicle battery is used. For short
journey times, check the vehicle
battery regularly and recharge if
necessary.
Note
If the rear heating system is
activated while the engine is
running, an Autostop will be
inhibited.
To ensure efficient performance, the
low level air vents in the rear
passenger compartment must not be
obstructed.
Page 133 of 265
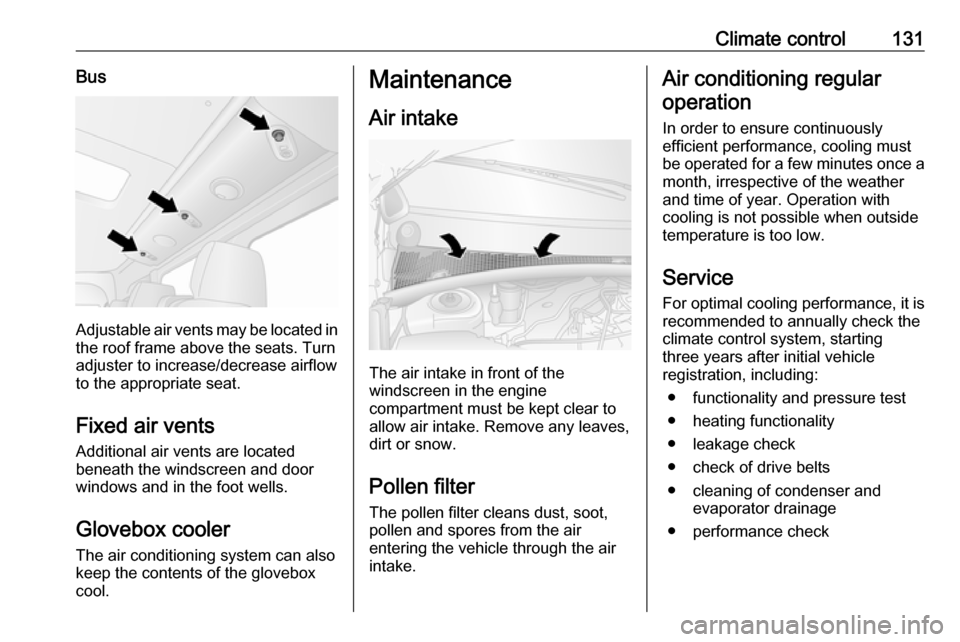
Climate control131Bus
Adjustable air vents may be located inthe roof frame above the seats. Turn
adjuster to increase/decrease airflow
to the appropriate seat.
Fixed air vents Additional air vents are located
beneath the windscreen and door
windows and in the foot wells.
Glovebox cooler
The air conditioning system can also
keep the contents of the glovebox
cool.
Maintenance
Air intake
The air intake in front of the
windscreen in the engine
compartment must be kept clear to
allow air intake. Remove any leaves,
dirt or snow.
Pollen filter The pollen filter cleans dust, soot,
pollen and spores from the air
entering the vehicle through the air
intake.
Air conditioning regular
operation
In order to ensure continuously
efficient performance, cooling must
be operated for a few minutes once a
month, irrespective of the weather
and time of year. Operation with
cooling is not possible when outside
temperature is too low.
ServiceFor optimal cooling performance, it is
recommended to annually check the
climate control system, starting
three years after initial vehicle
registration, including:
● functionality and pressure test
● heating functionality
● leakage check
● check of drive belts
● cleaning of condenser and evaporator drainage
● performance check
Page 143 of 265
Driving and operating141● Close the windows.
● Turn the ignition key to position
0 and remove it. Turn the
steering wheel until the
steering wheel lock is felt to
engage.
Lock the vehicle 3 24 and activate the
anti-theft locking system 3 34 and
anti-theft alarm system 3 34.
Air suspension
Operates automatically when the
vehicle is driven. The air suspension
system constantly adjusts the ride
height according to the vehicle load.
Caution
To ensure safe operation of the air
suspension system, do not exceed the maximum permissible gross
vehicle weight rating. Refer to
identification plate 3 226 or the
vehicle documents.
For further information on the air
suspension system, refer to the
operating instructions supplied.
Master switchCaution
The air suspension system must
be switched off when the vehicle is being towed, jump‐started, raised
off the ground or transported.
Do not switch off the air
suspension system when driving.
Jump starting 3 213, Towing the
vehicle 3 216.
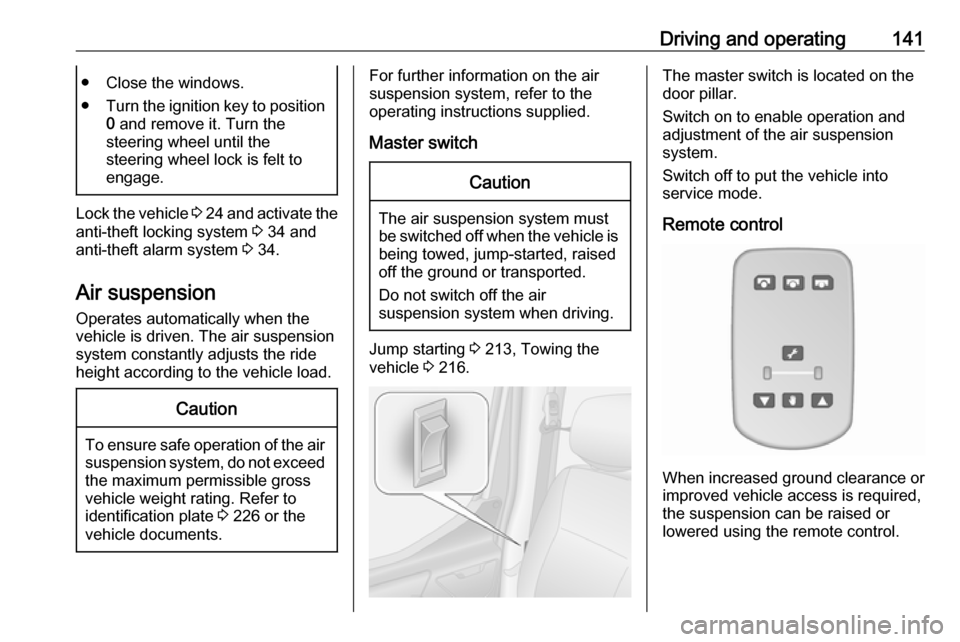
The master switch is located on the
door pillar.
Switch on to enable operation and
adjustment of the air suspension
system.
Switch off to put the vehicle into
service mode.
Remote control
When increased ground clearance or improved vehicle access is required,the suspension can be raised or
lowered using the remote control.
Page 145 of 265
Driving and operating143Engine exhaust9Danger
Engine exhaust gases contain
poisonous carbon monoxide,
which is colourless and odourless and could be fatal if inhaled.
If exhaust gases enter the interior
of the vehicle, open the windows.
Have the cause of the fault
rectified by a workshop.
Avoid driving with an open load
compartment, otherwise exhaust
gases could enter the vehicle.
Diesel particle filter
The diesel particle filter system filters
harmful soot particles out of the
exhaust gases. The system includes
a self-cleaning function that runs
automatically during driving without
any notification.
The filter is cleaned by periodically
burning off the soot particles at high
temperature. This process takes
place automatically under set driving
conditions. Autostop is not available
and fuel consumption may be higher
during this period. The emission of
smells and smoke during this process is normal.
Under certain driving conditions, e.g.
short distances, the system cannot
clean itself automatically.
If cleaning of the filter is required and
if previous driving conditions did not
enable automatic cleaning, it will be
indicated by illumination of control
indicator A 3 98. Seek the
assistance of a workshop
immediately.Caution
If the cleaning process is
interrupted, there is a risk of
provoking severe engine damage.
Cleaning takes place quickest at high engine speeds and loads.
Catalytic converter
The catalytic converter reduces the
amount of harmful substances in the
exhaust gases.
Caution
Fuel grades other than those listed on page 3 169, 3 228 could
damage the catalytic converter or
electronic components.
Unburnt fuel will overheat and
damage the catalytic converter.
Therefore avoid excessive use of the starter, running the fuel tank
dry and starting the engine by
pushing or towing.
In the event of misfiring, uneven
engine running, a reduction in engine performance or other unusual
problems, have the cause of the fault
rectified by a workshop as soon as
possible. In an emergency, driving
can be continued for a short period,
keeping vehicle speed and engine
speed low.
If control indicator Z flashes, the
permitted emission limits may be
exceeded. Lift your foot off the
accelerator until Z stops flashing and
is steadily illuminated. Contact a
workshop immediately.
Page 178 of 265
176Vehicle careGeneral Information
Accessories and vehicle modifications
We recommend the use of genuine
parts and accessories and factory
approved parts specific for your
vehicle type. We cannot assess or guarantee reliability of other products
- even if they have a regulatory or
otherwise granted approval.
Any modification, conversion or other changes made to standard vehicle
specifications (including, without
limitation, software modifications,
modifications of the electronic control units) may invalidate the warranty
offered by Opel. Furthermore, such
changes may impact fuel
consumption, CO 2 emissions and
other emissions of the vehicle and
cause the vehicle to no longer
conform to the operating permit,
impacting the validity of your vehicle
registration.Caution
When transporting the vehicle on
a train or on a recovery vehicle, the
mud flaps might be damaged.
Vehicle storage
Storage for a long period of time
If the vehicle is to be stored for several months:
● Wash and wax the vehicle.
● Have the wax in the engine compartment and underbody
checked.
● Clean and preserve rubber seals.
● Change engine oil.
● Drain washer fluid reservoir. ● Check coolant antifreeze and corrosion protection.
● Adjust tyre pressure to the value specified for full load.
● Park vehicle in a dry, well ventilated place. Engage first or
reverse gear. Prevent the vehicle
from rolling.
● Do not apply parking brake.
● Open bonnet, close all doors and
lock the vehicle.
● Disconnect the clamp from the negative terminal of the vehicle
battery. Beware that all systems
are not functional, e.g. anti-theft
alarm system.
Putting back into operation When the vehicle is to be put back into
operation:
● Connect the clamp to the negative terminal of the vehicle
battery. Activate the electronics
of the power windows.
● Check tyre pressure.
● Fill up the washer fluid reservoir. ● Check the engine oil level.
● Check the coolant level.
● Fit the number plate, if necessary.
Page 199 of 265
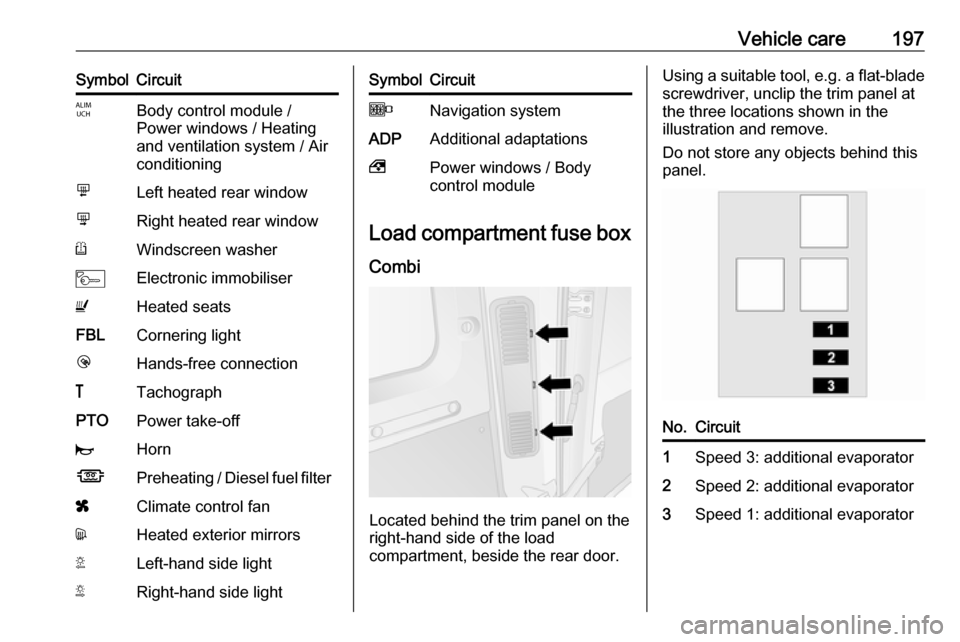
Vehicle care197SymbolCircuitIBody control module /
Power windows / Heating
and ventilation system / Air
conditioningmLeft heated rear windownRight heated rear windowRWindscreen washerMElectronic immobiliserUHeated seatsFBLCornering lightlHands-free connection&TachographPTOPower take-offjHornÍPreheating / Diesel fuel filterxClimate control fandHeated exterior mirrorsTLeft-hand side lightSRight-hand side lightSymbolCircuitONavigation systemADPAdditional adaptations,Power windows / Body
control module
Load compartment fuse box
Combi
Located behind the trim panel on the
right-hand side of the load
compartment, beside the rear door.
Using a suitable tool, e.g. a flat-blade screwdriver, unclip the trim panel at
the three locations shown in the
illustration and remove.
Do not store any objects behind this
panel.No.Circuit1Speed 3: additional evaporator2Speed 2: additional evaporator3Speed 1: additional evaporator
Page 217 of 265
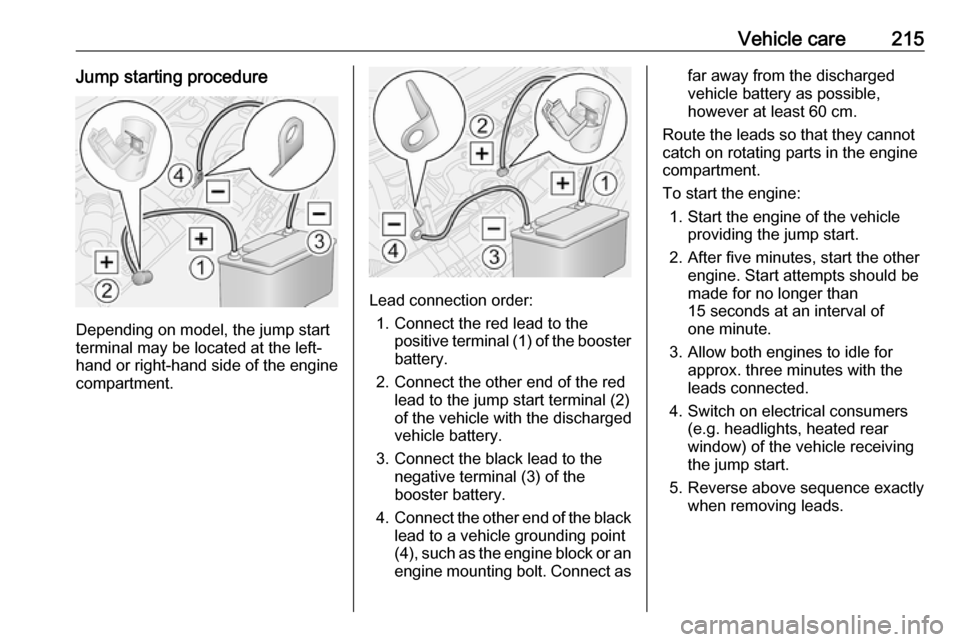
Vehicle care215Jump starting procedure
Depending on model, the jump start
terminal may be located at the left-
hand or right-hand side of the engine
compartment.
Lead connection order:
1. Connect the red lead to the positive terminal (1) of the booster
battery.
2. Connect the other end of the red lead to the jump start terminal (2)
of the vehicle with the discharged
vehicle battery.
3. Connect the black lead to the negative terminal (3) of the
booster battery.
4. Connect the other end of the black
lead to a vehicle grounding point
(4), such as the engine block or an
engine mounting bolt. Connect as
far away from the discharged
vehicle battery as possible,
however at least 60 cm.
Route the leads so that they cannot
catch on rotating parts in the engine
compartment.
To start the engine: 1. Start the engine of the vehicle providing the jump start.
2. After five minutes, start the other engine. Start attempts should be
made for no longer than
15 seconds at an interval of
one minute.
3. Allow both engines to idle for approx. three minutes with the
leads connected.
4. Switch on electrical consumers (e.g. headlights, heated rear
window) of the vehicle receiving
the jump start.
5. Reverse above sequence exactly when removing leads.
Page 218 of 265
216Vehicle careTowingTowing the vehicle
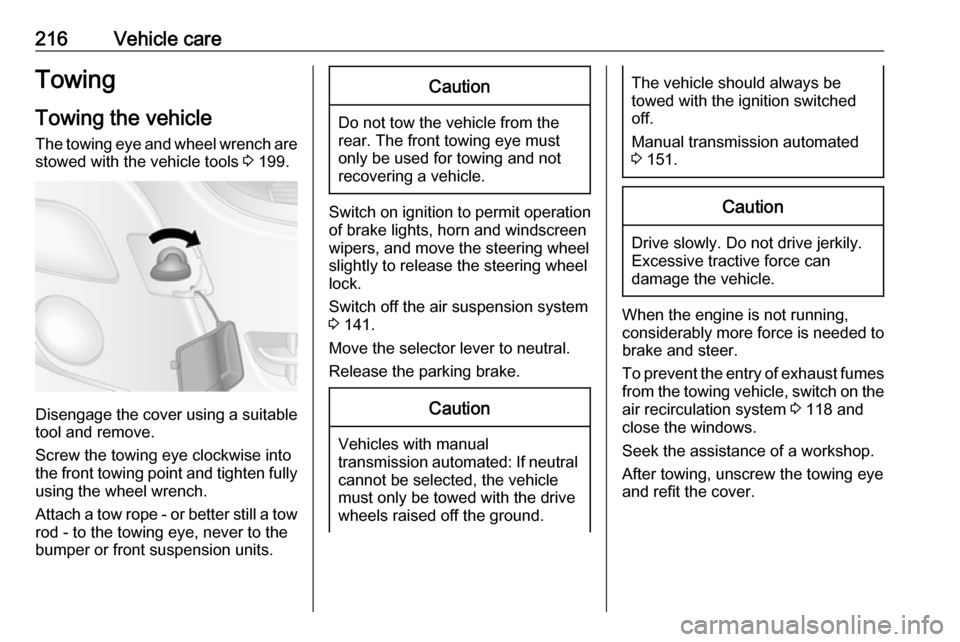
The towing eye and wheel wrench are stowed with the vehicle tools 3 199.
Disengage the cover using a suitable
tool and remove.
Screw the towing eye clockwise into
the front towing point and tighten fully using the wheel wrench.
Attach a tow rope - or better still a tow
rod - to the towing eye, never to the
bumper or front suspension units.
Caution
Do not tow the vehicle from the
rear. The front towing eye must
only be used for towing and not
recovering a vehicle.
Switch on ignition to permit operation
of brake lights, horn and windscreen
wipers, and move the steering wheel
slightly to release the steering wheel
lock.
Switch off the air suspension system 3 141.
Move the selector lever to neutral.
Release the parking brake.
Caution
Vehicles with manual
transmission automated: If neutral cannot be selected, the vehiclemust only be towed with the drive
wheels raised off the ground.
The vehicle should always be
towed with the ignition switched
off.
Manual transmission automated
3 151.Caution
Drive slowly. Do not drive jerkily.
Excessive tractive force can
damage the vehicle.
When the engine is not running,
considerably more force is needed to
brake and steer.
To prevent the entry of exhaust fumes
from the towing vehicle, switch on the air recirculation system 3 118 and
close the windows.
Seek the assistance of a workshop.
After towing, unscrew the towing eye
and refit the cover.