stop start OPEL MOVANO_B 2020 Manual user
[x] Cancel search | Manufacturer: OPEL, Model Year: 2020, Model line: MOVANO_B, Model: OPEL MOVANO_B 2020Pages: 353, PDF Size: 9.4 MB
Page 105 of 353

Instruments and controls1039Warning
When the engine is off,
considerably more force is needed
to brake and steer. During an
Autostop the brake servo unit will still be operational.
Do not remove key until vehicle is stationary, otherwise the steeringwheel lock could engage
unexpectedly.
Check engine oil level 3 271.
Keep engine turned off and let the
vehicle be towed to a workshop.
Low fuel Y illuminates yellow.
Illuminates when the ignition is
switched on and extinguishes shortly
after the engine starts.
Illuminates when the engine is
running
Fuel level in the tank is too low. Refuel
immediately.
Never run the tank dry.
Refuelling 3 263.
Catalytic converter 3 234.
Bleeding the diesel fuel system
3 276.
Stop-start system \ illuminates when an Autostop is
inhibited when certain conditions are
not fulfilled.
Ï illuminates during an Autostop.
Ï flashes if the clutch is not released
sufficiently.
Stop-start system 3 228.
Exterior light
F illuminates green.
Illuminated when the side lights are
on 3 110.
Low beam
9 illuminates or flashes green.
Illuminates
Illuminated when the headlights are on 3 110.Flashes
Fault in the lighting.
High beam P illuminates blue.
Illuminated when high beam is on and during headlight flash 3 111.
High beam assist f illuminates when the high beam
assist is activated 3 111.
Front fog lights
> illuminates green.
Illuminated when the front fog lights
are on 3 113.
Rear fog light ø illuminates yellow.
Illuminated when the rear fog light is on 3 114.
Cruise control
U , m illuminate green.
Page 109 of 353

Instruments and controls107Warning chimesIf several warnings appear at the
same time, only one warning chime will sound.
When starting the engine or whilst driving
The warning chime regarding
unfastened seat belts has priority
over any other warning chime.
● If seat belt is not fastened 3 56.
● If a certain speed is exceeded with the parking brake applied
3 245.
● If the parking assist detects an object or a fault is present
3 255.
● If the vehicle has manual transmission automated and the
clutch temperature is too high
3 241.
● If the vehicle speed briefly exceeds a set limit 3 91.
● During closing of the power sliding door 3 30.
● If the sliding door is open and the
parking brake is released 3 30.● During activation and
deactivation of alarm monitoring
of vehicle inclination 3 36.
● If the AdBlue level falls below a certain amount or a fault is
present 3 234.
● If the lane departure warning system detects an unintended
lane change and when the
system is activated 3 261.
When the vehicle is parked and /
or the driver's door is opened
● When the key is in the ignition switch.
● With exterior lights on 3 110.
● There is a fault with the power door lock system 3 28.
● If the vehicle has manual transmission automated 3 241,
the parking brake has not been
applied, neutral is not selected or the brake pedal has not been
depressed. A corresponding
message may also appear in the
Driver Information Centre 3 105.● If the sliding side door exterior
handle is in the open position
when unlocking the vehicle 3 30.
● If the parking brake is not applied
when the power sliding door
switch is pressed 3 30.
● If the power sliding door is locked
from the inside with the child lock
active 3 30.
● If the engine is in an Autostop but
not switched off. Stop-start
system 3 228.
Page 188 of 353

186Infotainment systemAvoidances
To edit the route by avoiding
particular sections, touch 7 followed
by yNAVI / ýNav , Route then
Avoidances .
Select a section from the list on the
display screen to be avoided. The
avoided section is highlighted in red.
Confirm the new route by touching
OK .Alternative routes
To change the route planning
method, touch 7 followed by yNAVI /
ý Nav , Route then Alternative routes .
The following options are available,
each with a distance and estimated
time:
● fast
● short
● eco
Select one of the options and confirm
the new route by touching r.
For further information, refer to
(NAVI 50 IntelliLink) "Setting up the
navigation system" in the "Usage"
section 3 166.NAVI 80 IntelliLink
Journeys can be planned in advance
by selecting both the starting point
and the destination.
From the Home page, touch MENU
then Navigation , followed by
Itineraries .
Select a point of departure in the
same way as entering a destination.
Refer to (NAVI 80 IntelliLink)
"Destination input" 3 177 . Then select
a destination, choose the type of
route and confirm.
The system plans the route and allows you to view the details.Change route
To change the route during active
route guidance, from the Home page, touch MENU then Navigation ,
followed by Change route .
The following options are available: ● Calculate alternative
● Cancel route
● Travel via
● Avoid roadblock
● Avoid part of route
● Minimise delaysCalculate alternative
Select to calculate an alternative
route to the destination.Cancel route
Select to stop the current route
guidance.
To restart guidance, touch Drive to..,
followed by Recent destinations and
select the route again.Travel via (waypoints)
Select to change the calculated route to your destination so that it includes
a particular location (waypoint).
The location to be included is entered
the same way as entering a
destination.
Select from the same list of options,
e.g. "Address", "Saved locations",
"Point of Interest", "Point on map".
Refer to (NAVI 80 IntelliLink)
"Destination input" 3 177.Avoid roadblock
Select this option in the event a
roadblock is not currently indicated by
the Traffic information service.
Refer to (NAVI 80 IntelliLink) "Traffic
information" below.
Page 211 of 353
Climate control209J:to windscreen, front door
windows and foot wellV:to windscreen and front door
windows
Intermediate settings are possible.
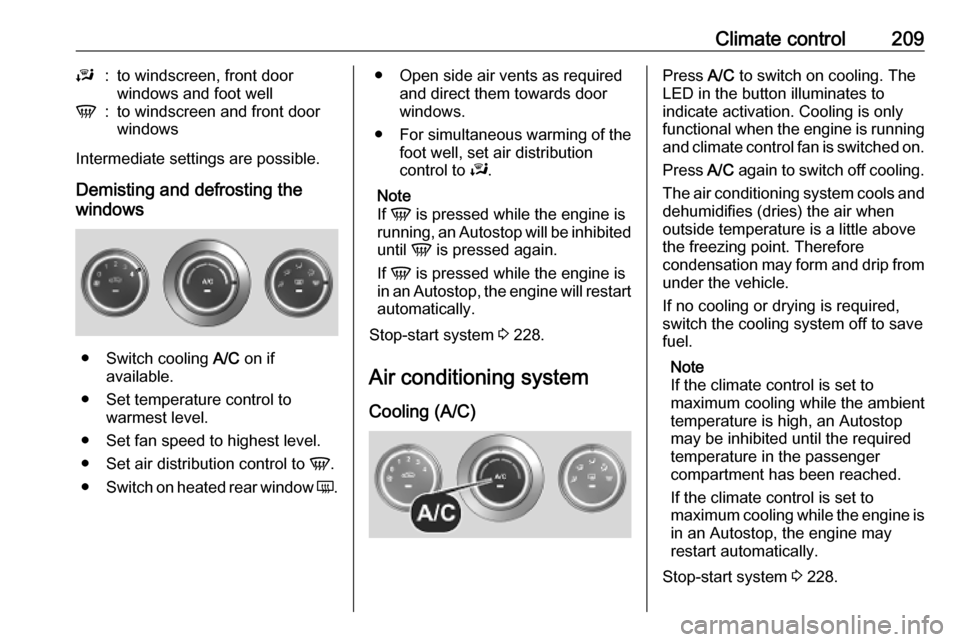
Demisting and defrosting the
windows
● Switch cooling A/C on if
available.
● Set temperature control to warmest level.
● Set fan speed to highest level.
● Set air distribution control to V.
● Switch on heated rear window Ü.
● Open side air vents as required
and direct them towards door
windows.
● For simultaneous warming of the
foot well, set air distribution
control to J.
Note
If V is pressed while the engine is
running, an Autostop will be inhibited
until V is pressed again.
If V is pressed while the engine is
in an Autostop, the engine will restart automatically.
Stop-start system 3 228.
Air conditioning system
Cooling (A/C)Press A/C to switch on cooling. The
LED in the button illuminates to
indicate activation. Cooling is only
functional when the engine is running and climate control fan is switched on.
Press A/C again to switch off cooling.
The air conditioning system cools and
dehumidifies (dries) the air when
outside temperature is a little above
the freezing point. Therefore
condensation may form and drip from under the vehicle.
If no cooling or drying is required,
switch the cooling system off to save
fuel.
Note
If the climate control is set to
maximum cooling while the ambient temperature is high, an Autostop
may be inhibited until the required
temperature in the passenger
compartment has been reached.
If the climate control is set to
maximum cooling while the engine is in an Autostop, the engine may
restart automatically.
Stop-start system 3 228.
Page 213 of 353
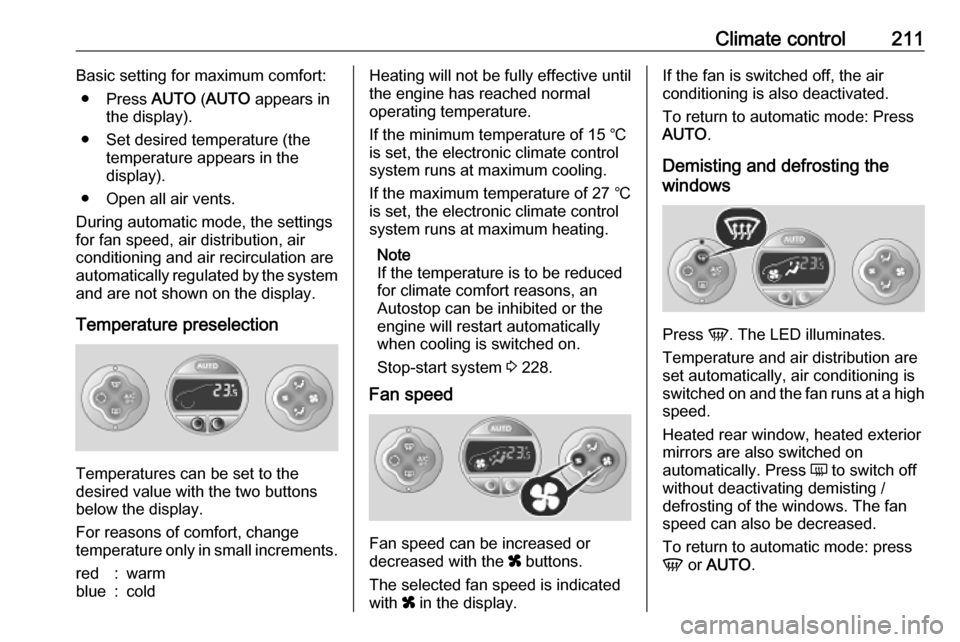
Climate control211Basic setting for maximum comfort:● Press AUTO (AUTO appears in
the display).
● Set desired temperature (the temperature appears in the
display).
● Open all air vents.
During automatic mode, the settings for fan speed, air distribution, air
conditioning and air recirculation are
automatically regulated by the system
and are not shown on the display.
Temperature preselection
Temperatures can be set to the
desired value with the two buttons
below the display.
For reasons of comfort, change
temperature only in small increments.
red:warmblue:coldHeating will not be fully effective until
the engine has reached normal
operating temperature.
If the minimum temperature of 15 ℃
is set, the electronic climate control
system runs at maximum cooling.
If the maximum temperature of 27 ℃
is set, the electronic climate control
system runs at maximum heating.
Note
If the temperature is to be reduced
for climate comfort reasons, an
Autostop can be inhibited or the
engine will restart automatically
when cooling is switched on.
Stop-start system 3 228.
Fan speed
Fan speed can be increased or
decreased with the x buttons.
The selected fan speed is indicated
with x in the display.
If the fan is switched off, the air
conditioning is also deactivated.
To return to automatic mode: Press AUTO .
Demisting and defrosting the
windows
Press V. The LED illuminates.
Temperature and air distribution are
set automatically, air conditioning is
switched on and the fan runs at a high
speed.
Heated rear window, heated exterior
mirrors are also switched on
automatically. Press Ü to switch off
without deactivating demisting /
defrosting of the windows. The fan speed can also be decreased.
To return to automatic mode: press
V or AUTO .
Page 214 of 353
212Climate controlNote
If V is pressed while the engine is
running, an Autostop will be inhibited
until V is pressed again.
If V is pressed while the engine is
in an Autostop, the engine will restart
automatically.
Stop-start system 3 228.
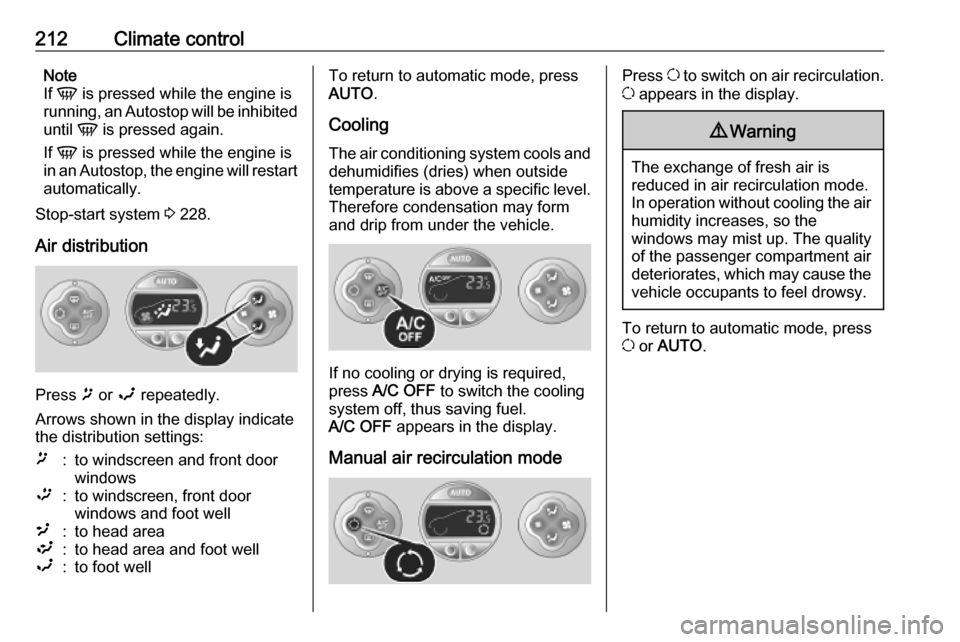
Air distribution
Press ï or î repeatedly.
Arrows shown in the display indicate
the distribution settings:
ï:to windscreen and front door
windows™:to windscreen, front door
windows and foot well²:to head area³:to head area and foot wellî:to foot wellTo return to automatic mode, press
AUTO .
Cooling
The air conditioning system cools and
dehumidifies (dries) when outside
temperature is above a specific level. Therefore condensation may form
and drip from under the vehicle.
If no cooling or drying is required,
press A/C OFF to switch the cooling
system off, thus saving fuel.
A/C OFF appears in the display.
Manual air recirculation mode
Press u to switch on air recirculation.
u appears in the display.9 Warning
The exchange of fresh air is
reduced in air recirculation mode.
In operation without cooling the air humidity increases, so the
windows may mist up. The quality
of the passenger compartment air
deteriorates, which may cause the vehicle occupants to feel drowsy.
To return to automatic mode, press
u or AUTO .
Page 217 of 353
Climate control215● After 5 seconds the preset dayflashes.
● Adjust the preset day using k or
l .
● The preset time and day are set once the display changes to the
current time.
Set time and weekday Þ
If the vehicle battery is disconnected
or its voltage is too low, the unit will
need to be reset.
● Press Þ until the time flashes.
● Press k or l to change the
current time.
● Time is stored when the display stops flashing.
● Wait for weekday to flash.
● Press k or l to change the
weekday.
● Weekday is stored when the display stops flashing.
Heating level
The preferred heating level for
programmed departure times can be set between 10 to 30 ℃.To adjust the temperature of theheating, turn the rotary knob located
on the control panel.turn clockwise:increase
temperatureturn anticlock‐
wise:decrease
temperature
Rear air conditioning
system
The rear air conditioning system is
activated in conjunction with the front
passenger compartment air
conditioning system.
Bus
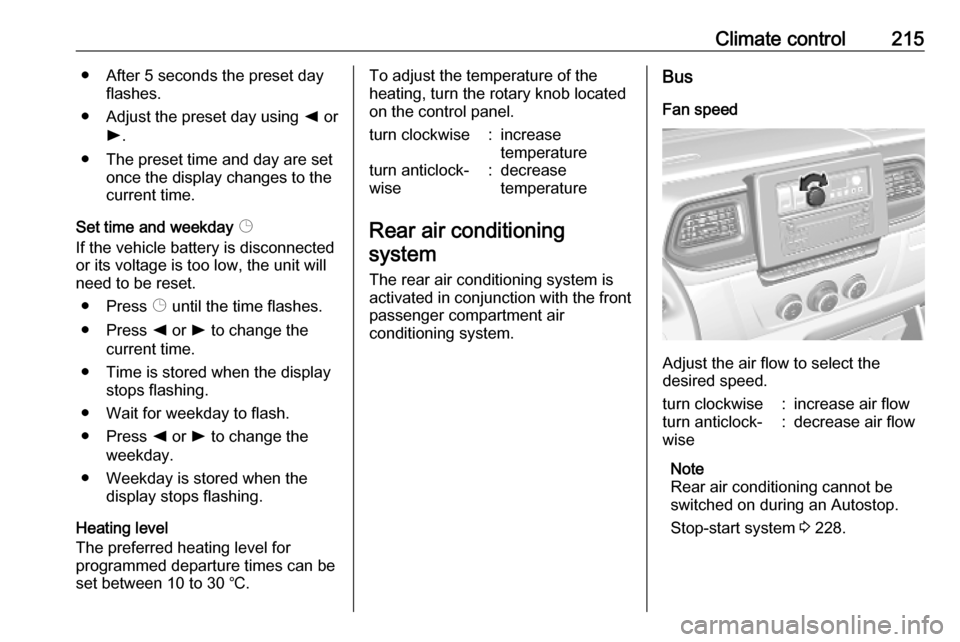
Fan speed
Adjust the air flow to select the
desired speed.
turn clockwise:increase air flowturn anticlock‐
wise:decrease air flow
Note
Rear air conditioning cannot be
switched on during an Autostop.
Stop-start system 3 228.
Page 218 of 353
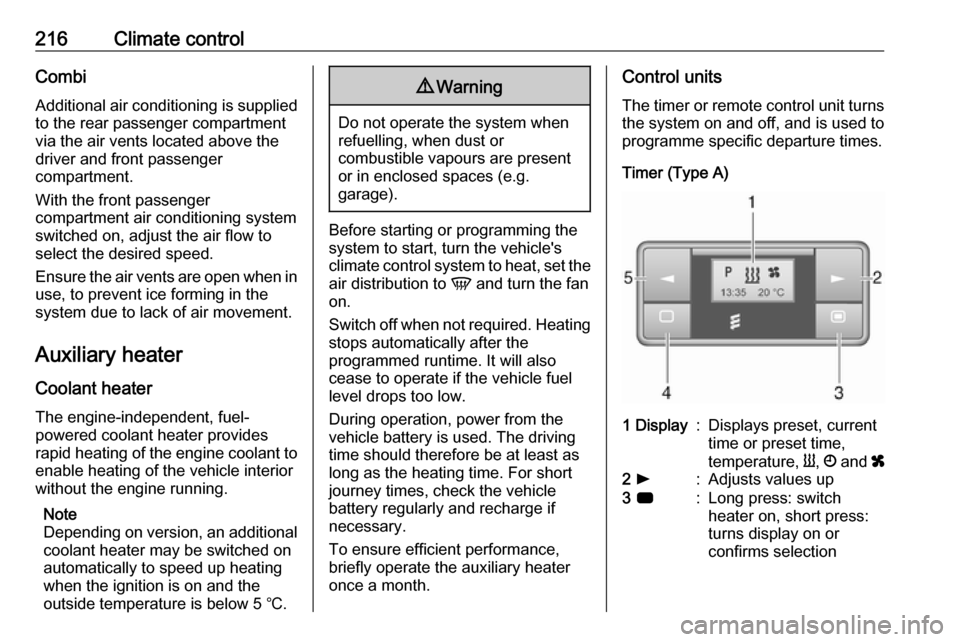
216Climate controlCombi
Additional air conditioning is supplied to the rear passenger compartment
via the air vents located above the
driver and front passenger
compartment.
With the front passenger
compartment air conditioning system
switched on, adjust the air flow to
select the desired speed.
Ensure the air vents are open when in use, to prevent ice forming in the
system due to lack of air movement.
Auxiliary heater Coolant heater
The engine-independent, fuel-
powered coolant heater provides rapid heating of the engine coolant to
enable heating of the vehicle interior
without the engine running.
Note
Depending on version, an additional
coolant heater may be switched on
automatically to speed up heating
when the ignition is on and the
outside temperature is below 5 ℃.9 Warning
Do not operate the system when
refuelling, when dust or
combustible vapours are present
or in enclosed spaces (e.g.
garage).
Before starting or programming the
system to start, turn the vehicle's
climate control system to heat, set the
air distribution to V and turn the fan
on.
Switch off when not required. Heating stops automatically after the
programmed runtime. It will also
cease to operate if the vehicle fuel
level drops too low.
During operation, power from the
vehicle battery is used. The driving
time should therefore be at least as
long as the heating time. For short
journey times, check the vehicle
battery regularly and recharge if
necessary.
To ensure efficient performance,
briefly operate the auxiliary heater
once a month.
Control units
The timer or remote control unit turns the system on and off, and is used to
programme specific departure times.
Timer (Type A)1 Display:Displays preset, current
time or preset time,
temperature, Y, Ö and x2 l:Adjusts values up3 7:Long press: switch
heater on, short press:
turns display on or
confirms selection
Page 222 of 353

220Climate controlTo activate a desired preset memory
number select P1, P2 or P3, then
select On and confirm.
When a program is activated P and
Y will be displayed together.
To deactivate a preset memory,
select P1, P2 or P3, then select Off
and confirm.
Heating stops automatically
5 minutes after the programmed
departure time.
Note
The remote control system features
a temperature sensor which
calculates the runtime according to
the ambient temperature and the
desired heating level (ECO or
HIGH). The system starts
automatically between
5 and 60 minutes prior to the
programmed departure time.
Set time and weekday Þ
If the vehicle battery is disconnected or its voltage is too low, the unit will
need to be reset.● Select F in the menu bar and
confirm.
● Select Þ in the menu bar and
confirm.
● Adjust using k or l to change
the hour and confirm.
● Adjust using k or l to change
the minutes and confirm.
● Press d to exit.
● Select F in the menu bar and
confirm.
● Select Mo in the menu bar and
confirm.
● Adjust using k or l to change
the weekday and confirm.
● Press d to exit.
Heating level
The preferred heating level for
programmed departure times can be
set to either ECO or HIGH.
● Select Y in the menu bar and
confirm.
● Select ECO or HIGH and confirm.
● Press d to exit.Operation (Type B)
Heating Y or Ventilation x
Select the operating mode Y or x, if
necessary.
● Press l three times.
● Press Y and OFF
simultaneously, Y or x flashes.
● Adjust using k or l to select Y
or x.
● Press Y and OFF simultaneously
to confirm.
To switch on, press Y for 1 second.
The predetermined heating duration,
e.g. 30, is displayed. The factory
setting is 30 minutes.
The heating duration can be set in
increments of 10 minutes. Due to the
power consumption, note the heating duration.
● Press l four times.
● Press Y and OFF
simultaneously, Y/x flashes.
● Adjust using k or l to select the
desired heating duration.
● Press Y and OFF simultaneously
to confirm.
Page 226 of 353

224Driving and operatingDriving and
operatingDriving hints ............................... 225
Driving economically ...............225
Control of the vehicle ...............225
Steering ................................... 225
Starting and operating ...............226
New vehicle running-in ............226
Ignition switch positions ...........226
Starting the engine ..................227
Idle speed control ....................228
Overrun cut-off ........................ 228
Stop-start system ....................228
Parking .................................... 231
Air suspension ......................... 231
Engine exhaust .......................... 233
Diesel particle filter ..................233
Catalytic converter ...................234
AdBlue ..................................... 234
Manual transmission ..................241
Manual transmission automa‐ ted .............................................. 241
Transmission display ...............241
Starting the engine ..................242
Selector lever .......................... 242Manual mode........................... 243
Electronic driving programmes 243
Fault ........................................ 244
Interruption of power supply ....244
Brakes ........................................ 244
Antilock brake system .............244
Parking brake .......................... 245
Brake assist ............................. 246
Hill start assist ......................... 246
Ride control systems .................247
Traction Control system ..........247
Electronic Stability Control ......248
Limited-slip rear axle ...............249
Driver assistance systems .........249
Cruise control .......................... 249
Speed limiter ........................... 251
Active emergency braking .......253
Parking assist .......................... 255
Side blind spot alert .................257
Rear view camera ...................259
Lane departure warning ..........261
Fuel ............................................ 262
Fuel for diesel engines ............262
Refuelling ................................ 263
Trailer hitch ................................ 265
General information .................265
Driving characteristics and towing tips .............................. 265
Trailer towing ........................... 265Towing equipment ...................266
Trailer stability assist ...............266
Auxiliary features .......................266
Power take-off ......................... 266