jump start OPEL VIVARO C 2020.25 Manual user
[x] Cancel search | Manufacturer: OPEL, Model Year: 2020.25, Model line: VIVARO C, Model: OPEL VIVARO C 2020.25Pages: 287, PDF Size: 28.79 MB
Page 157 of 287

Driving and operating1559Warning
If the vehicle battery is discharged,
the vehicle must not be towed,
tow-started or jump-started as the
steering wheel lock cannot be
disengaged.
Operation on vehicles with
electronic key system in case of
failure
If either the electronic key fails or the
battery of the electronic key is weak,
a message may be displayed in the
Driver Information Centre.
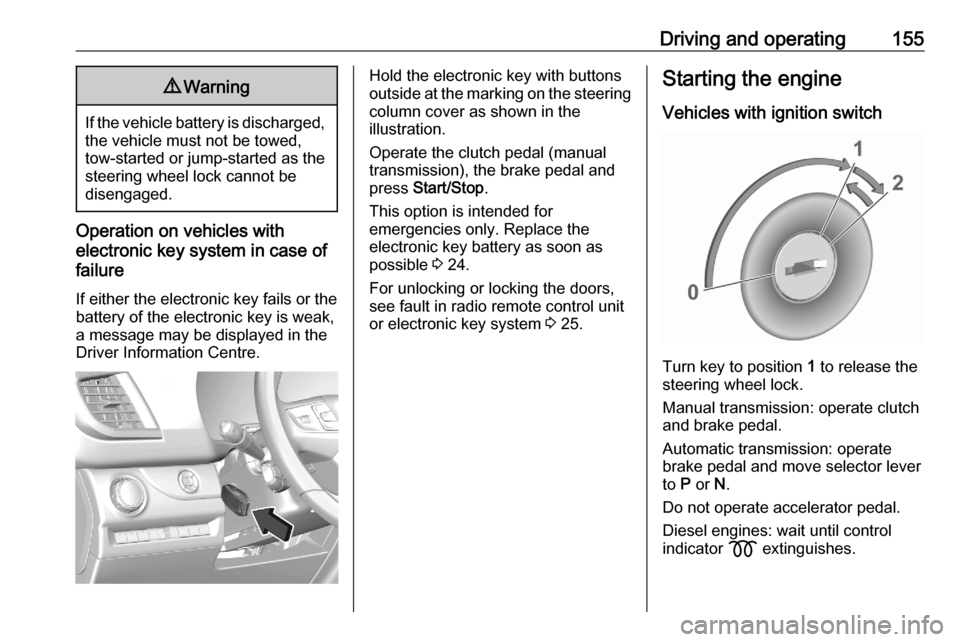
Hold the electronic key with buttons
outside at the marking on the steering column cover as shown in the
illustration.
Operate the clutch pedal (manual
transmission), the brake pedal and
press Start/Stop .
This option is intended for
emergencies only. Replace the
electronic key battery as soon as
possible 3 24.
For unlocking or locking the doors,
see fault in radio remote control unit
or electronic key system 3 25.Starting the engine
Vehicles with ignition switch
Turn key to position 1 to release the
steering wheel lock.
Manual transmission: operate clutch
and brake pedal.
Automatic transmission: operate
brake pedal and move selector lever
to P or N.
Do not operate accelerator pedal.
Diesel engines: wait until control
indicator z extinguishes.
Page 213 of 287

Vehicle care211Vehicle careGeneral Information...................212
Accessories and vehicle modifications .......................... 212
Vehicle storage ........................212
End-of-life vehicle recovery .....213
Vehicle checks ........................... 213
Performing work ......................213
Bonnet ..................................... 214
Engine oil ................................. 214
Engine coolant ......................... 215
Washer fluid ............................ 216
Brakes ..................................... 216
Brake fluid ............................... 216
Vehicle battery ......................... 217
Diesel fuel system bleeding .....219
Wiper blade replacement ........219
Bulb replacement .......................220
Halogen headlights ..................220
Xenon headlights .....................223
Front fog lights ......................... 224
Front turn lights .......................225
Tail lights ................................. 226
Side turn lights ......................... 228
Centre high-mounted brake light ......................................... 229Number plate light...................230
Interior lights ............................ 230
Electrical system ........................231
Fuses ....................................... 231
Engine compartment fuse box . 232
Instrument panel fuse box .......232
Vehicle tools .............................. 234
Tools ........................................ 234
Wheels and tyres .......................237
Winter tyres ............................. 237
Tyre designations ....................237
Tyre pressure .......................... 237
Tyre deflation detection
system .................................... 238
Tread depth ............................. 239
Changing tyre and wheel size . 240
Wheel covers ........................... 240
Tyre chains .............................. 240
Tyre repair kit .......................... 241
Wheel changing .......................244
Spare wheel ............................ 245
Jump starting ............................. 250
Towing ....................................... 251
Towing the vehicle ...................251
Towing another vehicle ...........252
Appearance care .......................253
Exterior care ............................ 253Interior care............................. 255
Floor mats ............................... 256
Page 219 of 287

Vehicle care217
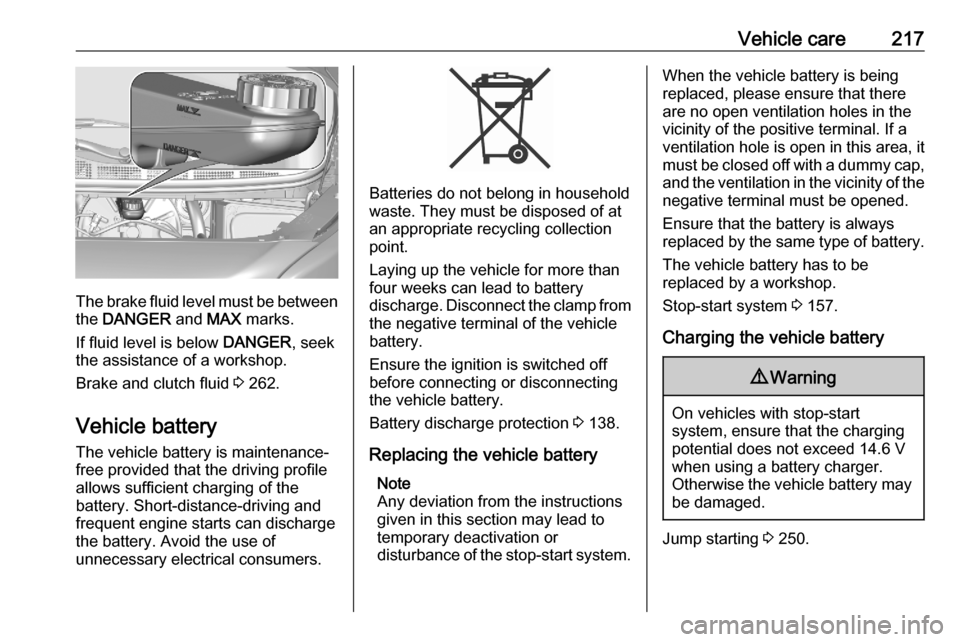
The brake fluid level must be betweenthe DANGER and MAX marks.
If fluid level is below DANGER, seek
the assistance of a workshop.
Brake and clutch fluid 3 262.
Vehicle battery
The vehicle battery is maintenance-
free provided that the driving profile
allows sufficient charging of the
battery. Short-distance-driving and
frequent engine starts can discharge
the battery. Avoid the use of
unnecessary electrical consumers.
Batteries do not belong in household
waste. They must be disposed of at
an appropriate recycling collection
point.
Laying up the vehicle for more than
four weeks can lead to battery
discharge. Disconnect the clamp from the negative terminal of the vehicle
battery.
Ensure the ignition is switched off
before connecting or disconnecting
the vehicle battery.
Battery discharge protection 3 138.
Replacing the vehicle battery Note
Any deviation from the instructions
given in this section may lead to
temporary deactivation or
disturbance of the stop-start system.
When the vehicle battery is being
replaced, please ensure that there
are no open ventilation holes in the
vicinity of the positive terminal. If a
ventilation hole is open in this area, it
must be closed off with a dummy cap,
and the ventilation in the vicinity of the negative terminal must be opened.
Ensure that the battery is always
replaced by the same type of battery.
The vehicle battery has to be
replaced by a workshop.
Stop-start system 3 157.
Charging the vehicle battery9 Warning
On vehicles with stop-start
system, ensure that the charging potential does not exceed 14.6 V
when using a battery charger.
Otherwise the vehicle battery may be damaged.
Jump starting 3 250.
Page 252 of 287

250Vehicle careJump startingDo not start with quick charger.
A vehicle with a discharged vehicle
battery can be started using jump
leads and the vehicle battery of
another vehicle.9 Warning
Be extremely careful when starting
with jump leads. Any deviation
from the following instructions can
lead to injuries or damage caused
by battery explosion or damage to the electrical systems of both
vehicles.
9 Warning
Avoid contact of the battery with
eyes, skin, fabrics and painted
surfaces. The fluid contains
sulphuric acid which can cause
injuries and damage in the event
of direct contact.
● Never expose the vehicle battery
to naked flames or sparks.
● A discharged vehicle battery can already freeze at a temperature
of 0 °C. Defrost the frozen battery before connecting jump leads.
● Wear eye protection and protective clothing when
handling a battery.
● Use a booster battery with the same voltage (12 V). Its capacity
(Ah) must not be much less than
that of the discharged vehicle battery.
● Use jump leads with insulated terminals and a cross section of
at least 16 mm 2
(25 mm 2
for
diesel engines).
● Do not disconnect the discharged
vehicle battery from the vehicle.
● Switch off all unnecessary electrical consumers.
● Do not lean over the vehicle battery during jump starting.
● Do not allow the terminals of one
lead to touch those of the other
lead.● The vehicles must not come into contact with each other during
the jump starting process.
● Apply the parking brake, transmission in neutral,
automatic transmission in P.
Open the positive terminal protection
caps of both vehicle batteries.
Lead connection order: 1. Connect the red lead to the positive terminal of the booster
battery.
2. Connect the other end of the red lead to the positive terminal of the
discharged battery.
Page 253 of 287

Vehicle care2513. Connect the black lead to thenegative terminal of the booster
battery.
4. Connect the other end of the black
lead to a vehicle grounding point
of your vehicle in the engine
compartment.
Route the leads so that they cannot
catch on rotating parts in the engine
compartment.
To start the engine: 1. Start the engine of the vehicle providing the jump.
2. After 5 minutes, start the other engine. Start attempts should be
made for no longer than 15
seconds at an interval of 1 minute.
3. Allow both engines to idle for approx. three minutes with the
leads connected.
4. Switch on electrical consumers e.g. headlights, heated rear
window of the vehicle receiving
the jump start.
5. Reverse above sequence exactly when removing leads.Towing
Towing the vehicle
Press in the middle of the cover plate
and slide to the upper left corner to
unclip it.
The towing eye is stowed with the vehicle tools 3 234.
Screw in the towing eye clockwise as
far as it will go until it stops in a
horizontal position.
Attach a tow rope – or better a tow rod
– to the towing eye.
The towing eye must only be used for
towing and not for recovering the
vehicle.
Switch on ignition to release steering
wheel lock and to permit operation of
brake lights, horn and windscreen
wiper.
Page 284 of 287

282Headlight flash ........................... 132
Headlight range adjustment ......132
Headlights................................... 130 Headlights when driving abroad 133
Head restraint adjustment .............8
Head restraints ............................ 47
Head-up display.......................... 121 Heated mirrors ............................. 40
Heated rear window ..................... 44
Heated windscreen .......................45
Heating ........................................ 52
Heating and ventilation system . 139
High beam ......................... 115, 131
High beam assist ................115, 131
Hill start assist ........................... 171
Hinged doors ................................ 33
Horn ....................................... 14, 95
I
Identification plate .....................264
Ignition switch positions .............153
Immobiliser .................................. 39
Indicators .................................... 105
Info Display ................................. 120
Instrument cluster ......................101
Instrument panel fuse box .........232
Instrument panel illumination control .................................... 135
Instrument panel overview ........... 10
Interior care ............................... 255Interior lighting............................ 135
Interior lights ...................... 135, 230
Interior mirror Rear view camera display .......199
Interior mirrors .............................. 41
Introduction .................................... 3
J Jump starting ............................. 250
K Keys ............................................. 22
Keys, locks ................................... 22
L
Lane departure warning .....113, 200
Lashing eyes ............................... 82
LED headlights ........................... 115
Lighting features .........................137
Light switch ................................ 130
load compartment .......................135
Load compartment ................33, 81
Load compartment cover .............81
load compartment lighting ..........135
Loading ......................................... 51
Loading information .....................91
Low beam ................................... 115
Low fuel ..................................... 114M
Malfunction indicator light ..........111
Manual anti-dazzle ......................41
Manual mode ............................. 167
Manual seat adjustment ...............48
Manual transmission .................. 168
Massage ....................................... 53
mechanical child lock.................... 43 Mirror adjustment ........................... 9
Misted light covers .....................135
Multimedia .................................. 124
Multimedia Navi .......................... 124
N
New vehicle running-in ..............153
Number plate light .....................230
O Object detection systems ...........192
Odometer ................................... 106
Oil, engine .......................... 262, 266
Opel Connect.............................. 128
Outside temperature ....................97
Overrun cut-off ........................... 157
P Panoramic roof ............................. 46
Panoramic view system ..............196
Parking ................................ 21, 160
Parking assist ............................ 192
Parking brake ..................... 112, 170