check engine light OPEL ZAFIRA C 2014 Manual user
[x] Cancel search | Manufacturer: OPEL, Model Year: 2014, Model line: ZAFIRA C, Model: OPEL ZAFIRA C 2014Pages: 299, PDF Size: 9.03 MB
Page 20 of 299

18In briefTransmission
Manual transmission
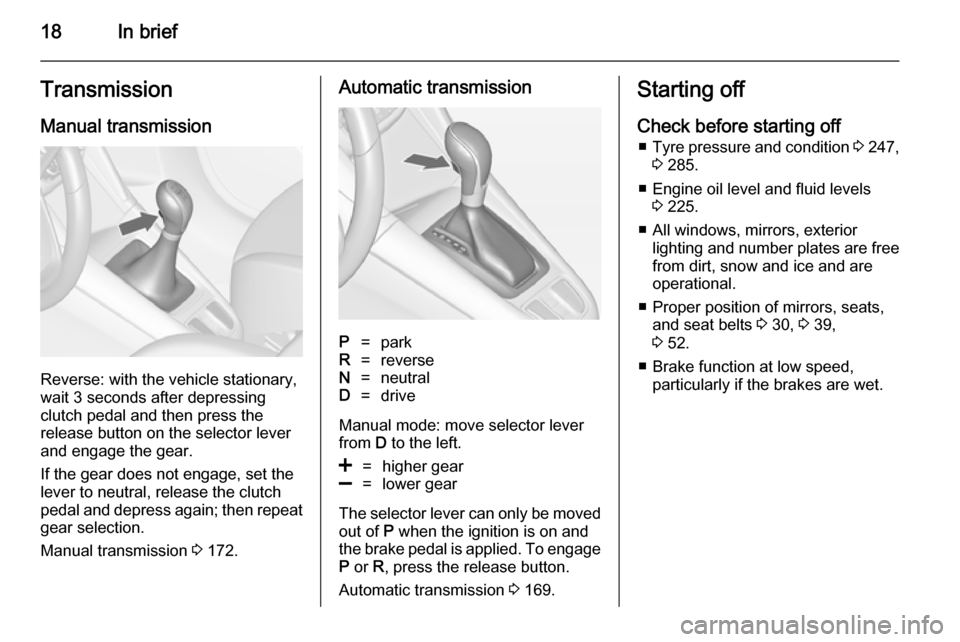
Reverse: with the vehicle stationary,
wait 3 seconds after depressing
clutch pedal and then press the
release button on the selector lever
and engage the gear.
If the gear does not engage, set the
lever to neutral, release the clutch
pedal and depress again; then repeat
gear selection.
Manual transmission 3 172.
Automatic transmissionP=parkR=reverseN=neutralD=drive
Manual mode: move selector lever
from D to the left.
<=higher gear]=lower gear
The selector lever can only be moved
out of P when the ignition is on and
the brake pedal is applied. To engage
P or R, press the release button.
Automatic transmission 3 169.
Starting off
Check before starting off ■ Tyre pressure and condition 3 247,
3 285.
■ Engine oil level and fluid levels 3 225.
■ All windows, mirrors, exterior lighting and number plates are free
from dirt, snow and ice and are
operational.
■ Proper position of mirrors, seats, and seat belts 3 30, 3 39,
3 52.
■ Brake function at low speed, particularly if the brakes are wet.
Page 31 of 299

Keys, doors and windows29
Status during the first 30 seconds of
anti-theft alarm system activation:LED illu‐
minates=test, arming delay.LED
flashes
quickly=doors, tailgate or
bonnet not completely
closed, or system fault.
Status after system is armed:
LED flashes
slowly=system is armed.
Seek the assistance of a workshop in
the event of faults.
Deactivation
Unlocking the vehicle deactivates the
anti-theft alarm system.
Alarm When triggered, the alarm sounds via a separate battery-backed power
sounder, and the hazard warning
lights flash simultaneously. The
number and duration of alarm signals
are stipulated by legislation.
The alarm can be silenced by
pressing any button on the radio
remote control or by switching on the
ignition.
The anti-theft alarm system can be
deactivated only by pressing button
c or by switching on the ignition.
A triggered alarm, which has not been interrupted by the driver, will be
indicated by the hazard warning
lights. They will flash quickly three
times when the vehicle is unlocked
next time with the radio remote
control. Additionally a warning
message or a warning code is
displayed in the Driver Information
Centre after switching on the ignition.
Vehicle messages 3 123.
Immobiliser The system is part of the ignition
switch and checks whether the
vehicle is allowed to be started with
the key being used.
The immobiliser is activated
automatically after the key has been
removed from the ignition switch.If the control indicator d flashes when
the ignition is on, there is a fault in the
system; the engine cannot be started. Switch off the ignition and repeat the
start attempt.
If the control indicator continues
flashing, attempt to start the engine
using the spare key and seek the
assistance of a workshop.
Note
The immobiliser does not lock the
doors. You should always lock the
vehicle after leaving it and switch on the anti-theft alarm system 3 23,
3 27.
Control indicator d 3 115.
Page 126 of 299

124Instruments and controls
Vehicle messages on theMidlevel-Display
The vehicle messages are displayed
as code numbers.
No.Vehicle message2No radio remote control
detected, depress clutch pedal
for a restart3Engine coolant level low4Air conditioning off5Steering wheel is lockedNo.Vehicle message6Depress brake pedal to release
electric parking brake7Turn steering wheel, switch
ignition off and then on9Turn steering wheel, start
engine again12Vehicle overloaded13Compressor overheated15Centre high-mounted brake
light failure16Brake light failure17Headlight levelling malfunction18Left low beam failure19Rear fog light failure20Right low beam failure21Left sidelight failure22Right sidelight failure23Reversing light failureNo.Vehicle message24Number plate light failure25Left front turn signal failure26Left rear turn signal failure27Right front turn signal failure28Right rear turn signal failure29Check trailer brake light30Check trailer reversing light31Check left trailer turn signal32Check right trailer turn signal33Check trailer rear fog light34Check trailer rear light35Replace battery in radio remote
control48Clean side blind zone alert
system49Lane departure warning
unavailable53Tighten gas cap
Page 164 of 299

162Driving and operatingStop-start systemThe stop-start system helps to save
fuel and to reduce the exhaust
emissions. When conditions allow, it
switches off the engine as soon as the
vehicle is at a low speed or at a
standstill, e.g. at a traffic light or in a
traffic jam. It starts the engine
automatically as soon as the clutch is depressed. A vehicle battery sensor
ensures that an Autostop is only
performed if the vehicle battery is
sufficiently charged for a restart.
Activation The stop-start system is available as
soon as the engine is started, the
vehicle starts-off and the conditions
as stated below in this section are
fulfilled.Deactivation
Deactivate the stop-start system
manually by pressing the eco button.
Deactivation is indicated by the LED in the button extinguishing.
Autostop If the vehicle is at a low speed or at a
standstill, activate an Autostop as
follows:
■ Depress the clutch pedal
■ set the lever to neutral
■ release the clutch pedal
The engine will be switched off while the ignition stays on.
An Autostop is indicated by the
needle at the AUTOSTOP position in
the tachometer.
During an Autostop, the heating and
brake performance will be
maintained.
Caution
The steering assist can be
reduced during an Autostop.
Conditions for an Autostop
The stop-start system checks if each
of the following conditions is fulfilled.
Page 213 of 299

Driving and operating211Caution
The system works at an ambient
temperature of approx. -8 °C to
100 °C.
Full function of the LPG system can only be guaranteed with liquid gas
which complies with the minimum
requirements of DIN EN 589.
Fuel selector
Pressing the LPG button switches
between petrol and liquid gas
operation as soon as the required
parameters (coolant temperature,
gas temperature and minimum
engine speed) have been reached.
The requirements are usually fulfilled
after around 60 seconds (depending
on exterior temperature) and the first
firm press on the accelerator. The
LED status shows the current
operating mode.1 off=petrol operation1 illumi‐
nates=liquid gas operation1 flashes=no switching is
possible, one type
of fuel is empty
As soon as the liquid gas tank is
empty, petrol operation is
automatically engaged until the
ignition is switched off.
Every six months, run the petrol tank
down until control indicator i
illuminates, then refuel. This helps
maintain fuel quality and system
function for petrol operation.
Fill the tank completely at regular
intervals to prevent corrosion in the
tank.
Faults and remedies
If gas mode is not possible, check the following:
■ Is there enough liquid gas present?
■ Is there enough petrol present for starting?
Due to extreme temperatures in
combination with the gas
composition, it may take slightly
longer before the system switches
from petrol to gas mode.
In extreme situations, the system may
also switch back to petrol mode if the
minimum requirements are not
fulfilled.
Seek the assistance of a workshop in the event of all other faults.Caution
Repairs and adjustments may onlybe made by trained specialists in
order to maintain the safety and
warranty on the LPG system.
Liquid gas is given a particular odour
(odorised) so that any leaks can be
detected easily.
Page 227 of 299

Vehicle care2259Danger
The ignition system and Xenon
headlights use extremely high
voltage. Do not touch.
Bonnet
Opening
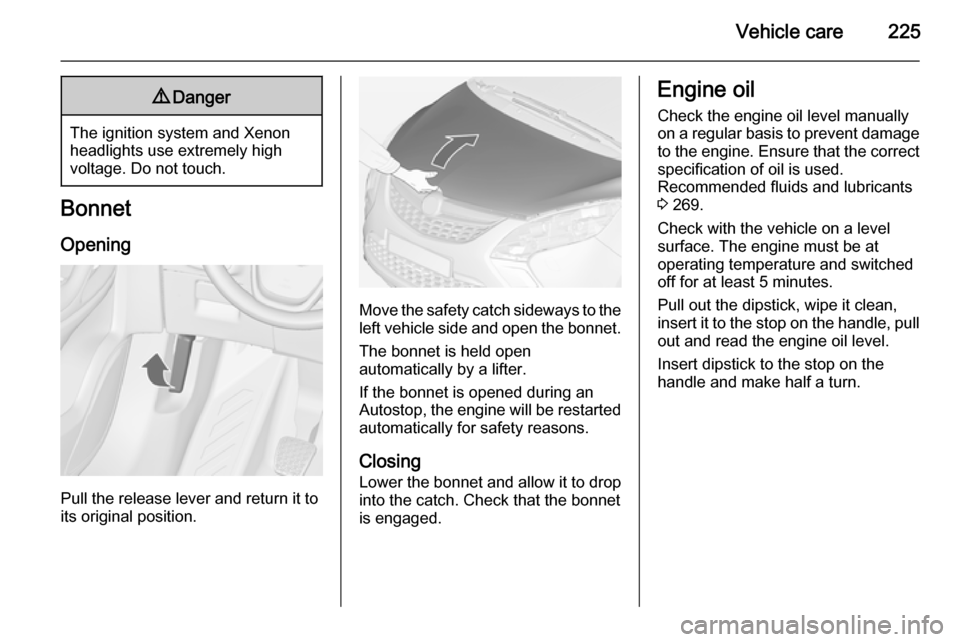
Pull the release lever and return it to
its original position.
Move the safety catch sideways to the left vehicle side and open the bonnet.
The bonnet is held open
automatically by a lifter.
If the bonnet is opened during an
Autostop, the engine will be restarted automatically for safety reasons.
Closing
Lower the bonnet and allow it to drop into the catch. Check that the bonnet
is engaged.
Engine oil
Check the engine oil level manuallyon a regular basis to prevent damage
to the engine. Ensure that the correct specification of oil is used.
Recommended fluids and lubricants
3 269.
Check with the vehicle on a level
surface. The engine must be at
operating temperature and switched
off for at least 5 minutes.
Pull out the dipstick, wipe it clean, insert it to the stop on the handle, pull
out and read the engine oil level.
Insert dipstick to the stop on the
handle and make half a turn.