stop start OPEL ZAFIRA C 2017.25 Manual user
[x] Cancel search | Manufacturer: OPEL, Model Year: 2017.25, Model line: ZAFIRA C, Model: OPEL ZAFIRA C 2017.25Pages: 291, PDF Size: 9.02 MB
Page 163 of 291
Driving and operating1611. Continuously drive the vehiclefor 10 minutes making sure that
vehicle speed is always higher
than 20 km/h.
2. If AdBlue refill is detected successfully, AdBlue supply-
driven limitations will disappear.
If AdBlue refill is still not detected,
seek the assistance of a workshop.
If AdBlue must be refilled at
temperatures below -11 °C, the
refilling of AdBlue may not be
detected by the system. In this
event, park the vehicle in a space
with a higher ambient temperature
until AdBlue is liquefied.
Note
When unscrewing the protective cap
from the filler neck, ammonia fumes
may emerge. Do not inhale as the fumes have a pungent smell. The
fumes are not harmful by inhalation.
The AdBlue tank should be filled
completely. This must be done if the
warning message regarding
prevention of an engine restart is
already displayed.The vehicle must be parked on a level surface.
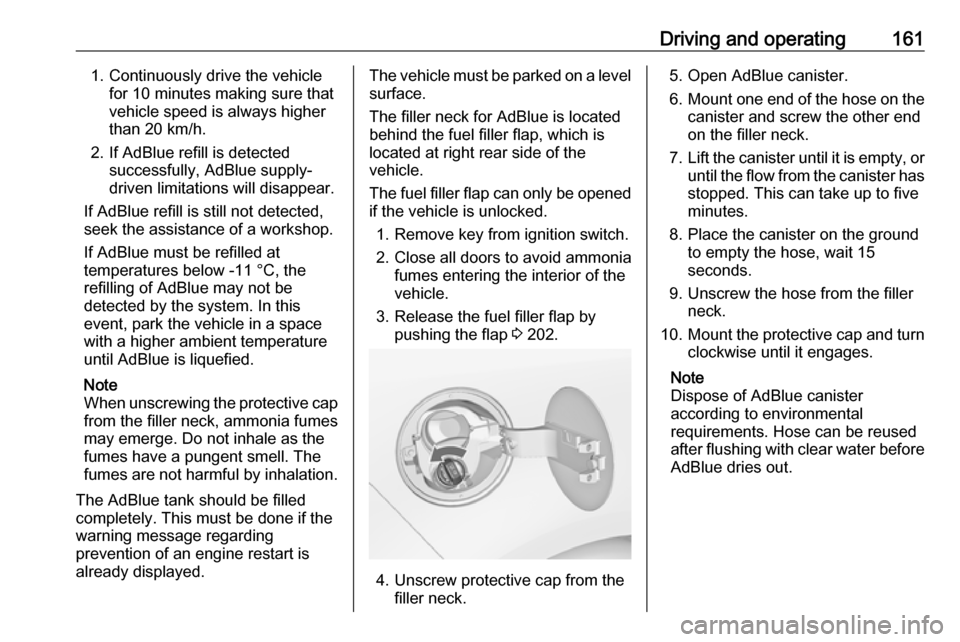
The filler neck for AdBlue is located
behind the fuel filler flap, which is located at right rear side of the
vehicle.
The fuel filler flap can only be opened
if the vehicle is unlocked.
1. Remove key from ignition switch.
2. Close all doors to avoid ammonia fumes entering the interior of the
vehicle.
3. Release the fuel filler flap by pushing the flap 3 202.
4. Unscrew protective cap from the
filler neck.
5. Open AdBlue canister.
6. Mount one end of the hose on the
canister and screw the other end
on the filler neck.
7. Lift the canister until it is empty, or
until the flow from the canister has stopped. This can take up to five
minutes.
8. Place the canister on the ground to empty the hose, wait 15
seconds.
9. Unscrew the hose from the filler neck.
10. Mount the protective cap and turn
clockwise until it engages.
Note
Dispose of AdBlue canister
according to environmental
requirements. Hose can be reused
after flushing with clear water before
AdBlue dries out.
Page 166 of 291

164Driving and operating● The automatic neutral shiftfunction automatically shifts gear
to idling when the vehicle is
stopped with a forward gear
engaged and the brake pedal is
pressed.
● When SPORT mode is engaged,
the vehicle shifts at higher engine
speeds (unless cruise control is
on). SPORT mode 3 171.
● Special programmes automatically adapt the gearshift
points when driving up inclines or down hills.
● In snowy or icy conditions or on other slippery surfaces, the
electronic transmission control
enables the driver to select
manually first, second or third
gear for starting off.
Kickdown If the accelerator pedal is pressed
down completely in automatic mode, the transmission shifts to a lower gear
depending on engine speed.Fault
In the event of a fault a message is
displayed in the Driver Information
Centre. Vehicle messages 3 123.
The transmission no longer shifts
automatically. Continued travel is
possible with manual shifting.
Only the highest gear is available.
Depending on the fault, 2nd gear may also be available in manual mode.
Shift only when vehicle is at a
standstill.
Have the cause of the fault remedied by a workshop.
Interruption of power supply In the event of an interruption of
power supply, the selector lever
cannot be moved out of the P
position. The ignition key cannot be removed from the ignition switch.
If the vehicle battery is discharged,
start the vehicle using jump leads
3 251.
If the vehicle battery is not the cause
of the fault, release the selector lever.
1. Apply the parking brake.
2. Release the selector lever trim from the centre console at the
front, fold it upwards and rotate it
to the left.
Page 167 of 291

Driving and operating1653. Push down the release lever andmove the selector lever out of P or
N . If these positions are engaged
again, the selector lever will be
locked in position again. Have the cause of the power supply
interruption remedied by a
workshop.
4. Mount the selector lever trim onto
the centre console and refit.Manual transmission
To engage reverse, depress the
clutch pedal and then press the
release button on the selector lever
and engage the gear.
If the gear does not engage, set the
lever to neutral, release the clutch
pedal and depress again; then repeat
gear selection.
Do not slip the clutch unnecessarily.
When operating, depress the clutch
pedal completely. Do not use the
pedal as a foot rest.
Caution
It is not advisable to drive with the hand resting on the selector lever.
Gear shift indication 3 114.
Stop-start system 3 154.
Page 170 of 291

168Driving and operatingVehicles with automatic transmission:Engaging D and then depressing the
accelerator pedal releases the
electric parking brake automatically.
This is not possible when the switch
m is pulled at the same time.
Dynamic braking when vehicle is
moving
When the vehicle is moving and the
switch m is kept pulled, the electric
parking brake system will decelerate the vehicle, but will not apply
statically.
As soon as the switch m is released,
dynamic braking will be stopped.
Functionality check
When the vehicle is not moving, the
electric parking brake might be
applied automatically. This is done to
check the system.
Fault
Failure mode of electric parking brake
is indicated by a control indicator j
and by a vehicle message which is
displayed in the Driver Information
Centre. Vehicle messages 3 123.Apply electric parking brake: pull and
hold switch m for more than five
seconds. If control indicator m
illuminates, electric parking brake is
applied.
Release electric parking brake: push
and hold the switch m for more than
two seconds. If control indicator m
extinguishes, electric parking brake is
released.
Control indicator m flashes: electric
parking brake is not fully applied or
released. When continuously
flashing, release electric parking
brake and retry applying.
Brake assist If brake pedal is depressed quickly
and forcefully, maximum brake force
is automatically applied.
Operation of brake assist might
become apparent by a pulse in the
brake pedal and a greater resistance
when depressing the brake pedal.Maintain steady pressure on the
brake pedal as long as full braking is
required. Maximum brake force is
automatically reduced when brake
pedal is released.
Hill start assist The system helps prevent unintendedmovement when driving away on
inclines.
When releasing the brake pedal after
stopping on an incline, the brakes
remain on for a further two seconds.
The brakes release automatically as
soon as the vehicle begins to
accelerate or the two seconds holding
time is over.
The hill start assist is not active during
an Autostop.
Page 218 of 291
216Vehicle care
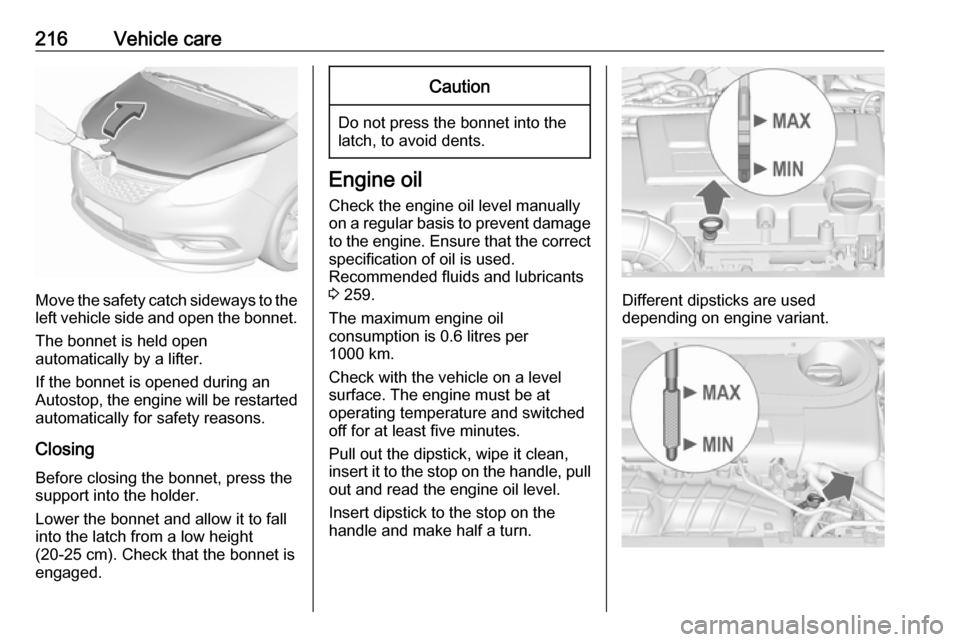
Move the safety catch sideways to theleft vehicle side and open the bonnet.
The bonnet is held open
automatically by a lifter.
If the bonnet is opened during an
Autostop, the engine will be restarted automatically for safety reasons.
Closing Before closing the bonnet, press the
support into the holder.
Lower the bonnet and allow it to fall
into the latch from a low height
(20-25 cm). Check that the bonnet is
engaged.
Caution
Do not press the bonnet into the
latch, to avoid dents.
Engine oil
Check the engine oil level manually
on a regular basis to prevent damage
to the engine. Ensure that the correct specification of oil is used.
Recommended fluids and lubricants
3 259.
The maximum engine oil
consumption is 0.6 litres per
1000 km.
Check with the vehicle on a level
surface. The engine must be at
operating temperature and switched
off for at least five minutes.
Pull out the dipstick, wipe it clean, insert it to the stop on the handle, pull
out and read the engine oil level.
Insert dipstick to the stop on the
handle and make half a turn.
Different dipsticks are used
depending on engine variant.
Page 222 of 291
220Vehicle care
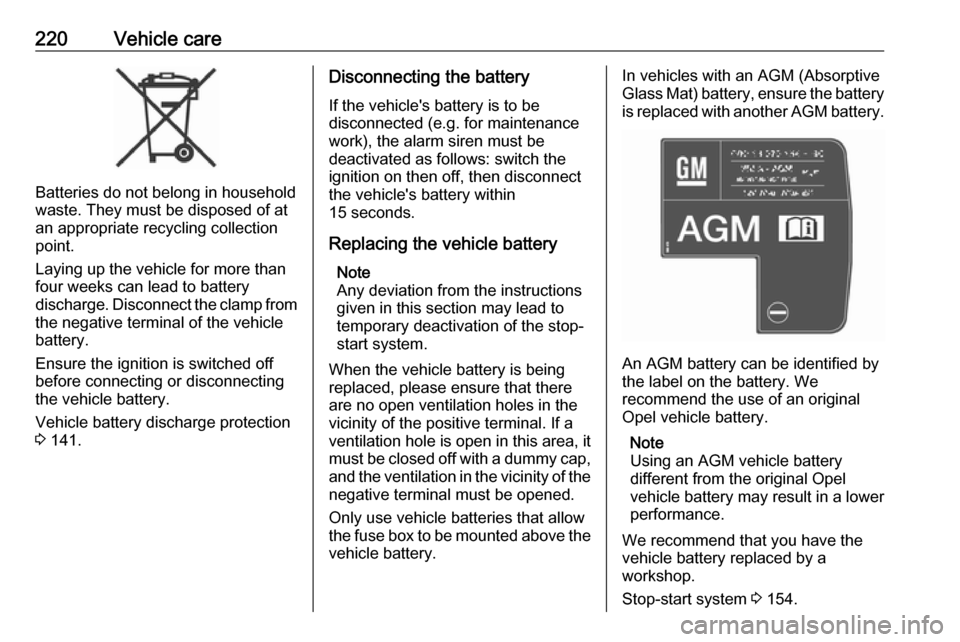
Batteries do not belong in household
waste. They must be disposed of at
an appropriate recycling collection
point.
Laying up the vehicle for more than
four weeks can lead to battery
discharge. Disconnect the clamp from the negative terminal of the vehicle
battery.
Ensure the ignition is switched off
before connecting or disconnecting
the vehicle battery.
Vehicle battery discharge protection
3 141.
Disconnecting the battery
If the vehicle's battery is to be
disconnected (e.g. for maintenance
work), the alarm siren must be
deactivated as follows: switch the
ignition on then off, then disconnect
the vehicle's battery within
15 seconds.
Replacing the vehicle battery Note
Any deviation from the instructions
given in this section may lead to
temporary deactivation of the stop-
start system.
When the vehicle battery is being
replaced, please ensure that there
are no open ventilation holes in the
vicinity of the positive terminal. If a
ventilation hole is open in this area, it
must be closed off with a dummy cap,
and the ventilation in the vicinity of the negative terminal must be opened.
Only use vehicle batteries that allow
the fuse box to be mounted above the
vehicle battery.In vehicles with an AGM (Absorptive
Glass Mat) battery, ensure the battery
is replaced with another AGM battery.
An AGM battery can be identified by
the label on the battery. We
recommend the use of an original
Opel vehicle battery.
Note
Using an AGM vehicle battery
different from the original Opel
vehicle battery may result in a lower performance.
We recommend that you have the
vehicle battery replaced by a
workshop.
Stop-start system 3 154.
Page 223 of 291
Vehicle care221Charging the vehicle battery9Warning
On vehicles with stop-start
system, ensure that the charging potential does not exceed
14.6 volts when using a battery
charger. Otherwise the vehicle
battery might be damaged.
Jump starting 3 251.
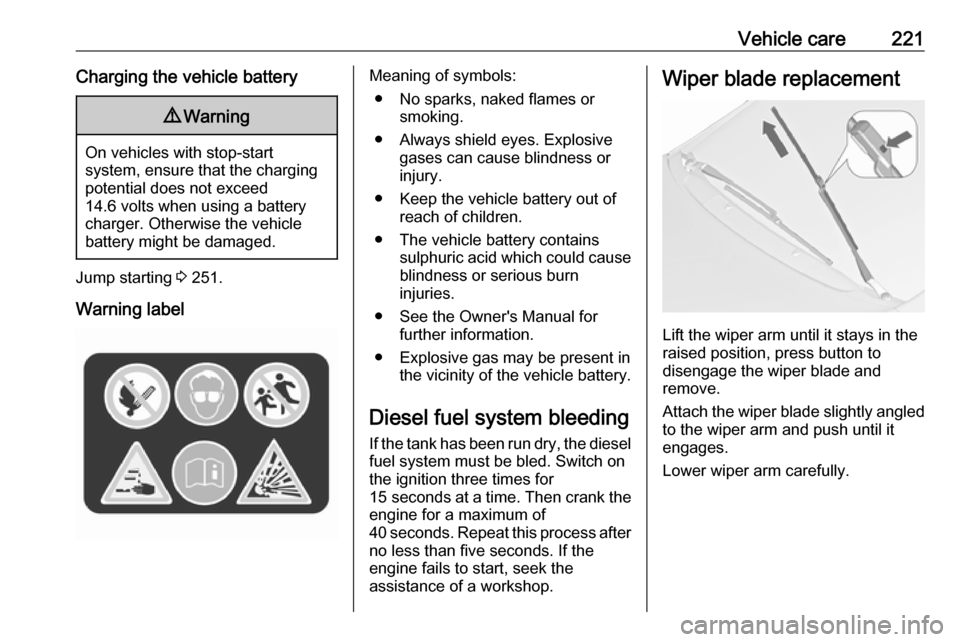
Warning label
Meaning of symbols: ● No sparks, naked flames or smoking.
● Always shield eyes. Explosive gases can cause blindness or
injury.
● Keep the vehicle battery out of reach of children.
● The vehicle battery contains sulphuric acid which could cause
blindness or serious burn
injuries.
● See the Owner's Manual for further information.
● Explosive gas may be present in the vicinity of the vehicle battery.
Diesel fuel system bleeding If the tank has been run dry, the diesel
fuel system must be bled. Switch on
the ignition three times for
15 seconds at a time. Then crank the
engine for a maximum of 40 seconds. Repeat this process after
no less than five seconds. If the
engine fails to start, seek the
assistance of a workshop.Wiper blade replacement
Lift the wiper arm until it stays in the
raised position, press button to
disengage the wiper blade and
remove.
Attach the wiper blade slightly angled
to the wiper arm and push until it
engages.
Lower wiper arm carefully.
Page 234 of 291

232Vehicle careNo.Circuit16Starter17Transmission control module18Heated rear window19Front power windows20Rear power windows21Rear electrical centre22Left high beam (Halogen)23–24Right headlight (LED)25Left headlight (LED)26Front fog lights27Diesel fuel heating28Stop-start system29Electric parking brake30ABS31Adaptive cruise control32AirbagNo.Circuit33Adaptive forward lighting/Auto‐
matic light control34Exhaust gas recirculation35Exterior mirror/Rain sensor36Climate control37Canister vent solenoid38Vacuum pump39Central control module40Windscreen washer/Rear
window washer system41Right high beam (Halogen)42Radiator fan43Windscreen wiper44Windscreen wiper45Radiator fan46–47Horn48Radiator fanNo.Circuit49Fuel pump50Headlamp levelling/Adaptive
forward lighting51Air shutter52Auxiliary heater/Diesel engine53Transmission control module/
Engine control module54Vacuum pump/Instrument
panel cluster/Heating ventila‐
tion/Air conditioning system
After having changed defective fuses,
close the fuse box cover and press
until it engages.
If the fuse box cover is not closed
correctly, malfunctions may occur.
Page 242 of 291

240Vehicle care
Select Tyre load page under Vehicle
Information Menu ? in the Driver
Information Centre 3 117.
Select: ● Light for comfort pressure up to
3 people.
● Eco for Eco pressure up to
3 people.
● Max for full load.
Tyre pressure sensor matching
process
Each tyre pressure sensor has a
unique identification code. The
identification code must be matched
to a new wheel position after rotating
the wheels or exchanging the
complete wheel set and if one or more
tyre pressure sensors were replaced. The tyre pressure sensor matching
process should also be performed
after replacing a spare wheel with a
road wheel containing the tyre
pressure sensor.
The malfunction light w and the
warning message or code should
extinguish at the next ignition cycle.
The sensors are matched to the
wheel positions, using a relearn tool,
in the following order: left side front
wheel, right side front wheel, right
side rear wheel and left side rear
wheel. The turn signal light at the
current active position is illuminated
until sensor is matched.
Consult your workshop for service.
There are two minutes to match the
first wheel position, and five minutes
overall to match all four wheel
positions. If it takes longer, the
matching process stops and must be
restarted.
The tyre pressure sensor matching
process is:
1. Apply the parking brake.2. Turn the ignition on.
3. On vehicles with automatic transmission: set the selector
lever to P.
On vehicles with manual
transmission: select neutral.
4. Press MENU on the turn signal
lever to select the Vehicle
Information Menu ? in the
Driver Information Centre.
5. Turn the adjuster wheel to scroll to
the tyre pressure menu.
Page 246 of 291
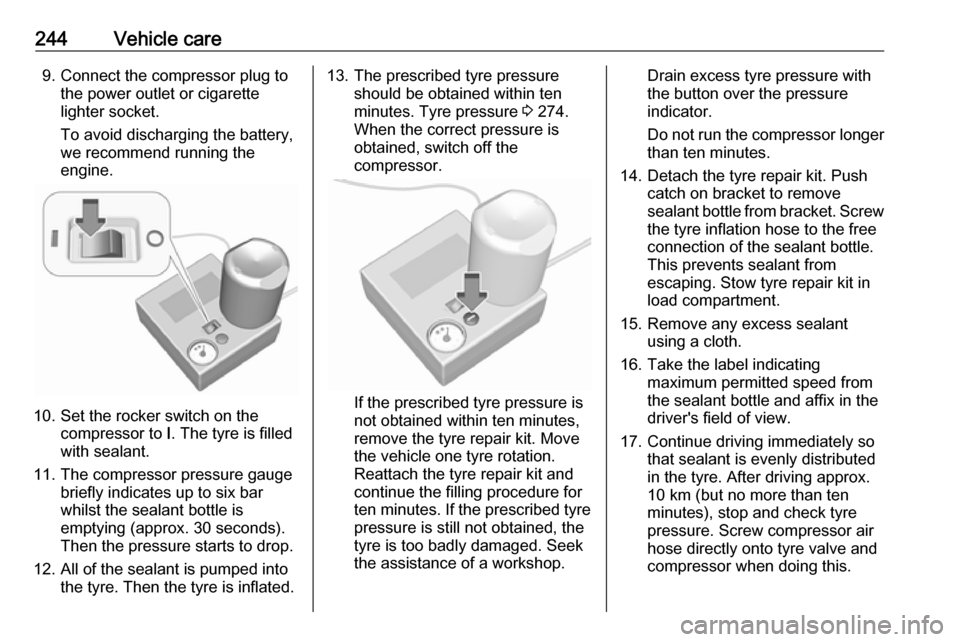
244Vehicle care9. Connect the compressor plug tothe power outlet or cigarette
lighter socket.
To avoid discharging the battery,
we recommend running the
engine.
10. Set the rocker switch on the compressor to I. The tyre is filled
with sealant.
11. The compressor pressure gauge briefly indicates up to six bar
whilst the sealant bottle is
emptying (approx. 30 seconds).
Then the pressure starts to drop.
12. All of the sealant is pumped into the tyre. Then the tyre is inflated.
13. The prescribed tyre pressureshould be obtained within ten
minutes. Tyre pressure 3 274.
When the correct pressure is
obtained, switch off the
compressor.
If the prescribed tyre pressure is
not obtained within ten minutes,
remove the tyre repair kit. Move
the vehicle one tyre rotation.
Reattach the tyre repair kit and
continue the filling procedure for
ten minutes. If the prescribed tyre
pressure is still not obtained, the
tyre is too badly damaged. Seek
the assistance of a workshop.
Drain excess tyre pressure with
the button over the pressure indicator.
Do not run the compressor longer
than ten minutes.
14. Detach the tyre repair kit. Push catch on bracket to remove
sealant bottle from bracket. Screw the tyre inflation hose to the free
connection of the sealant bottle.
This prevents sealant from
escaping. Stow tyre repair kit in
load compartment.
15. Remove any excess sealant using a cloth.
16. Take the label indicating maximum permitted speed from
the sealant bottle and affix in the
driver's field of view.
17. Continue driving immediately so that sealant is evenly distributed
in the tyre. After driving approx.
10 km (but no more than ten
minutes), stop and check tyre
pressure. Screw compressor air
hose directly onto tyre valve and
compressor when doing this.