tailgate OPEL ZAFIRA C 2018 Manual user
[x] Cancel search | Manufacturer: OPEL, Model Year: 2018, Model line: ZAFIRA C, Model: OPEL ZAFIRA C 2018Pages: 341, PDF Size: 9.99 MB
Page 274 of 341

272Vehicle care
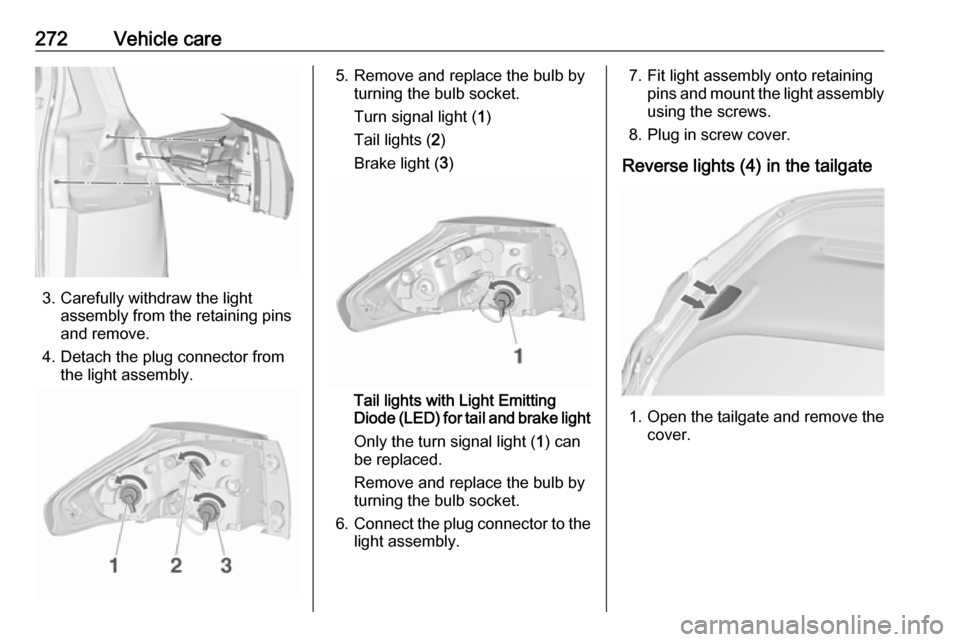
3. Carefully withdraw the lightassembly from the retaining pins
and remove.
4. Detach the plug connector from the light assembly.
5. Remove and replace the bulb by turning the bulb socket.
Turn signal light ( 1)
Tail lights ( 2)
Brake light ( 3)
Tail lights with Light Emitting
Diode (LED) for tail and brake light
Only the turn signal light ( 1) can
be replaced.
Remove and replace the bulb by
turning the bulb socket.
6. Connect the plug connector to the
light assembly.
7. Fit light assembly onto retaining pins and mount the light assembly
using the screws.
8. Plug in screw cover.
Reverse lights (4) in the tailgate
1. Open the tailgate and remove the
cover.
Page 279 of 341

Vehicle care277Engine compartment fusebox
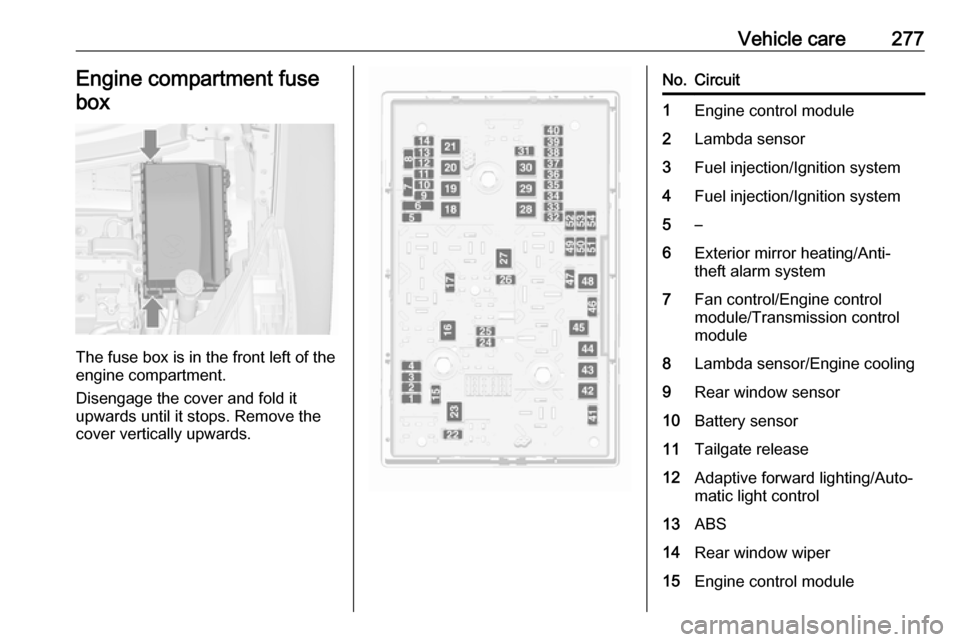
The fuse box is in the front left of the
engine compartment.
Disengage the cover and fold it
upwards until it stops. Remove the
cover vertically upwards.
No.Circuit1Engine control module2Lambda sensor3Fuel injection/Ignition system4Fuel injection/Ignition system5–6Exterior mirror heating/Anti-
theft alarm system7Fan control/Engine control
module/Transmission control
module8Lambda sensor/Engine cooling9Rear window sensor10Battery sensor11Tailgate release12Adaptive forward lighting/Auto‐
matic light control13ABS14Rear window wiper15Engine control module
Page 284 of 341

282Vehicle careVehicle tools
Tools
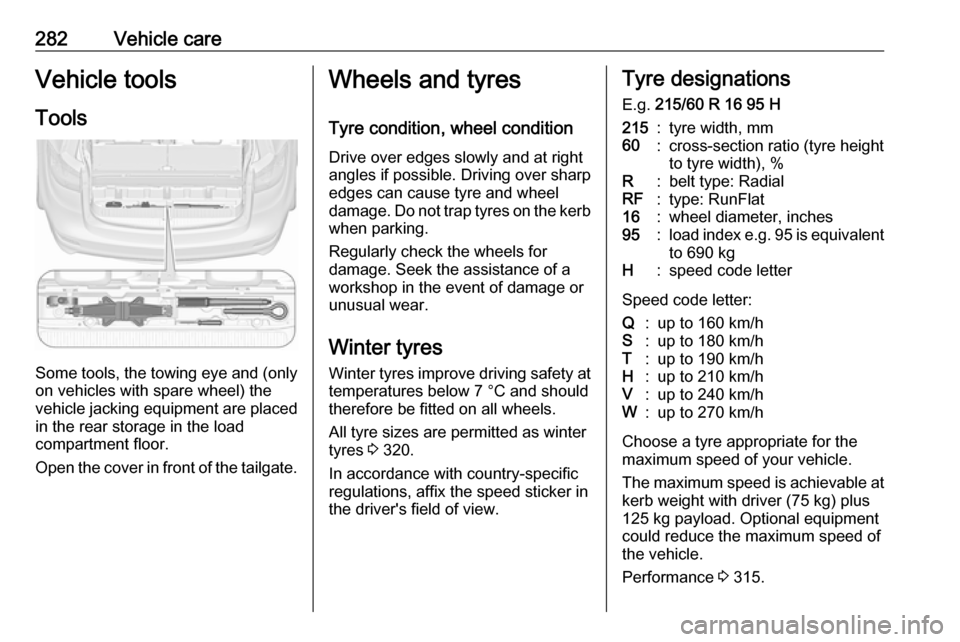
Some tools, the towing eye and (only on vehicles with spare wheel) the
vehicle jacking equipment are placed
in the rear storage in the load
compartment floor.
Open the cover in front of the tailgate.
Wheels and tyres
Tyre condition, wheel condition Drive over edges slowly and at right
angles if possible. Driving over sharp
edges can cause tyre and wheel
damage. Do not trap tyres on the kerb when parking.
Regularly check the wheels for
damage. Seek the assistance of a workshop in the event of damage or
unusual wear.
Winter tyres
Winter tyres improve driving safety at temperatures below 7 °C and should
therefore be fitted on all wheels.
All tyre sizes are permitted as winter
tyres 3 320.
In accordance with country-specific
regulations, affix the speed sticker in
the driver's field of view.Tyre designations
E.g. 215/60 R 16 95 H215:tyre width, mm60:cross-section ratio (tyre height
to tyre width), %R:belt type: RadialRF:type: RunFlat16:wheel diameter, inches95:load index e.g. 95 is equivalent
to 690 kgH:speed code letter
Speed code letter:
Q:up to 160 km/hS:up to 180 km/hT:up to 190 km/hH:up to 210 km/hV:up to 240 km/hW:up to 270 km/h
Choose a tyre appropriate for the
maximum speed of your vehicle.
The maximum speed is achievable at kerb weight with driver (75 kg) plus
125 kg payload. Optional equipment
could reduce the maximum speed of
the vehicle.
Performance 3 315.
Page 297 of 341

Vehicle care295
8. Lower holder all the way andremove spare wheel.
9. Change the wheel. The damaged wheel must be
secured in the load compartment,
see below.
10. Lift the empty spare wheel holder and insert the safety cable.
11. Lift the spare wheel holder further
and engage in both catches. The
open sides of the catches must
point in the direction of travel.
12. Close the empty spare wheel holder by turning both hexagon
bolts clockwise using the wheel
wrench.
13. Fit the caps above both hexagon bolts.
14. Stow wheel wrench and the jack in the storage in front of the
tailgate.
15. Close the storage compartment cover.
When stowing the spare wheel in the
spare wheel holder, note that the
wheel is positioned with the tyre valve
above the recess of the wheel holder.
Stowing a damaged full size
wheel in the load compartment
The spare wheel holder is not
designed for other tyre sizes than the
spare wheel.
A damaged wheel wider than the
spare wheel must be stowed in the
load compartment and secured with a strap. Vehicle tools 3 282.
The seats of the third row must be folded down 3 79.
1. Position the wheel close to the left
sidewall of the load compartment.
2. Place the loop end of the strap through the front lashing eye on
the left side.
3. Place the hook end of the strap through the loop and pull it until
the strap is fastened securely to
the lashing eye.