ECO mode OPEL ZAFIRA C 2019 Manual user
[x] Cancel search | Manufacturer: OPEL, Model Year: 2019, Model line: ZAFIRA C, Model: OPEL ZAFIRA C 2019Pages: 317, PDF Size: 9.38 MB
Page 147 of 317
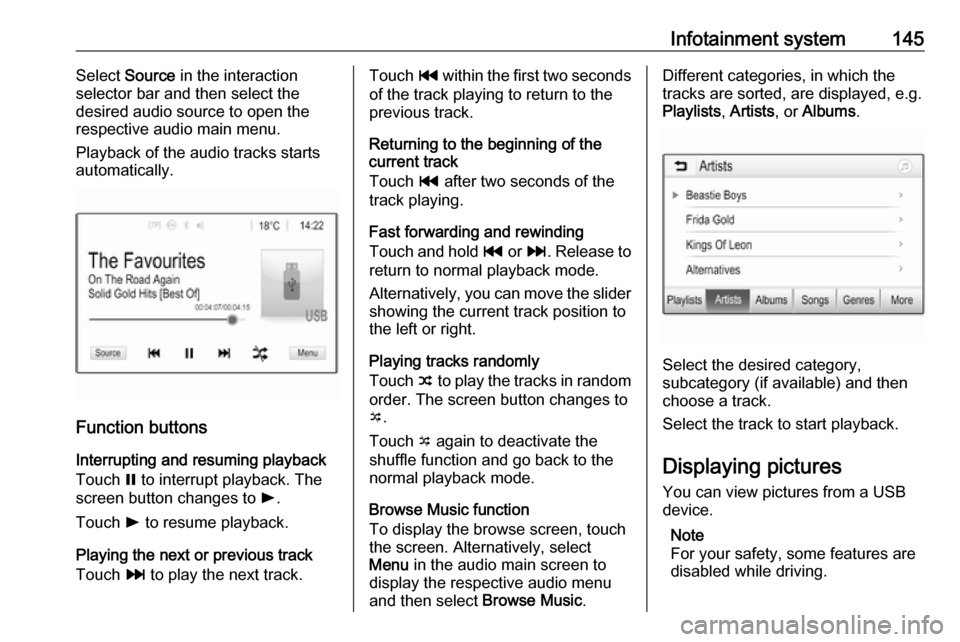
Infotainment system145Select Source in the interaction
selector bar and then select the
desired audio source to open the
respective audio main menu.
Playback of the audio tracks starts automatically.
Function buttons
Interrupting and resuming playback
Touch = to interrupt playback. The
screen button changes to l.
Touch l to resume playback.
Playing the next or previous track
Touch v to play the next track.
Touch t within the first two seconds
of the track playing to return to the
previous track.
Returning to the beginning of the
current track
Touch t after two seconds of the
track playing.
Fast forwarding and rewinding
Touch and hold t or v. Release to
return to normal playback mode.
Alternatively, you can move the slider
showing the current track position to
the left or right.
Playing tracks randomly
Touch n to play the tracks in random
order. The screen button changes to
o .
Touch o again to deactivate the
shuffle function and go back to the
normal playback mode.
Browse Music function
To display the browse screen, touch
the screen. Alternatively, select
Menu in the audio main screen to
display the respective audio menu
and then select Browse Music.Different categories, in which the
tracks are sorted, are displayed, e.g.
Playlists , Artists , or Albums .
Select the desired category,
subcategory (if available) and then
choose a track.
Select the track to start playback.
Displaying pictures
You can view pictures from a USB
device.
Note
For your safety, some features are
disabled while driving.
Page 149 of 317
Infotainment system147Display settings
Select Display Settings to open a
submenu for the adjustment of brightness and contrast.
Touch + or - to adjust the settings.
Playing movies You can view movies from a USBdevice.
Note
For your safety, the movie function is
not available while driving.
Activating the movie function
If the device is not yet connected to
the Infotainment system, connect the device 3 143.
Press ; and then select Gallery to
open the media main menu.
Touch m to open the movie main
menu to display a list of items stored
on the USB device. Select the desired
movie. If this is stored within a folder,
select the respective folder first.
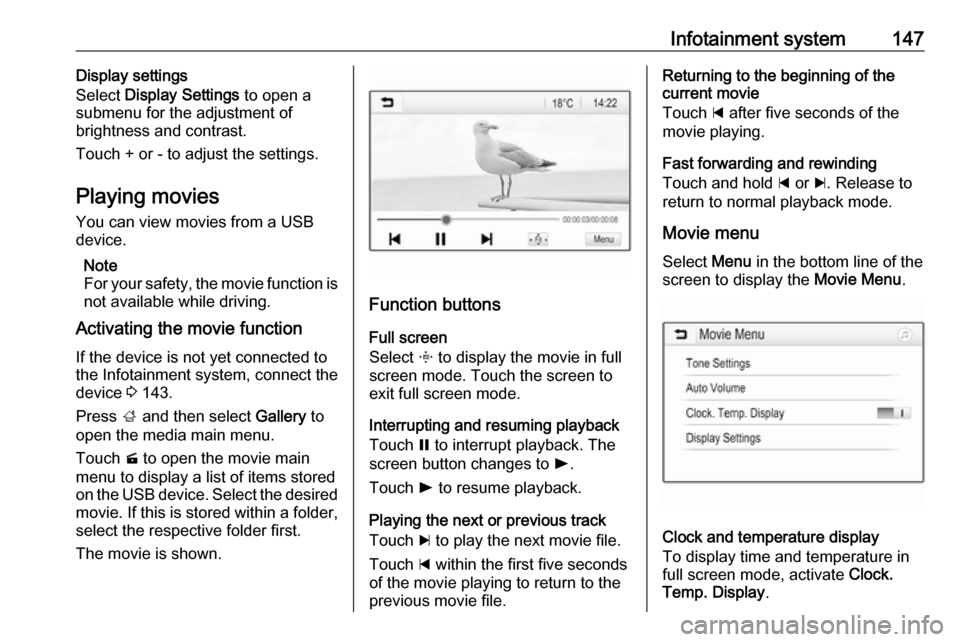
The movie is shown.
Function buttons
Full screen
Select x to display the movie in full
screen mode. Touch the screen to
exit full screen mode.
Interrupting and resuming playback
Touch = to interrupt playback. The
screen button changes to l.
Touch l to resume playback.
Playing the next or previous track
Touch c to play the next movie file.
Touch d within the first five seconds
of the movie playing to return to the
previous movie file.
Returning to the beginning of the
current movie
Touch d after five seconds of the
movie playing.
Fast forwarding and rewinding
Touch and hold d or c. Release to
return to normal playback mode.
Movie menuSelect Menu in the bottom line of the
screen to display the Movie Menu.
Clock and temperature display
To display time and temperature in
full screen mode, activate Clock.
Temp. Display .
Page 173 of 317
Infotainment system171Select one of the ringtones.
Functions during a call
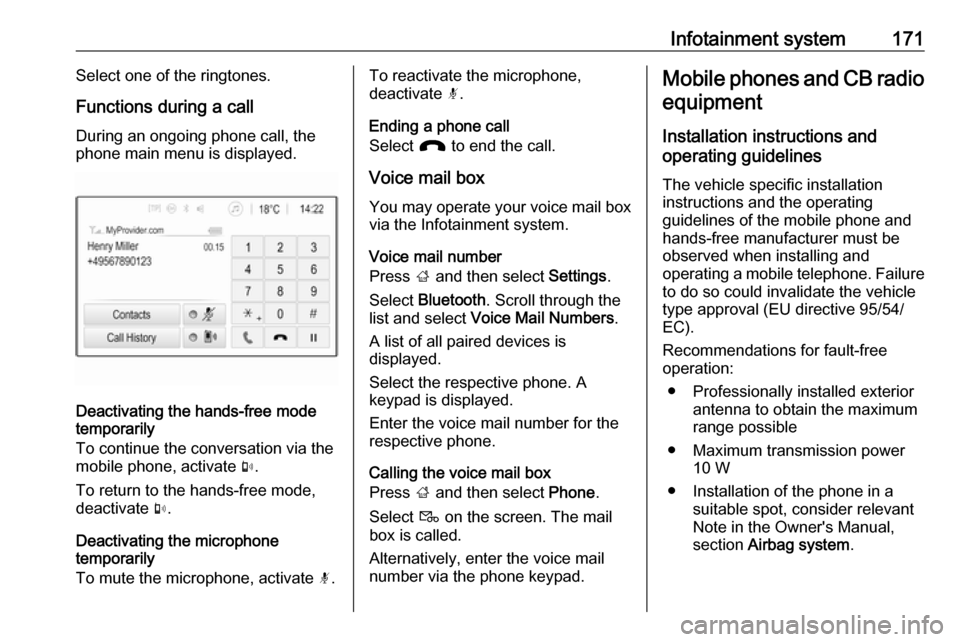
During an ongoing phone call, the
phone main menu is displayed.
Deactivating the hands-free mode
temporarily
To continue the conversation via the mobile phone, activate m.
To return to the hands-free mode,
deactivate m.
Deactivating the microphone
temporarily
To mute the microphone, activate n.
To reactivate the microphone,
deactivate n.
Ending a phone call
Select J to end the call.
Voice mail box You may operate your voice mail box
via the Infotainment system.
Voice mail number
Press ; and then select Settings.
Select Bluetooth . Scroll through the
list and select Voice Mail Numbers .
A list of all paired devices is
displayed.
Select the respective phone. A
keypad is displayed.
Enter the voice mail number for the
respective phone.
Calling the voice mail box
Press ; and then select Phone.
Select t on the screen. The mail
box is called.
Alternatively, enter the voice mail
number via the phone keypad.Mobile phones and CB radio
equipment
Installation instructions and
operating guidelines
The vehicle specific installation
instructions and the operating
guidelines of the mobile phone and
hands-free manufacturer must be
observed when installing and
operating a mobile telephone. Failure
to do so could invalidate the vehicle
type approval (EU directive 95/54/
EC).
Recommendations for fault-free
operation:
● Professionally installed exterior antenna to obtain the maximum
range possible
● Maximum transmission power 10 W
● Installation of the phone in a suitable spot, consider relevant
Note in the Owner's Manual,
section Airbag system .
Page 178 of 317
176Climate control
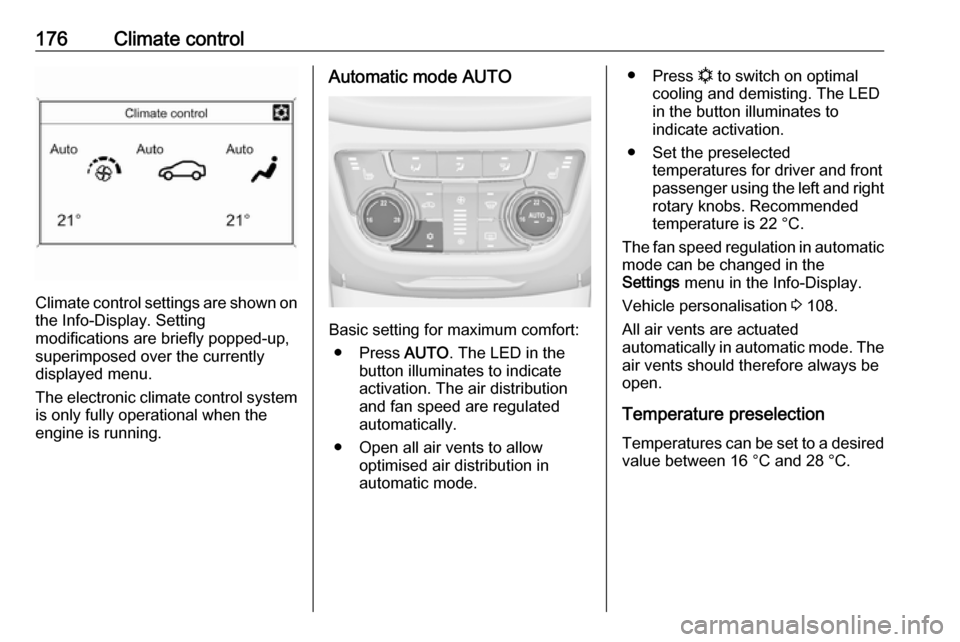
Climate control settings are shown onthe Info-Display. Setting
modifications are briefly popped-up,
superimposed over the currently
displayed menu.
The electronic climate control system
is only fully operational when the
engine is running.
Automatic mode AUTO
Basic setting for maximum comfort:
● Press AUTO. The LED in the
button illuminates to indicate
activation. The air distribution
and fan speed are regulated
automatically.
● Open all air vents to allow optimised air distribution in
automatic mode.
● Press n to switch on optimal
cooling and demisting. The LED in the button illuminates to
indicate activation.
● Set the preselected temperatures for driver and front
passenger using the left and right
rotary knobs. Recommended
temperature is 22 °C.
The fan speed regulation in automatic mode can be changed in the
Settings menu in the Info-Display.
Vehicle personalisation 3 108.
All air vents are actuated
automatically in automatic mode. The air vents should therefore always be
open.
Temperature preselection
Temperatures can be set to a desired value between 16 °C and 28 °C.
Page 194 of 317
192Driving and operatingThe vehicle must be parked on a levelsurface.
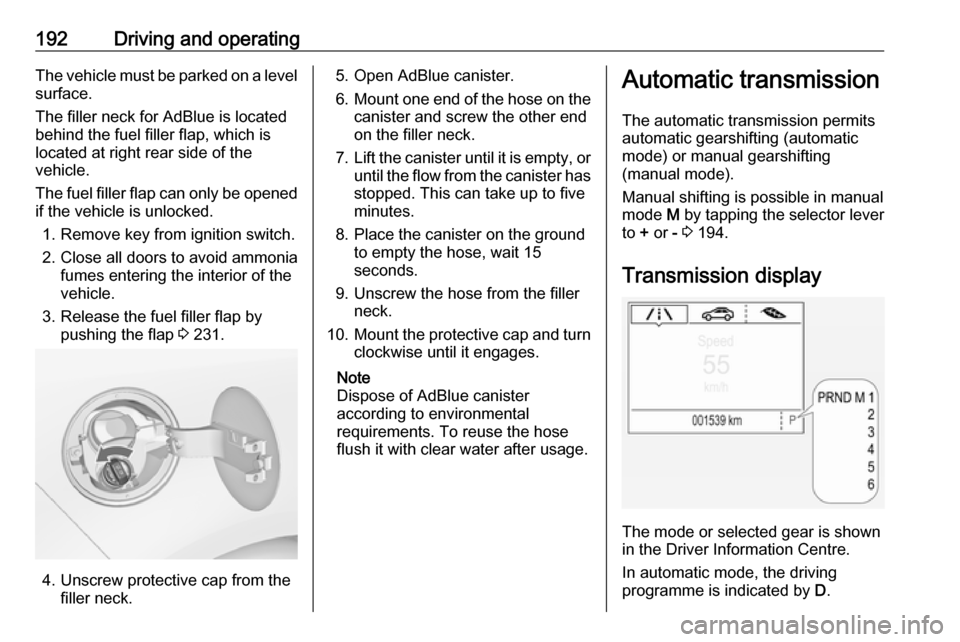
The filler neck for AdBlue is located behind the fuel filler flap, which islocated at right rear side of the
vehicle.
The fuel filler flap can only be opened
if the vehicle is unlocked.
1. Remove key from ignition switch.2. Close all doors to avoid ammonia fumes entering the interior of the
vehicle.
3. Release the fuel filler flap by pushing the flap 3 231.
4. Unscrew protective cap from the
filler neck.
5. Open AdBlue canister.
6. Mount one end of the hose on the
canister and screw the other end
on the filler neck.
7. Lift the canister until it is empty, or
until the flow from the canister has stopped. This can take up to five
minutes.
8. Place the canister on the ground to empty the hose, wait 15
seconds.
9. Unscrew the hose from the filler neck.
10. Mount the protective cap and turn
clockwise until it engages.
Note
Dispose of AdBlue canister
according to environmental
requirements. To reuse the hose
flush it with clear water after usage.Automatic transmission
The automatic transmission permits
automatic gearshifting (automatic
mode) or manual gearshifting
(manual mode).
Manual shifting is possible in manual
mode M by tapping the selector lever
to + or - 3 194.
Transmission display
The mode or selected gear is shown
in the Driver Information Centre.
In automatic mode, the driving
programme is indicated by D.
Page 196 of 317
194Driving and operatingParking
Apply the parking brake and engage
P .
The ignition key can only be removed
when the selector lever is in position
P .
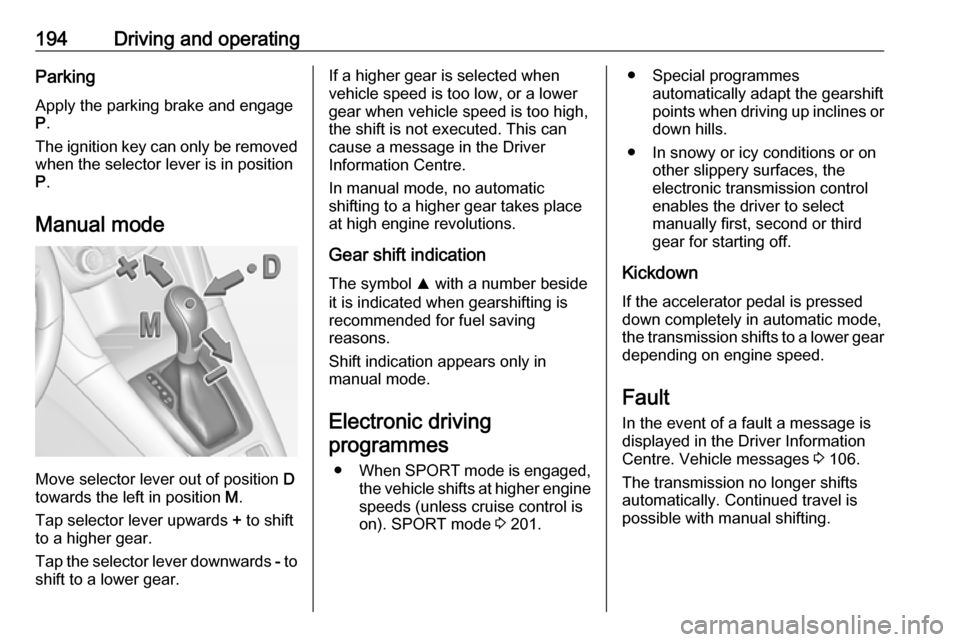
Manual mode
Move selector lever out of position D
towards the left in position M.
Tap selector lever upwards + to shift
to a higher gear.
Tap the selector lever downwards - to
shift to a lower gear.
If a higher gear is selected when
vehicle speed is too low, or a lower
gear when vehicle speed is too high,
the shift is not executed. This can
cause a message in the Driver
Information Centre.
In manual mode, no automatic
shifting to a higher gear takes place
at high engine revolutions.
Gear shift indication
The symbol R with a number beside
it is indicated when gearshifting is
recommended for fuel saving
reasons.
Shift indication appears only in
manual mode.
Electronic driving programmes
● When SPORT mode is engaged,
the vehicle shifts at higher engine
speeds (unless cruise control is
on). SPORT mode 3 201.● Special programmes
automatically adapt the gearshift
points when driving up inclines or down hills.
● In snowy or icy conditions or on other slippery surfaces, the
electronic transmission control
enables the driver to select
manually first, second or third
gear for starting off.
Kickdown If the accelerator pedal is presseddown completely in automatic mode,the transmission shifts to a lower gear
depending on engine speed.
Fault
In the event of a fault a message is
displayed in the Driver Information
Centre. Vehicle messages 3 106.
The transmission no longer shifts automatically. Continued travel is
possible with manual shifting.
Page 200 of 317
198Driving and operatingTo reduce the operating forces ofthe parking brake, depress the
foot brake at the same time.
Control indicator R 3 96.
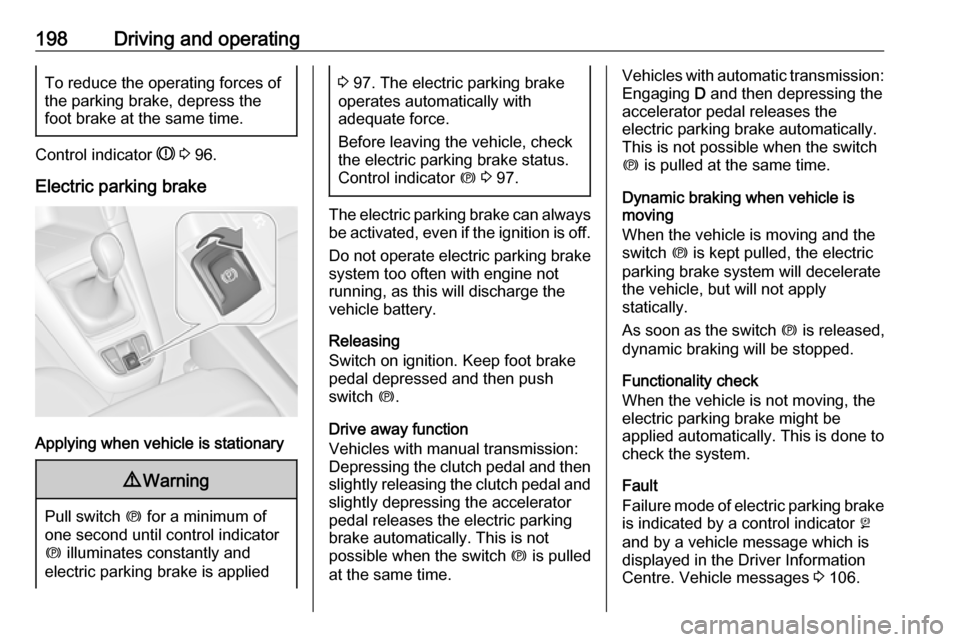
Electric parking brake
Applying when vehicle is stationary
9 Warning
Pull switch m for a minimum of
one second until control indicator
m illuminates constantly and
electric parking brake is applied
3 97. The electric parking brake
operates automatically with
adequate force.
Before leaving the vehicle, check
the electric parking brake status.
Control indicator m 3 97.
The electric parking brake can always
be activated, even if the ignition is off.
Do not operate electric parking brake
system too often with engine not
running, as this will discharge the
vehicle battery.
Releasing
Switch on ignition. Keep foot brake
pedal depressed and then push
switch m.
Drive away function
Vehicles with manual transmission:
Depressing the clutch pedal and then
slightly releasing the clutch pedal and slightly depressing the accelerator
pedal releases the electric parking
brake automatically. This is not
possible when the switch m is pulled
at the same time.
Vehicles with automatic transmission: Engaging D and then depressing the
accelerator pedal releases the
electric parking brake automatically. This is not possible when the switch
m is pulled at the same time.
Dynamic braking when vehicle is
moving
When the vehicle is moving and the
switch m is kept pulled, the electric
parking brake system will decelerate
the vehicle, but will not apply
statically.
As soon as the switch m is released,
dynamic braking will be stopped.
Functionality check
When the vehicle is not moving, the
electric parking brake might be
applied automatically. This is done to
check the system.
Fault
Failure mode of electric parking brake
is indicated by a control indicator j
and by a vehicle message which is
displayed in the Driver Information
Centre. Vehicle messages 3 106.
Page 203 of 317

Driving and operating2019Warning
Do not let this special safety
feature tempt you into taking risks
when driving.
Adapt speed to the road
conditions.
Control indicator b 3 98.
Deactivation
ESC and TC can be deactivated: ● hold b pressed for a minimum of
five seconds: ESC and TC are
both deactivated. k and n
illuminate and status messages
appear in the Driver Information
Centre.
● To deactivate only Traction control system press button b
briefly: TC is inactive but ESC
remains active, k illuminates. A
status message appears in the
Driver Information Centre when
TC is deactivated.
ESC is reactivated by pressing the
b button again. If the TC system was
previously disabled, both TC and
ESC are reactivated. k and n
extinguishes when TC and ESC are
reactivated.
ESC is also reactivated the next time
the ignition is switched on.
Fault
If there is a fault in the system the
control indicator b illuminates
continuously and a message appears in the Driver Information Centre. The
system is not operational.
Have the cause of the fault remedied
by a workshop.
Interactive driving system Flex Ride Flex Ride driving system allows the
driver to select between three driving
modes:
● SPORT mode: press SPORT,
LED illuminates.
● TOUR mode: press TOUR, LED
illuminates.
● Normal mode: neither SPORT or
TOUR are pressed, no LED
illuminates.
Deactivate SPORT mode and TOUR
mode by pressing the corresponding
button once more.
Page 204 of 317
202Driving and operatingIn each driving mode Flex Ride
networks the following electronic systems:
● Continuous Damping Control
● Accelerator Pedal Control
● Steering Control
● Automatic transmission
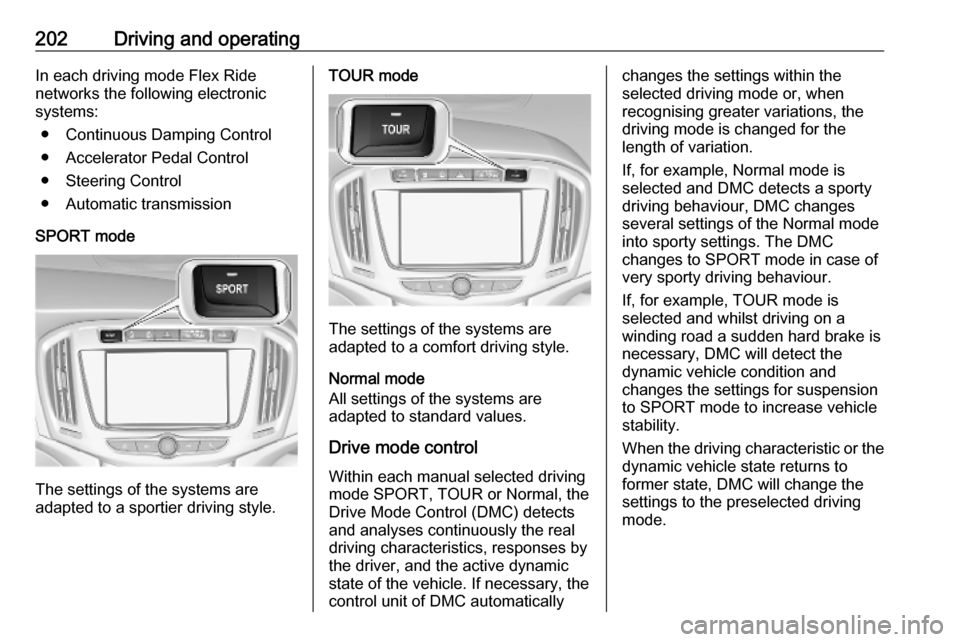
SPORT mode
The settings of the systems are
adapted to a sportier driving style.
TOUR mode
The settings of the systems are
adapted to a comfort driving style.
Normal mode
All settings of the systems are
adapted to standard values.
Drive mode control Within each manual selected driving
mode SPORT, TOUR or Normal, the
Drive Mode Control (DMC) detects
and analyses continuously the real
driving characteristics, responses by
the driver, and the active dynamic
state of the vehicle. If necessary, the
control unit of DMC automatically
changes the settings within the
selected driving mode or, when
recognising greater variations, the
driving mode is changed for the
length of variation.
If, for example, Normal mode is
selected and DMC detects a sporty
driving behaviour, DMC changes
several settings of the Normal mode
into sporty settings. The DMC
changes to SPORT mode in case of
very sporty driving behaviour.
If, for example, TOUR mode is
selected and whilst driving on a
winding road a sudden hard brake is
necessary, DMC will detect the
dynamic vehicle condition and
changes the settings for suspension
to SPORT mode to increase vehicle
stability.
When the driving characteristic or the
dynamic vehicle state returns to
former state, DMC will change the
settings to the preselected driving
mode.
Page 268 of 317
266Vehicle care6. Press SET/CLR to begin the
sensor matching process. A
message requesting acceptance
of the process should be
displayed.
7. Press SET/CLR again to confirm
the selection. The horn sounds
twice to indicate the receiver is in relearn mode.
8. Start with the left side front wheel.
9. Place the relearn tool against the tyre sidewall, near the valve stem.Then press the button to activate
the tyre pressure sensor. A horn
chirp confirms that the sensor
identification code has been
matched to this wheel position.
10. Proceed to the right side front wheel, and repeat the procedure
in Step 9.
11. Proceed to the right side rear wheel, and repeat the procedure
in Step 9.
12. Proceed to the left side rear wheel, and repeat the procedure
in Step 9. The horn sounds twice
to indicate the sensor
identification code has beenmatched to the left side rear tyre,
and the tyre pressure sensor
matching process is no longer
active.
13. Turn off the ignition.
14. Set all four tyres to the recommended air pressure level
as indicated on the tyre pressure
information label.
15. Ensure the tyre loading status is set according to the selected
pressure 3 101.
Tread depth
Check tread depth at regular
intervals.
Tyres should be replaced for safety
reasons at a tread depth of 2-3 mm
(4 mm for winter tyres).
For safety reasons, it is
recommended that the tread depth of
the tyres on one axle should not vary
by more than 2 mm.
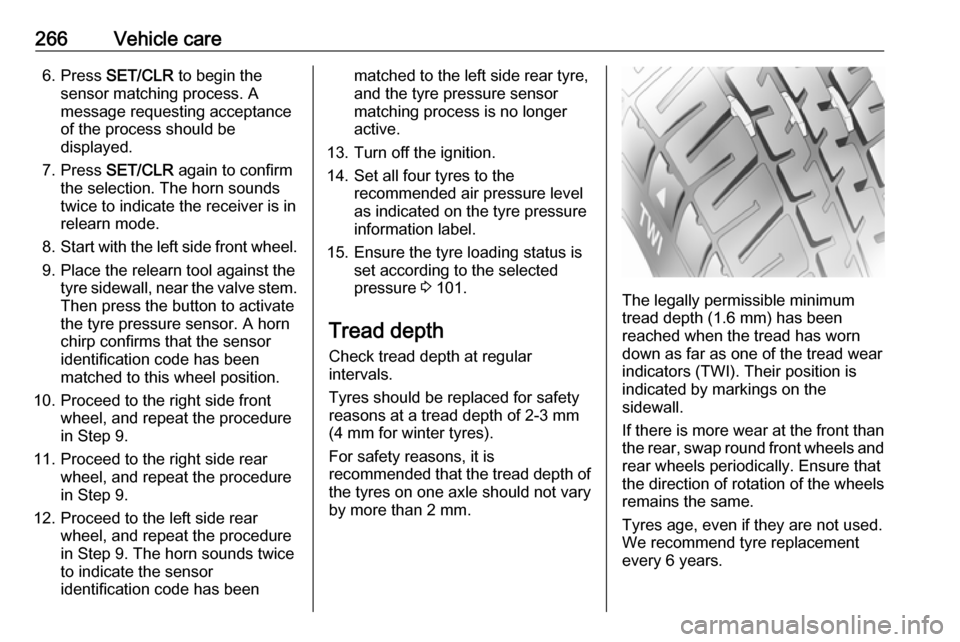
The legally permissible minimum
tread depth (1.6 mm) has been
reached when the tread has worn
down as far as one of the tread wear
indicators (TWI). Their position is
indicated by markings on the
sidewall.
If there is more wear at the front than
the rear, swap round front wheels and rear wheels periodically. Ensure that
the direction of rotation of the wheels
remains the same.
Tyres age, even if they are not used.
We recommend tyre replacement
every 6 years.