service OPEL ZAFIRA C 2019 Manual user
[x] Cancel search | Manufacturer: OPEL, Model Year: 2019, Model line: ZAFIRA C, Model: OPEL ZAFIRA C 2019Pages: 317, PDF Size: 9.38 MB
Page 182 of 317

180Climate control
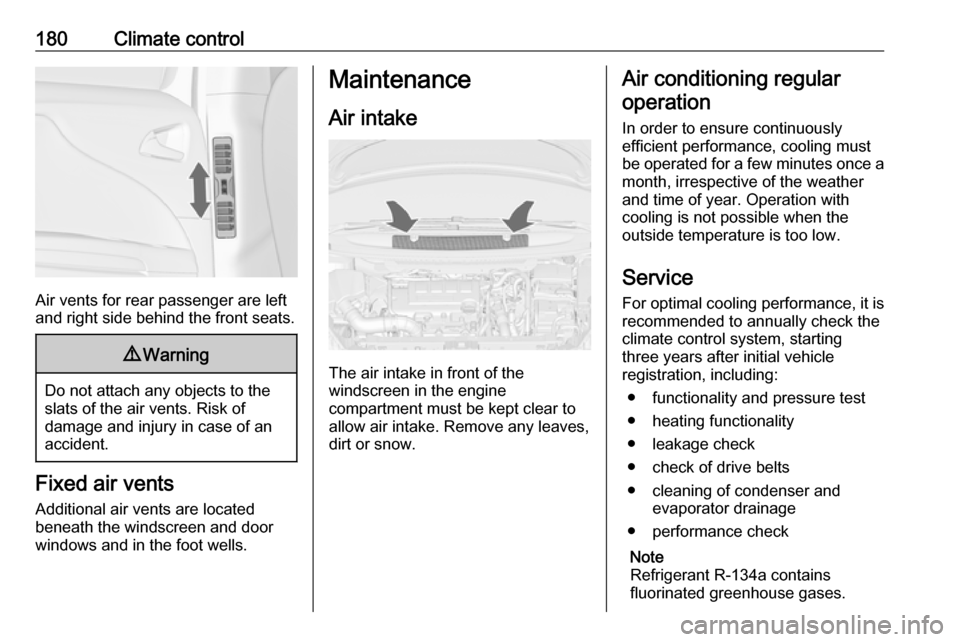
Air vents for rear passenger are left
and right side behind the front seats.
9 Warning
Do not attach any objects to the
slats of the air vents. Risk of
damage and injury in case of an
accident.
Fixed air vents
Additional air vents are located
beneath the windscreen and door windows and in the foot wells.
Maintenance
Air intake
The air intake in front of the
windscreen in the engine
compartment must be kept clear to
allow air intake. Remove any leaves,
dirt or snow.
Air conditioning regular
operation
In order to ensure continuously
efficient performance, cooling must
be operated for a few minutes once a
month, irrespective of the weather
and time of year. Operation with
cooling is not possible when the
outside temperature is too low.
Service For optimal cooling performance, it is recommended to annually check the
climate control system, starting
three years after initial vehicle
registration, including:
● functionality and pressure test
● heating functionality
● leakage check
● check of drive belts
● cleaning of condenser and evaporator drainage
● performance check
Note
Refrigerant R-134a contains
fluorinated greenhouse gases.
Page 186 of 317

184Driving and operatingTurn key briefly to position 3 and
release: an automatic procedure
operates the starter with a short delay
until the engine is running, see
Automatic Starter Control.
Manual transmission: during an
Autostop, the engine can be started
by depressing the clutch pedal
3 185.
Automatic transmission: during an
Autostop, the engine can be started
by releasing the brake pedal 3 185.
Before restarting or to switch off the engine, turn the key back to position
0 .9 Danger
Switching off the engine during
driving may cause loss of power
support for brake and steering
systems. Assistance systems and
airbag systems are disabled.
Lighting and brake lights will
extinguish. Therefore power down
the engine and ignition while
driving only when required in case of emergency.
Starting the vehicle at low
temperatures
The start of the engine without
additional heaters is possible down to -25 °С for diesel engines and -30 °C
for petrol engines. Required is an engine oil with the correct viscosity,
the correct fuel, performed services
and a sufficiently charged battery.
With temperatures below -30 °C the
automatic transmission need a
warming phase of approx. five
minutes. The selector lever must be
in position P.
Automatic Starter Control This function controls the engine
starting procedure. The driver does
not have to hold the key in position 3.
Once applied, the system will go on
starting automatically until the engine
is running. Because of the checking
procedure, the engine starts running
after a short delay.Possible reasons for a non-starting
engine:
● Clutch pedal not operated (manual transmission).
● Brake pedal not operated or selector lever not in P or N
(automatic transmission).
● Timeout occurred.
Turbo engine warm-up
Upon start-up, engine available
torque may be limited for a short time,
especially when the engine
temperature is cold. The limitation is
to allow the lubrication system to fully protect the engine.
Overrun cut-off The fuel supply is automatically cut off
during overrun, i.e. when the vehicle
is driven with a gear engaged but accelerator pedal is released.
Depending on driving conditions, the
overrun cut-off may be deactivated.
Page 191 of 317

Driving and operating189% illuminates along with a warning
message when exhaust filter is full.
Start cleaning process as soon as
possible.
% flashes along with a warning
message when exhaust filter has
reached the maximum filling level.
Start cleaning process immediately to
avoid damage to the engine.
Activate self-cleaning process To activate cleaning process,
continue driving, keep engine speed
above 2000 rpm. Shift down if
necessary. Exhaust filter cleaning is
then started.
Cleaning process is completed more
quickly at high engine speeds and
loads.
Control indicator % extinguishes as
soon as the self-cleaning operation is
complete. Keep on driving until self-
cleaning operation is complete.Caution
If possible, do not interrupt
cleaning process. Drive until
cleaning is completed to avoid the need for service or repair by a
workshop.
Cleaning process not possible
If cleaning is not possible for anyreason, control indicator Z
illuminates and a warning message
appears in the Driver Information
Centre. Engine power may be
reduced. Seek the assistance of a
workshop immediately.
Catalytic converter
The catalytic converter reduces the
amount of harmful substances in the
exhaust gases.
Caution
Fuel grades other than those listed on pages 3 229, 3 292 could
damage the catalytic converter or
electronic components.
Unburnt petrol will overheat and
damage the catalytic converter.
Therefore avoid excessive use of the starter, running the fuel tank
dry and starting the engine by
pushing or towing.
In the event of misfiring, uneven
engine running, a reduction in engine performance or other unusual
problems, have the cause of the fault
rectified by a workshop as soon as
possible. In an emergency, driving
can be continued for a short period,
keeping vehicle speed and engine
speed low.
Page 219 of 317

Driving and operating217Brake preparation system
When approaching a vehicle ahead
so quickly that a collision is likely, the brake preparation system slightlypressurises the brakes. This reduces
the response time, when a manual or automatic braking is requested.
The brake system is prepared so that braking can occur more rapidly.
Emergency automatic braking
After the brake preparation and just
before the imminent collision, this
function automatically applies limited
braking to reduce the impact speed of
the collision.
Forward looking brake assist
In addition to brake preparation
system and emergency automatic
braking, the forward looking brake
assist function makes the brake assist more sensitive. In this way,
depressing the brake pedal slightly
results immediately in a strong
braking. This function helps the driver
brake quicker and stronger before the imminent collision.9 Warning
Active emergency braking is not
designed to apply strong
autonomous braking or to avoid automatically a collision. It is
designed to reduce the vehicle
speed before collision. It may not
react on stopped vehicles,
pedestrians or animals. After a
sudden lane change, the system
needs a certain time to detect the
next preceding vehicle.
The complete attention of the
driver is always required while
driving. The driver shall always be ready to take action and apply the brakes and steer to avoid
collisions. The system is designed
to work with all occupants wearing their seat belts.
System limitations
The active emergency braking has
limited or no function during rain,
snow or heavy dirt, as the radar
sensor can be covered by a water
film, dust, ice or snow. In case of
sensor blockage, clean the sensor
cover.
In some seldom cases the active
emergency braking system may
provide a short automatic braking in
situations that seem to be
unnecessary, for instance due to
traffic signs in a curve or due to
vehicles in another lane. This is
acceptable operation, the vehicle
does not need service. Firmly apply
the accelerator pedal to override the
automatic braking.
Deactivation and re-activation
Settings can be changed in the
vehicle personalisation menu in the
Info-Display.
Select the relevant setting in
Settings in the Info-Display.
Vehicle personalisation 3 108.
We recommend to deactivate the
system in the vehicle personalisation
in the following cases:
● when the vehicle is being towed
● before using an automatic car wash with ignition switched on
Page 220 of 317

218Driving and operating● if the windscreen has beendamaged close to the camera
● if the front bumper has been damaged
Fault
In the event of a system service
requirement, a message is displayed
in the Driver Information Centre.
If the system does not work as it
should, vehicle messages are
displayed in the Driver Information
Centre.
Vehicle messages 3 106.
Parking assist Front-rear parking assist9 Warning
The driver bears full responsibility
for the parking manoeuvre.
Always check the surrounding
area when driving backwards or
forwards while using parking
assist system.
The front-rear parking assist
measures the distance between the vehicle and obstacles in front of and
behind the vehicle. It informs and
warns the driver by giving acoustic
signals and display indication.
It uses two different acoustic warning
signals for the front and rear
monitoring areas, each with a
different tone frequency. The signal
for front obstacles sounds via the
front speakers, for rear obstacles it
sounds via the rear speakers.
The system has four ultrasonic
parking sensors each in the rear and
front bumper.
Activation
When reverse gear is engaged, the
front and rear parking assist is ready
to operate.
The system is also activated
automatically at a speed up to
11 km/h.
An illuminated LED in the parking
assist button r indicates that the
system is ready to operate.
If r is switched off within an ignition
cycle, the front parking assist is
deactivated. If vehicle speed has
exceeded 25 km/h beforehand,
parking assist will be reactivated when speed drops below 11 km/h.
Page 242 of 317

240Vehicle care● Since the durability of AdBlue islimited to two years, fluid should
be exchanged if it is too old. Seek the assistance of a workshop.
● Fit the number plate if necessary.
End-of-life vehicle recovery
Information on end-of-life vehicle
recovery centres and the recycling of
end-of-life vehicles is available on our website, where legally required. Only
entrust this work to an authorised
recycling centre.
Gas vehicles must be recycled by a
service centre authorised for gas
vehicles.Vehicle checks
Performing work9 Warning
Only perform engine compartment
checks when the ignition is off.
The cooling fan may start
operating even if the ignition is off.
9 Danger
The ignition system uses
extremely high voltage. Do not
touch.
Bonnet
Opening
Pull the release lever and return it to
its original position.
Page 266 of 317

264Vehicle careSelect Tyre pressure page under
Vehicle Information Menu ?
3 101.
System status and pressure warnings are displayed by a message
indicating the corresponding tyre in the Driver Information Centre.
The system considers the tyre
temperature for the warnings.
A detected low tyre pressure
condition is indicated by control
indicator w 3 99.
If w illuminates, stop as soon as
possible and inflate the tyres as
recommended 3 297.
If w flashes for 60-90 seconds and
then illuminates continuously, there is
a fault in the system. Consult a
workshop.
After inflating, some driving may be
required to update the tyre pressure
values in the Driver Information
Centre. During this time w may
illuminate.
If w illuminates at lower temperatures
and extinguishes after some driving,
this could be an indicator for
approaching a low tyre pressure
condition. Check tyre pressure.
Vehicle messages 3 106.
If the tyre pressure must be reduced
or increased, switch off ignition.
Only mount wheels with pressure
sensors, otherwise the tyre pressure
will not be displayed and w
illuminates continuously.
A temporary spare wheel is not
equipped with pressure sensors. The
tyre pressure monitoring system is
not operational for these wheels.
Control indicator w illuminates. For
the further three wheels the system
remains operational.
The use of commercially available
liquid tyre repair kits can impair the
function of the system. Factory-
approved repair kits can be used.Operating electronic devices or being close to facilities using similar wave
frequencies could disrupt the tyre
pressure monitoring system.
Each time the tyres are replaced, tyre pressure monitoring system sensors
must be dismounted and serviced. For the screwed sensor: replace
valve core and sealing ring. For
clipped sensor: replace complete
valve stem.
Vehicle loading status Adjust tyre pressure to load condition
according to the tyre information label or tyre pressure chart 3 297, and
select the appropriate setting in the Tyre load menu in the Driver
Information Centre 3 101. This
setting is the reference for the tyre
pressure warnings.
The Tyre load menu only appears if
the vehicle is at a standstill and the parking brake is applied. On vehicles
with automatic transmission the
selector lever has to be in P.
Page 267 of 317

Vehicle care265
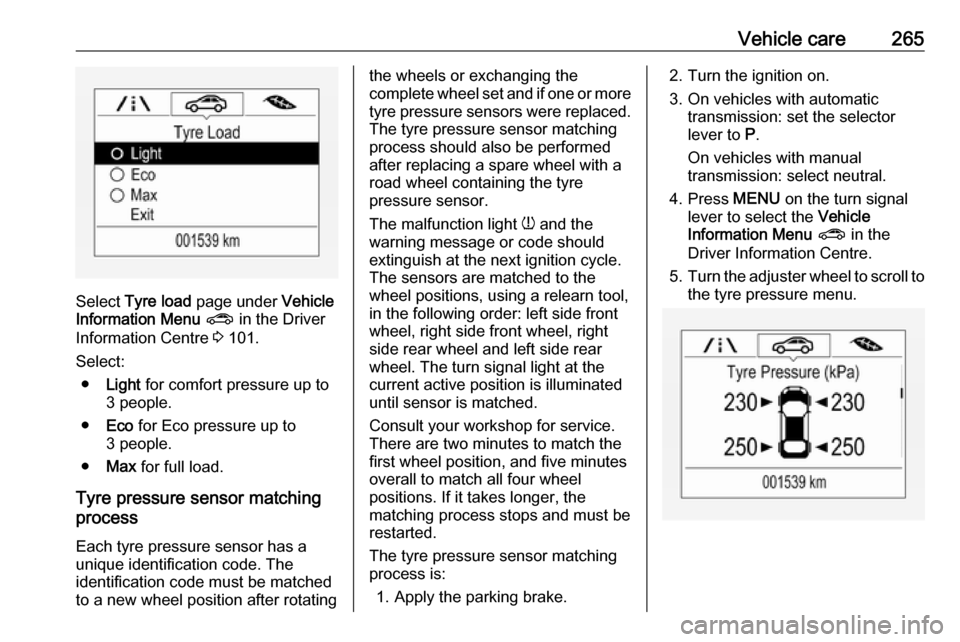
Select Tyre load page under Vehicle
Information Menu ? in the Driver
Information Centre 3 101.
Select: ● Light for comfort pressure up to
3 people.
● Eco for Eco pressure up to
3 people.
● Max for full load.
Tyre pressure sensor matching
process
Each tyre pressure sensor has a
unique identification code. The
identification code must be matched
to a new wheel position after rotating
the wheels or exchanging the
complete wheel set and if one or more
tyre pressure sensors were replaced. The tyre pressure sensor matching
process should also be performed
after replacing a spare wheel with a
road wheel containing the tyre
pressure sensor.
The malfunction light w and the
warning message or code should
extinguish at the next ignition cycle.
The sensors are matched to the
wheel positions, using a relearn tool,
in the following order: left side front
wheel, right side front wheel, right
side rear wheel and left side rear
wheel. The turn signal light at the
current active position is illuminated
until sensor is matched.
Consult your workshop for service.
There are two minutes to match the
first wheel position, and five minutes
overall to match all four wheel
positions. If it takes longer, the
matching process stops and must be
restarted.
The tyre pressure sensor matching
process is:
1. Apply the parking brake.2. Turn the ignition on.
3. On vehicles with automatic transmission: set the selector
lever to P.
On vehicles with manual
transmission: select neutral.
4. Press MENU on the turn signal
lever to select the Vehicle
Information Menu ? in the
Driver Information Centre.
5. Turn the adjuster wheel to scroll to
the tyre pressure menu.
Page 286 of 317

284Service and maintenanceService and
maintenanceGeneral information ...................284
Service information ..................284
Recommended fluids, lubricants
and parts .................................... 285
Recommended fluids and lubricants ................................ 285General information
Service information In order to ensure economical and
safe vehicle operation and to
maintain the value of your vehicle, it
is of vital importance that all
maintenance work is carried out at the proper intervals as specified.
The detailed, up-to-date service
schedule for your vehicle is available
at the workshop.
European service intervals Maintenance of your vehicle is
required every 30,000 km or after one year, whichever occurs first.
Additional engine oil and filter change
is indicated by the engine oil life
system, when required earlier than
maintenance.
A shorter service interval can be valid for severe driving behaviour, e.g. for
taxis and police vehicles.
The European service intervals are
valid for the following countries:Andorra, Austria, Belgium, Bosnia-
Herzegovina, Bulgaria, Croatia,
Cyprus, Czech Republic, Denmark,
Estonia, Finland, France, Germany,
Greece, Greenland, Hungary,
Iceland, Ireland, Italy, Latvia,
Liechtenstein, Lithuania,
Luxembourg, Macedonia, Malta,
Monaco, Montenegro, Netherlands,
Norway, Poland, Portugal, Romania,
San Marino, Serbia, Slovakia,
Slovenia, Spain, Sweden,
Switzerland, United Kingdom.
Service display 3 91.
International service intervals
Maintenance of your vehicle is
required every 15,000 km or after one
year, whichever occurs first.
Additional engine oil and filter change
is indicated by the engine oil life
system, when required earlier than
maintenance.
Severe operating conditions exist if
one or more of the following
circumstances occur frequently: Cold starting, stop and go operation, trailer operation, mountain driving, driving
on poor and sandy road surfaces,
Page 287 of 317

Service and maintenance285increased air pollution, presence of
airborne sand and high dust content,
driving at high altitude and large
variations of temperature. Under
these severe operating conditions,
certain service work may be required more frequently than the regularservice interval.
The international service intervals are
valid for the countries which are not
listed in the European service
intervals.
Service display 3 91.
Confirmations
Confirmation of service is recorded in the Service and Warranty Booklet.
The date and mileage is completed
with the stamp and signature of the
servicing workshop.
Make sure that the Service and
Warranty Booklet is completed
correctly as continuous proof of
service is essential if any warranty or goodwill claims are to be met, and is
also a benefit when selling the
vehicle.Recommended fluids,
lubricants and parts
Recommended fluids andlubricants
Only use products that meet the
recommended specifications.9 Warning
Operating materials are
hazardous and could be
poisonous. Handle with care. Pay
attention to information given on
the containers.
Engine oil
Engine oil is identified by its quality
and its viscosity. Quality is more
important than viscosity when
selecting which engine oil to use. The oil quality ensures e.g. engine
cleanliness, wear protection and oil
ageing control, whereas viscosity
grade gives information on the oil's
thickness over a temperature range.
Dexos is the newest engine oil quality
that provides optimum protection for
gasoline and diesel engines. If it is
unavailable, engine oils of other listed qualities have to be used.
Recommendations for gasoline
engines are also valid for Ethanol
(E85) fuelled engines.
Select the appropriate engine oil
based on its quality and on the
minimum ambient temperature
3 289.
Topping up engine oilCaution
In case of any spilled oil, wipe it up and dispose it properly.
Engine oils of different manufacturersand brands can be mixed as long as
they comply with the required engine
oil quality and viscosity.
Use of engine oils for all petrol
engines with only ACEA quality is
prohibited, since it can cause engine
damage under certain operating
conditions.