buttons OPEL ZAFIRA TOURER 2016 Owners Manual
[x] Cancel search | Manufacturer: OPEL, Model Year: 2016, Model line: ZAFIRA TOURER, Model: OPEL ZAFIRA TOURER 2016Pages: 301, PDF Size: 9.16 MB
Page 13 of 301
In brief11
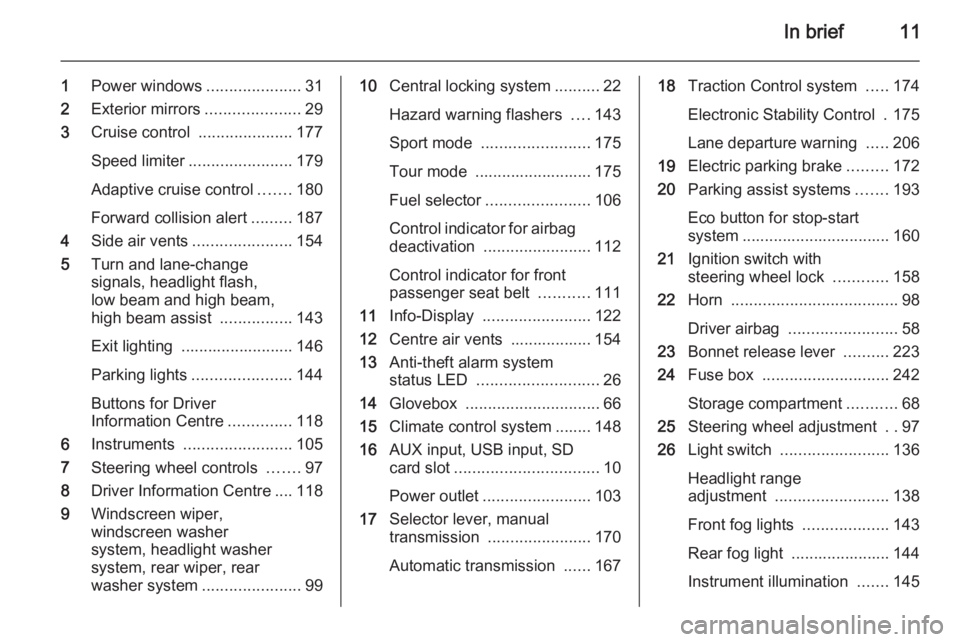
1Power windows .....................31
2 Exterior mirrors .....................29
3 Cruise control .....................177
Speed limiter ....................... 179
Adaptive cruise control .......180
Forward collision alert .........187
4 Side air vents ...................... 154
5 Turn and lane-change
signals, headlight flash,
low beam and high beam,
high beam assist ................143
Exit lighting ......................... 146
Parking lights ...................... 144
Buttons for Driver
Information Centre ..............118
6 Instruments ........................ 105
7 Steering wheel controls .......97
8 Driver Information Centre .... 118
9 Windscreen wiper,
windscreen washer
system, headlight washer
system, rear wiper, rear
washer system ......................9910Central locking system ..........22
Hazard warning flashers ....143
Sport mode ........................ 175
Tour mode .......................... 175
Fuel selector ....................... 106
Control indicator for airbag
deactivation ........................ 112
Control indicator for front
passenger seat belt ...........111
11 Info-Display ........................ 122
12 Centre air vents .................. 154
13 Anti-theft alarm system
status LED ........................... 26
14 Glovebox .............................. 66
15 Climate control system ........ 148
16 AUX input, USB input, SD
card slot ................................ 10
Power outlet ........................ 103
17 Selector lever, manual
transmission ....................... 170
Automatic transmission ......16718Traction Control system .....174
Electronic Stability Control . 175
Lane departure warning .....206
19 Electric parking brake .........172
20 Parking assist systems .......193
Eco button for stop-start
system ................................. 160
21 Ignition switch with
steering wheel lock ............158
22 Horn ..................................... 98
Driver airbag ........................ 58
23 Bonnet release lever ..........223
24 Fuse box ............................ 242
Storage compartment ...........68
25 Steering wheel adjustment ..97
26 Light switch ........................ 136
Headlight range
adjustment ......................... 138
Front fog lights ...................143
Rear fog light ...................... 144
Instrument illumination .......145
Page 25 of 301
Keys, doors and windows23
Unlocking and opening the
tailgate
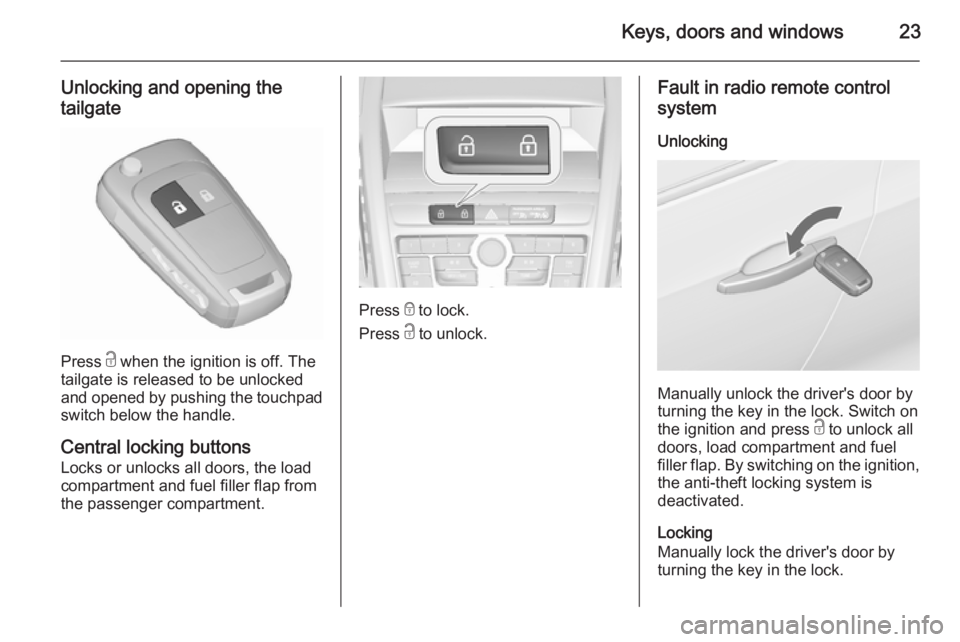
Press c when the ignition is off. The
tailgate is released to be unlocked
and opened by pushing the touchpad switch below the handle.
Central locking buttons Locks or unlocks all doors, the load
compartment and fuel filler flap from
the passenger compartment.
Press e to lock.
Press c to unlock.
Fault in radio remote control
system
Unlocking
Manually unlock the driver's door by
turning the key in the lock. Switch on
the ignition and press c to unlock all
doors, load compartment and fuel
filler flap. By switching on the ignition, the anti-theft locking system is
deactivated.
Locking
Manually lock the driver's door by
turning the key in the lock.
Page 49 of 301
Seats, restraints47
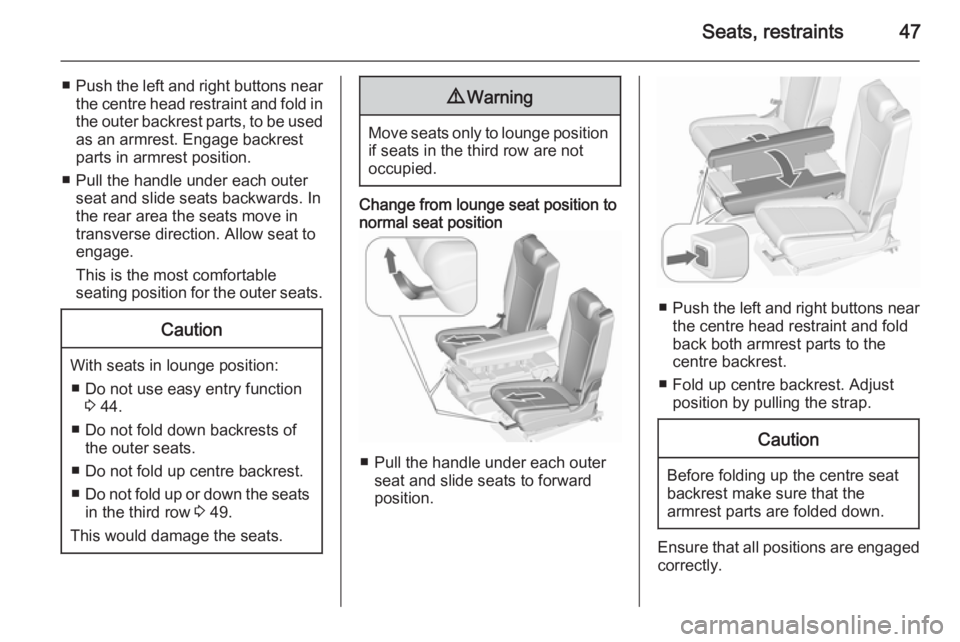
■Push the left and right buttons near
the centre head restraint and fold in
the outer backrest parts, to be used as an armrest. Engage backrestparts in armrest position.
■ Pull the handle under each outer seat and slide seats backwards. In
the rear area the seats move in
transverse direction. Allow seat to
engage.
This is the most comfortable
seating position for the outer seats.Caution
With seats in lounge position:
■ Do not use easy entry function 3 44.
■ Do not fold down backrests of the outer seats.
■ Do not fold up centre backrest.
■ Do not fold up or down the seats
in the third row 3 49.
This would damage the seats.
9 Warning
Move seats only to lounge position
if seats in the third row are not
occupied.
Change from lounge seat position to normal seat position
■ Pull the handle under each outer seat and slide seats to forward
position.
■ Push the left and right buttons near
the centre head restraint and fold
back both armrest parts to the
centre backrest.
■ Fold up centre backrest. Adjust position by pulling the strap.
Caution
Before folding up the centre seat
backrest make sure that the
armrest parts are folded down.
Ensure that all positions are engaged
correctly.
Page 110 of 301
108Instruments and controlsCaution
If engine coolant temperature is
too high, stop vehicle, switch off
engine. Danger to engine. Check
coolant level.
Service display
The engine oil life system lets you
know when to change the engine oil
and filter. Based on driving
conditions, the interval at which an
engine oil and filter change will be
indicated can vary considerably.
In the Uplevel-Combi-Display, the
remaining oil life duration is displayed
in the Vehicle Information Menu .
In the Midlevel-Display, the remaining engine oil life duration is displayed by
the control indicator I, therefore the
ignition must be switched on, with the
engine not running.
The menu and function can be
selected via the buttons on the turn signal lever.
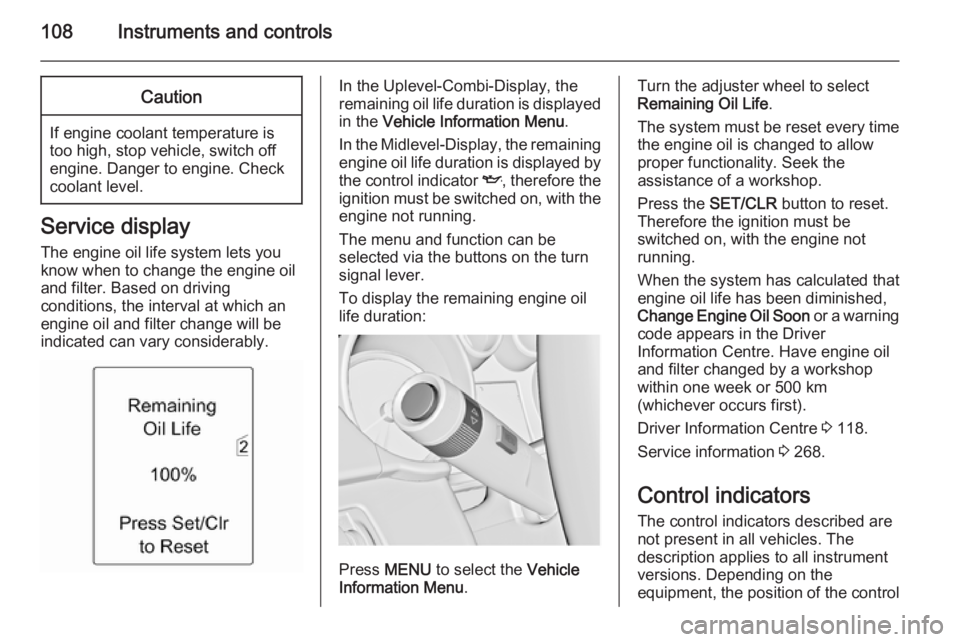
To display the remaining engine oil life duration:
Press MENU to select the Vehicle
Information Menu .
Turn the adjuster wheel to select
Remaining Oil Life .
The system must be reset every time
the engine oil is changed to allow
proper functionality. Seek the
assistance of a workshop.
Press the SET/CLR button to reset.
Therefore the ignition must be
switched on, with the engine not
running.
When the system has calculated that
engine oil life has been diminished,
Change Engine Oil Soon or a warning
code appears in the Driver
Information Centre. Have engine oil
and filter changed by a workshop
within one week or 500 km
(whichever occurs first).
Driver Information Centre 3 118.
Service information 3 268.
Control indicators The control indicators described are
not present in all vehicles. The
description applies to all instrument
versions. Depending on the
equipment, the position of the control
Page 120 of 301
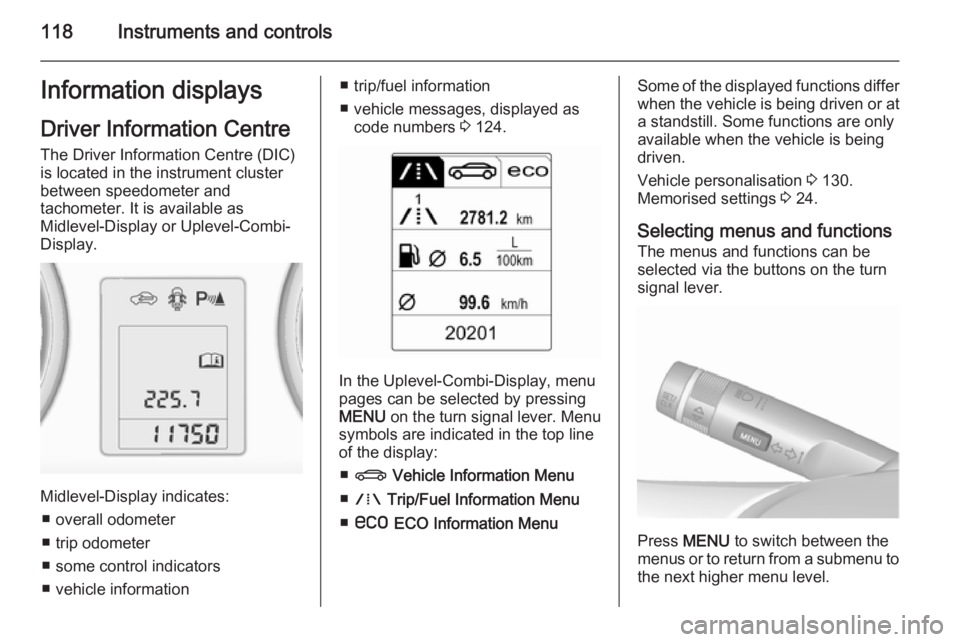
118Instruments and controlsInformation displaysDriver Information Centre The Driver Information Centre (DIC)
is located in the instrument cluster
between speedometer and
tachometer. It is available as
Midlevel-Display or Uplevel-Combi-
Display.
Midlevel-Display indicates:
■ overall odometer
■ trip odometer
■ some control indicators
■ vehicle information
■ trip/fuel information
■ vehicle messages, displayed as code numbers 3 124.
In the Uplevel-Combi-Display, menu
pages can be selected by pressing
MENU on the turn signal lever. Menu
symbols are indicated in the top line
of the display:
■ X Vehicle Information Menu
■ W Trip/Fuel Information Menu
■ s ECO Information Menu
Some of the displayed functions differ
when the vehicle is being driven or at
a standstill. Some functions are only
available when the vehicle is being
driven.
Vehicle personalisation 3 130.
Memorised settings 3 24.
Selecting menus and functions The menus and functions can beselected via the buttons on the turnsignal lever.
Press MENU to switch between the
menus or to return from a submenu to the next higher menu level.
Page 125 of 301
Instruments and controls123
■ vehicle messages 3 124
■ settings for vehicle personalisation 3 130
The type of information and how it is
displayed depends on the equipment
of the vehicle and the settings made.
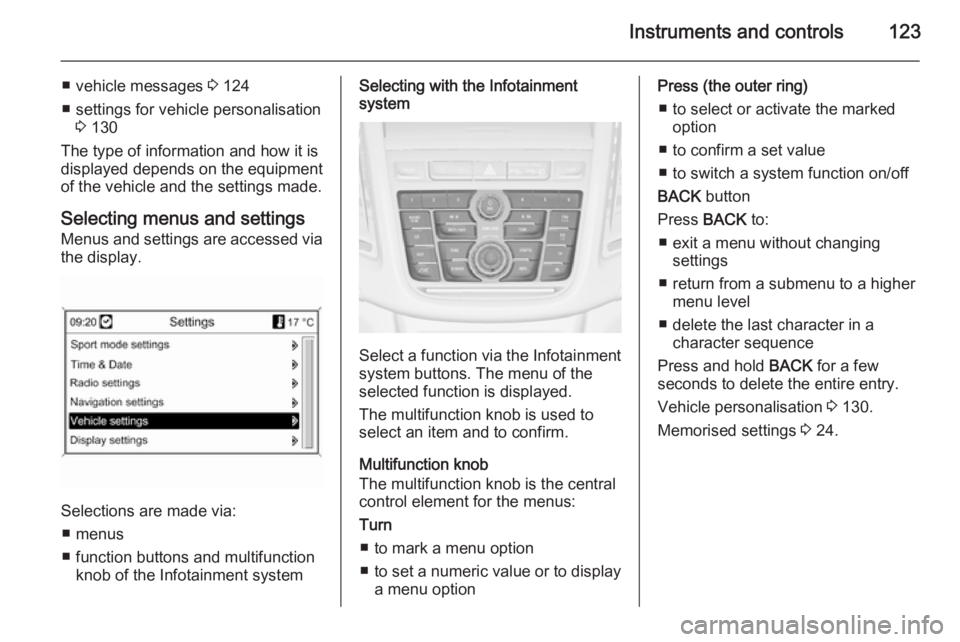
Selecting menus and settingsMenus and settings are accessed via
the display.
Selections are made via:
■ menus
■ function buttons and multifunction knob of the Infotainment system
Selecting with the Infotainment
system
Select a function via the Infotainment
system buttons. The menu of the
selected function is displayed.
The multifunction knob is used to
select an item and to confirm.
Multifunction knob
The multifunction knob is the central control element for the menus:
Turn
■ to mark a menu option
■ to set a numeric value or to display
a menu option
Press (the outer ring)
■ to select or activate the marked option
■ to confirm a set value
■ to switch a system function on/off
BACK button
Press BACK to:
■ exit a menu without changing settings
■ return from a submenu to a higher menu level
■ delete the last character in a character sequence
Press and hold BACK for a few
seconds to delete the entire entry.
Vehicle personalisation 3 130.
Memorised settings 3 24.
Page 130 of 301
128Instruments and controlsTrip computerThe menus and functions can be
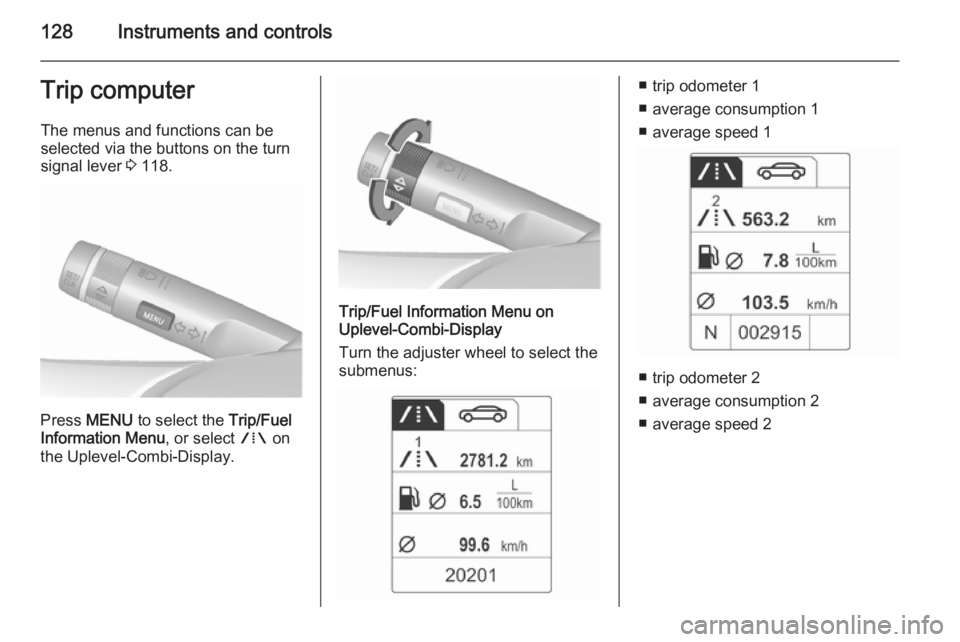
selected via the buttons on the turn signal lever 3 118.
Press MENU to select the Trip/Fuel
Information Menu , or select W on
the Uplevel-Combi-Display.
Trip/Fuel Information Menu on
Uplevel-Combi-Display
Turn the adjuster wheel to select the
submenus:
■ trip odometer 1
■ average consumption 1
■ average speed 1
■ trip odometer 2
■ average consumption 2
■ average speed 2
Page 154 of 301
152Climate control
If the minimum temperature Lo is set,
the climate control system runs at
maximum cooling, if cooling n is
switched on.
If the maximum temperature Hi is set,
the climate control system runs at
maximum heating.
Note
If n is switched on, reducing the set
cabin temperature can cause the
engine to restart from an Autostop or inhibit an Autostop.
Demisting and defrosting the
windows V
■ Press V. Activation is indicated by
illumination of the LED in the
button.
■ Temperature and air distribution are set automatically and the fan
runs at high speed.
■ Switch on heated rear window Ü.
■ To return to previous mode: press V , to return to Automatic mode:
press AUTO .
Setting of automatic rear window
heating can be changed in the
Settings menu in the Info-Display.
Vehicle personalisation 3 130.
Note
If V is pressed while the engine is
running, an Autostop will be inhibited
until V is pressed again.
If l is pressed with the fan switched
on and the engine running, an
Autostop will be inhibited until l is
pressed again or until the fan is
switched off.If V is pressed while the engine is
in an Autostop, the engine will restart
automatically.
If l is pressed with the fan switched
on while the engine is in an
Autostop, the engine will restart
automatically.
Stop-start system 3 160.
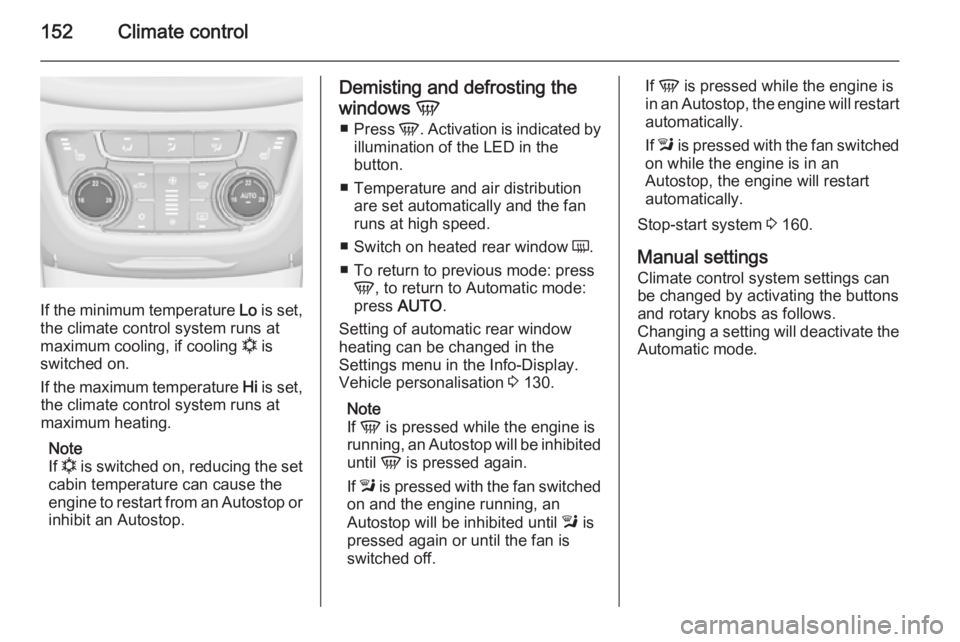
Manual settings Climate control system settings can
be changed by activating the buttons
and rotary knobs as follows.
Changing a setting will deactivate the Automatic mode.
Page 204 of 301
202Driving and operating
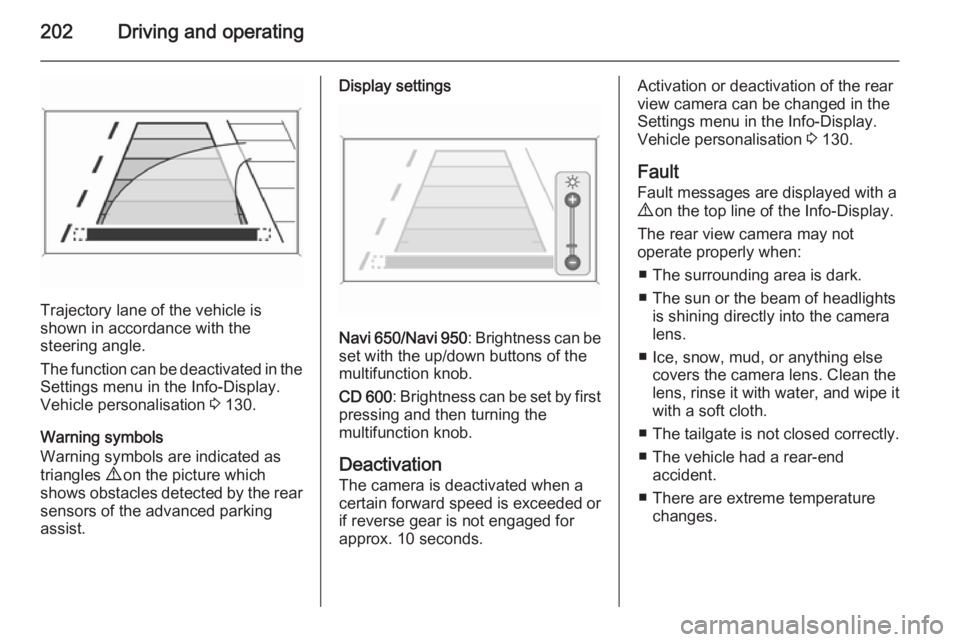
Trajectory lane of the vehicle is
shown in accordance with the
steering angle.
The function can be deactivated in the
Settings menu in the Info-Display.
Vehicle personalisation 3 130.
Warning symbols
Warning symbols are indicated as
triangles 9 on the picture which
shows obstacles detected by the rear sensors of the advanced parking
assist.
Display settings
Navi 650 /Navi 950 : Brightness can be
set with the up/down buttons of the
multifunction knob.
CD 600 : Brightness can be set by first
pressing and then turning the
multifunction knob.
Deactivation
The camera is deactivated when a
certain forward speed is exceeded or
if reverse gear is not engaged for
approx. 10 seconds.
Activation or deactivation of the rear
view camera can be changed in the
Settings menu in the Info-Display.
Vehicle personalisation 3 130.
Fault
Fault messages are displayed with a
9 on the top line of the Info-Display.
The rear view camera may not
operate properly when:
■ The surrounding area is dark.
■ The sun or the beam of headlights is shining directly into the camera
lens.
■ Ice, snow, mud, or anything else covers the camera lens. Clean the
lens, rinse it with water, and wipe it
with a soft cloth.
■ The tailgate is not closed correctly.
■ The vehicle had a rear-end accident.
■ There are extreme temperature changes.
Page 249 of 301
Vehicle care247Caution
Tyre pressure monitoring system
warns only about low tyre pressure condition and does not replace
regular tyre maintenance by the
driver.
All wheels must be equipped with pressure sensors and the tyres must
have the prescribed pressure.
Note
In countries where the tyre pressure
monitoring system is legally
required, the use of wheels without
pressure sensors will invalidate the
vehicle type approval.
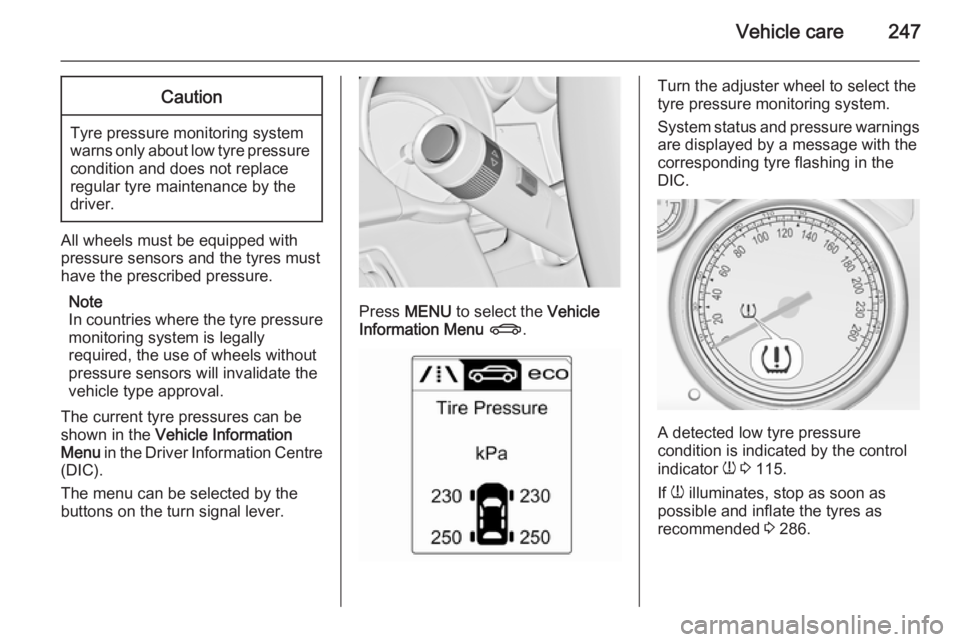
The current tyre pressures can be
shown in the Vehicle Information
Menu in the Driver Information Centre
(DIC).
The menu can be selected by the
buttons on the turn signal lever.
Press MENU to select the Vehicle
Information Menu X .
Turn the adjuster wheel to select the
tyre pressure monitoring system.
System status and pressure warnings
are displayed by a message with the
corresponding tyre flashing in the
DIC.
A detected low tyre pressure
condition is indicated by the control
indicator w 3 115.
If w illuminates, stop as soon as
possible and inflate the tyres as
recommended 3 286.