glove box PEUGEOT 206 2003 Owners Manual
[x] Cancel search | Manufacturer: PEUGEOT, Model Year: 2003, Model line: 206, Model: PEUGEOT 206 2003Pages: 171, PDF Size: 2.12 MB
Page 3 of 171
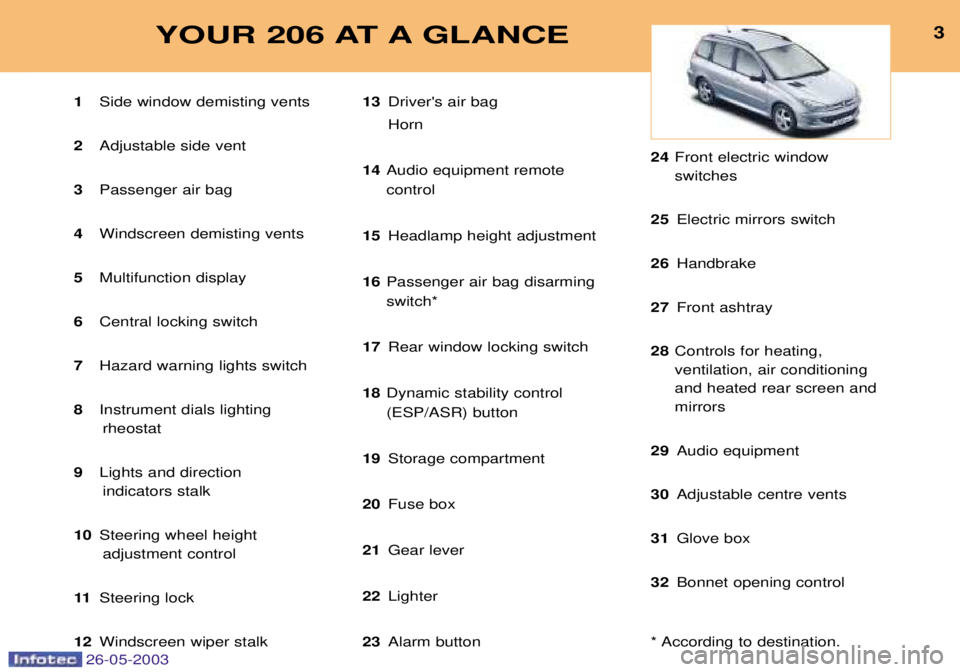
26-05-2003
3YOUR 206 AT A GLANCE
1Side window demisting vents
2 Adjustable side vent
3 Passenger air bag
4 Windscreen demisting vents
5 Multifunction display
6 Central locking switch
7 Hazard warning lights switch
8 Instrument dials lighting
rheostat
9 Lights and direction
indicators stalk
10 Steering wheel height
adjustment control
11 Steering lock
12 Windscreen wiper stalk 13
Driver's air bag Horn
14 Audio equipment remote control
15 Headlamp height adjustment
16 Passenger air bag disarmingswitch*
17 Rear window locking switch
18 Dynamic stability control(ESP/ASR) button
19 Storage compartment
20 Fuse box
21 Gear lever
22 Lighter
23 Alarm button 24
Front electric window switches
25 Electric mirrors switch
26 Handbrake
27 Front ashtray
28 Controls for heating,ventilation, air conditioningand heated rear screen andmirrors
29 Audio equipment
30 Adjustable centre vents
31 Glove box
32 Bonnet opening control
* According to destination.
Page 56 of 171
26-05-2003
YOUR 206 IN DETAIL55
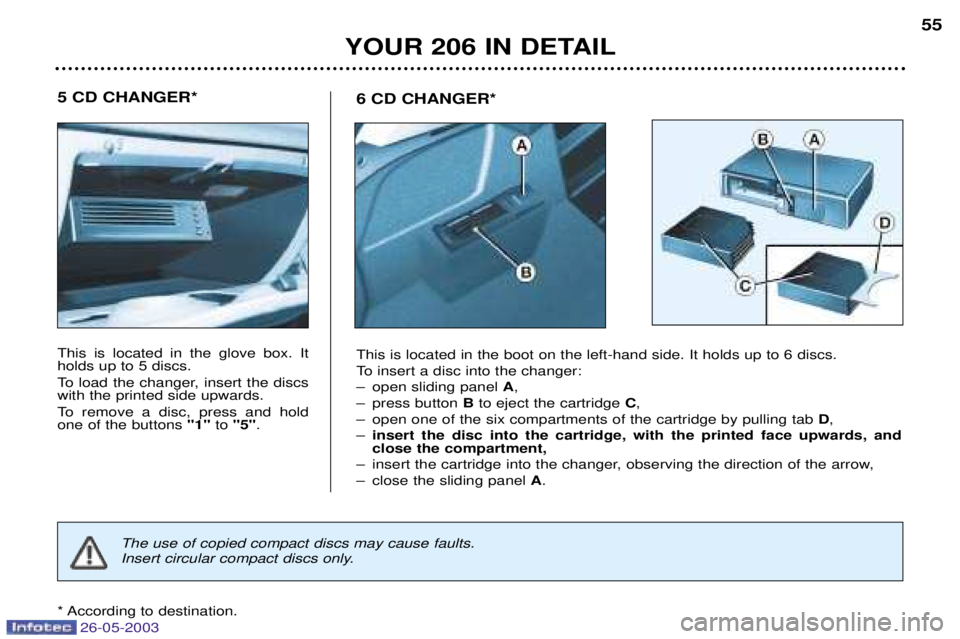
6 CD CHANGER*
This is located in the boot on the left-hand side. It holds up to 6 discs.
To insert a disc into the changer:
Ð open sliding panel
A,
Ð press button Bto eject the cartridge C,
Ð open one of the six compartments of the cartridge by pulling tab D,
Ð insert the disc into the cartridge, with the printed face upwards, and close the compartment,
Ð insert the cartridge into the changer, observing the direction of the arrow,
Ð close the sliding panel A.
5 CD CHANGER*This is located in the glove box. It holds up to 5 discs.
To load the changer, insert the discs with the printed side upwards.
To remove a disc, press and hold one of the buttons
"1"to "5" .
* According to destination.
The use of copied compact discs may cause faults.
Insert circular compact discs only.
Page 57 of 171
26-05-2003
YOUR 206 IN DETAIL
56
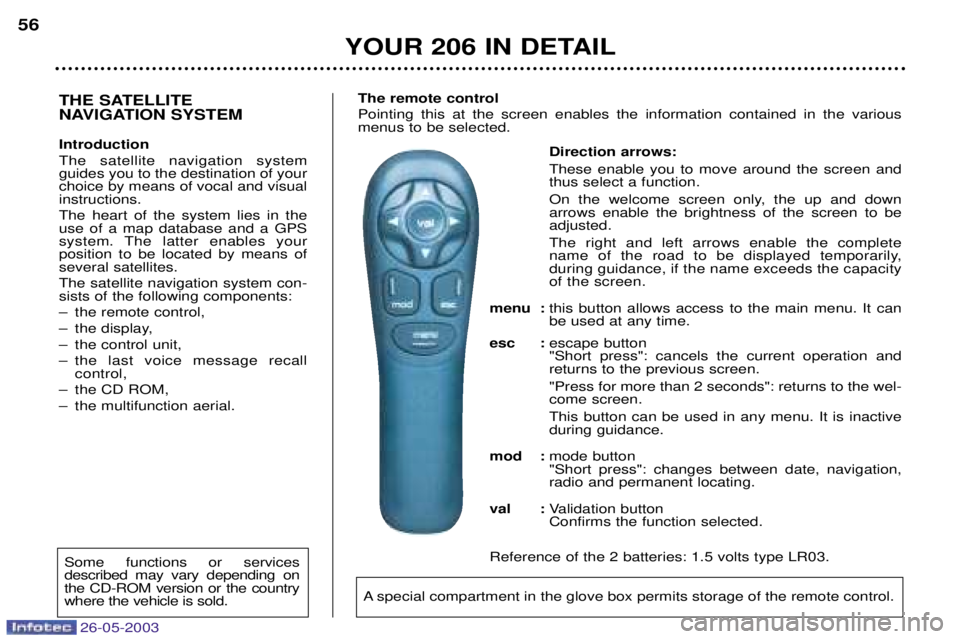
Direction arrows: These enable you to move around the screen and thus select a function.
On the welcome screen only, the up and down arrows enable the brightness of the screen to beadjusted. The right and left arrows enable the complete
name of the road to be displayed temporarily,during guidance, if the name exceeds the capacityof the screen.
menu : this button allows access to the main menu. It canbe used at any time.
esc : escape button"Short press": cancels the current operation andreturns to the previous screen. "Press for more than 2 seconds": returns to the wel- come screen. This button can be used in any menu. It is inactive during guidance.
mod : mode button"Short press": changes between date, navigation,radio and permanent locating.
val : Validation buttonConfirms the function selected.
Reference of the 2 batteries: 1.5 volts type LR03.
THE SATELLITE
NAVIGATION SYSTEM Introduction The satellite navigation system guides you to the destination of yourchoice by means of vocal and visualinstructions. The heart of the system lies in the use of a map database and a GPS
system. The latter enables yourposition to be located by means ofseveral satellites. The satellite navigation system con- sists of the following components:
Ð the remote control,
Ð the display,
Ð the control unit,
Ð the last voice message recall control,
Ð the CD ROM,
Ð the multifunction aerial. The remote control Pointing this at the screen enables the information contained in the various menus to be selected.
A special compartment in the glove box permits storage of the remote control.
Some functions or services described may vary depending onthe CD-ROM version or the countrywhere the vehicle is sold.
Page 59 of 171
26-05-2003
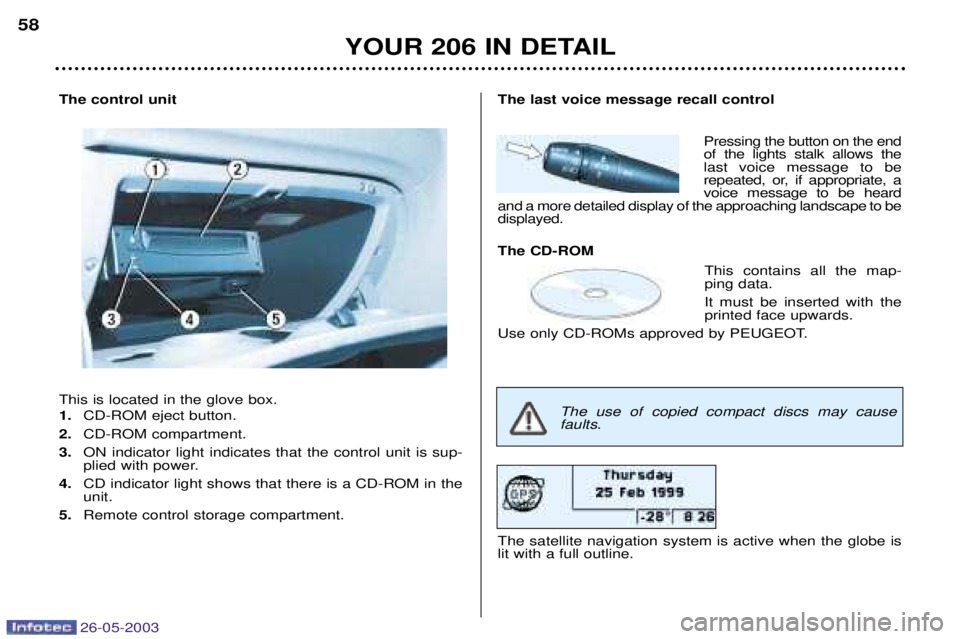
The control unit This is located in the glove box. 1.CD-ROM eject button.
2. CD-ROM compartment.
3. ON indicator light indicates that the control unit is sup-
plied with power.
4. CD indicator light shows that there is a CD-ROM in theunit.
5. Remote control storage compartment. The last voice message recall control
Pressing the button on the endof the lights stalk allows thelast voice message to be
repeated, or, if appropriate, avoice message to be heard
and a more detailed display of the approaching landscape to bedisplayed. The CD-ROM
This contains all the map- ping data. It must be inserted with the printed face upwards.
Use only CD-ROMs approved by PEUGEOT. The satellite navigation system is active when the globe is lit with a full outline.
YOUR 206 IN DETAIL
58
The use of copied compact discs may cause faults.
Page 112 of 171
26-05-2003
YOUR 206 IN DETAIL103
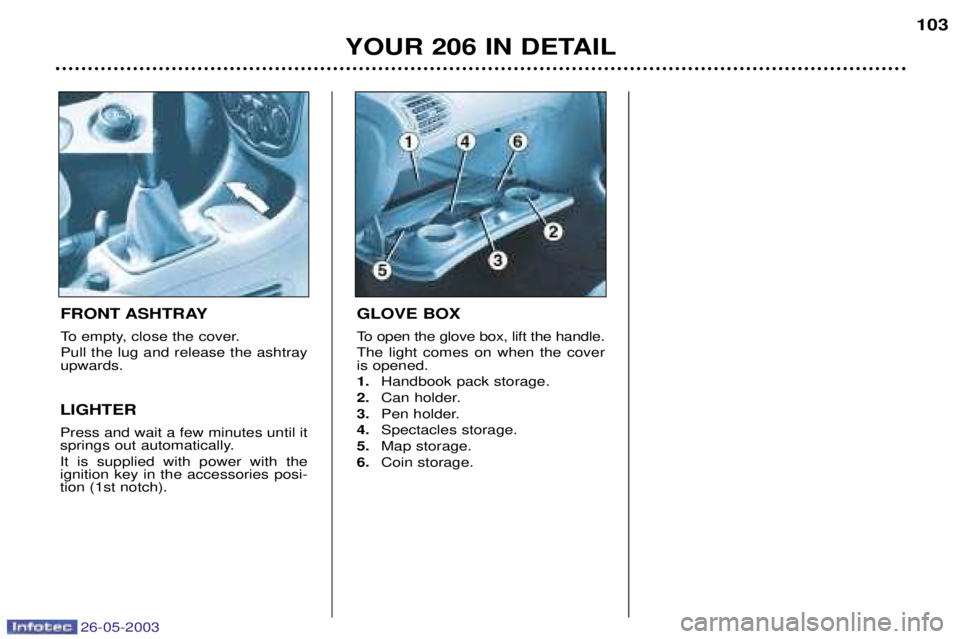
FRONT ASHTRAY
To empty, close the cover. Pull the lug and release the ashtray upwards.
LIGHTER Press and wait a few minutes until it
springs out automatically. It is supplied with power with the ignition key in the accessories posi-tion (1st notch).
GLOVE BOX
To open the glove box, lift the handle. The light comes on when the cover is opened. 1. Handbook pack storage.
2. Can holder.
3. Pen holder.
4. Spectacles storage.
5. Map storage.
6. Coin storage.
Page 155 of 171
26-05-2003
PRACTICAL INFORMATION137
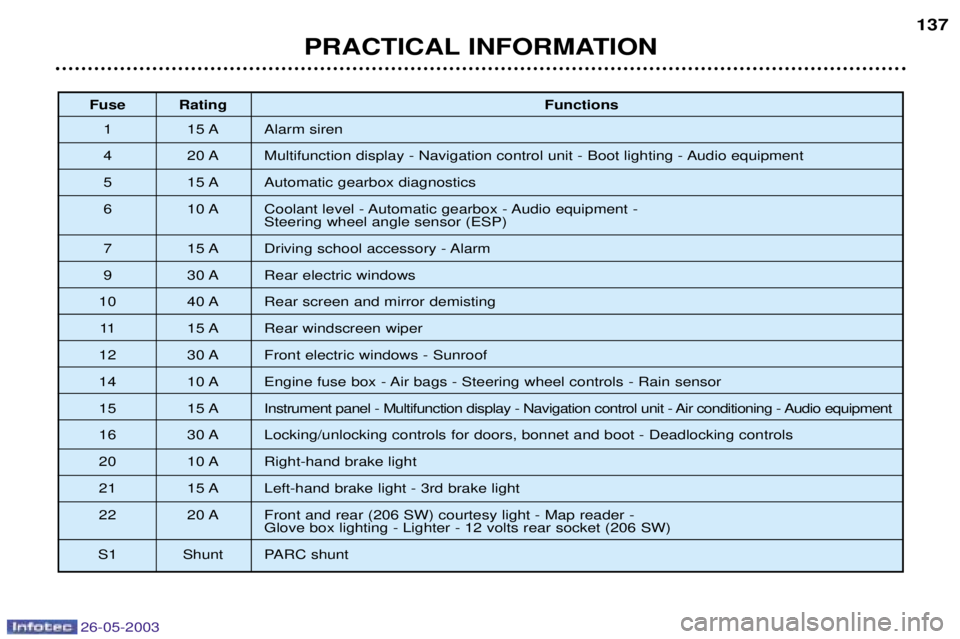
Fuse Rating
Functions
1 15 A Alarm siren
4 20 A Multifunction display - Navigation control unit - Boot lighting - Audio equipment
5 15 A Automatic gearbox diagnostics
6 10 A Coolant level - Automatic gearbox - Audio equipment - Steering wheel angle sensor (ESP)
7 15 A Driving school accessory - Alarm
9 30 A Rear electric windows
10 40 A Rear screen and mirror demisting
11 15 A Rear windscreen wiper
12 30 A Front electric windows - Sunroof
14 10 A Engine fuse box - Air bags - Steering wheel controls - Rain sensor
15 15 A Instrument panel - Multifunction display - Navigation control unit - Air conditioning - Audio equipment
16 30 A Locking/unlocking controls for doors, bonnet and boot - Deadlocking controls
20 10 A Right-hand brake light
21 15 A Left-hand brake light - 3rd brake light
22 20 A Front and rear (206 SW) courtesy light - Map reader - Glove box lighting - Lighter - 12 volts rear socket (206 SW)
S1 Shunt PARC shunt