ESP Peugeot 206 SW Dag 2003 User Guide
[x] Cancel search | Manufacturer: PEUGEOT, Model Year: 2003, Model line: 206 SW Dag, Model: Peugeot 206 SW Dag 2003Pages: 168, PDF Size: 2.1 MB
Page 33 of 168
26-05-2003
INSTRUMENTS AND CONTROLS33
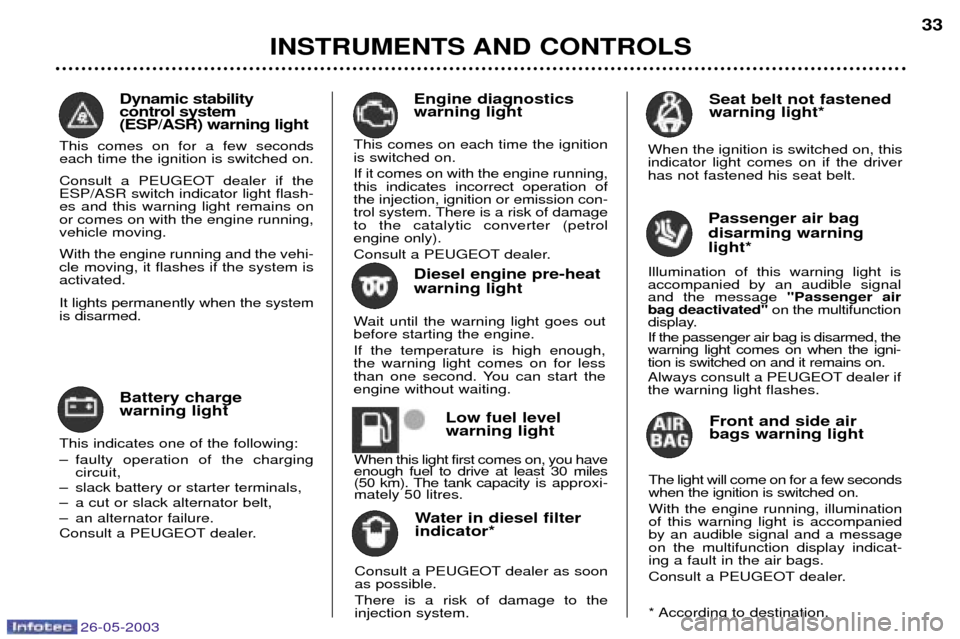
Seat belt not fastened warning light*
When the ignition is switched on, thisindicator light comes on if the driverhas not fastened his seat belt.
Front and side airbags warning light
The light will come on for a few secondswhen the ignition is switched on. With the engine running, illumination of this warning light is accompaniedby an audible signal and a messageon the multifunction display indicat-ing a fault in the air bags.
Consult a PEUGEOT dealer.
Battery charge warning light
This indicates one of the following:
Ð faulty operation of the charging circuit,
Ð slack battery or starter terminals,
Ð a cut or slack alternator belt,
Ð an alternator failure.
Consult a PEUGEOT dealer. Engine diagnostics warning light
This comes on each time the ignitionis switched on. If it comes on with the engine running, this indicates incorrect operation ofthe injection, ignition or emission con-
trol system. There is a risk of damageto the catalytic converter (petrolengine only).
Consult a PEUGEOT dealer.
Dynamic stability control system(ESP/ASR) warning light
This comes on for a few secondseach time the ignition is switched on.
Consult a PEUGEOT dealer if the ESP/ASR switch indicator light flash-es and this warning light remains onor comes on with the engine running,vehicle moving. With the engine running and the vehi- cle moving, it flashes if the system isactivated. It lights permanently when the system is disarmed.
* According to destination.
Water in diesel filter indicator*
Consult a PEUGEOT dealer as soonas possible. There is a risk of damage to the injection system. Passenger air bag disarming warninglight*
Illumination of this warning light is
accompanied by an audible signaland the message "Passenger air
bag deactivated" on the multifunction
display. If the passenger air bag is disarmed, the warning light comes on when the igni-tion is switched on and it remains on.
Always consult a PEUGEOT dealer if the warning light flashes.
Low fuel level warning light
When this light first comes on, you have enough fuel to drive at least 30 miles
(50 km). The tank capacity is approxi-
mately 50 litres. Diesel engine pre-heat warning light
Wait until the warning light goes out before starting the engine. If the temperature is high enough, the warning light comes on for less
than one second. You can start theengine without waiting.
Page 35 of 168
26-05-2003
Instrument panel display After switching on the ignition, three functions are shown in succession:
Ð service indicator (see corresponding section),
Ð engine oil level indicator,
Ð total distance recorder (total or trip distances).Note:the total or trip distances are displayed for 30 seconds when the ignition is switched off, on opening the driver's door,
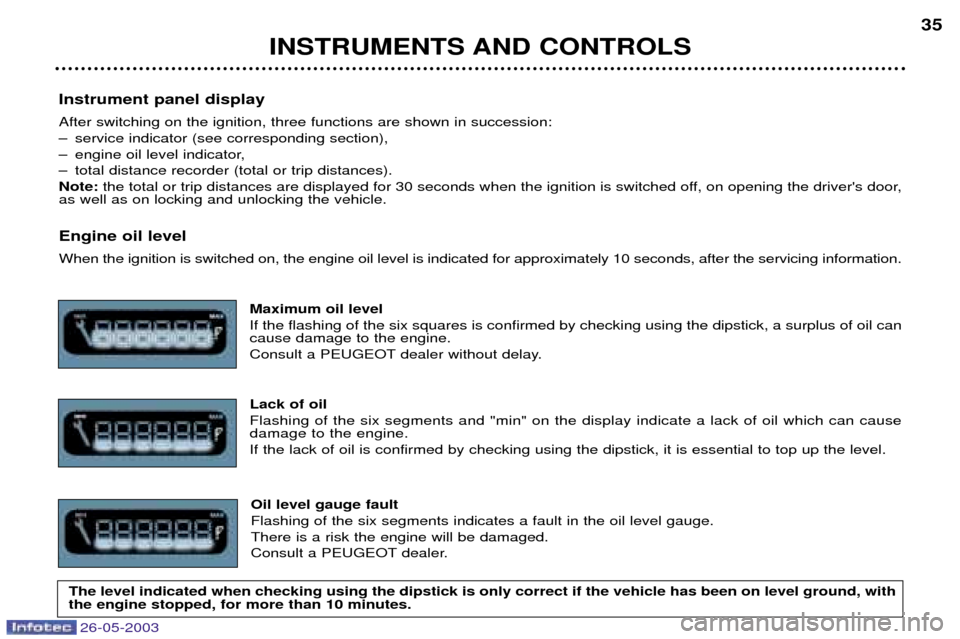
as well as on locking and unlocking the vehicle. Engine oil level When the ignition is switched on, the engine oil level is indicated for approximately 10 seconds, after the servicing informati on.
Maximum oil level If the flashing of the six squares is confirmed by checking using the dipstick, a surplus of oil can cause damage to the engine.
Consult a PEUGEOT dealer without delay. Lack of oilFlashing of the six segments and "min" on the display indicate a lack of oil which can cause damage to the engine. If the lack of oil is confirmed by checking using the dipstick, it is essential to top up the level.
Oil level gauge fault Flashing of the six segments indicates a fault in the oil level gauge.There is a risk the engine will be damaged.
Consult a PEUGEOT dealer.
INSTRUMENTS AND CONTROLS 35
The level indicated when checking using the dipstick is only correct if the vehicle has been on level ground, with the engine stopped, for more than 10 minutes.
Page 39 of 168
26-05-2003
YOUR 206 IN DETAIL39
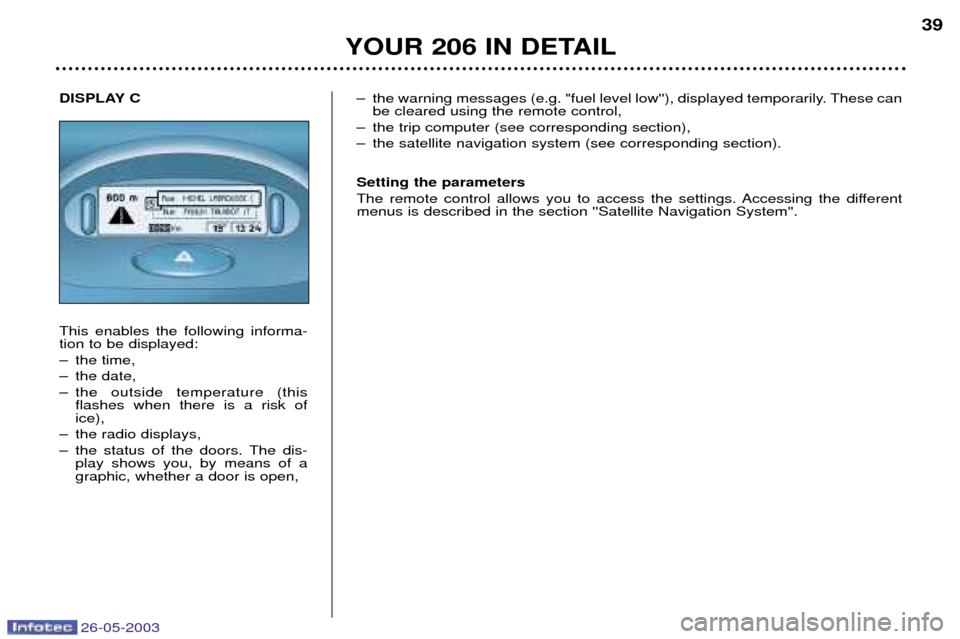
DISPLAY C This enables the following informa- tion to be displayed:
Ð the time,
Ð the date,
Ð the outside temperature (this flashes when there is a risk of ice),
Ð the radio displays,
Ð the status of the doors. The dis- play shows you, by means of a graphic, whether a door is open, Ð the warning messages (e.g. "fuel level low''), displayed temporarily. These can
be cleared using the remote control,
Ð the trip computer (see corresponding section),
Ð the satellite navigation system (see corresponding section). Setting the parameters
The remote control allows you to access the settings. Accessing the different menus is described in the section ''Satellite Navigation System''.
Page 45 of 168

26-05-2003
Manual station search Press the "MAN"button.
Briefly press button Lor Nto increase or decrease the frequency displayed.
By continuing to press the button in the direction selected, you will obtain continuous scrolling of the frequency. The scrolling stops as soon as the button is released.Pressing the "MAN"button again returns you to automatic station search.
Manual storing of stations in the memory Select the station required. Press one of the buttons "1"to "6" for more than two seconds.
The sound stops then becomes audible again, confirming that the station has been stored in the memory. Automatic storing of FM stations in the memory (autostore)
Audio RB3:press and hold the "BND/AST" button for more than two seconds.
Audio RD3: press and hold button Rfor more than two seconds.
Your radio automatically stores the 6 stations with the strongest signal in FM. These stations are stored in the FMast waveband.
If it is not possible to find 6 stations, the remaining memories are empty.
Recalling stations stored in the memory For each waveband, briefly press buttons "1"to "6" to recall the corresponding station.
YOUR 206 IN DETAIL 49
Page 48 of 168
26-05-2003
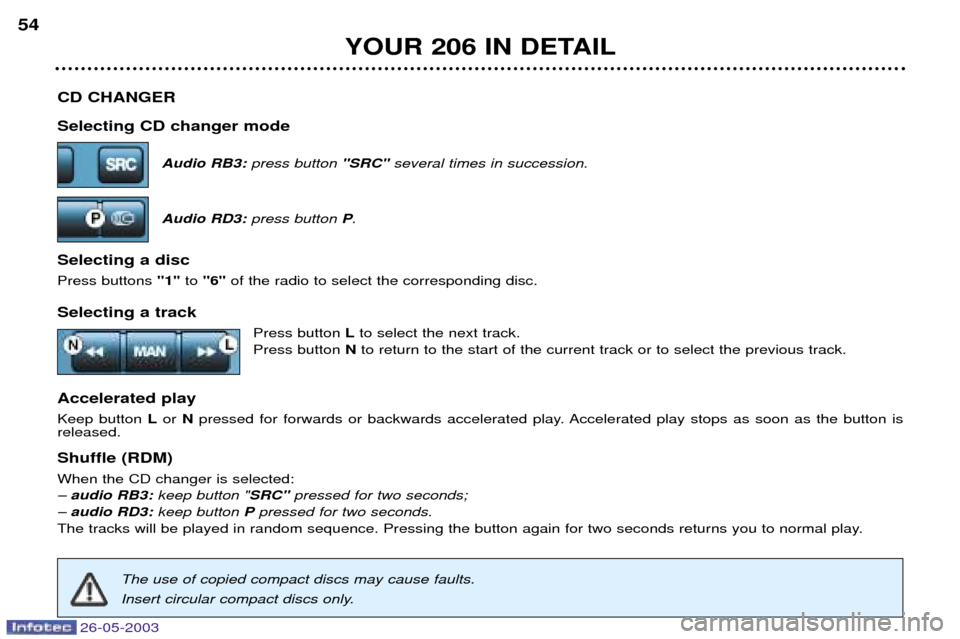
CD CHANGER Selecting CD changer modeAudio RB3:press button "SRC" several times in succession.
Audio RD3: press button P.
Selecting a disc Press buttons "1"to "6" of the radio to select the corresponding disc.
Selecting a track Press button Lto select the next track.
Press button Nto return to the start of the current track or to select the previous track.
Accelerated playKeep button Lor Npressed for forwards or backwards accelerated play. Accelerated play stops as soon as the button is
released. Shuffle (RDM) When the CD changer is selected: Ð audio RB3: keep button " SRC" pressed for two seconds;
Ð audio RD3: keep button Ppressed for two seconds.
The tracks will be played in random sequence. Pressing the button again for two seconds returns you to normal play.
YOUR 206 IN DETAIL
54
The use of copied compact discs may cause faults.
Insert circular compact discs only.
Page 52 of 168

26-05-2003
Manual station search Press the "MAN"button.
Briefly press button Lor Nto increase or decrease the frequency displayed.
By continuing to press the button in the direction selected, you will obtain continuous scrolling of the frequency. The scrolling stops as soon as the button is released.Pressing the "MAN"button again returns you to automatic station search.
Manual storing of stations in the memory Select the station required. Press one of the buttons "1"to "6" for more than two seconds.
The sound stops then becomes audible again, confirming that the station has been stored in the memory. Automatic storing of FM stations in the memory (autostore)
Audio RB3:press and hold the "BND/AST" button for more than two seconds.
Audio RD3: press and hold button Rfor more than two seconds.
Your radio automatically stores the 6 stations with the strongest signal in FM. These stations are stored in the FMast waveband.
If it is not possible to find 6 stations, the remaining memories are empty.
Recalling stations stored in the memory For each waveband, briefly press buttons "1"to "6" to recall the corresponding station.
YOUR 206 IN DETAIL 49
Page 54 of 168

26-05-2003
PTY function: Audio RD3 This allows you to listen to stations broadcasting a specific type of programme (news, culture, sport, rock etc.).With FMselected, press the "TA"button for more than two seconds to switch this function on or off.
To search for a PTYprogramme:
Ð select the PTYfunction,
Ð briefly press button Lor Nto scroll down the list of the various types of programmes offered,
Ð when the programme of your choice is displayed, keep button Lor Npressed for more than
two seconds to carry out an automatic search (after an automatic search the PTYfunction is
switched off).
In PTY mode the different types of programmes can be stored in the memory. To do this, press the preselection buttons
"1" to "6" for more than two seconds. Briefly press the corresponding button to recall the type of programme stored in
the memory.
EON system: Audio RD3
This connects stations which are part of the same network. It enables the broadcast of traffic information, by a station that is part of the same network as the station to which you are listening. This service is available when you have selected the TAtraffic information programme or the PTYfunction.
YOUR 206 IN DETAIL 51
Page 74 of 168
26-05-2003
YOUR 206 IN DETAIL73
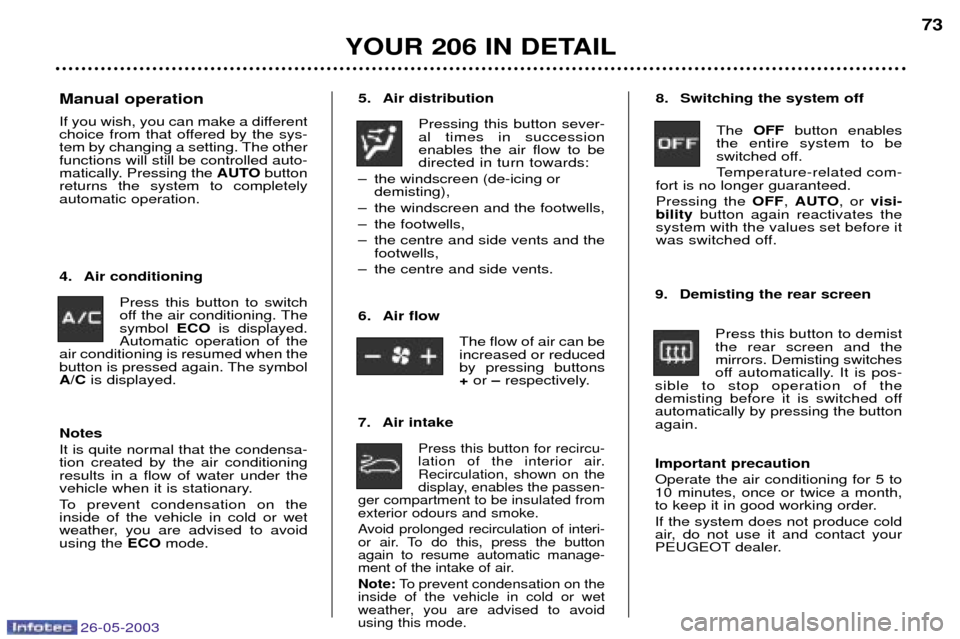
5. Air distribution
Pressing this button sever- al times in successionenables the air flow to bedirected in turn towards:
Ð the windscreen (de-icing or demisting),
Ð the windscreen and the footwells,
Ð the footwells,
Ð the centre and side vents and the footwells,
Ð the centre and side vents.
7. Air intake
Press this button for recircu-
lation of the interior air.Recirculation, shown on the
display, enables the passen-
ger compartment to be insulated fromexterior odours and smoke.
Avoid prolonged recirculation of interi-
or air. To do this, press the buttonagain to resume automatic manage-
ment of the intake of air. Note: To prevent condensation on the
inside of the vehicle in cold or wet
weather, you are advised to avoidusing this mode.
4. Air conditioning
Press this button to switch
off the air conditioning. Thesymbol ECOis displayed.
Automatic operation of the
air conditioning is resumed when the
button is pressed again. The symbolA/C is displayed. 8. Switching the system off
The OFF button enables
the entire system to be
switched off.
Temperature-related com-
fort is no longer guaranteed.Pressing the OFF, AUTO , or visi-
bility button again reactivates the
system with the values set before it
was switched off.
9. Demisting the rear screen Press this button to demistthe rear screen and themirrors. Demisting switches
off automatically. It is pos-
sible to stop operation of the
demisting before it is switched offautomatically by pressing the buttonagain. Important precaution Operate the air conditioning for 5 to 10 minutes, once or twice a month,
to keep it in good working order. If the system does not produce cold
air, do not use it and contact your
PEUGEOT dealer.
Manual operation
If you wish, you can make a different
choice from that offered by the sys-
tem by changing a setting. The otherfunctions will still be controlled auto-
matically. Pressing the
AUTObutton
returns the system to completelyautomatic operation.
6. Air flowThe flow of air can beincreased or reducedby pressing buttons+or Ðrespectively.
Notes It is quite normal that the condensa- tion created by the air conditioningresults in a flow of water under the
vehicle when it is stationary.
To prevent condensation on the inside of the vehicle in cold or wet
weather, you are advised to avoidusing the ECOmode.
Page 81 of 168
26-05-2003
YOUR 206 IN DETAIL79
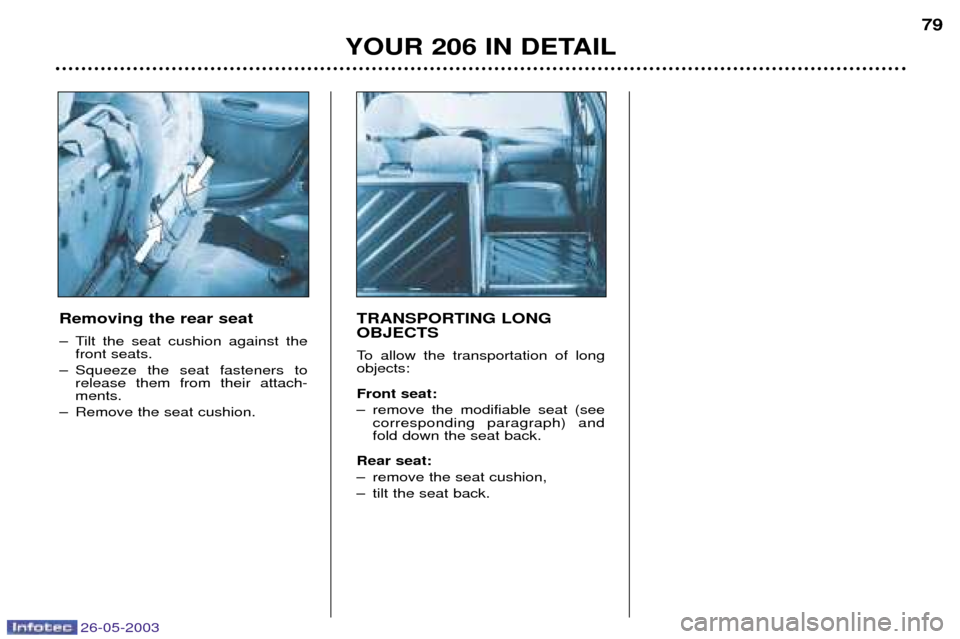
Removing the rear seat
Ð Tilt the seat cushion against the front seats.
Ð Squeeze the seat fasteners to release them from their attach- ments.
Ð Remove the seat cushion. TRANSPORTING LONG OBJECTS
To allow the transportation of long objects: Front seat:
Ð remove the modifiable seat (see
corresponding paragraph) and fold down the seat back.
Rear seat:
Ð remove the seat cushion,
Ð tilt the seat back.
Page 83 of 168
26-05-2003
YOUR 206 IN DETAIL81
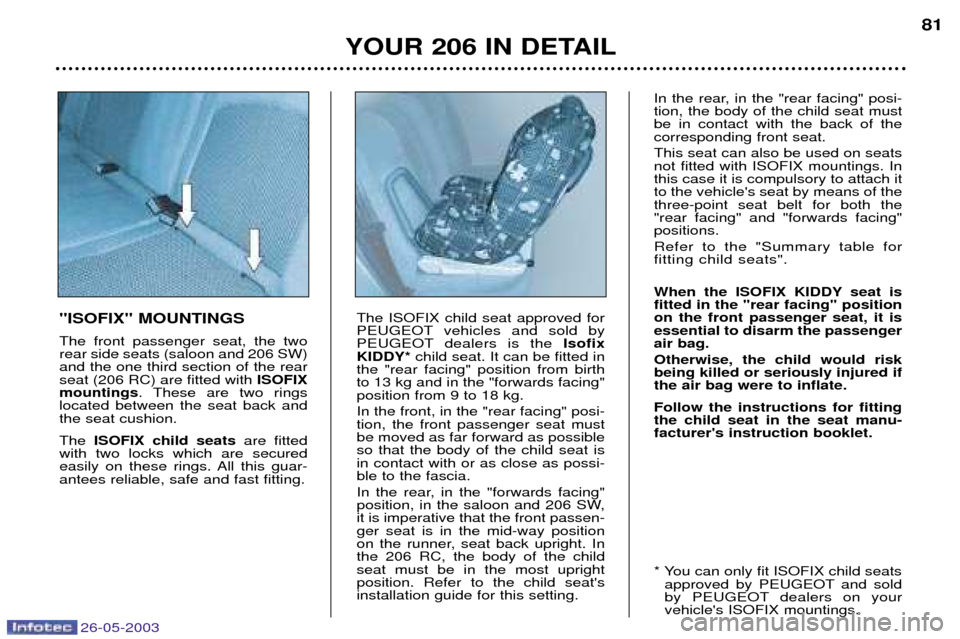
"ISOFIX" MOUNTINGS The front passenger seat, the two rear side seats (saloon and 206 SW)and the one third section of the rearseat (206 RC) are fitted with ISOFIX
mountings . These are two rings
located between the seat back andthe seat cushion. The ISOFIX child seats are fitted
with two locks which are secured
easily on these rings. All this guar-antees reliable, safe and fast fitting. The ISOFIX child seat approved for
PEUGEOT vehicles and sold by
PEUGEOT dealers is the
Isofix
KIDDY* child seat. It can be fitted in
the "rear facing" position from birthto 13 kg and in the "forwards facing"position from 9 to 18 kg. In the front, in the "rear facing" posi- tion, the front passenger seat mustbe moved as far forward as possibleso that the body of the child seat isin contact with or as close as possi-ble to the fascia.
In the rear, in the "forwards facing"
position, in the saloon and 206 SW,it is imperative that the front passen-ger seat is in the mid-way position
on the runner, seat back upright. Inthe 206 RC, the body of the childseat must be in the most uprightposition. Refer to the child seat'sinstallation guide for this setting. In the rear, in the "rear facing" posi-tion, the body of the child seat mustbe in contact with the back of thecorresponding front seat. This seat can also be used on seats not fitted with ISOFIX mountings. Inthis case it is compulsory to attach itto the vehicle's seat by means of thethree-point seat belt for both the"rear facing" and "forwards facing"positions. Refer to the "Summary table for fitting child seats".
When the ISOFIX KIDDY seat is fitted in the "rear facing" positionon the front passenger seat, it isessential to disarm the passengerair bag. Otherwise, the child would risk being killed or seriously injured ifthe air bag were to inflate. Follow the instructions for fitting the child seat in the seat manu-facturer's instruction booklet.
* You can only fit ISOFIX child seats
approved by PEUGEOT and sold
by PEUGEOT dealers on yourvehicle's ISOFIX mountings.