phone PEUGEOT 208 2021 User Guide
[x] Cancel search | Manufacturer: PEUGEOT, Model Year: 2021, Model line: 208, Model: PEUGEOT 208 2021Pages: 276, PDF Size: 8.02 MB
Page 52 of 276
50
Ease of use and comfort
Switch off demisting/defrosting when
you no longer need it; reducing
electrical consumption in turn decreases
energy consumption.
Temperature pre- conditioning (Electric)
This function allows you to programme the
temperature in the passenger compartment to
reach a pre-defined, non-modifiable temperature
(approx. 21°C) before you enter the vehicle, on
the days and at the times of your choice.
This function is available when the vehicle is
connected or not connected.
Programming
With PEUGEOT Connect Radio or
PEUGEOT Connect Nav system
(Depending on country of sale)Programming can be carried out from a
smartphone using the MYPEUGEOT APP
application.
For more information on Remote functions,
refer to the corresponding section.
With PEUGEOT Connect Nav system
In the Climate > OPTIONS menu:Select Temperature conditioning .
► Press + to add a programme.
Once the function is deactivated, the system
returns to the previous settings.
Switching off the thermal
comfort system
► Press this button.
Its indicator lamp comes on and all of the other
indicator lamps for the system go off.
This action deactivates all of the functions of the
air conditioning system.
The temperature is no longer regulated. A slight
flow of air can still be felt, due to the forward
movement of the vehicle.
Front demisting - de-icing
Automatic Visibility programme
This mode allows the windscreen and side
windows to be demisted or defrosted as quickly
as possible.
► Press this button to activate/deactivate
the mode (confirmed by the illumination/
extinction of the
indicator lamp).
The programme automatically manages the air
conditioning (depending on version), air flow
and air intake, and provides optimum distribution
towards the windscreen and side windows.
It is possible to manually change the air flow
without deactivating the automatic Visibility
programme.
With Stop & Start, when demisting has
been activated, STOP mode is not
available.
In wintry conditions, before moving off,
remove all snow or ice on the windscreen
near the camera.
Otherwise, the operation of the equipment
using the camera may be affected.
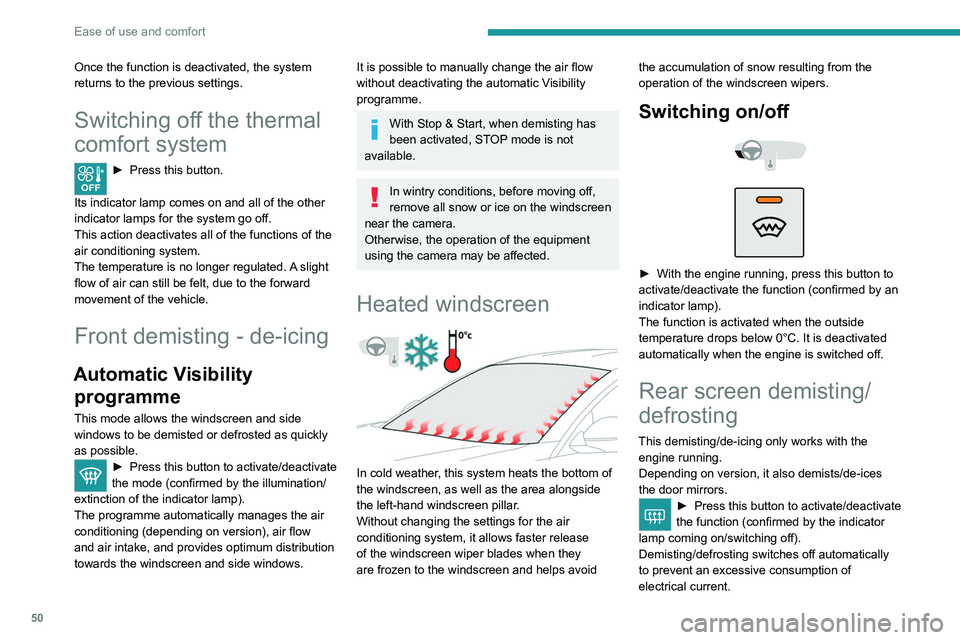
Heated windscreen
In cold weather, this system heats the bottom of
the windscreen, as well as the area alongside
the left-hand windscreen pillar.
Without changing the settings for the air
conditioning system, it allows faster release
of the windscreen wiper blades when they
are frozen to the windscreen and helps avoid the accumulation of snow resulting from the
operation of the windscreen wipers.
Switching on/
off
► With the engine running, press this button to
activate/deactivate the function (confirmed by an
indicator lamp).
The function is activated when the outside
temperature drops below 0°C. It is deactivated
automatically when the engine is switched off.
Rear screen demisting/
defrosting
This demisting/de-icing only works with the engine running.
Depending on version, it also demists/de-ices
the door mirrors.
► Press this button to activate/deactivate
the function (confirmed by the indicator
lamp coming on/switching off).
Demisting/defrosting switches off automatically
to prevent an excessive consumption of
electrical current.
Page 53 of 276
51
Ease of use and comfort
3Switch off demisting/defrosting when
you no longer need it; reducing
electrical consumption in turn decreases
energy consumption.
Temperature pre- conditioning (Electric)
This function allows you to programme the
temperature in the passenger compartment to
reach a pre-defined, non-modifiable temperature
(approx. 21°C) before you enter the vehicle, on
the days and at the times of your choice.
This function is available when the vehicle is
connected or not connected.
Programming
With PEUGEOT Connect Radio or
PEUGEOT Connect Nav system
(Depending on country of sale)Programming can be carried out from a
smartphone using the MYPEUGEOT APP
application.
For more information on Remote functions,
refer to the corresponding section.
With PEUGEOT Connect Nav system
In the Climate > OPTIONS menu:Select Temperature conditioning .
►
Press
+ to add a programme.
► Select the time of entry into the vehicle and
the desired days. Press OK.
►
Press
ON to activate this programme.
The temperature pre-conditioning sequence
begins approximately 45 minutes before the
programmed time when the vehicle is connected
(20 minutes when it is not connected) and is
maintained for 10 minutes after.
You can set multiple programmes. Each one is saved in the system.
To optimise the driving range, we recommend
starting a programme while the vehicle is
connected.
The fan noise that occurs during temperature pre-conditioning is perfectly
normal.
Operating conditions
– The function is only activated when the
ignition is switched off and the
vehicle
locked.
–
When the vehicle is not connected, the
function is only activated if the battery charge
level is greater than 50%.
–
When the vehicle is not connected and a
recurring programme is active (e.g. from Monday
to Friday), if two temperature pre-conditioning
sequences are run without the vehicle being
used, the programme will be deactivated.
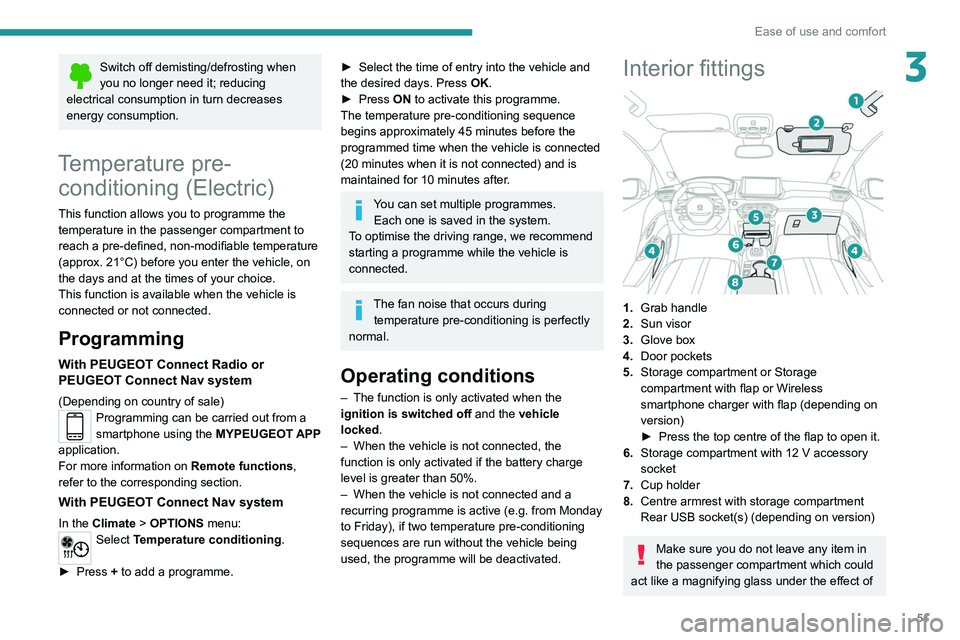
Interior fittings
1. Grab handle
2. Sun visor
3. Glove box
4. Door pockets
5. Storage compartment or Storage
compartment with flap or Wireless
smartphone charger with flap (depending on
version)
►
Press the top centre of the flap to open it.
6. Storage compartment with 12 V accessory
socket
7. Cup holder
8. Centre armrest with storage compartment
Rear USB socket(s) (depending on version)
Make sure you do not leave any item in
the passenger compartment which could
act like a magnifying glass under the effect of
Page 54 of 276
52
Ease of use and comfort
With the Keyless Entry and Starting system, the
charger’s operation may be briefly disrupted
when a door is opened or the ignition is switched
off.
Charging
► Open the flap to access the charging area.
► With the charging area clear, place a device
in its centre.
The system is not designed to charge multiple devices simultaneously.
Do not leave any metal objects (coins,
keys, vehicle remote control, etc.) in the
charging area while a device is being
charged, due to the risk of overheating or
interrupting the charging process.
the sun's rays and cause a fire - risk of fire or
damage to interior surfaces!
Sun visor
► With the ignition on, raise the concealing
flap; depending on the version, the mirror is
illuminated automatically.
This sun visor is also equipped with a ticket
holder.
Glove box
► To open the glove box, lift the handle.
Never drive with the glove box open
when a passenger is at the front. It may
cause injury during sharp deceleration!
USB sockets
USB sockets allow the connection of a portable
device.
The USB socket at the front on the right-hand side also allows a
smartphone to be connected by Android Auto
® or
CarPlay®, enabling certain smartphone
applications to be used on the touch screen.
For best results, use a cable made or approved
by the device manufacturer.
These applications can be managed using the
steering-mounted controls or the audio system
controls.
When the USB socket is used, the
portable device charges automatically.
While charging, a message is displayed if the
power drawn by the portable device exceeds
the current supplied by the vehicle.
For more information about how to use this
equipment, refer to the sections describing
the audio and telematics systems.
12 V accessory socket
► Plug in a 12 V accessory (with a maximum
rated power of 120 W) using a suitable adapter.
Observe the maximum power rating to
avoid damaging the accessory.
The connection of an electrical device not approved by PEUGEOT, such as a
USB charger, may adversely affect the
operation of vehicle electrical systems,
causing faults such as poor radio reception or
interference with displays in the screens.
Wireless smartphone
charger
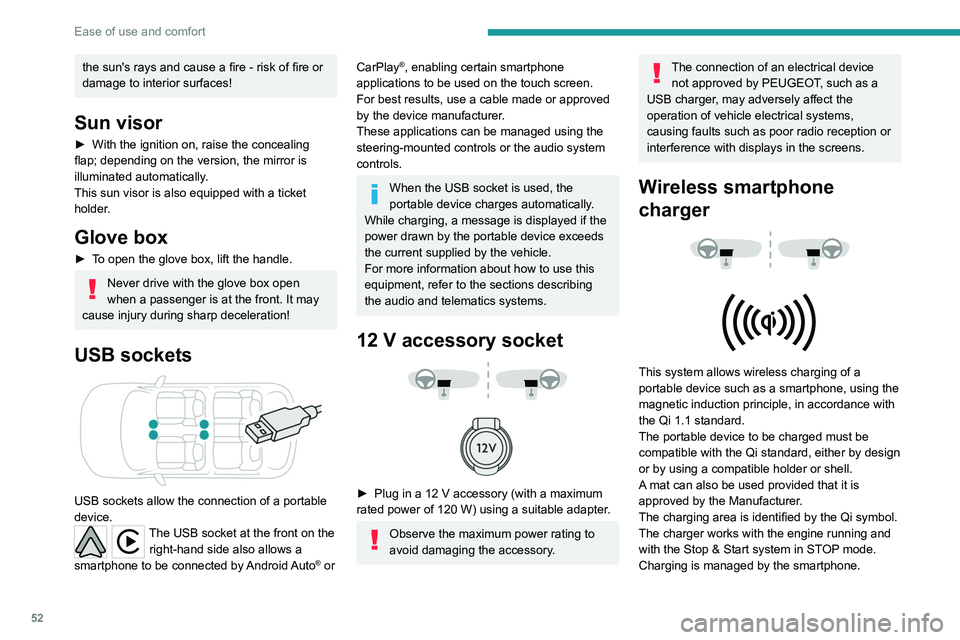
This system allows wireless charging of a
portable device such as a smartphone, using the
magnetic induction principle, in accordance with
the Qi 1.1 standard.
The portable device to be charged must be
compatible with the Qi standard, either by design
or by using a compatible holder or shell.
A mat can also be used provided that it is
approved by the Manufacturer.
The charging area is identified by the Qi symbol.
The charger works with the engine running and
with the Stop & Start system in STOP mode.
Charging is managed by the smartphone.
Page 147 of 276
145
Practical information
7Connection
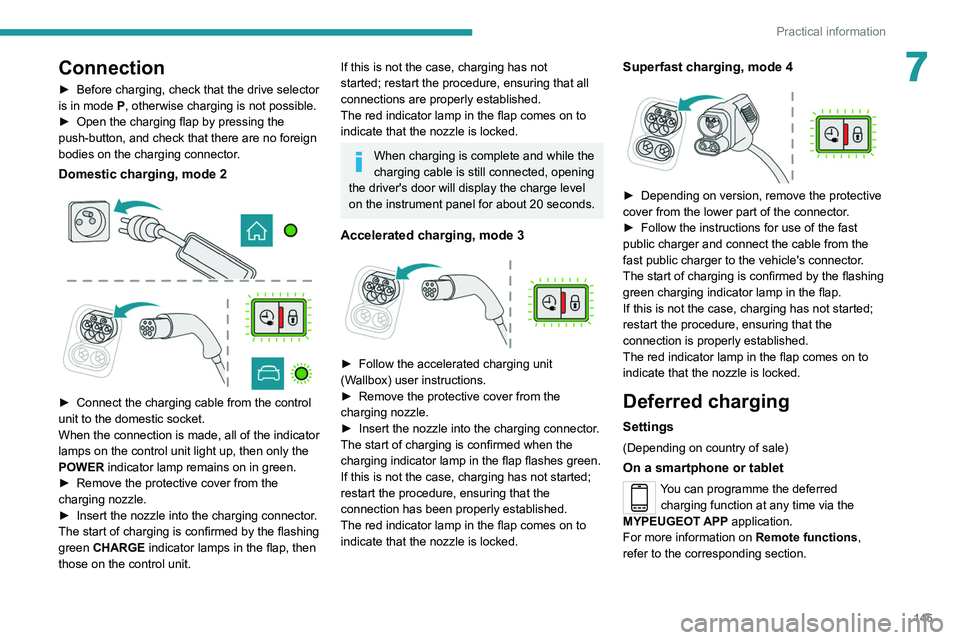
► Before charging, check that the drive selector
is in mode P, otherwise charging is not possible.
►
Open the charging flap by pressing the
push-button, and check that there are no foreign
bodies on the charging connector
.
Domestic charging, mode 2
► Connect the charging cable from the control
unit to the domestic socket.
When the connection is made, all of the indicator
lamps on the control unit light up, then only the
POWER
indicator lamp remains on in green.
►
Remove the protective cover from the
charging nozzle.
►
Insert the nozzle into the charging connector
.
The start of charging is confirmed by the flashing
green CHARGE indicator lamps in the flap, then
those on the control unit.
If this is not the case, charging has not
started; restart the procedure, ensuring that all
connections are properly established.
The red indicator lamp in the flap comes on to
indicate that the nozzle is locked.
When charging is complete and while the
charging cable is still connected, opening
the driver's door will display the charge level
on the instrument panel for about 20 seconds.
Accelerated charging, mode 3
► Follow the accelerated charging unit
(W allbox) user instructions.
►
Remove the protective cover from the
charging nozzle.
►
Insert the nozzle into the charging connector
.
The start of charging is confirmed when the
charging indicator lamp in the flap flashes green.
If this is not the case, charging has not started;
restart the procedure, ensuring that the
connection has been properly established.
The red indicator lamp in the flap comes on to
indicate that the nozzle is locked.
Superfast charging, mode 4
► Depending on version, remove the protective
cover from the lower part of the connector .
►
Follow the instructions for use of the fast
public charger and connect the cable from the
fast public charger
to the vehicle's connector.
The start of charging is confirmed by the flashing
green charging indicator lamp in the flap.
If this is not the case, charging has not started;
restart the procedure, ensuring that the
connection is properly established.
The red indicator lamp in the flap comes on to
indicate that the nozzle is locked.
Deferred charging
Settings
(Depending on country of sale)
On a smartphone or tablet
You can programme the deferred charging function at any time via the
MYPEUGEOT APP application.
For more information on Remote functions,
refer to the corresponding section.
Page 154 of 276
152
Practical information
If a telephone call is in progress at the
time, it will be maintained for around 10
minutes via the audio system’s hands-free
system.
Exiting the mode
These functions are automatically reactivated the
next time the vehicle is used.
To restore the use of these functions
immediately, start the engine and let it run:
– For less than 10 minutes, to use the
equipment for approximately 5 minutes.
– For more than 10 minutes, to use the
equipment for approximately 30 minutes.
Let the engine run for the specified duration to
ensure that the battery charge is sufficient.
To recharge the battery, avoid repeatedly or
continuously restarting the engine.
A flat battery prevents the engine from starting.
For more information on the 12 V battery,
refer to the corresponding section.
Load reduction mode
This system manages the use of certain
functions according to the level of charge
remaining in the battery.
When the vehicle is being driven, the load
reduction function temporarily deactivates certain
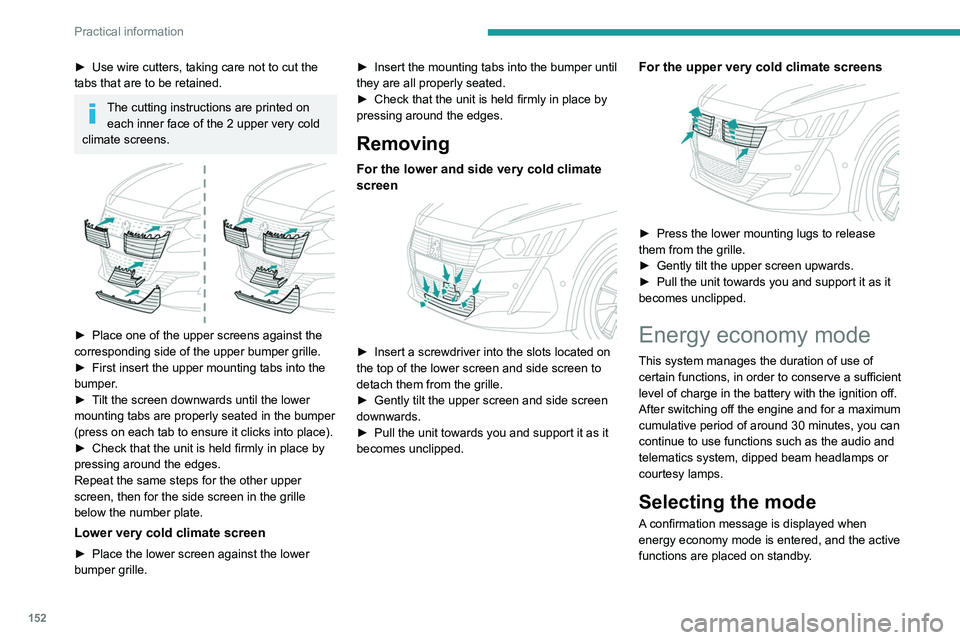
► Use wire cutters, taking care not to cut the
tabs that are to be retained.
The cutting instructions are printed on
each inner face of the 2 upper very cold
climate screens.
► Place one of the upper screens against the
corresponding side of the upper bumper grille.
►
First insert the upper mounting tabs into the
bumper
.
►
T
ilt the screen downwards until the lower
mounting tabs are properly seated in the bumper
(press on each tab to ensure it clicks into place).
►
Check that the unit is held firmly in place by
pressing around the edges.
Repeat the same steps for the other upper
screen, then for the side screen in the grille
below the number plate.
Lower very cold climate screen
► Place the lower screen against the lower
bumper grille. ►
Insert the mounting tabs into the bumper until
they are all properly seated.
►
Check that the unit is held firmly in place by
pressing around the edges.
Removing
For the lower and side very cold climate
screen
► Insert a screwdriver into the slots located on
the top of the lower screen and side screen to
detach them from the grille.
►
Gently tilt the upper screen and side screen
downwards.
►
Pull the unit towards you and support it as it
becomes unclipped.
For the upper very cold climate screens
► Press the lower mounting lugs to release
them from the grille.
►
Gently tilt the upper screen upwards.
►
Pull the unit towards you and support it as it
becomes unclipped.
Energy economy mode
This system manages the duration of use of
certain functions, in order to conserve a sufficient
level of charge in the battery with the ignition off.
After switching off the engine and for a maximum
cumulative period of around 30 minutes, you can
continue to use functions such as the audio and
telematics system, dipped beam headlamps or
courtesy lamps.
Selecting the mode
A confirmation message is displayed when
energy economy mode is entered, and the active
functions are placed on standby.
Page 155 of 276
153
Practical information
7If a telephone call is in progress at the
time, it will be maintained for around 10
minutes via the audio system’s hands-free
system.
Exiting the mode
These functions are automatically reactivated the
next time the vehicle is used.
To restore the use of these functions
immediately, start the engine and let it run:
–
For less than 10 minutes, to use the
equipment for approximately 5 minutes.
–
For more than 10 minutes, to use the
equipment for approximately 30 minutes.
Let the engine run for the specified duration to
ensure that the battery charge is sufficient.
T
o recharge the battery, avoid repeatedly or
continuously restarting the engine.
A flat battery prevents the engine from starting.
For more information on the 12
V battery,
refer to the corresponding section.
Load reduction mode
This system manages the use of certain
functions according to the level of charge
remaining in the battery.
When the vehicle is being driven, the load
reduction function temporarily deactivates certain
functions, such as the air conditioning and the
heated rear screen.
The deactivated functions are reactivated
automatically as soon as conditions permit.
Bonnet
Stop & Start
Before doing anything under the bonnet,
you must switch off the ignition to avoid any
risk of the engine restarting automatically.
Take care with objects or clothing that could
be caught in the blades of the cooling fan
or in certain moving components - risk of
strangulation and serious injury!
Electric motor
Take care with objects or clothing that
could be caught in the blades of the cooling
fan or in certain moving components - risk of
strangulation and serious injury!
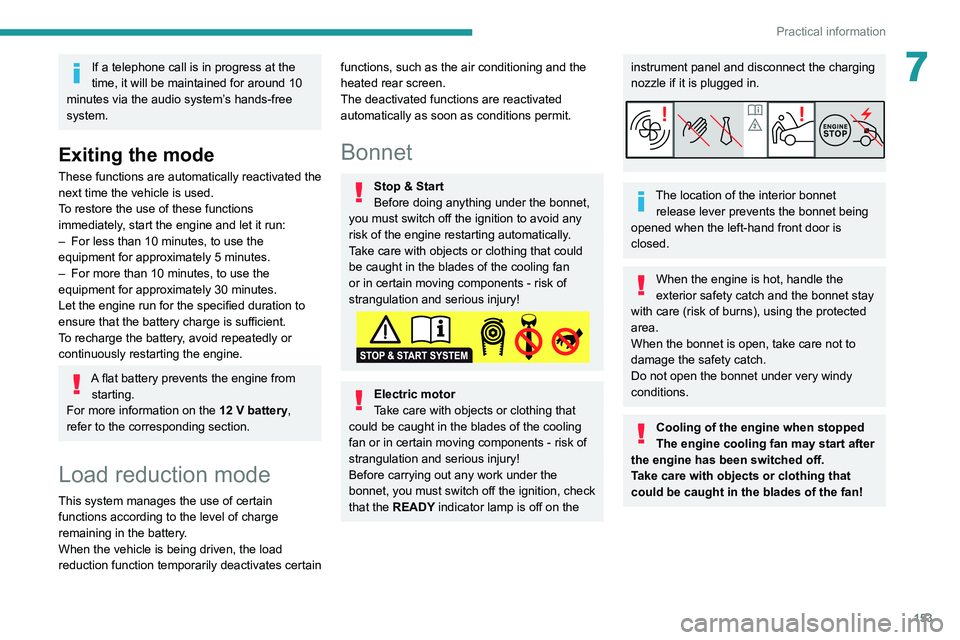
Before carrying out any work under the
bonnet, you must switch off the ignition, check
that the READY indicator lamp is off on the
instrument panel and disconnect the charging
nozzle if it is plugged in.
The location of the interior bonnet release lever prevents the bonnet being
opened when the left-hand front door is
closed.
When the engine is hot, handle the
exterior safety catch and the bonnet stay
with care (risk of burns), using the protected
area.
When the bonnet is open, take care not to
damage the safety catch.
Do not open the bonnet under very windy
conditions.
Cooling of the engine when stopped
The engine cooling fan may start after
the engine has been switched off.
Take care with objects or clothing that
could be caught in the blades of the fan!
Page 189 of 276

187
Touch screen BLUETOOTH audio system
10Touch screen BLUETOOTH audio
system
Multimedia audio system -
Bluetooth
® telephone
The functions and settings described
vary according to the vehicle version and
configuration.
For safety reasons and because they
require sustained attention by the driver,
the following operations must be carried out
with the vehicle stationary and the ignition
on:
–
Pairing the smartphone with the system in
Bluetooth mode.
–
Using the smartphone.
– Changing the system settings and
configuration.
The system is protected in such a way that it will only operate in the vehicle.
The Energy Economy Mode message is
displayed when the system is about to enter
the corresponding mode.
First steps
With the engine running, a press mutes
the sound.
With the ignition off, a press turns the system on.
Increase or decrease the volume using
the thumbwheel on the left-hand side.
To access the menus, press this button on the touch screen.
Press the back arrow to go back a level.
To clean the screen, use a soft, non-abrasive cloth (e.g. spectacles cloth)
with no additional product.
Do not use sharp objects on the screen.
Do not touch the screen with wet hands.
Certain information is displayed permanently in
the upper bar of the touch screen:
–
Air conditioning information (depending on
version).
–
Bluetooth connection.
–
Indication of location data sharing.
Selection of the audio source:
– FM/AM/DAB radio stations (depending on
equipment).
–
T
elephone connected via Bluetooth and
Bluetooth multimedia broadcast (streaming).
–
USB memory stick.
–
Media player connected via the auxiliary
socket (depending on equipment).
In very hot conditions, the volume may
be limited to protect the system. It may
go into standby (screen and sound off) for at
least 5 minutes.
The return to normal takes place when the
temperature in the passenger compartment
has dropped.
Steering mounted controls
Steering mounted controls -
Type 1
Radio:
Select the previous/next preset radio
station.
Select the previous/next item in a menu or a list.
Media:
Select the previous/next track.
Select the previous/next item in a menu or a list.
Radio:
Page 190 of 276
188
Touch screen BLUETOOTH audio system
Telephone
Connect a mobile phone via Bluetooth®.
Driving
Activate, deactivate or configure certain vehicle functions (depending on
equipment/version).
Short press: display the list of radio stations.
Long press: update the list.
Media:
Short press: display the list of folders.
Long press: display the available sorting options.
Short press: change audio source (radio;
USB; AUX if equipment connected; CD;
streaming).
Long press: display the call log.
Short press during an incoming call: accept the
call.
Short press during a call in progress: end the
call.
Confirm a selection.
Increase volume.
Decrease volume.
Mute/restore sound by simultaneously
pressing the increase and decrease
volume buttons.
Steering mounted controls -
Type 2
Voice commands:
This control is located on the steering
wheel or at the end of the lighting control stalk
(depending on equipment). Short press, smartphone voice commands via
the system.
Increase volume.
Decrease volume.
Mute by pressing the volume increase
and decrease buttons simultaneously
(depending on equipment).
Restore the sound by pressing one of the two
volume buttons.
Change the multimedia source.
Short press: display the calls log.
Short press during an incoming call:
accept the call.
Long press during an incoming call: reject the
call.
Short press during a call in progress: end the
call.
Radio (rotate): previous/next preset
station.
Media (rotate): previous/next track, move in a
list.
Short press: confirm a selection; if nothing
selected, access to presets.
Radio: display the list of stations.
Media: display the list of tracks.
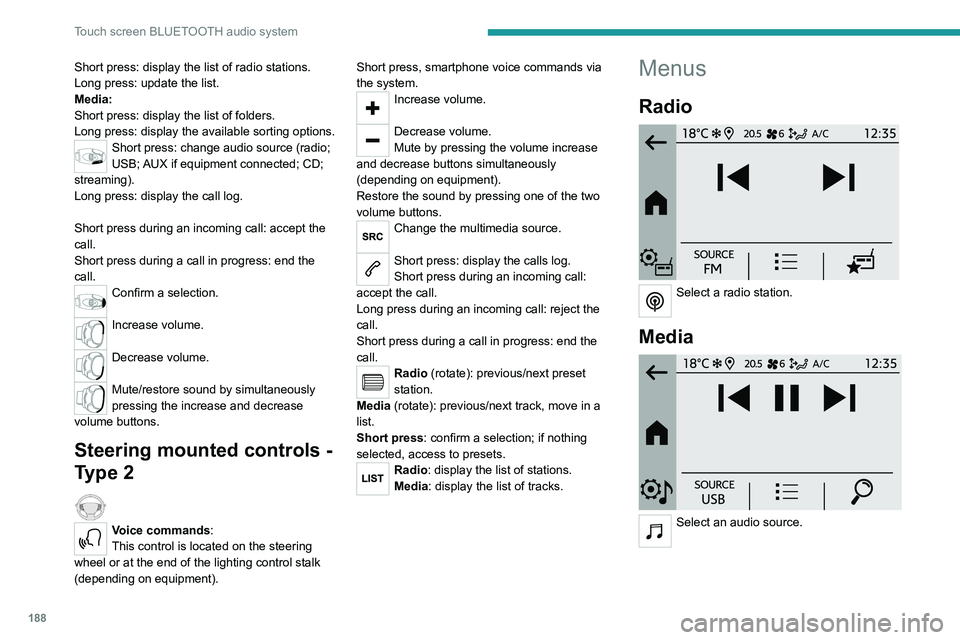
Menus
Radio
Select a radio station.
Media
Select an audio source.
Page 191 of 276
189
Touch screen BLUETOOTH audio system
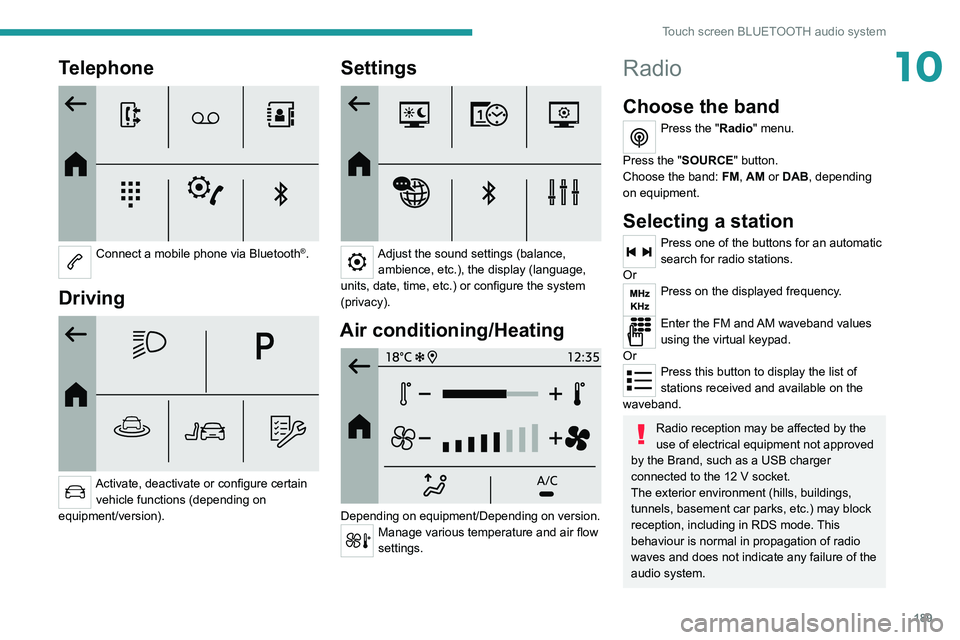
10Telephone
Connect a mobile phone via Bluetooth®.
Driving
Activate, deactivate or configure certain vehicle functions (depending on
equipment/version).
Settings
Adjust the sound settings (balance, ambience, etc.), the display (language,
units, date, time, etc.) or configure the system
(privacy).
Air conditioning/Heating
Depending on equipment/Depending on version.Manage various temperature and air flow
settings.
Radio
Choose the band
Press the "Radio" menu.
Press the "SOURCE" button.
Choose the band: FM, AM or DAB, depending
on equipment.
Selecting a station
Press one of the buttons for an automatic
search for radio stations.
Or
Press on the displayed frequency.
Enter the FM and AM waveband values
using the virtual keypad.
Or
Press this button to display the list of
stations received and available on the
waveband.
Radio reception may be affected by the
use of electrical equipment not approved
by the Brand, such as a USB charger
connected to the 12 V socket.
The exterior environment (hills, buildings,
tunnels, basement car parks, etc.) may block
reception, including in RDS mode. This
behaviour is normal in propagation of radio
waves and does not indicate any failure of the
audio system.
Page 193 of 276
191
Touch screen BLUETOOTH audio system
10when the system switches to "FM" analogue
radio with sometimes a variation in volume.
Once the digital signal quality is restored, the
system automatically changes back to "DAB".
If the "DAB" station being listened to is
not available on "FM", or if the "FM-DAB
tracking" is not activated, the sound will cut
out while the digital signal is too weak.
Media
Selecting the source
Press the "Media" menu.
Press the "SOURCE" button.
Select the source (USB, Bluetooth or AUX,
depending on equipment).
USB port
Insert the USB memory stick into the USB
port or connect the USB device to the
USB port using a suitable cable (not supplied).
To protect the system, do not use a USB hub.
The system builds playlists (in temporary
memory); this operation can take from a
few seconds to several minutes at the first
connection. Playlists are updated whenever a USB memory
stick is connected or the contents of a particular
USB memory stick are changed. The lists
are memorised: if they are not modified, the
subsequent loading time will be shorter.
Auxiliary (AUX) jack socket
Depending on equipmentConnect a portable device (MP3 player,
etc.) to the auxiliary jack socket using an
audio cable (not supplied).
This source is only available if " Aux
Amplification " has been selected in the audio
settings.
First adjust the volume on the portable device
(to a high level). Then adjust the volume of the
audio system.
Controls are managed via the portable device.
Bluetooth Streaming®
Streaming allows you to listen to the audio feed
from your smartphone.
The Bluetooth profile must be activated.
First adjust the volume on the portable device
(to a high level). Then adjust the volume of the
system.
If play does not start automatically, it may be
necessary to start the audio playback from the
smartphone.
Control is from the portable device or by using
the system's touch buttons.
Once connected in Streaming mode, the
smartphone is considered to be a media
source.
Connecting Apple® players
Connect the Apple® player to the USB socket
using a suitable cable (not supplied).
Play starts automatically.
Control is via the audio system.
The classifications available are those of the portable device connected (artists/
albums/genres/playlists/audio books/
podcasts). It is also possible to use a
classification structured in the form of a
library.
The default classification used is by artist. To
modify the classification used, return to the
first level of the menu then select the desired
classification (playlists for example) and
confirm to go down through the menu to the
desired track.
The version of software in the audio system may
not be compatible with the generation of the
Apple
® player.
Media settings
Press the "Media Settings" button.
Activate/deactivate track playback options and
access the audio settings.