steering wheel PEUGEOT 208 2021 Owners Manual
[x] Cancel search | Manufacturer: PEUGEOT, Model Year: 2021, Model line: 208, Model: PEUGEOT 208 2021Pages: 276, PDF Size: 8.02 MB
Page 4 of 276
2
Contents
■
Overview
■
Eco-driving
1InstrumentsInstrument panels 9
Warning and indicator lamps 12
Indicators 19
Manual test 23
Total distance recorder 23
Lighting dimmer 23
Trip computer 24
5-inch touch screen 25
7-inch or 10-inch touch screen 26
Additional remotely operable functions
(Electric)
28
2AccessRemote control / Key 30
Proximity Keyless Entry and Start 32
Central locking 34
Back-up procedures 34
Doors 37
Boot 37
Alarm 38
Electric windows 40
3Ease of use and comfortPEUGEOT i-Cockpit 41
Front seats 41
Steering wheel adjustment 43
Mirrors 43
Rear bench seat 45
Heating and Ventilation 46
Manual air conditioning 47
Automatic air conditioning 48
Front demisting - de-icing 50
Heated windscreen 50
Rear screen demisting/defrosting 50
Temperature pre-conditioning (Electric) 51
Interior fittings 51
Courtesy lamps 53
Interior ambient lighting 54
Panoramic glass sunroof 54
Boot fittings 55
Rear shelf (Van) 55
4Lighting and visibilityExterior lighting control stalk 57
Direction indicators 58
Headlamp beam height adjustment 59
Automatic illumination of headlamps 59
Guide-me-home and welcome lighting 60
Automatic lighting systems - General
recommendations
60
Automatic headlamp dipping 61
Wiper control stalk 61
Changing a wiper blade 63
Automatic wipers 64
5SafetyGeneral safety recommendations 65
Hazard warning lamps 65
Horn 66
Pedestrian horn (Electric) 66
Emergency or assistance 66
Electronic stability control (ESC) 68
Seat belts 70
Airbags 72
Child seats 74
Deactivating the front passenger airbag 76
ISOFIX child seats 78
i-Size child seats 81
Child lock 82
6DrivingDriving recommendations 84
Starting / Switching off the engine with
the key
86
Starting/Switching off the engine with
Keyless Entry and Starting
87
Manual parking brake 89
Electric parking brake 89
5-speed manual gearbox 92
6-speed manual gearbox 92
Automatic gearbox (EAT6) 92
Automatic gearbox (EAT8) 94
Drive selector (Electric) 97
Driving modes 98
Hill start assist 99
Gear shift indicator 100
Stop & Start 100
Tyre under-inflation detection 102
Driving and manoeuvring aids - General
recommendations
103
Road signs recognition 104
Speed limiter 108
Cruise control - Specific recommendations 109
Cruise control 11 0
Drive Assist Plus 111
Adaptive cruise control 111
Lane positioning assist 11 5
Active lane departure warning system 11 9
Blind spot sensors 122
Active Safety Brake with Collision Risk Alert
and Intelligent emergency braking assistance
123
Distraction detection 126
Page 5 of 276
3
Contents
Parking sensors 127
Visiopark 1 129
Park Assist 131
7Practical informationCompatibility of fuels 136
Refuelling 136
Misfuel prevention (Diesel) 137
Charging system (Electric) 137
Charging the traction battery (Electric) 143
Towing device 146
Towing device with quickly detachable towball 147
Roof bars 150
Snow chains 150
Very cold climate screens 151
Energy economy mode 152
Bonnet 153
Engine compartment 154
Checking levels 155
Checks 157
AdBlue® (BlueHDi) 159
Free-wheeling 161
Advice on care and maintenance 162
8In the event of a breakdownWarning triangle 164
Running out of fuel (Diesel) 164
Tool kit 164
Temporary puncture repair kit 166
Spare wheel 168
Changing a bulb 171
Fuses 175
12
V battery
/ Accessory battery 175
Towing the vehicle 178
9Technical dataEngine technical data and towed loads 181
Petrol engines 182
Diesel engines 184
Electric motor 185
Dimensions 186
Identification markings 186
10Touch screen BLUETOOTH audio systemFirst steps 187
Steering mounted controls 187
Menus 188
Radio 189
DAB (Digital Audio Broadcasting) radio 190
Media 191
Telephone 192
Settings 194
Frequently asked questions 194
11PEUGEOT Connect RadioFirst steps 196
Steering mounted controls 197
Menus 198
Applications 199
Radio 199
DAB (Digital Audio Broadcasting) radio 201
Media 201
Telephone 203
Settings 206
Frequently asked questions 207
12PEUGEOT Connect NavFirst steps 209
Steering mounted controls 210
Menus 210
Voice commands 212
Navigation 215
Connected navigation 218
Applications 220
Radio 223
DAB (Digital Audio Broadcasting) radio 224
Media 224
Telephone 226
Settings 228
Frequently asked questions 230
13Event data recorders
■
Alphabetical index
bit.ly/helpPSA
Access to additional videos
Page 13 of 276
11
Instruments
1• Information related to the gearbox and gear
shift indicator (Petrol or Diesel).
•
Information related to the drive selector
(Electric).
•
Fuel gauge (Petrol or Diesel).
•
Range (Petrol or Diesel).
•
Coolant temperature indicator (Petrol or
Diesel).
•
Charge level and range indicator (Electric).
•
Power indicator (Electric).
•
Driving mode.
–
in variable locations:
•
Digital speedometer
.
•
T
otal distance recorder.
•
Status or alert messages displayed
temporarily
.
Optional information
Depending on the selected display mode and
active features, additional information may be
displayed:
–
Rev counter (Petrol or Diesel).
–
T
rip computer.
–
Driving aid functions.
–
Speed limiter or cruise control.
–
Media currently playing.
–
Navigation instructions.
–
Analogue speedometer
.
–
Engine information (G-meters, Power-meters,
Boost,
Torque) in Sport mode.
–
Energy flows (Electric).
Customising the instrument
panel
Depending on version, the appearance of the
instrument panel may be customisable (colour
and/or display mode).
Display language and units
These depend on the touch screen
settings.
When travelling abroad, the speed must be
shown in the official units of the country you
are driving in (mph, miles or km/h, km).
As a safety measure, these adjustments must be carried out with the vehicle
stationary.
Choice of display colour (Petrol or
Diesel)
Depending on version, the instrument panel
display colour depends on the colour scheme
chosen in this system.
The settings are changed via the Settings touch screen menu.
Choosing the display mode
In each mode, specific types of information are
displayed on the instrument panel.
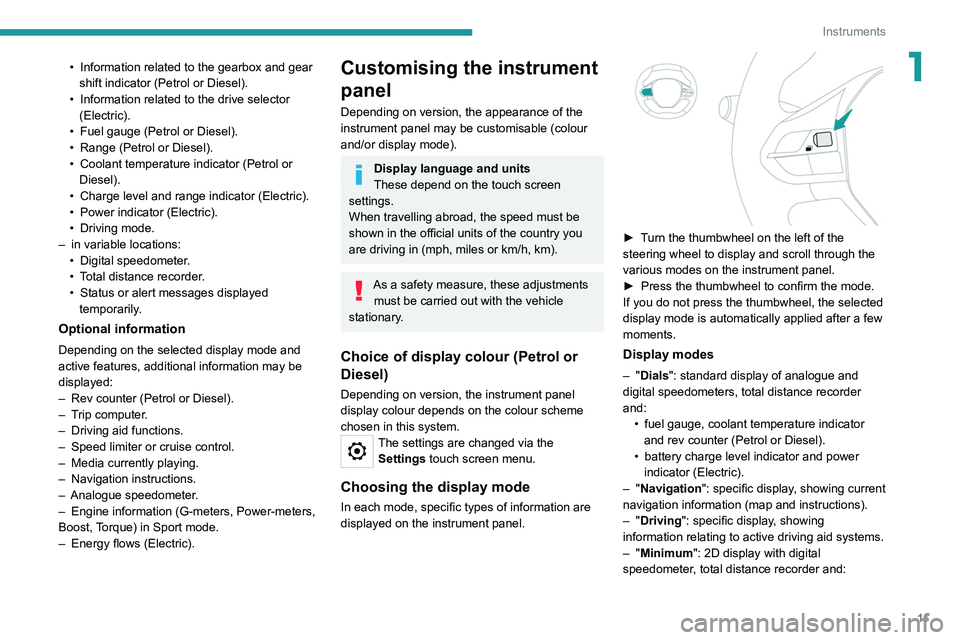
► Turn the thumbwheel on the left of the
steering wheel to display and scroll through the
various modes on the instrument panel.
►
Press the thumbwheel to confirm the mode.
If you do not press the thumbwheel, the selected
display mode is automatically applied after a few
moments.
Display modes
– "Dials": standard display of analogue and
digital speedometers, total distance recorder
and: •
fuel gauge, coolant temperature indicator
and rev counter (Petrol or Diesel).
•
battery charge level indicator and power
indicator (Electric).
–
"Navigation": specific display, showing current
navigation information (map and instructions).
–
"Driving": specific display, showing
information relating to active driving aid systems.
–
"Minimum": 2D display with digital
speedometer, total distance recorder and:
Page 15 of 276
13
Instruments
1List of warning and
indicator lamps
Red warning/indicator lamps
STOP
Fixed, associated with another warning
lamp, accompanied by the display of a
message and an audible signal.
A serious fault with the engine, braking system,
power steering or automatic gearbox or a major
electrical fault has been detected.
Carry out (1) and then (2).
Engine self-diagnostic system (Petrol or
Diesel)
Fixed.
A major engine fault has been
detected.
Carry out (1) and then (2).
Maximum coolant temperature (Petrol or
Diesel)
Fixed with display blocks lit in red
(with matrix instrument panel).
or
Fixed (except on matrix instrument panel).
The temperature of the cooling system is too
high.
Carry out (1), then wait until the engine has
cooled down before topping up the level, if
necessary. If the problem persists, carry out (2).
Engine oil pressure (Petrol or Diesel)Fixed.
There is a fault with the engine lubrication
system.
Carry out (1) and then (2).
System malfunction (Electric)Fixed.
A fault involving the electric motor or
traction battery has been detected.
Carry out (1) and then (2).
Cable connected (Electric)Fixed when the ignition is switched on.
The charging cable is connected to the
vehicle's connector.
Fixed when the ignition is switched on,
accompanied by a message.
It is not possible to start the vehicle while the
charging cable is connected to the vehicle’s
connector.
Disconnect the charging cable and close the
flap.
12V battery charge
Fixed.
The battery charging circuit is faulty
(e.g.
dirty terminals, loose or severed alternator
belt).
Carry out (1).
If the electric parking brake stops working,
immobilise the vehicle:
►
With the manual gearbox, engage a gear
.
►
With the EA
T6 automatic gearbox, move the
gear selector to position
P
. ►
With the EA
T8 automatic gearbox or drive
selector, fit the chock against one of the wheels.
Clean and tighten the terminals. If the warning
lamp does not go off when the engine is started,
carry out (2).
Door(s) openFixed, associated with a message
identifying the access.
A door or the tailgate is not properly closed
(speed less than 6 mph (10 km/h)).
Fixed, associated with a message
identifying the access, accompanied by
an audible signal.
A door or the tailgate is not properly closed
(speed above 6 mph (10 km/h)).
Seat belts not fastened/unfastenedFixed or flashing, accompanied by an
increasing audible signal.
A seat belt has not been fastened or has been
unfastened.
Manual parking brakeFixed.
The parking brake is applied or not
properly released.
Electric parking brakeFixed.
The electric parking brake is applied.
Flashing.
Application/release is faulty.
Carry out (1): park on flat ground (on a level
surface).
With a manual gearbox, engage a gear.
Page 18 of 276
16
Instruments
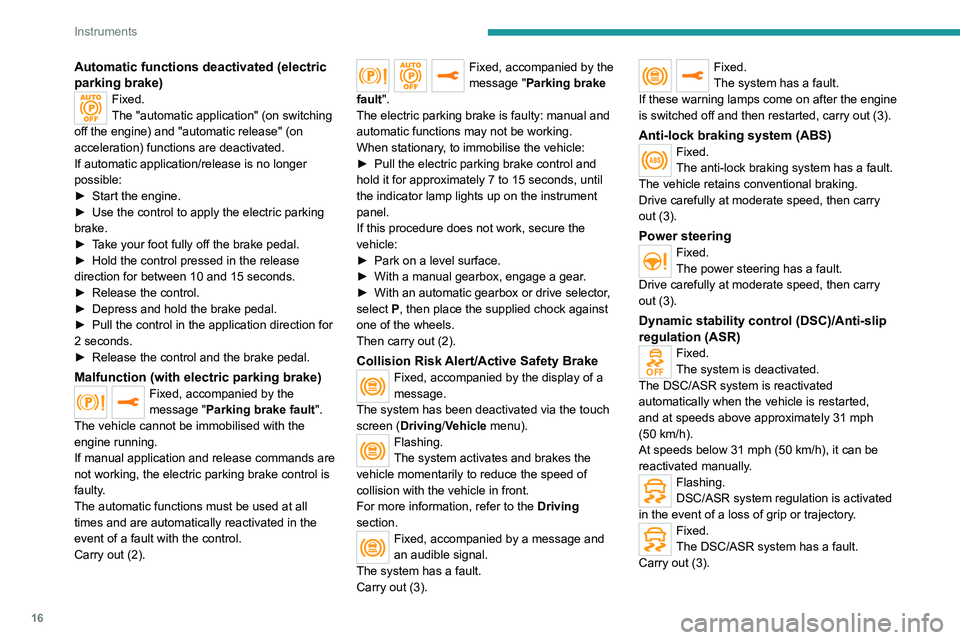
Automatic functions deactivated (electric
parking brake)
Fixed.
The "automatic application" (on switching
off the engine) and "automatic release" (on
acceleration) functions are deactivated.
If automatic application/release is no longer
possible:
►
Start the engine.
►
Use the control to apply the electric parking
brake.
►
T
ake your foot fully off the brake pedal.
►
Hold the control pressed in the release
direction for between 10 and 15 seconds.
►
Release the control.
►
Depress and hold the brake pedal.
►
Pull the control in the application direction for
2
seconds.
►
Release the control and the brake pedal.
Malfunction (with electric parking brake)Fixed, accompanied by the
message "Parking brake fault".
The vehicle cannot be immobilised with the
engine running.
If manual application and release commands are
not working, the electric parking brake control is
faulty.
The automatic functions must be used at all
times and are automatically reactivated in the
event of a fault with the control.
Carry out (2).
Fixed, accompanied by the
message "Parking brake
fault".
The electric parking brake is faulty: manual and
automatic functions may not be working.
When stationary, to immobilise the vehicle:
►
Pull the electric parking brake control and
hold it for approximately 7 to 15 seconds, until
the indicator lamp lights up on the instrument
panel.
If this procedure does not work, secure the
vehicle:
►
Park on a level surface.
►
With a manual gearbox, engage a gear
.
►
With an automatic gearbox or drive selector
,
select
P, then place the supplied chock against
one of the wheels.
Then carry out (2).
Collision Risk Alert/Active Safety BrakeFixed, accompanied by the display of a
message.
The system has been deactivated via the touch
screen (Driving/Vehicle menu).
Flashing.
The system activates and brakes the
vehicle momentarily to reduce the speed of
collision with the vehicle in front.
For more information, refer to the Driving
section.
Fixed, accompanied by a message and
an audible signal.
The system has a fault.
Carry out (3).
Fixed.
The system has a fault.
If these warning lamps come on after the engine
is switched off and then restarted, carry out (3).
Anti-lock braking system (ABS)Fixed.
The anti-lock braking system has a fault.
The vehicle retains conventional braking.
Drive carefully at moderate speed, then carry
out (3).
Power steeringFixed.
The power steering has a fault.
Drive carefully at moderate speed, then carry
out (3).
Dynamic stability control (DSC)/Anti-slip
regulation (ASR)
Fixed.
The system is deactivated.
The DSC/ASR system is reactivated
automatically when the vehicle is restarted,
and at speeds above approximately 31 mph
(50
km/h).
At speeds below 31
mph (50 km/h), it can be
reactivated manually.
Flashing.
DSC/ASR system regulation is activated
in the event of a loss of grip or trajectory.
Fixed.
The DSC/ASR system has a fault.
Carry out (3).
Page 34 of 276
32
Access
Anti-theft protection
Do not modify the electronic vehicle
immobiliser, as this might result in
malfunctions.
For vehicles with a key ignition switch,
remember to remove the key and turn the
steering wheel to engage the steering lock.
Locking the vehicle
Driving with the doors locked could make
it more difficult for the emergency services
to enter the passenger compartment in an
emergency.
As a safety precaution, remove the key from
the ignition or take the electronic key with you
when leaving the vehicle, even for a short
time.
Purchasing a second-hand vehicle
Have the key codes memorised by a
PEUGEOT dealer, to ensure that the keys
in your possession are the only ones able to
start the vehicle.
Proximity Keyless Entry
and Start
This is a Keyless Entry and Starting system.
It enables automatic vehicle locking/unlocking
simply by detecting the electronic key. As long as the driver has the electronic key
on their person, the vehicle unlocks as they
approach and locks when they walk away.
If the electronic key is present in an area
between 2 and 7 m from the vehicle for more
than 30 minutes, the system is deactivated to
preserve the battery.
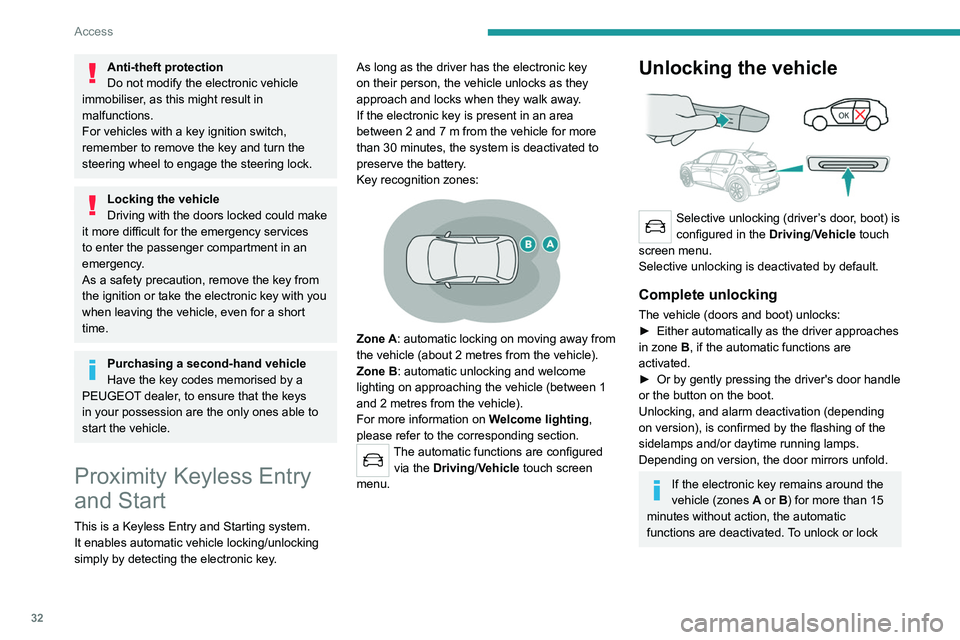
Key recognition zones:
Zone A: automatic locking on moving away from
the vehicle (about 2
metres from the vehicle).
Zone B: automatic unlocking and welcome
lighting on approaching the vehicle (between 1
and 2
metres from the vehicle).
For more information on Welcome lighting,
please refer to the corresponding section.
The automatic functions are configured via the Driving/Vehicle touch screen
menu.
Unlocking the vehicle
Selective unlocking (driver’s door, boot) is
configured in the Driving/Vehicle touch
screen menu.
Selective unlocking is deactivated by default.
Complete unlocking
The vehicle (doors and boot) unlocks:
► Either automatically as the driver approaches
in zone
B, if the automatic functions are
activated.
►
Or by gently pressing the driver's door handle
or the button on the boot.
Unlocking, and alarm deactivation (depending
on version), is confirmed by the flashing of the
sidelamps and/or daytime running lamps.
Depending on version, the door mirrors unfold.
If the electronic key remains around the
vehicle (zones A or B) for more than 15
minutes without action, the automatic
functions are deactivated. To unlock or lock
the vehicle, use the remote control or press
one of the door handles.
If using the door handle does not lock/unlock
the vehicle, bring the electronic key closer
and repeat the desired action.
Selective unlocking
Driver’s door and fuel filler/charging flap
They unlock:
► Either automatically when approaching the
driver’s door, if the automatic functions are
activated.
► Or by gently pressing the driver's door
handle.
► Once inside the vehicle, to unlock all
accesses, press the central locking button or pull
the opening control on any door.
Selective unlocking of the boot
The boot unlocks automatically as you approach
the rear of the vehicle.
► Press the tailgate control to open the boot.
The doors remain locked.
Locking the vehicle
Normal locking
Page 43 of 276
41
Ease of use and comfort
3PEUGEOT i-Cockpit
Before taking to the road and to make the
most of the ergonomic layout of the PEUGEOT
i-Cockpit, carry out these adjustments in the
following order:
–
head restraint height.
–
seat backrest angle.
–
seat cushion height.
–
longitudinal seat position.
–
steering wheel reach and then height.
–
rear view mirror and door mirrors.
Once these adjustments have been
made, check that the "head-up"
instrument panel can be viewed correctly over
the smaller diameter steering wheel.
Before moving the seat backwards,
ensure that there is no person or object
that might prevent the full travel of the seat.
There is a risk of trapping or pinching
passengers if present in the rear seats or of
jamming the seat if large objects are placed
on the floor behind the seat.
Front seats
Front head restraints
Adjusting the height
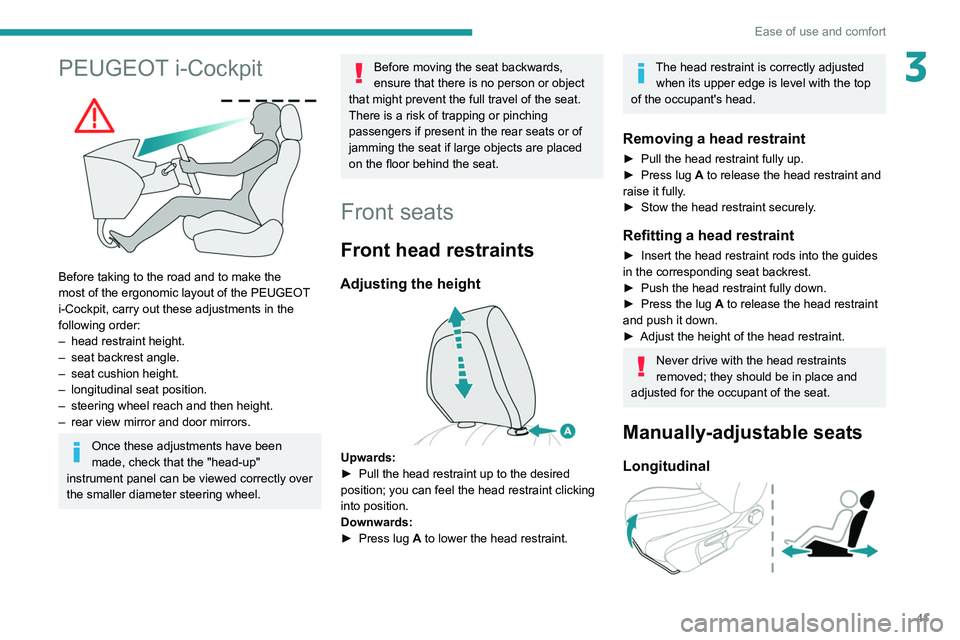
Upwards:
► Pull the head restraint up to the desired
position; you can feel the head restraint clicking
into position.
Downwards:
►
Press lug
A to lower the head restraint.
The head restraint is correctly adjusted when its upper edge is level with the top
of the occupant's head.
Removing a head restraint
► Pull the head restraint fully up.
► Press lug A to release the head restraint and
raise it fully.
►
Stow the head restraint securely
.
Refitting a head restraint
► Insert the head restraint rods into the guides
in the corresponding seat backrest.
►
Push the head restraint fully down.
►
Press the lug
A to release the head restraint
and push it down.
►
Adjust the height of the head restraint.
Never drive with the head restraints
removed; they should be in place and
adjusted for the occupant of the seat.
Manually-adjustable seats
Longitudinal
Page 45 of 276
43
Ease of use and comfort
3After one hour, the function is deactivated; the
indicator lamp goes off.
Heated seats
The function is active only with the engine
running and when the outside temperature is
below 20°C.
►
Press the button corresponding to the seat.
►
Each press changes the heating level; the
corresponding number of indicator lamps come
on.
►
T
o switch off the heating, press the button
until all of the indicator lamps are off.
The system status is memorised when the
ignition is switched off.
Do not use the function when the seat
is not occupied.
Reduce the heating intensity as soon as
possible.
When the seat and passenger compartment
have reached a satisfactory temperature,
switch the function off; reducing electrical
consumption in turn decreases energy
consumption.
Prolonged use of heated seats is not
recommended for people with sensitive
skin.
There is a risk of burns for people whose
perception of heat is impaired (e.g.
illness,
taking medication).
To keep the heated pad intact and to prevent
a short circuit:
–
Do not place heavy or sharp objects on the
seat.
–
Do not kneel or stand on the seat.
–
Do not spill liquids onto the seat.
–
Never use the heating function if the seat
is damp.
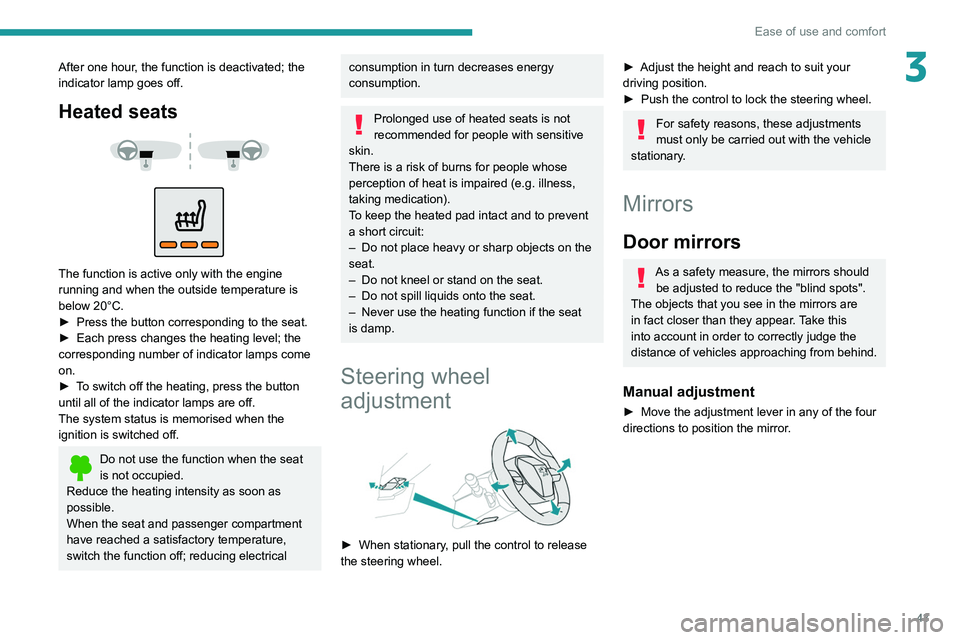
Steering wheel
adjustment
► When stationary , pull the control to release
the steering wheel.
► Adjust the height and reach to suit your
driving position.
►
Push the control to lock the steering wheel.
For safety reasons, these adjustments
must only be carried out with the vehicle
stationary.
Mirrors
Door mirrors
As a safety measure, the mirrors should be adjusted to reduce the "blind spots".
The objects that you see in the mirrors are
in fact closer than they appear. Take this
into account in order to correctly judge the
distance of vehicles approaching from behind.
Manual adjustment
► Move the adjustment lever in any of the four
directions to position the mirror .
Page 68 of 276
66
Safety
Data processing
All processing of personal information by
the "Peugeot Connect SOS" system (PE112)
complies with the framework for protection
of personal information established by
Regulation 2016/679 (GDPR) and Directive
2002/58/EC of the European Parliament
and the Council, and in particular, seeks to
protect the vital interests of the data subject,
in accordance with Article 6.1, paragraph d) of
Regulation 2016/679.
Personal information processing is strictly
limited to the management of the "Peugeot
Connect SOS" system used with the “112”
European single emergency call number.
The "Peugeot Connect SOS" system is able
to collect and process only the following
data relating to the vehicle: chassis number,
type (passenger vehicle or light commercial
vehicle), fuel type or power source, most
recent three locations and direction of travel,
and a timestamped log file recording the
automatic activation of the system.
The recipients of the processed data are the
emergency call handling centres designated
by the relevant national authorities in the
territory in which they are located, enabling
priority reception and handling of calls to the
“112” emergency number.
* According to the geographic coverage of ‘Peugeot Connect SOS’, ‘Peugeot Connect Assistance’ and the official national language chosen by the owner
of the vehicle.
The list of countries covered and telematic services provided is availab\
le from dealers or on the website for your country.Horn
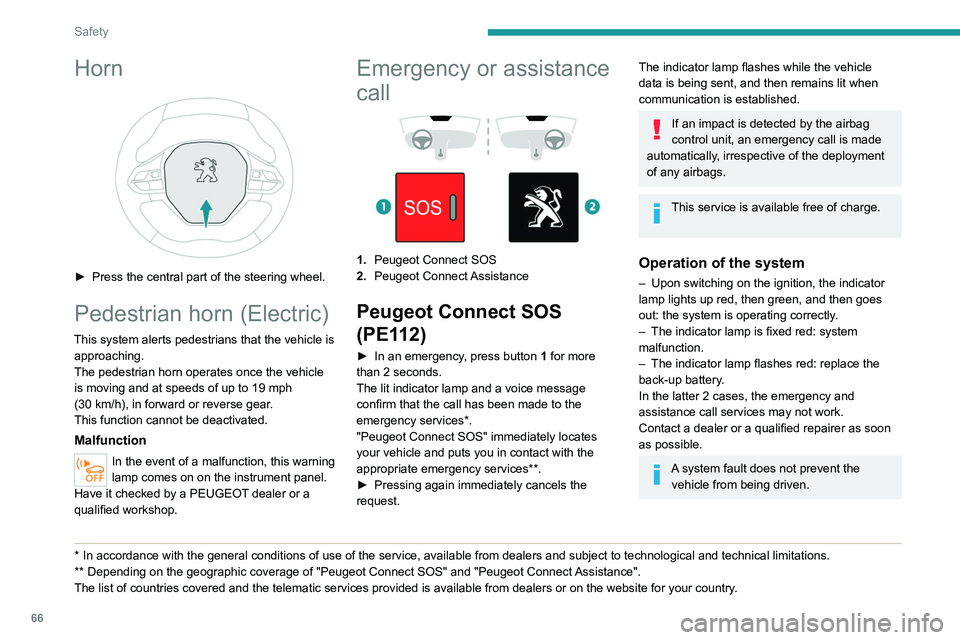
► Press the central part of the steering wheel.
Pedestrian horn (Electric)
This system alerts pedestrians that the vehicle is approaching.
The pedestrian horn operates once the vehicle
is moving and at speeds of up to 19 mph
(30
km/h), in forward or reverse gear.
This function cannot be deactivated.
Malfunction
In the event of a malfunction, this warning
lamp comes on on the instrument panel.
Have it checked by a PEUGEOT dealer or a
qualified workshop.
* In accordance with the general conditions of use of the service, available from dealers an\
d subject to technological and technical limitations.
** Depend ing on the geographic coverage of "Peugeot Connect SOS" and "Peugeot Connect Assistance".
The list of countries covered and the telematic services provided is ava\
ilable from dealers or on the website for your country.
Emergency or assistance
call
1. Peugeot Connect SOS
2. Peugeot Connect Assistance
Peugeot Connect SOS
(PE112)
► In an emergency , press button 1 for more
than 2 seconds.
The lit indicator lamp and a voice message
confirm that the call has been made to the
emergency services*.
"Peugeot Connect SOS" immediately locates
your vehicle and puts you in contact with the
appropriate emergency services**.
►
Pressing again immediately cancels the
request.
The indicator lamp flashes while the vehicle
data is being sent, and then remains lit when
communication is established.
If an impact is detected by the airbag
control unit, an emergency call is made
automatically, irrespective of the deployment
of any airbags.
This service is available free of charge.
Operation of the system
– Upon switching on the ignition, the indicator
lamp lights up red, then green, and then goes
out: the system is operating correctly
.
–
The indicator lamp is fixed red: system
malfunction.
–
The indicator lamp flashes red: replace the
back-up battery
.
In the latter 2 cases, the emergency and
assistance call services may not work.
Contact a dealer or a qualified repairer as soon
as possible.
A system fault does not prevent the vehicle from being driven.
Page 74 of 276
72
Safety
Lateral airbags
This system protects the driver and front
passenger in the event of a serious side impact,
limiting the risk of injury to the chest, between
the hip and the shoulder.
Each lateral airbag is fitted in the seat backrest
frame, on the door side.
Deployment
The lateral airbags are deployed on one side in
the event of a serious side impact applied to all
or part of the side impact zone B.
The lateral airbag inflates between the chest of
the vehicle's occupant and the corresponding
door panel.
Curtain airbags
System contributing towards greater protection
for the driver and passengers (with the exception
of the rear centre passenger) in the event of a
serious side impact in order to limit the risk of
injury to the side of the head.
Each curtain airbag is built into the pillars and
the upper passenger compartment area.
Deployment
It deploys simultaneously with the corresponding
lateral airbag in the event of a serious side
impact applied to all or part of the side impact
zone B.
Airbags
General information
System designed to help improve the safety
of the occupants sitting in the front seats and
the rear outer seats, in the event of a violent
collision. The airbags supplement the action
of the seat belts equipped with a force limiting
system.
Electronic detectors record and analyse the
front and side impacts sustained in the impact
detection zones:
–
In the event of violent impact, the airbags
deploy instantly and help better protect the
occupants of the vehicle; immediately after the
impact, the airbags deflate rapidly in order not
to hinder the visibility or the possible exit of the
occupants.
–
In the event of a slight impact, a rear impact
and under certain rollover conditions, the airbags
may not deploy; only the seat belt helps to
protect you in these situations.
The seriousness of the impact depends on the
nature of the obstacle and the speed of the
vehicle at the moment of collision.
The airbags do not operate when the
ignition is switched off.
This equipment will only deploy once. If a
second impact occurs (during the same or a
* For more information on Deactivating the front passenger airbag, refer t\
o the corresponding section.
subsequent accident), the airbag will not be
deployed again.
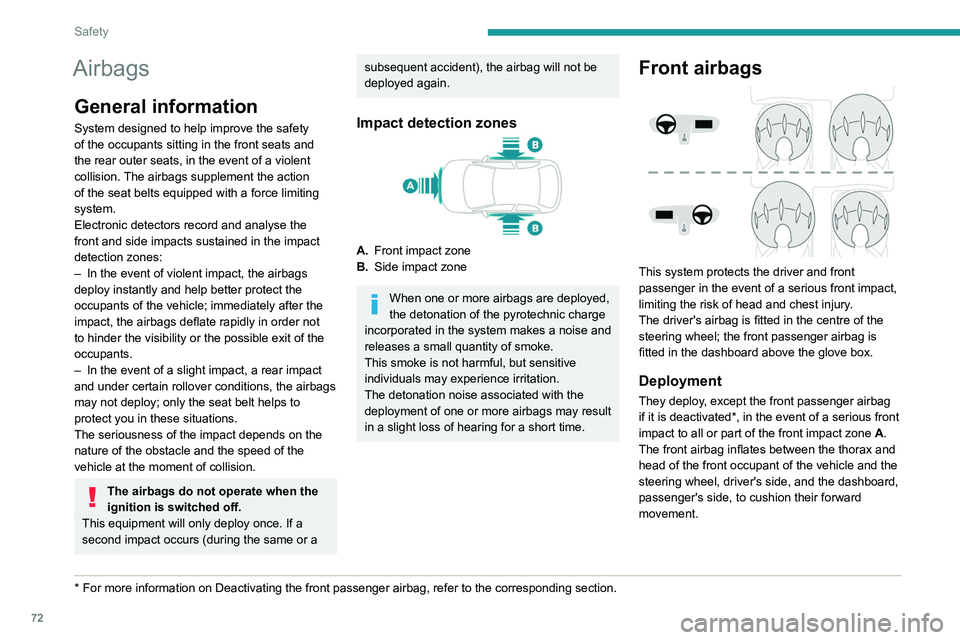
Impact detection zones
A. Front impact zone
B. Side impact zone
When one or more airbags are deployed,
the detonation of the pyrotechnic charge
incorporated in the system makes a noise and
releases a small quantity of smoke.
This smoke is not harmful, but sensitive
individuals may experience irritation.
The detonation noise associated with the
deployment of one or more airbags may result
in a slight loss of hearing for a short time.
Front airbags
This system protects the driver and front
passenger in the event of a serious front impact,
limiting the risk of head and chest injury.
The driver's airbag is fitted in the centre of the
steering wheel; the front passenger airbag is
fitted in the dashboard above the glove box.
Deployment
They deploy, except the front passenger airbag
if it is deactivated*, in the event of a serious front
impact to all or part of the front impact zone A.
The front airbag inflates between the thorax and
head of the front occupant of the vehicle and the
steering wheel, driver's side, and the dashboard,
passenger's side, to cushion their forward
movement.