ESP PEUGEOT 3008 2021 Owners Manual
[x] Cancel search | Manufacturer: PEUGEOT, Model Year: 2021, Model line: 3008, Model: PEUGEOT 3008 2021Pages: 292, PDF Size: 9.65 MB
Page 2 of 292
Access to the Handbook
ONLINE
Go to the PEUGEOT website, "MyPeugeot" section
to consult or download the handbook or go to the
following address:
http://public.servicebox.peugeot.com/APddb/
Scan this QR Code for direct access.
This symbol indicates the latest
information available.
Select:
–
the language,
–
the vehicle and body style,
–
the issue period of the handbook corresponding to
the date of 1st registration of the vehicle.
MOBILE
Install the
Scan
application (content
004400590044004C004F00440045004F0048000300521089004C00510048000C0011
Then select:
–
the vehicle,
–
the issue period corresponding to the date of 1st
registration of the vehicle.
Page 12 of 292
10
Instruments
• "Navigation".
• "Trip computer".
• "Rev counter".
• "Energy flow" (depending on version).
• "Power indicator" (depending on version).
• "Energy consumption" (depending on
version).
► Confirm to save and exit.
"PERSONAL" mode is displayed immediately.
Warning and indicator
lamps
Displayed as symbols, the warning and indicator
lamps inform the driver of the occurrence of a
malfunction (warning lamps) or of the operating
status of a system (operation or deactivation
indicator lamps). Certain lamps light up in two
ways (fixed or flashing) and/or in several colours.
Associated warnings
The illumination of a lamp may be accompanied
by an audible signal and/or a message displayed
in a screen.
Relating the type of alert to the operating status
of the vehicle allows you to determine whether
the situation is normal or whether a fault has
occurred: refer to the description of each lamp
for further information.
When the ignition is switched on
Certain red or orange warning lamps come on
for a few seconds when the ignition is switched
– Driving aid functions.
– Speed limiter or cruise control.
–
Media currently playing.
–
Navigation instructions.
–
Engine information from the Dynamic Pack.
–
Power flow (Rechargeable hybrid).
Customising the instrument
panel
Depending on version, the appearance of the
instrument panel may be customisable (colour
and/or display mode).
Display language and units
These depend on the multifunction
screen settings (configuration menu).
When travelling abroad, the speed must be
shown in the official units of the country you
are driving in (mph, miles or km/h, km).
As a safety measure, these adjustments must be carried out with the vehicle
stationary.
Choosing the display colour
Depending on version, the instrument panel
display colour depends on the colour scheme
chosen in this system.
This function is set via the Settings touch screen menu.
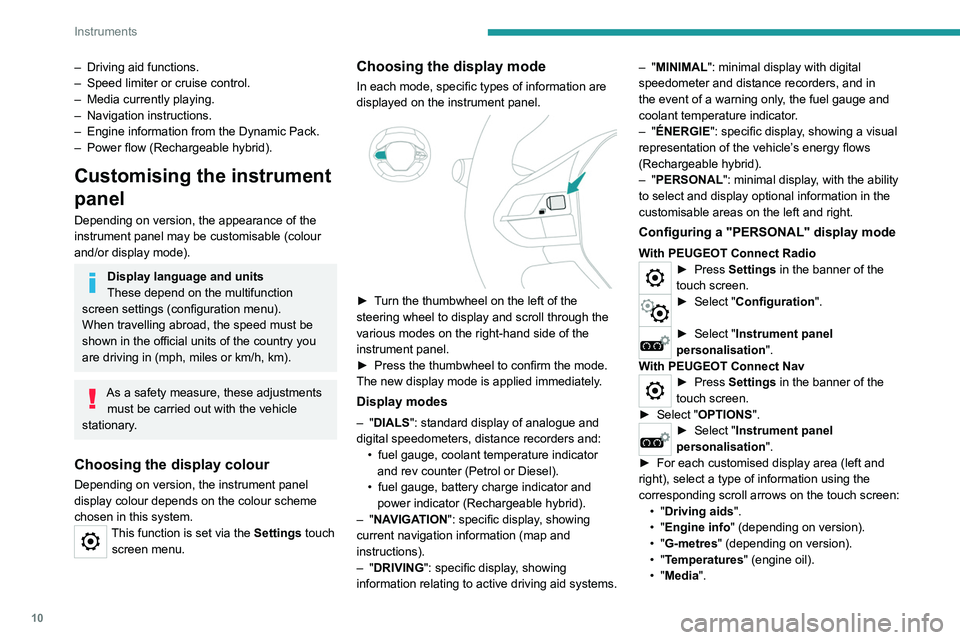
Choosing the display mode
In each mode, specific types of information are
displayed on the instrument panel.
► Turn the thumbwheel on the left of the
steering wheel to display and scroll through the
various modes on the right-hand side of the
instrument panel.
►
Press the thumbwheel to confirm the mode.
The new display mode is applied immediately
.
Display modes
– "DIALS": standard display of analogue and
digital speedometers, distance recorders and: •
fuel gauge, coolant temperature indicator
and rev counter (Petrol or Diesel).
•
fuel gauge, battery charge indicator and
power indicator (Rechargeable hybrid).
–
"NAVIGATION": specific display, showing
current navigation information (map and
instructions).
–
"DRIVING": specific display, showing
information relating to active driving aid systems. –
"MINIMAL": minimal display with digital
speedometer and distance recorders, and in
the event of a warning only, the fuel gauge and
coolant temperature indicator.
– "ÉNERGIE": specific display, showing a visual
representation of the vehicle’s energy flows
(Rechargeable hybrid).
– "PERSONAL": minimal display, with the ability
to select and display optional information in the
customisable areas on the left and right.
Configuring a "PERSONAL" display mode
With PEUGEOT Connect Radio► Press Settings in the banner of the
touch screen.
► Select " Configuration ".
► Select "Instrument panel
personalisation".
With PEUGEOT Connect Nav
► Press Settings in the banner of the
touch screen.
►
Select "
OPTIONS".
► Select " Instrument panel
personalisation".
►
For each customised display area (left and
right), select a type of information using the
corresponding scroll arrows on the touch screen: •
"Driving aids".
•
"Engine info " (depending on version).
•
"G-metres " (depending on version).
•
"Temperatures " (engine oil).
•
"Media".
Page 13 of 292
11
Instruments
1• "Navigation".
• "Trip computer".
•
"Rev counter".
•
"Energy flow" (depending on version).
•
"Power indicator" (depending on version).
•
"Energy consumption " (depending on
version).
►
Confirm to save and exit.
"
PERSONAL" mode is displayed immediately.
Warning and indicator
lamps
Displayed as symbols, the warning and indicator
lamps inform the driver of the occurrence of a
malfunction (warning lamps) or of the operating
status of a system (operation or deactivation
indicator lamps). Certain lamps light up in two
ways (fixed or flashing) and/or in several colours.
Associated warnings
The illumination of a lamp may be accompanied
by an audible signal and/or a message displayed
in a screen.
Relating the type of alert to the operating status
of the vehicle allows you to determine whether
the situation is normal or whether a fault has
occurred: refer to the description of each lamp
for further information.
When the ignition is switched on
Certain red or orange warning lamps come on
for a few seconds when the ignition is switched on. These warning lamps should go off as soon
as the engine is started.
For more information on a system or a function,
refer to the corresponding section.
Persistent warning lamp
If a red or orange warning lamp comes on, there
may be fault which needs further investigation.
If a lamp remains lit
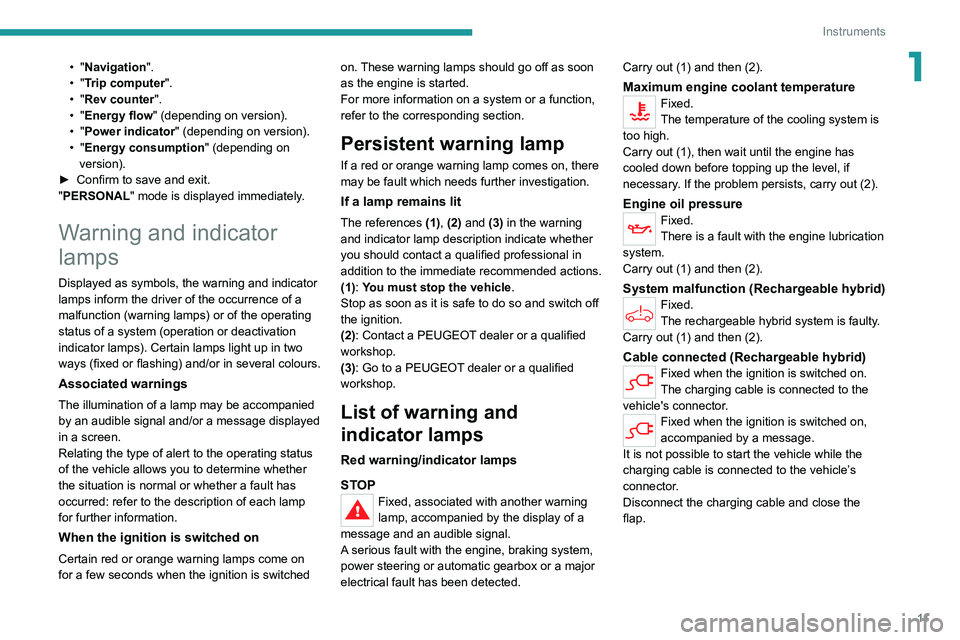
The references (1), (2) and (3) in the warning
and indicator lamp description indicate whether
you should contact a qualified professional in
addition to the immediate recommended actions.
(1): You must stop the vehicle
.
Stop as soon as it is safe to do so and switch off
the ignition.
(2): Contact a PEUGEOT dealer or a qualified
workshop.
(3): Go to a PEUGEOT dealer or a qualified
workshop.
List of warning and
indicator lamps
Red warning/indicator lamps
STOP
Fixed, associated with another warning
lamp, accompanied by the display of a
message and an audible signal.
A serious fault with the engine, braking system,
power steering or automatic gearbox or a major
electrical fault has been detected. Carry out (1) and then (2).
Maximum engine coolant temperatureFixed.
The temperature of the cooling system is
too high.
Carry out (1), then wait until the engine has
cooled down before topping up the level, if
necessary. If the problem persists, carry out (2).
Engine oil pressureFixed.
There is a fault with the engine lubrication
system.
Carry out (1) and then (2).
System malfunction (Rechargeable hybrid)Fixed.
The rechargeable hybrid system is faulty.
Carry out (1) and then (2).
Cable connected (Rechargeable hybrid)Fixed when the ignition is switched on.
The charging cable is connected to the
vehicle's connector.
Fixed when the ignition is switched on,
accompanied by a message.
It is not possible to start the vehicle while the
charging cable is connected to the vehicle’s
connector.
Disconnect the charging cable and close the
flap.
Page 16 of 292
14
Instruments
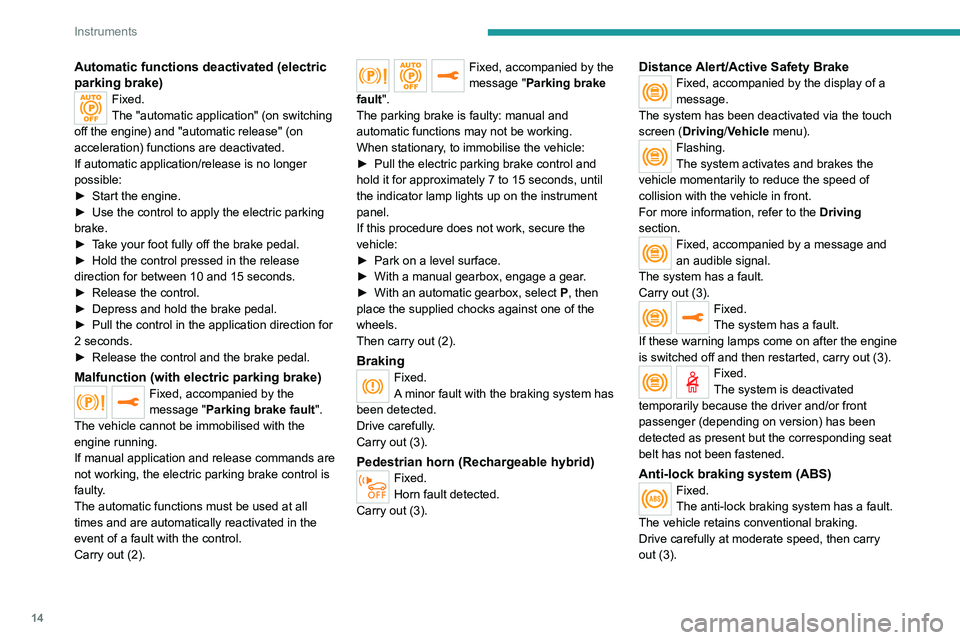
Automatic functions deactivated (electric
parking brake)
Fixed.
The "automatic application" (on switching
off the engine) and "automatic release" (on
acceleration) functions are deactivated.
If automatic application/release is no longer
possible:
►
Start the engine.
►
Use the control to apply the electric parking
brake.
►
T
ake your foot fully off the brake pedal.
►
Hold the control pressed in the release
direction for between 10 and 15 seconds.
►
Release the control.
►
Depress and hold the brake pedal.
►
Pull the control in the application direction for
2
seconds.
►
Release the control and the brake pedal.
Malfunction (with electric parking brake)Fixed, accompanied by the
message "Parking brake fault".
The vehicle cannot be immobilised with the
engine running.
If manual application and release commands are
not working, the electric parking brake control is
faulty.
The automatic functions must be used at all
times and are automatically reactivated in the
event of a fault with the control.
Carry out (2).
Fixed, accompanied by the
message "Parking brake
fault".
The parking brake is faulty: manual and
automatic functions may not be working.
When stationary, to immobilise the vehicle:
►
Pull the electric parking brake control and
hold it for approximately 7 to 15 seconds, until
the indicator lamp lights up on the instrument
panel.
If this procedure does not work, secure the
vehicle:
►
Park on a level surface.
►
With a manual gearbox, engage a gear
.
►
With an automatic gearbox, select
P
, then
place the supplied chocks against one of the
wheels.
Then carry out (2).
BrakingFixed.
A minor fault with the braking system has
been detected.
Drive carefully.
Carry out (3).
Pedestrian horn (Rechargeable hybrid)Fixed.
Horn fault detected.
Carry out (3).
Distance Alert/Active Safety BrakeFixed, accompanied by the display of a
message.
The system has been deactivated via the touch
screen (Driving/Vehicle menu).
Flashing.
The system activates and brakes the
vehicle momentarily to reduce the speed of
collision with the vehicle in front.
For more information, refer to the Driving
section.
Fixed, accompanied by a message and
an audible signal.
The system has a fault.
Carry out (3).
Fixed.
The system has a fault.
If these warning lamps come on after the engine
is switched off and then restarted, carry out (3).
Fixed.
The system is deactivated
temporarily because the driver and/or front
passenger (depending on version) has been
detected as present but the corresponding seat
belt has not been fastened.
Anti-lock braking system (ABS)Fixed.
The anti-lock braking system has a fault.
The vehicle retains conventional braking.
Drive carefully at moderate speed, then carry
out (3).
Page 20 of 292
18
Instruments
► Press this button to temporarily display the
driving range.
Actions required related to a lack of AdBlue®
The following warning lamps light up when the
quantity of AdBlue® is below the reserve level:
driving range of 1,500 miles (2,400 km).
Together with the warning lamps, messages
regularly remind you of the need to top up to
avoid engine starting being prevented. Refer to
the Warning and indicator lamps section for
details of the messages displayed.
For more information on AdBlue®
(BlueHDi) and in particular on topping
up, refer to the corresponding section.
Warning/indicator
lamps on Action Remaining
range
Top up. Between 1,500 miles
and 500
miles (2,400
km and 800
km)
On versions fitted with an electric gauge, the
engine oil level status is displayed on the
instrument panel for a few seconds when
the ignition is switched on, after the servicing
information, in the form of messages.
The level read will only be correct if the vehicle is on level ground and the engine
has been off for more than 30 minutes.
Low oil level
This is indicated by the message " Oil
level incorrect" on the instrument panel,
accompanied by the lighting of the Service
warning lamp and an audible signal.
If a low oil level is confirmed by a check using
the dipstick, the level must be topped up to avoid
damage to the engine.
For more information on Checking levels, refer
to the corresponding section.
Oil gauge malfunction
This is indicated by the message " Oil level
measurement invalid" on the instrument panel.
Consult a PEUGEOT dealer or a qualified
workshop.
In the event of a malfunction of the
electric gauge, the oil level is no longer
monitored.
If the system is faulty, you must check the
engine oil level using the manual dipstick
located in the engine compartment.
For more information on Checking levels,
refer to the corresponding section.
Coolant temperature
indicator
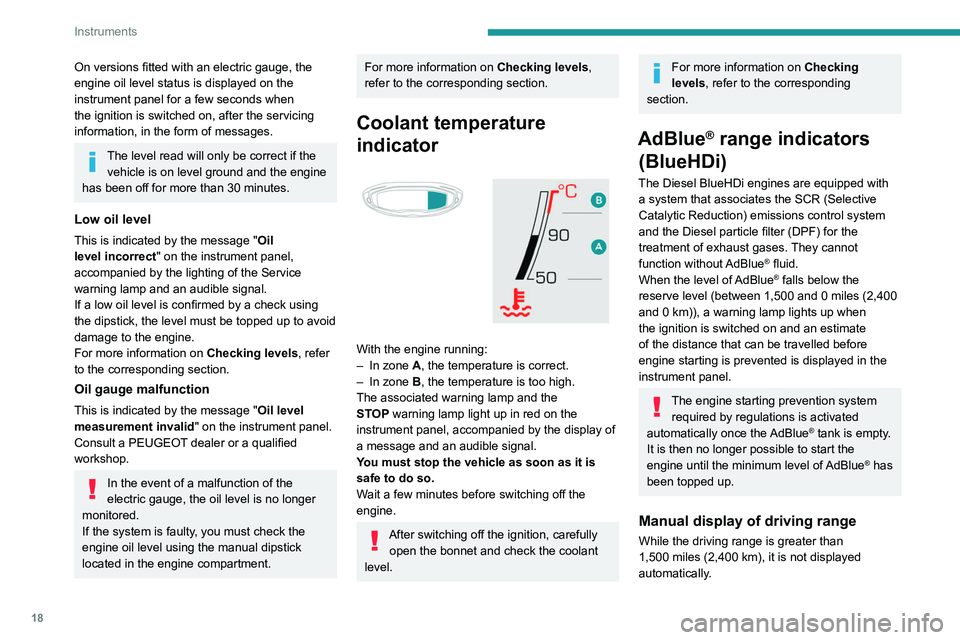
With the engine running:
– In zone A, the temperature is correct.
–
In zone
B, the temperature is too high.
The associated warning lamp and the
STOP
warning lamp light up in red on the
instrument panel, accompanied by the display of
a message and an audible signal.
You must stop the vehicle as soon as it is
safe to do so.
Wait a few minutes before switching off the
engine.
After switching off the ignition, carefully open the bonnet and check the coolant
level.
For more information on Checking
levels, refer to the corresponding
section.
AdBlue® range indicators
(BlueHDi)
The Diesel BlueHDi engines are equipped with
a system that associates the SCR (Selective
Catalytic Reduction) emissions control system
and the Diesel particle filter (DPF) for the
treatment of exhaust gases. They cannot
function without AdBlue
® fluid.
When the level of AdBlue® falls below the
reserve level (between 1,500 and 0 miles (2,400
and 0
km)), a warning lamp lights up when
the ignition is switched on and an estimate
of the distance that can be travelled before
engine starting is prevented is displayed in the
instrument panel.
The engine starting prevention system required by regulations is activated
automatically once the AdBlue
® tank is empty.
It is then no longer possible to start the
engine until the minimum level of AdBlue
® has
been topped up.
Manual display of driving range
While the driving range is greater than
1,500 miles (2,400 km), it is not displayed
automatically.
Page 21 of 292
19
Instruments
1
► Press this button to temporarily display the
driving range.
Actions required related to a lack of AdBlue®
The following warning lamps light up when the
quantity of AdBlue® is below the reserve level:
driving range of 1,500 miles (2,400 km).
Together with the warning lamps, messages
regularly remind you of the need to top up to
avoid engine starting being prevented. Refer to
the Warning and indicator lamps section for
details of the messages displayed.
For more information on AdBlue®
(BlueHDi) and in particular on topping
up, refer to the corresponding section.
Warning/ indicator
lamps on Action Remaining
range
Top up. Between 1,500 miles
and 500
miles (2,400
km and 800
km)
Warning/indicator
lamps on Action Remaining
range
Top up as
soon as
possible.Between
500 miles
and 62
miles (800
km and
100
km)
A top-up is
vital, there is
a risk that the
engine will
be prevented
from starting.Between 62
miles and 0
miles (100
km and 0
km)
To be able
to restart the
engine, add at
least 5 litres of
AdBlue
® to the
tank. 0 miles (km)
Malfunction of the SCR emissions
control system
Malfunction detection
If a malfunction is detected,
these warning lamps come
on, accompanied by an
audible signal and the
display of an "
Emissions
control
fault" message.
The alert is triggered while driving when the
fault is detected for the first time, and thereafter
when switching on the ignition for subsequent
journeys, for as long as the cause of the fault
persists.
If the fault is temporary, the alert
disappears during the next journey, after
self-diagnostic checks of the SCR emissions
control system.
Malfunction confirmed during the
permitted driving phase (between 685
miles and 0
miles (1,100 km and 0 km))
If the fault indication is still displayed
permanently after 31 miles (50 km) of driving, the
fault in the SCR system is confirmed.
The AdBlue warning lamp flashes and
a message is displayed (" Emissions
control
fault: starting prevented in X miles
(kms)"), indicating the driving range in miles or
kilometres.
Page 26 of 292
24
Instruments
eSave
The eSave function makes it possible to reserve
all or part of the electrical energy in the traction
battery for later use during a journey (e.g. driving
in an urban area or in an area reserved for
electric vehicles).
► Select the electric range to be reserved ( 10
km, 20 km or the full range MAX) then activate
the function by pressing ON.
Activation of the function is confirmed by
the lighting of this indicator lamp on the
instrument panel and the indication of the energy
reserve in miles or kms.
► To use the energy reserve, choose the
Electric driving mode in the mode selector.
If the requested range exceeds the
available range (not recommended), the
internal combustion engine starts to recharge
the traction battery up to the requested
threshold. This leads to excessive fuel
consumption.
Upper bar
Certain information is displayed permanently in
the upper bar of the touch screen:
– Time and outside temperature (a blue warning
lamp appears if there is a risk of ice).
– Reminder of the air conditioning information,
and direct access to the corresponding menu.
– Reminder of information from the
RadioMedia and Telephone menus and
For more information about the menus,
refer to the sections describing the audio
and telematics systems.
Radio/Media
Climate
Settings for temperature, air flow, etc.
For more information on Mono-zone semi-
automatic air conditioning and Dual-zone
automatic air conditioning , refer to the
corresponding sections.
Navigation (Depending on equipment)
Driving or Vehicle (Depending on
equipment)
Activation, deactivation and settings for certain
functions.
The functions are organised in 2 tabs: " Driving
functions" and "Vehicle settings".
Telephone
Applications
Access to certain configurable equipment.
Energy
Access to the rechargeable hybrid system
features (energy flow, consumption statistics,
deferred charging, eSave function).
Energy menu
Flow
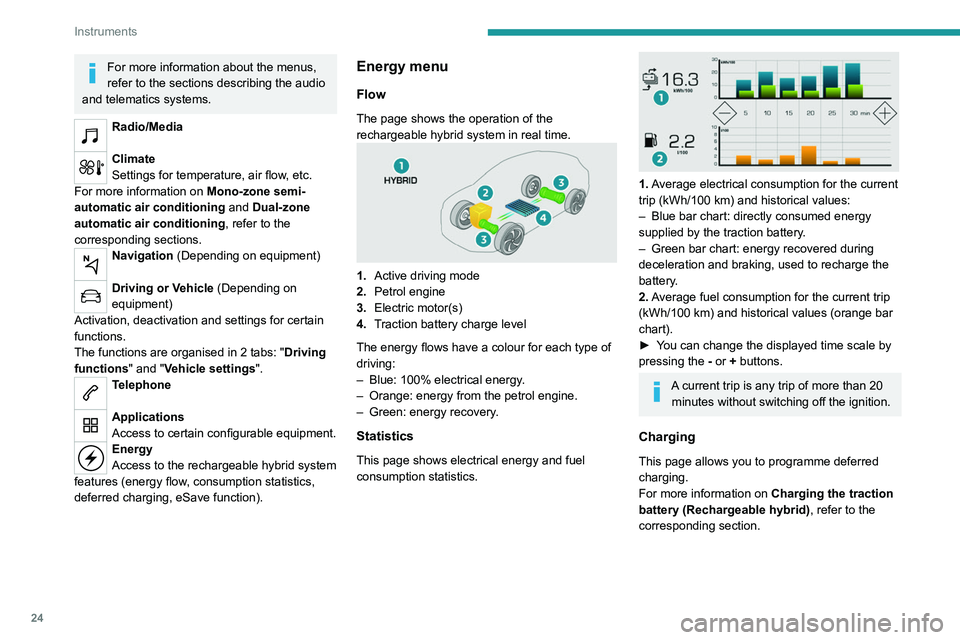
The page shows the operation of the
rechargeable hybrid system in real time.
1. Active driving mode
2. Petrol engine
3. Electric motor(s)
4. Traction battery charge level
The energy flows have a colour for each type of
driving:
–
Blue: 100% electrical energy
.
–
Orange: energy from the petrol engine.
–
Green: energy recovery
.
Statistics
This page shows electrical energy and fuel
consumption statistics.
1. Average electrical consumption for the current
trip (kWh/100 km) and historical values:
–
Blue bar chart: directly consumed energy
supplied by the traction battery
.
–
Green bar chart: energy recovered during
deceleration and braking, used to recharge the
battery
.
2. Average fuel consumption for the current trip
(kWh/100
km) and historical values (orange bar
chart).
►
Y
ou can change the displayed time scale by
pressing the
-
or + buttons.
A current trip is any trip of more than 20 minutes without switching off the ignition.
Charging
This page allows you to programme deferred
charging.
For more information on Charging the traction
battery (Rechargeable hybrid), refer to the
corresponding section.
Page 27 of 292
25
Instruments
1eSave
The eSave function makes it possible to reserve
all or part of the electrical energy in the traction
battery for later use during a journey (e.g. driving
in an urban area or in an area reserved for
electric vehicles).
►
Select the electric range to be reserved ( 10
km
, 20 km or the full range MAX) then activate
the function by pressing ON.
Activation of the function is confirmed by
the lighting of this indicator lamp on the
instrument panel and the
indication of the energy
reserve in miles or kms.
►
T
o use the energy reserve, choose the
Electric driving mode in the mode selector.
If the requested range exceeds the
available range (not recommended), the
internal combustion engine starts to recharge
the traction battery up to the requested
threshold. This leads to excessive fuel
consumption.
Upper bar
Certain information is displayed permanently in
the upper bar of the touch screen:
–
T
ime and outside temperature (a blue warning
lamp appears if there is a risk of ice).
–
Reminder of the air conditioning information,
and direct access to the corresponding menu.
–
Reminder of information from the
RadioMedia
and Telephone menus and
navigation instructions (depending on
equipment).
–
Notifications.
–
Access to the
Settings for the touch screen
and the digital instrument panel (date/time,
languages, units, etc.).
Remote functions
(Rechargeable hybrid)
These features are accessible
using a smartphone, via the
MyPeugeot
application:
–
Battery charge management.
–
T
emperature pre-conditioning management.
–
Consultation of the state of charge and range
of the vehicle.
Installation procedure
► Download the MyPeugeot app from the
appropriate online store for your smartphone.
►
Create an account.
►
Enter the vehicle’
s VIN (code beginning with
"VF" on the vehicle registration document).
For more information on Identification
markings, refer to the corresponding section.
Network coverage
In order to be able to use the various
remotely operable features, ensure that your
vehicle is located in an area covered by the
mobile network.
A lack of network coverage may prevent
communication with the vehicle (for example,
if it is in an underground car park). In such
cases, the application will display a message
indicating that the connection with the vehicle
could not be established.
Page 28 of 292
26
Access
Remote control / Key
Remote control function
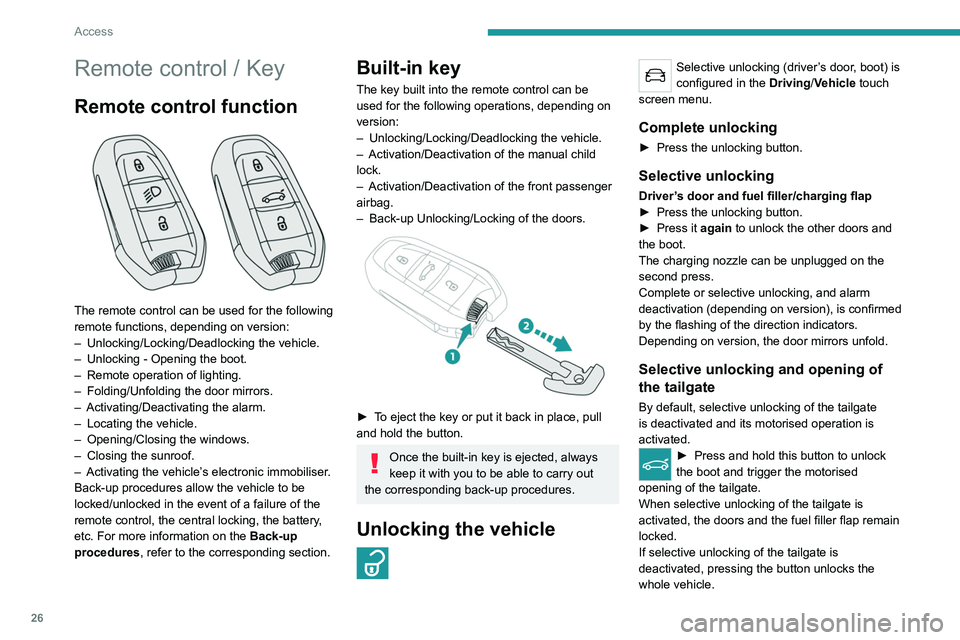
The remote control can be used for the following
remote functions, depending on version:
–
Unlocking/Locking/Deadlocking the vehicle.
–
Unlocking - Opening the boot.
–
Remote operation of lighting.
–
Folding/Unfolding the door mirrors.
–
Activating/Deactivating the alarm.
–
Locating the vehicle.
–
Opening/Closing the windows.
–
Closing the sunroof.
–
Activating the vehicle’
s electronic immobiliser.
Back-up procedures allow the vehicle to be
locked/unlocked in the event of a failure of the
remote control, the central locking, the battery,
etc. For more information on the Back-up
procedures, refer to the corresponding section.
Built-in key
The key built into the remote control can be
used for the following operations, depending on
version:
–
Unlocking/Locking/Deadlocking the vehicle.
–
Activation/Deactivation of the manual child
lock.
–
Activation/Deactivation of the front passenger
airbag.
–
Back-up Unlocking/Locking of the doors.
► To eject the key or put it back in place, pull
and hold the button.
Once the built-in key is ejected, always
keep it with you to be able to carry out
the corresponding back-up procedures.
Unlocking the vehicle
Selective unlocking (driver’s door, boot) is
configured in the Driving/Vehicle touch
screen menu.
Complete unlocking
► Press the unlocking button.
Selective unlocking
Driver’s door and fuel filler/charging flap
► Press the unlocking button.
►
Press it
again to unlock the other doors and
the boot.
The charging nozzle can be unplugged on the
second press.
Complete or selective unlocking, and alarm
deactivation (depending on version), is confirmed
by the flashing of the direction indicators.
Depending on version, the door mirrors unfold.
Selective unlocking and opening of
the tailgate
By default, selective unlocking of the tailgate
is deactivated and its motorised operation is
activated.
► Press and hold this button to unlock
the boot and trigger the motorised
opening of the tailgate.
When selective unlocking of the tailgate is
activated, the doors and the fuel filler flap remain
locked.
If selective unlocking of the tailgate is
deactivated, pressing the button unlocks the
whole vehicle.
If motorised operation of the tailgate is
deactivated, pressing the button partially
opens the tailgate.
To lock the vehicle, it is necessary to close
the tailgate again.
Locking the vehicle
Normal locking
► Press the locking button.
The locking, and the activation of the alarm
depending on version, is confirmed by the
lighting of the direction indicators.
Depending on version, the door mirrors fold.
An access (door or boot) that is not properly closed prevents locking of the
vehicle. However, if the vehicle is fitted with
an alarm, it will be activated after 45 seconds.
If the vehicle is unlocked but the doors or boot
are not subsequently opened, the vehicle
will automatically lock itself again after about
30 seconds. If the vehicle is fitted with an
alarm, it will be reactivated automatically.
Page 31 of 292
29
Access
2Locking the vehicle
Normal locking
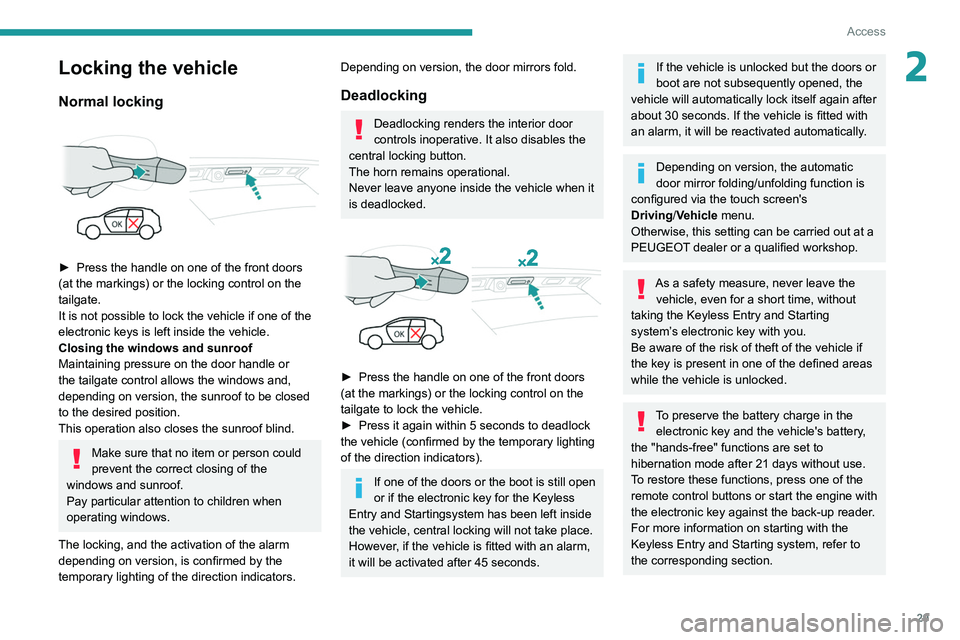
► Press the handle on one of the front doors
(at the markings) or the locking control on the
tailgate.
It is not possible to lock the vehicle if one of the
electronic keys is left inside the vehicle.
Closing the windows and sunroof
Maintaining pressure on the door handle or
the tailgate control allows the windows and,
depending on version, the sunroof to be closed
to the desired position.
This operation also closes the sunroof blind.
Make sure that no item or person could
prevent the correct closing of the
windows and sunroof.
Pay particular attention to children when
operating windows.
The locking, and the activation of the alarm
depending on version, is confirmed by the
temporary lighting of the direction indicators.
Depending on version, the door mirrors fold.
Deadlocking
Deadlocking renders the interior door
controls inoperative. It also disables the
central locking button.
The horn remains operational.
Never leave anyone inside the vehicle when it
is deadlocked.
► Press the handle on one of the front doors
(at the markings) or the locking control on the
tailgate to lock the vehicle.
►
Press it again within 5 seconds to deadlock
the vehicle (confirmed by the temporary lighting
of the direction indicators).
If one of the doors or the boot is still open
or if the electronic key for the Keyless
Entry and Starting
system has been left inside
the vehicle, central locking will not take place.
However
, if the vehicle is fitted with an alarm,
it will be activated after 45
seconds.
If the vehicle is unlocked but the doors or
boot are not subsequently opened, the
vehicle will automatically lock itself again after
about 30
seconds. If the vehicle is fitted with
an alarm, it will be reactivated automatically.
Depending on version, the automatic
door mirror folding/unfolding function is
configured via the touch screen's
Driving/Vehicle menu.
Otherwise, this setting can be carried out at a
PEUGEOT dealer or a qualified workshop.
As a safety measure, never leave the vehicle, even for a short time, without
taking the Keyless Entry and Starting
system’s electronic key with you.
Be aware of the risk of theft of the vehicle if
the key is present in one of the defined areas
while the vehicle is unlocked.
To preserve the battery charge in the electronic key and the vehicle's battery,
the "hands-free" functions are set to
hibernation mode after 21 days without use.
To restore these functions, press one of the
remote control buttons or start the engine with
the electronic key against the back-up reader.
For more information on starting with the
Keyless Entry and Starting system, refer to
the corresponding section.