lock PEUGEOT 3008 2023 Owners Manual
[x] Cancel search | Manufacturer: PEUGEOT, Model Year: 2023, Model line: 3008, Model: PEUGEOT 3008 2023Pages: 292, PDF Size: 9.43 MB
Page 4 of 292
2
Contents
■
Overview
■
Eco-driving
1Dashboard instrumentsDriver information 9
Digital instrument panels 9
Warning and indicator lamps 11
Indicators 16
Manual test 20
Distance recorders 20
Lighting dimmer 21
Trip computer 21
Touch screen 22
Remotely operable additional functions
(Rechargeable hybrid)
24
2AccessElectronic key with remote control function
and built-in key 26
Keyless Entry and Start 28
Central locking 30
Back-up procedures 30
Doors 32
Boot 32
Hands-free tailgate 33
Alarm 37
Electric windows 38
Panoramic sunroof 39
3Ease of use and comfortDriving position 42
Front seats 43
Steering wheel adjustment 47
Mirrors 47
Rear bench seat 49
Rear seats 50
Seat modularity 55
Heating and Ventilation 56
Dual-zone automatic air conditioning 57
Front demisting - defrosting 60
Heated windscreen 60
Rear screen demisting/defrosting 61
Temperature pre-conditioning
(Rechargeable hybrid)
61
Front fittings 62
Courtesy lamps 66
Interior ambient lighting 66
Rear fittings 66
Boot fittings 68
4Lighting and visibilityLighting control stalk 74
Direction indicators 75
Headlamp beam height adjustment 76
Automatic illumination of headlamps 76
Guide-me-home and welcome lighting 77
Automatic lighting systems - General
recommendations
77
Automatic headlamp dipping 77
Static cornering lighting 78
Night Vision 79
Wiper control stalk 80
Automatic wipers 81
Changing a wiper blade 83
5SafetyGeneral safety recommendations 84
Hazard warning lamps 84
Horn 85
Pedestrian horn (Rechargeable hybrid) 85
Emergency or assistance 85
Electronic stability control (ESC) 87
Advanced Grip Control 89
Hill Assist Descent Control 90
Seat belts 91
Airbags 95
Child seats 97
Deactivating the front passenger airbag 99
ISOFIX child seats 102
i-Size child seats 108
Child lock 109
6DrivingDriving recommendations 111
Starting/Switching off the engine 11 2
Starting rechargeable hybrid vehicles 11 3
Electric parking brake 11 5
6-speed manual gearbox 11 7
Automatic gearbox (type 1) 11 7
Automatic gearbox (type 2) 120
Hill start assist 124
Driving modes 125
Gear shift indicator 126
Stop & Start 127
Tyre under-inflation detection 128
Driving and manoeuvring aids - General
recommendations
130
Memorising speeds 131
Road signs recognition 131
Speed limiter 135 CarM an uals 2 .c o m
Page 7 of 292
5
Overview
D.Select previous/next media
Confirm a selection
E. Access the Telephone menu
Manage calls
F. Select an audio source
G. Display the list of radio stations/audio tracks
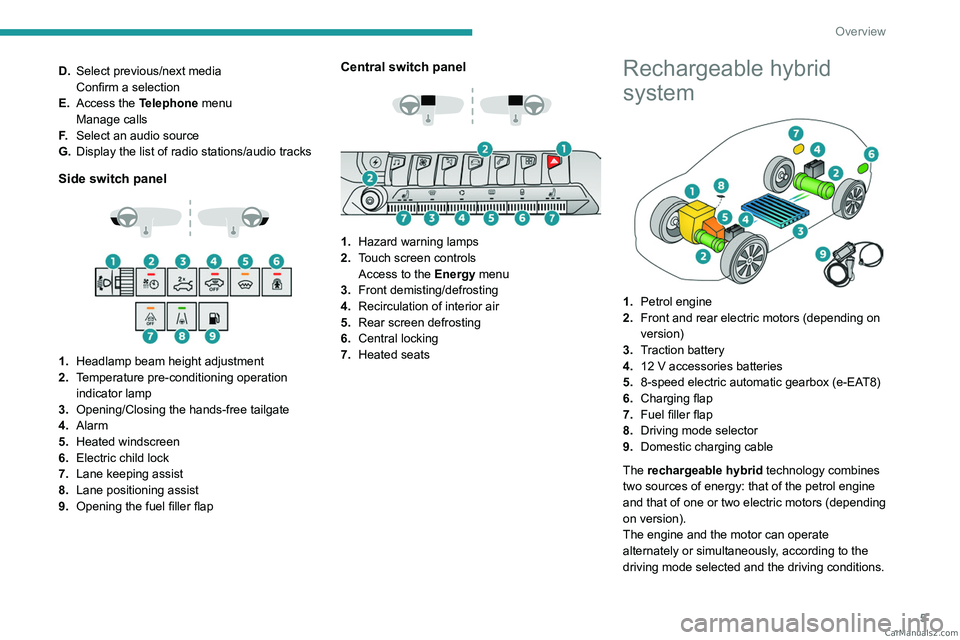
Side switch panel
1. Headlamp beam height adjustment
2. Temperature pre-conditioning operation
indicator lamp
3. Opening/Closing the hands-free tailgate
4. Alarm
5. Heated windscreen
6. Electric child lock
7. Lane keeping assist
8. Lane positioning assist
9. Opening the fuel filler flap
Central switch panel
1. Hazard warning lamps
2. Touch screen controls
Access to the Energy menu
3. Front demisting/defrosting
4. Recirculation of interior air
5. Rear screen defrosting
6. Central locking
7. Heated seats
Rechargeable hybrid
system
1.Petrol engine
2. Front and rear electric motors (depending on
version)
3. Traction battery
4. 12 V accessories batteries
5. 8-speed electric automatic gearbox (e-EAT8)
6. Charging flap
7. Fuel filler flap
8. Driving mode selector
9. Domestic charging cable
The rechargeable hybrid technology combines
two sources of energy: that of the petrol engine
and that of one or two electric motors (depending
on version).
The engine and the motor can operate
alternately or simultaneously, according to the
driving mode selected and the driving conditions. CarM an uals 2 .c o m
Page 16 of 292
14
Dashboard instruments
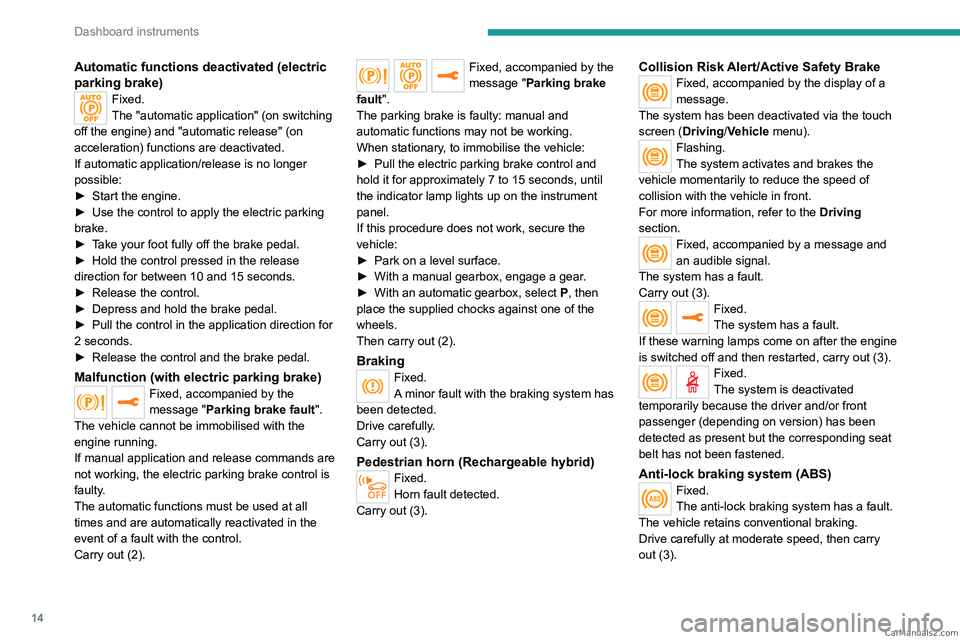
Automatic functions deactivated (electric
parking brake)
Fixed.
The "automatic application" (on switching
off the engine) and "automatic release" (on
acceleration) functions are deactivated.
If automatic application/release is no longer
possible:
►
Start the engine.
►
Use the control to apply the electric parking
brake.
►
T
ake your foot fully off the brake pedal.
►
Hold the control pressed in the release
direction for between 10 and 15 seconds.
►
Release the control.
►
Depress and hold the brake pedal.
►
Pull the control in the application direction for
2
seconds.
►
Release the control and the brake pedal.
Malfunction (with electric parking brake)Fixed, accompanied by the
message "Parking brake fault".
The vehicle cannot be immobilised with the
engine running.
If manual application and release commands are
not working, the electric parking brake control is
faulty.
The automatic functions must be used at all
times and are automatically reactivated in the
event of a fault with the control.
Carry out (2).
Fixed, accompanied by the
message "Parking brake
fault".
The parking brake is faulty: manual and
automatic functions may not be working.
When stationary, to immobilise the vehicle:
►
Pull the electric parking brake control and
hold it for approximately 7 to 15 seconds, until
the indicator lamp lights up on the instrument
panel.
If this procedure does not work, secure the
vehicle:
►
Park on a level surface.
►
With a manual gearbox, engage a gear
.
►
With an automatic gearbox, select
P
, then
place the supplied chocks against one of the
wheels.
Then carry out (2).
BrakingFixed.
A minor fault with the braking system has
been detected.
Drive carefully.
Carry out (3).
Pedestrian horn (Rechargeable hybrid)Fixed.
Horn fault detected.
Carry out (3).
Collision Risk Alert/Active Safety BrakeFixed, accompanied by the display of a
message.
The system has been deactivated via the touch
screen (Driving/Vehicle menu).
Flashing.
The system activates and brakes the
vehicle momentarily to reduce the speed of
collision with the vehicle in front.
For more information, refer to the Driving
section.
Fixed, accompanied by a message and
an audible signal.
The system has a fault.
Carry out (3).
Fixed.
The system has a fault.
If these warning lamps come on after the engine
is switched off and then restarted, carry out (3).
Fixed.
The system is deactivated
temporarily because the driver and/or front
passenger (depending on version) has been
detected as present but the corresponding seat
belt has not been fastened.
Anti-lock braking system (ABS)Fixed.
The anti-lock braking system has a fault.
The vehicle retains conventional braking.
Drive carefully at moderate speed, then carry
out (3). CarM an uals 2 .c o m
Page 19 of 292
17
Dashboard instruments
1The servicing information is displayed in the
instrument panel. Depending on the version of
the vehicle:
–
The distance recorder display line indicates
the distance remaining before the next service
is due, or the distance travelled since it was due
preceded by the "-" sign.
–
An alert message indicates the distance
remaining, as well as the period before the next
service is due or how long it is overdue.
The value indicated is calculated according to the distance covered and
the time elapsed since the last service.
The alert may also be triggered close to a
due date.
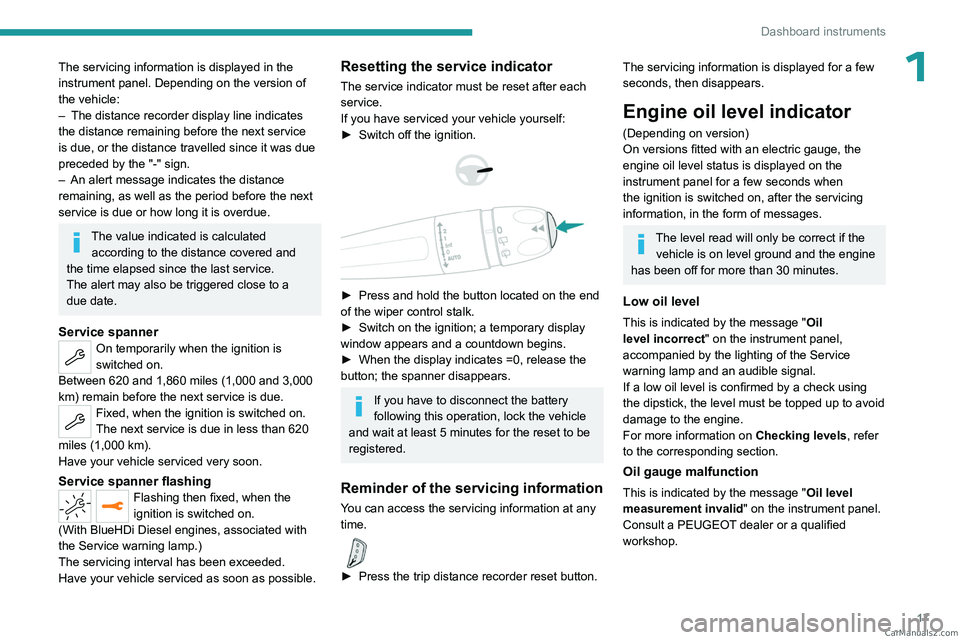
Service spannerOn temporarily when the ignition is
switched on.
Between 620 and 1,860 miles (1,000 and 3,000
km) remain before the next service is due.
Fixed, when the ignition is switched on.
The next service is due in less than 620
miles (1,000 km).
Have your vehicle serviced very soon.
Service spanner flashingFlashing then fixed, when the
ignition is switched on.
(With
BlueHDi Diesel engines, associated with
the Service warning lamp.)
The servicing interval has been exceeded.
Have your vehicle serviced as soon as possible.
Resetting the service indicator
The service indicator must be reset after each
service.
If you have serviced your vehicle yourself:
►
Switch off the ignition.
► Press and hold the button located on the end
of the wiper control stalk.
►
Switch on the ignition; a temporary display
window appears and a countdown begins.
►
When the display indicates =0, release the
button; the spanner disappears.
If you have to disconnect the battery
following this operation, lock the vehicle
and wait at least 5 minutes for the reset to be
registered.
Reminder of the servicing information
You can access the servicing information at any
time.
► Press the trip distance recorder reset button.
The servicing information is displayed for a few
seconds, then disappears.
Engine oil level indicator
(Depending on version)
On versions fitted with an electric gauge, the
engine oil level status is displayed on the
instrument panel for a few seconds when
the ignition is switched on, after the servicing
information, in the form of messages.
The level read will only be correct if the vehicle is on level ground and the engine
has been off for more than 30 minutes.
Low oil level
This is indicated by the message " Oil
level incorrect" on the instrument panel,
accompanied by the lighting of the Service
warning lamp and an audible signal.
If a low oil level is confirmed by a check using
the dipstick, the level must be topped up to avoid
damage to the engine.
For more information on Checking levels, refer
to the corresponding section.
Oil gauge malfunction
This is indicated by the message " Oil level
measurement invalid" on the instrument panel.
Consult a PEUGEOT dealer or a qualified
workshop. CarM an uals 2 .c o m
Page 22 of 292
20
Dashboard instruments
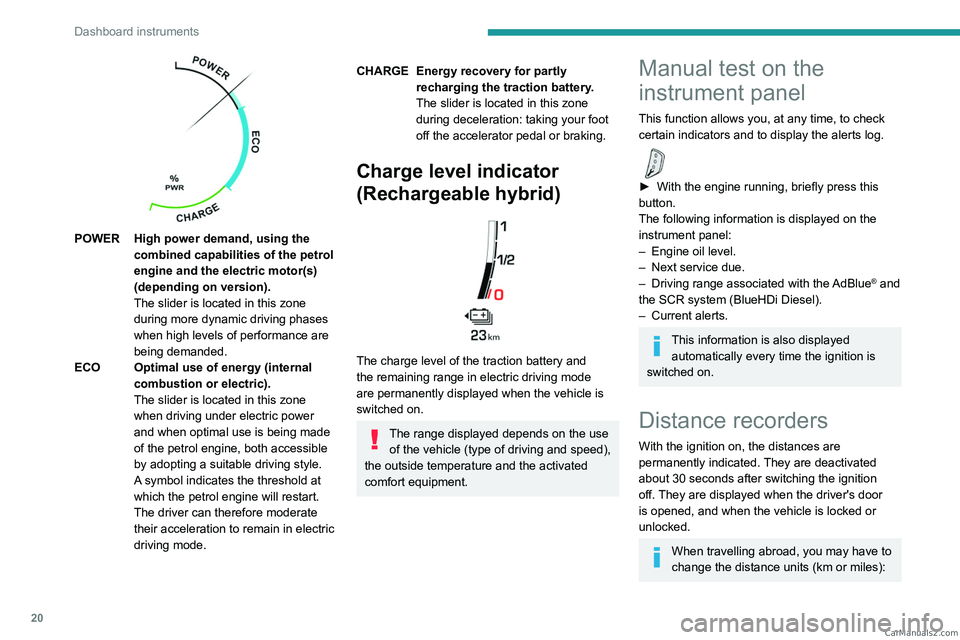
POWER High power demand, using the combined capabilities of the petrol
engine and the electric motor(s)
(depending on version).
The slider is located in this zone
during more dynamic driving phases
when high levels of performance are
being demanded.
ECO Optimal use of energy (internal combustion or electric).
The slider is located in this zone
when driving under electric power
and when optimal use is being made
of the petrol engine, both accessible
by adopting a suitable driving style.
A symbol indicates the threshold at
which the petrol engine will restart.
The driver can therefore moderate
their acceleration to remain in electric
driving mode.
CHARGE Energy recovery for partly recharging the traction battery.
The slider is located in this zone
during deceleration: taking your foot
off the accelerator pedal or braking.
Charge level indicator
(Rechargeable hybrid)
The charge level of the traction battery and
the remaining range in electric driving mode
are permanently displayed when the vehicle is
switched on.
The range displayed depends on the use of the vehicle (type of driving and speed),
the outside temperature and the activated
comfort equipment.
Manual test on the
instrument panel
This function allows you, at any time, to check
certain indicators and to display the alerts log.
► With the engine running, briefly press this
button.
The following information is displayed on the
instrument panel:
–
Engine oil level.
–
Next service due.
–
Driving range associated with the
AdBlue® and
the SCR system (BlueHDi Diesel).
–
Current alerts.
This information is also displayed automatically every time the ignition is
switched on.
Distance recorders
With the ignition on, the distances are
permanently indicated. They are deactivated
about 30 seconds after switching the ignition
off. They are displayed when the driver's door
is opened, and when the vehicle is locked or
unlocked.
When travelling abroad, you may have to
change the distance units (km or miles): CarM an uals 2 .c o m
Page 28 of 292
26
Access
Electronic key with
remote control function
and built-in key
Remote control function
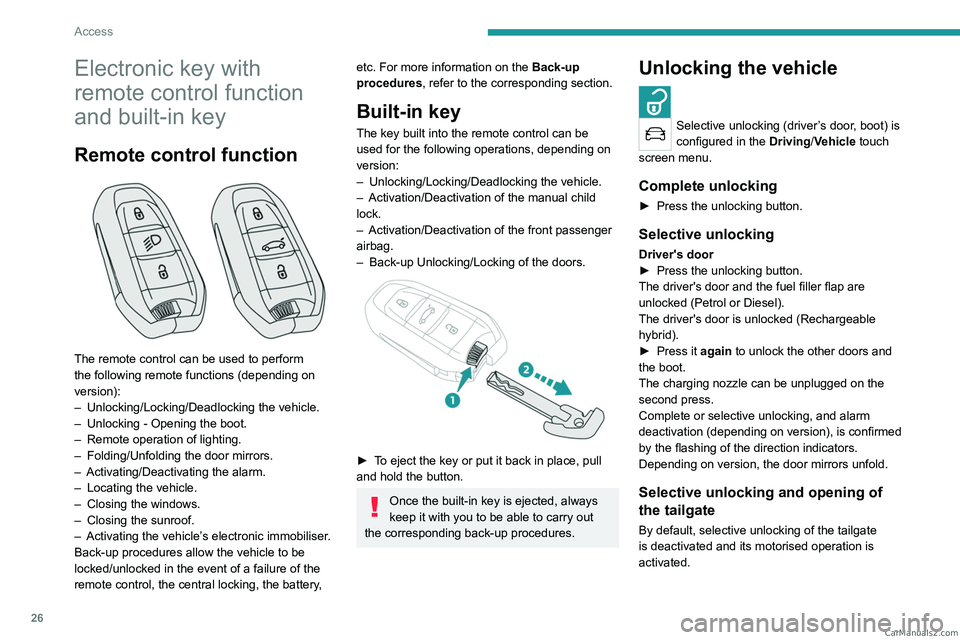
The remote control can be used to perform
the following remote functions (depending on
version):
–
Unlocking/Locking/Deadlocking the vehicle.
–
Unlocking - Opening the boot.
–
Remote operation of lighting.
–
Folding/Unfolding the door mirrors.
–
Activating/Deactivating the alarm.
–
Locating the vehicle.
–
Closing the windows.
–
Closing the sunroof.
–
Activating the vehicle’
s electronic immobiliser.
Back-up procedures allow the vehicle to be
locked/unlocked in the event of a failure of the
remote control, the central locking, the battery,
etc. For more information on the Back-up
procedures, refer to the corresponding section.
Built-in key
The key built into the remote control can be
used for the following operations, depending on
version:
–
Unlocking/Locking/Deadlocking the vehicle.
–
Activation/Deactivation of the manual child
lock.
–
Activation/Deactivation of the front passenger
airbag.
–
Back-up Unlocking/Locking of the doors.
► To eject the key or put it back in place, pull
and hold the button.
Once the built-in key is ejected, always
keep it with you to be able to carry out
the corresponding back-up procedures.
Unlocking the vehicle
Selective unlocking (driver’s door, boot) is
configured in the Driving/Vehicle touch
screen menu.
Complete unlocking
► Press the unlocking button.
Selective unlocking
Driver's door
► Press the unlocking button.
The driver's door and the fuel filler flap are
unlocked (Petrol or Diesel).
The driver's door is unlocked (Rechargeable
hybrid).
►
Press it
again to unlock the other doors and
the boot.
The charging nozzle can be unplugged on the
second press.
Complete or selective unlocking, and alarm
deactivation (depending on version), is confirmed
by the flashing of the direction indicators.
Depending on version, the door mirrors unfold.
Selective unlocking and opening of
the tailgate
By default, selective unlocking of the tailgate
is deactivated and its motorised operation is
activated. CarM an uals 2 .c o m
Page 29 of 292
27
Access
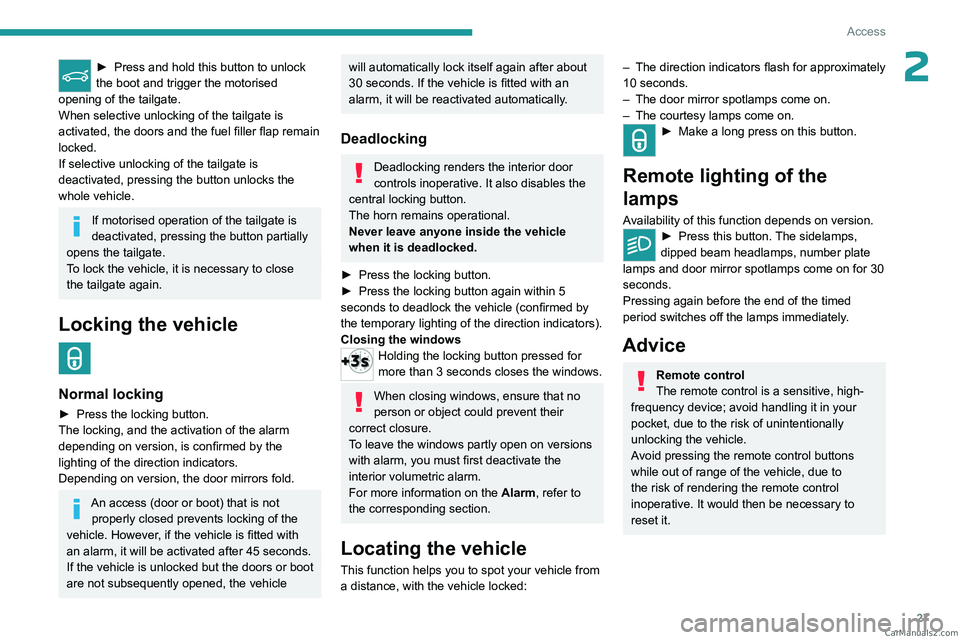
2► Press and hold this button to unlock
the boot and trigger the motorised
opening of the tailgate.
When selective unlocking of the tailgate is
activated, the doors and the fuel filler flap remain
locked.
If selective unlocking of the tailgate is
deactivated, pressing the button unlocks the
whole vehicle.
If motorised operation of the tailgate is
deactivated, pressing the button partially
opens the tailgate.
To lock the vehicle, it is necessary to close
the tailgate again.
Locking the vehicle
Normal locking
► Press the locking button.
The locking, and the activation of the alarm
depending on version, is confirmed by the
lighting of the direction indicators.
Depending on version, the door mirrors fold.
An access (door or boot) that is not properly closed prevents locking of the
vehicle. However, if the vehicle is fitted with
an alarm, it will be activated after 45
seconds.
If the vehicle is unlocked but the doors or boot
are not subsequently opened,
the vehicle
will automatically lock itself again after about
30 seconds. If the vehicle is fitted with an
alarm, it will be reactivated automatically.
Deadlocking
Deadlocking renders the interior door
controls inoperative. It also disables the
central locking button.
The horn remains operational.
Never leave anyone inside the vehicle
when it is deadlocked.
►
Press the locking button.
►
Press the locking button again within 5
seconds to deadlock the vehicle (confirmed by
the temporary lighting of the direction indicators).
Closing the windows
Holding the locking button pressed for
more than 3 seconds closes the windows.
When closing windows, ensure that no
person or object could prevent their
correct closure.
To leave the windows partly open on versions
with alarm, you must first deactivate the
interior volumetric alarm.
For more information on the Alarm, refer to
the corresponding section.
Locating the vehicle
This function helps you to spot your vehicle from
a distance, with the vehicle locked:
– The direction indicators flash for approximately
10 seconds.
–
The door mirror spotlamps come on.
–
The courtesy lamps come on.
► Make a long press on this button.
Remote lighting of the
lamps
Availability of this function depends on version.► Press this button. The sidelamps,
dipped beam headlamps, number plate
lamps and door mirror spotlamps come on for 30
seconds.
Pressing again before the end of the timed
period switches off the lamps immediately.
Advice
Remote control
The remote control is a sensitive, high-
frequency device; avoid handling it in your
pocket, due to the risk of unintentionally
unlocking the vehicle.
Avoid pressing the remote control buttons
while out of range of the vehicle, due to
the risk of rendering the remote control
inoperative. It would then be necessary to
reset it. CarM an uals 2 .c o m
Page 30 of 292
28
Access
Anti-theft protection
Do not modify the electronic vehicle
immobiliser, as this might result in
malfunctions.
Remember to turn the steering wheel to
engage the steering lock.
Locking the vehicle
Driving with the doors locked could make
it more difficult for the emergency services
to enter the passenger compartment in an
emergency.
As a safety precaution, take the electronic key
with you when leaving the vehicle, even for a
short time.
Purchasing a second-hand vehicle
Have the key codes memorised by a
PEUGEOT dealer, to ensure that the keys
in your possession are the only ones able to
start the vehicle.
Keyless Entry and Start
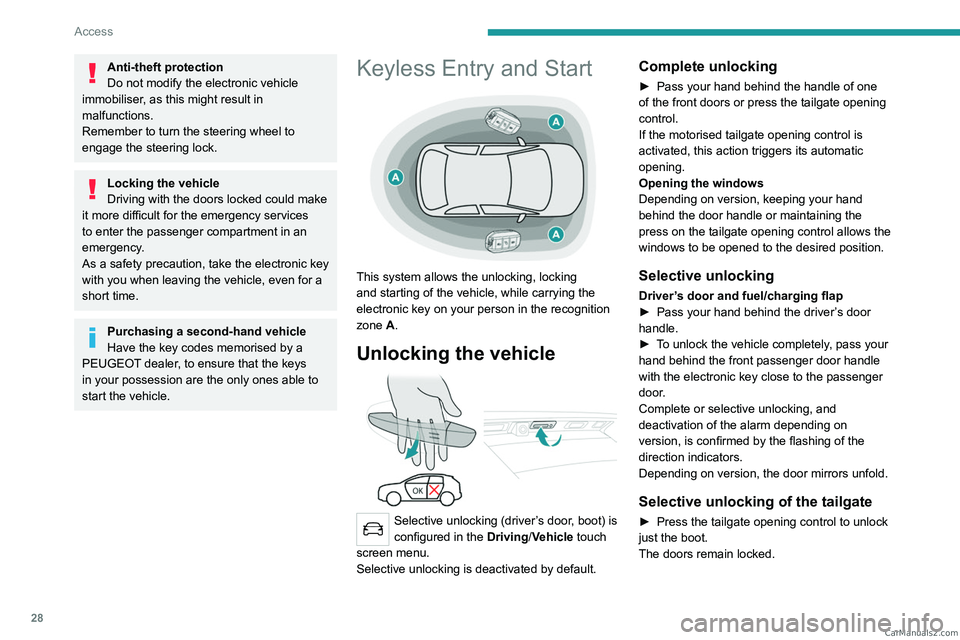
This system allows the unlocking, locking
and starting of the vehicle, while carrying the
electronic key on your person in the recognition
zone A.
Unlocking the vehicle
Selective unlocking (driver’s door, boot) is
configured in the Driving/Vehicle touch
screen menu.
Selective unlocking is deactivated by default.
Complete unlocking
► Pass your hand behind the handle of one
of the front doors or press the tailgate opening
control.
If the motorised tailgate opening control is
activated, this action triggers its automatic
opening.
Opening the windows
Depending on version, keeping your hand
behind the door handle or maintaining the
press on the tailgate opening control allows the
windows to be opened to the desired position.
Selective unlocking
Driver’s door and fuel/charging flap
► Pass your hand behind the driver ’s door
handle.
►
T
o unlock the vehicle completely, pass your
hand behind the front passenger door handle
with the electronic key close to the passenger
door.
Complete or selective unlocking, and
deactivation of the alarm
depending on
version,
is confirmed by the flashing of the
direction indicators.
Depending on version, the door mirrors unfold.
Selective unlocking of the tailgate
► Press the tailgate opening control to unlock
just the boot.
The doors remain locked. CarM an uals 2 .c o m
Page 31 of 292
29
Access
2If selective unlocking of the tailgate is
deactivated, pressing this control also
unlocks the doors.
Locking the vehicle
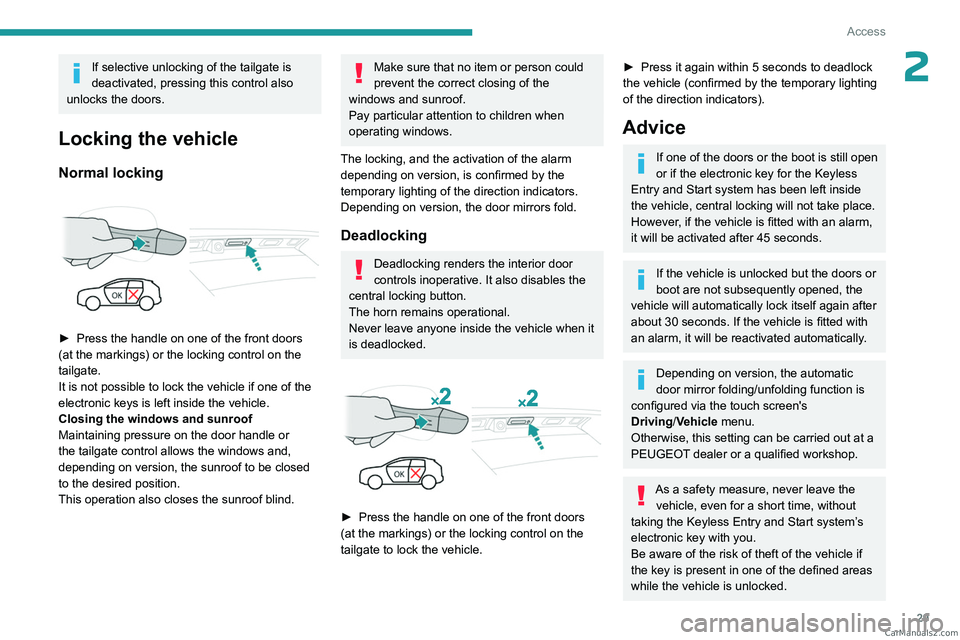
Normal locking
► Press the handle on one of the front doors
(at the markings) or the locking control on the
tailgate.
It is not possible to lock the vehicle if one of the
electronic keys is left inside the vehicle.
Closing the windows and sunroof
Maintaining pressure on the door handle or
the tailgate control allows the windows and,
depending on version, the sunroof to be closed
to the desired position.
This operation also closes the sunroof blind.
Make sure that no item or person could
prevent the correct closing of the
windows and sunroof.
Pay particular attention to children when
operating windows.
The locking, and the activation of the alarm
depending on version, is confirmed by the
temporary lighting of the direction indicators.
Depending on version, the door mirrors fold.
Deadlocking
Deadlocking renders the interior door
controls inoperative. It also disables the
central locking button.
The horn remains operational.
Never leave anyone inside the vehicle when it
is deadlocked.
► Press the handle on one of the front doors
(at the markings) or the locking control on the
tailgate to lock the vehicle.
► Press it again within 5 seconds to deadlock
the vehicle (confirmed by the temporary lighting
of the direction indicators).
Advice
If one of the doors or the boot is still open
or if the electronic key for the Keyless
Entry and Start
system has been left inside
the vehicle, central locking will not take place.
However
, if the vehicle is fitted with an alarm,
it will be activated after 45
seconds.
If the vehicle is unlocked but the doors or
boot are not subsequently opened, the
vehicle will automatically lock itself again after
about 30
seconds. If the vehicle is fitted with
an alarm, it will be reactivated automatically.
Depending on version, the automatic
door mirror folding/unfolding function is
configured via the touch screen's
Driving/Vehicle menu.
Otherwise, this setting can be carried out at a
PEUGEOT dealer or a qualified workshop.
As a safety measure, never leave the vehicle, even for a short time, without
taking the Keyless Entry and Start system’s
electronic key with you.
Be aware of the risk of theft of the vehicle if
the key is present in one of the defined areas
while the vehicle is unlocked. CarM an uals 2 .c o m
Page 32 of 292
30
Access
To preserve the battery charge in the electronic key and the vehicle's battery,
the "hands-free" functions are set to
hibernation mode after 21 days without use.
To restore these functions, press one of the
remote control buttons or start the engine with
the electronic key against the back-up reader.
For more information on starting with the
Keyless Entry and Start system, refer to the
corresponding section.
Electrical interference
The electronic key may not work if it is
close to an electronic device (e.g.
mobile
telephone (switched on or on standby), laptop
computer, strong magnetic fields). If this
occurs, move the electronic key away from
the electronic device.
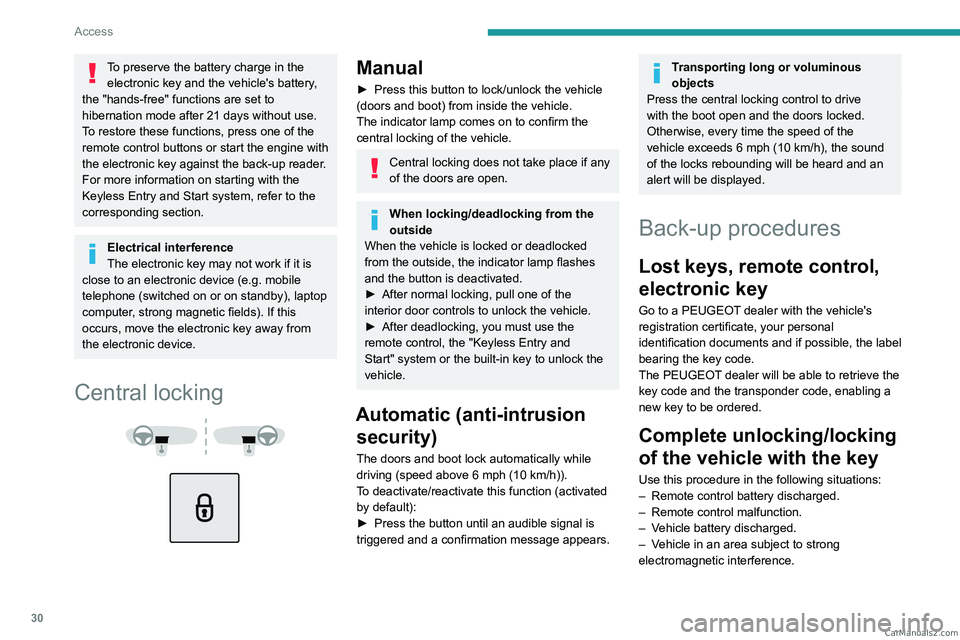
Central locking
Manual
► Press this button to lock/unlock the vehicle
(doors and boot) from inside the vehicle.
The indicator lamp comes on to confirm the
central locking of the vehicle.
Central locking does not take place if any
of the doors are open.
When locking/deadlocking from the
outside
When the vehicle is locked or deadlocked
from the outside, the indicator lamp flashes
and the button is deactivated.
►
After normal locking, pull one of the
interior door controls to unlock the vehicle.
►
After deadlocking, you must use the
remote control, the "Keyless Entry and
Start" system or the built-in key to unlock the
vehicle.
Automatic (anti-intrusion security)
The doors and boot lock automatically while
driving (speed above 6 mph (10
km/h)).
To deactivate/reactivate this function (activated
by default):
►
Press the button until an audible signal is
triggered and a confirmation message appears.
Transporting long or voluminous
objects
Press the central locking control to drive
with the boot open and the doors locked.
Otherwise, every time the speed of the
vehicle exceeds 6 mph (10 km/h), the sound
of the locks rebounding will be heard and an
alert will be displayed.
Back-up procedures
Lost keys, remote control,
electronic key
Go to a PEUGEOT dealer with the vehicle's
registration certificate, your personal
identification documents and if possible, the label
bearing the key code.
The PEUGEOT dealer will be able to retrieve the
key code and the transponder code, enabling a
new key to be ordered.
Complete unlocking/locking
of the vehicle with the key
Use this procedure in the following situations:
– Remote control battery discharged.
–
Remote control malfunction.
–
V
ehicle battery discharged.
–
V
ehicle in an area subject to strong
electromagnetic interference. CarM an uals 2 .c o m