towing Peugeot 308 2015.5 Owner's Manual - RHD (UK, Australia)
[x] Cancel search | Manufacturer: PEUGEOT, Model Year: 2015.5, Model line: 308, Model: Peugeot 308 2015.5Pages: 396, PDF Size: 10.06 MB
Page 5 of 396
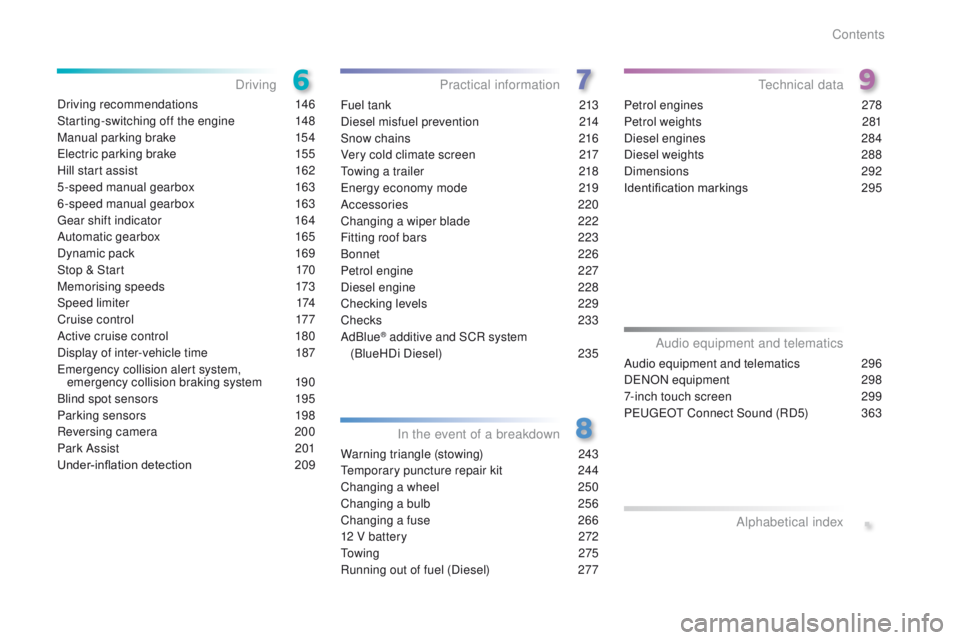
Driving recommendations 146
Starting-switching off the engine
1
48
Manual parking brake
1
54
el
ectric parking brake
1
55
Hill start assist
1
62
5-speed manual gearbox
1
63
6-speed manual gearbox
1
63
ge
ar shift indicator
1
64
Automatic gearbox
1
65
Dynamic pack
1
69
Stop & Start
1
70
Memorising speeds
1
73
Speed limiter
1
74
Cruise control
1
77
Active cruise control
1
80
Display of inter-vehicle time
1
87
em
ergency collision alert system,
emergency collision braking system
1
90
Blind spot sensors
1
95
Parking sensors
1
98
Reversing camera
2
00
Park Assist
2
01
Under-inflation detection
20
9Fuel tank
2 13
Diesel misfuel prevention
2
14
Snow chains
2
16
Very cold climate screen
2
17
to
wing a trailer
2
18
en
ergy economy mode
2
19
Accessories
2
20
Changing a wiper blade
2
22
Fitting roof bars
2
23
Bonnet
226
Petrol engine
2
27
Diesel engine
2
28
Checking levels
2
29
Checks
233
AdBlue
® additive and SCR system
(
BlueHDi Diesel)
23
5
Warning triangle (stowing)
2
43
te
mporary puncture repair kit
2
44
Changing a wheel
2
50
Changing a bulb
2
56
Changing a fuse
2
66
12 V battery
2
72
to
w i n g
2 7 5
Running out of fuel (Diesel)
2
77Petrol engines
2
78
Petrol weights
2
81
Diesel engines
2
84
Diesel weights
2
88
Dimensions
2
92
Identification markings
2
95
Driving
Practical information
In the event of a breakdownte chnical data
.
Audio equipment and telematics 296
D
eN
ON equipment
2
98
7-inch touch screen
2
99
Peuge
O
t Connect Sound (RD5)
3
63
Audio equipment and telematics
Alphabetical index
Contents
Page 7 of 396
5
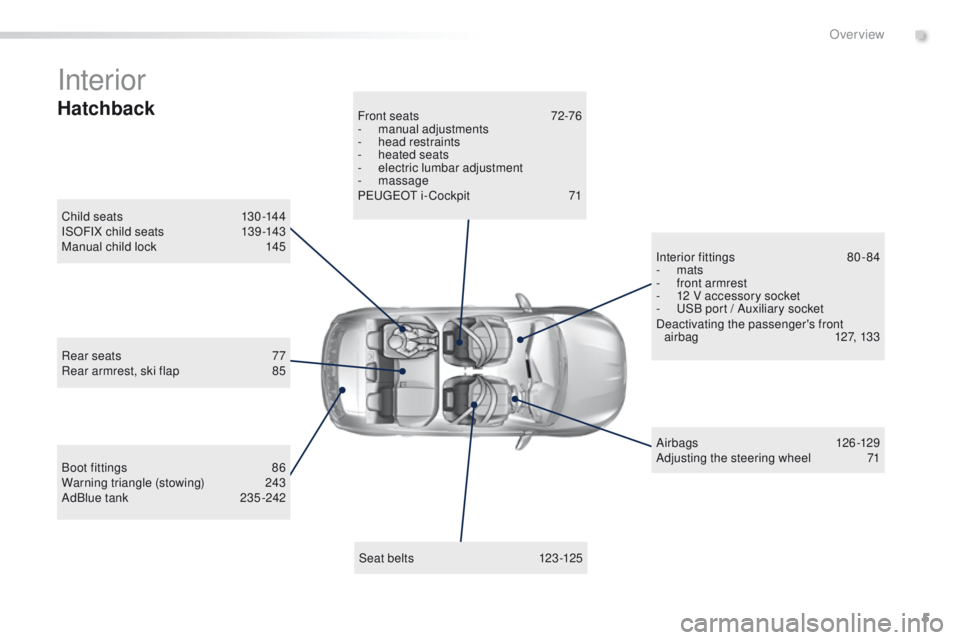
Interior
Boot fittings 86
Warning triangle (stowing) 2 43
AdBlue tank
2
35 -242
Seat belts
1
23-125
Front seats
7
2-76
-
m
anual adjustments
-
h
ead restraints
-
hea
ted seats
-
e
lectric lumbar adjustment
- massage
P
e
uge
Ot
i- Cockpit
7
1
Child seats
1
30 -144
ISOFIX child seats
1
39 -143
Manual child lock
1
45
A ir bags
126 -129
Adjusting the steering wheel 7 1
Interior fittings
8
0-84
- mats
-
f
ront armrest
-
1
2 V accessory socket
- u
S
B port / Auxiliary socket
Deactivating the passenger's front airbag
1
27, 133
Rear seats
7
7
Rear armrest, ski flap
8
5
Hatchback
.
Over view
Page 8 of 396
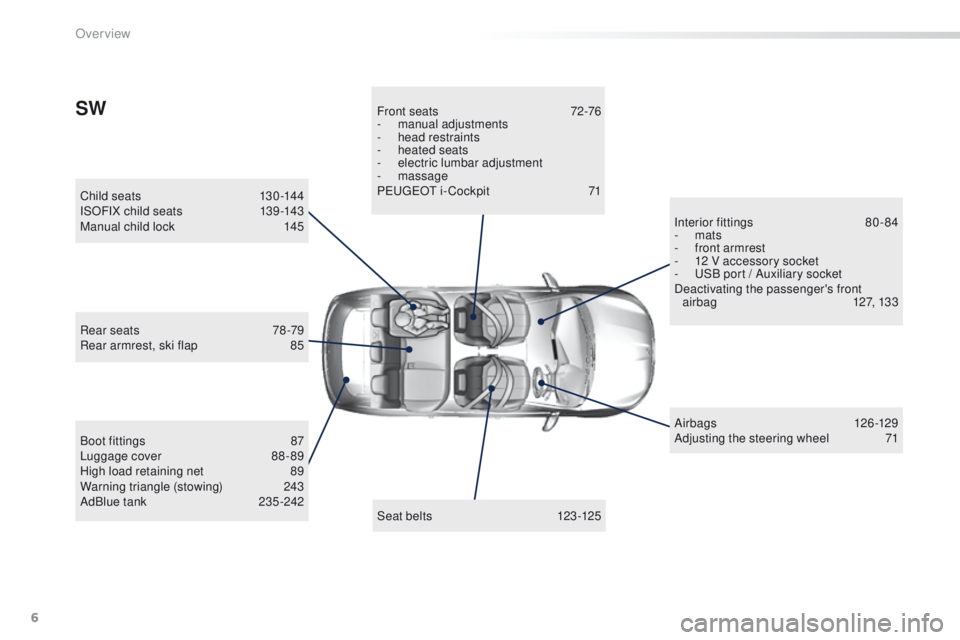
6
Boot fittings 87
L uggage cover 8 8 - 89
High load retaining net
8
9
Warning triangle (stowing)
2
43
AdBlue tank
2
35 -242Seat belts
1
23-125
Front seats
7
2-76
-
m
anual adjustments
-
h
ead restraints
-
hea
ted seats
-
e
lectric lumbar adjustment
- massage
P
e
uge
Ot
i- Cockpit
7
1
Child seats
1
30 -144
ISOFIX child seats
1
39 -143
Manual child lock
1
45
A ir bags
126 -129
Adjusting the steering wheel 7 1
Interior fittings
8
0-84
- mats
-
f
ront armrest
-
1
2 V accessory socket
- u
S
B port / Auxiliary socket
Deactivating the passenger's front airbag
1
27, 133
Rear seats
7
8-79
Rear armrest, ski flap
8
5
SW
Over view
Page 88 of 396
86
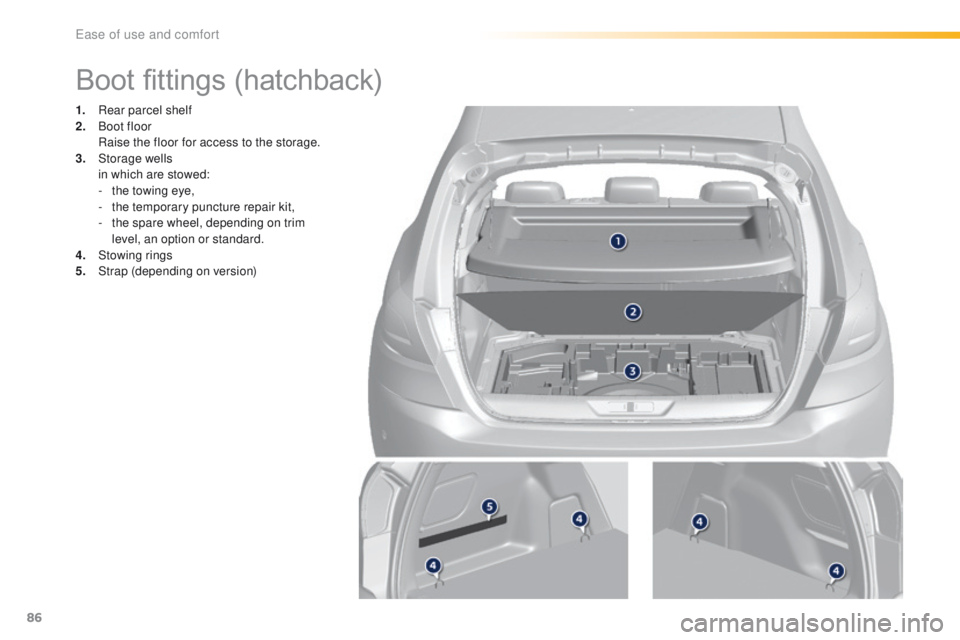
Boot fittings (hatchback)
1. Rear parcel shelf
2. Boot floor
R
aise the floor for access to the storage.
3.
St
orage wells
i
n which are stowed:
-
t
he towing eye,
-
t
he temporary puncture repair kit,
-
t
he spare wheel, depending on trim
level, an option or standard.
4.
S
towing rings
5.
S
trap (depending on version)
Ease of use and comfort
Page 89 of 396
87
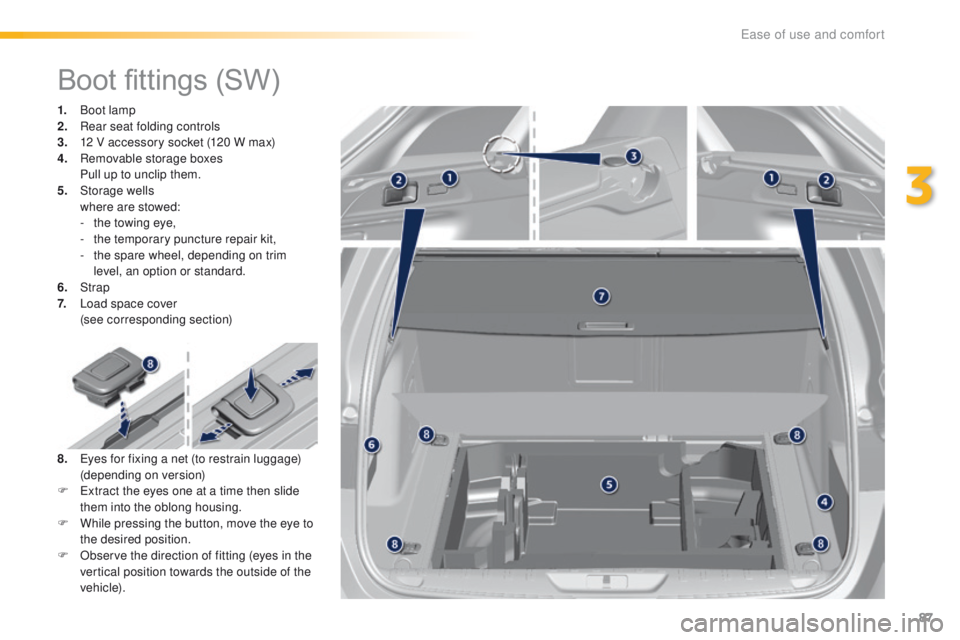
Boot fittings (SW)
1. Boot lamp
2. Rear seat folding controls
3.
1
2 V accessory socket (120 W max)
4.
R
emovable storage boxes
P
ull up to unclip them.
5.
St
orage wells
w
here are stowed:
-
t
he towing eye,
-
t
he temporary puncture repair kit,
-
t
he spare wheel, depending on trim
level, an option or standard.
6.
Strap
7.
L
oad space cover
(
see corresponding section)
8.
e
ye
s for fixing a net (to restrain luggage)
(
depending on version)
F
e
x
tract the eyes one at a time then slide
them into the oblong housing.
F
W
hile pressing the button, move the eye to
the desired position.
F
O
bserve the direction of fitting (eyes in the
vertical position towards the outside of the
vehicle).
3
Ease of use and comfort
Page 93 of 396
91
In order for these systems to be fully effective, follow the operation and maintenance
guidelines below:
F t
o o
btain an even air distribution, take care not to obstruct the exterior air intake grilles
located at the base of the windscreen, the nozzles, the vents and the air outlets, as well
as the air extractor located in the boot.
F
D
o not cover the sunshine sensor, located on the dashboard; this is used for regulation
of the air conditioning system.
F
O
perate the air conditioning system for at least 5 to 10 minutes, once or twice a month
to keep it in per fect working order.
F
e
n
sure that the passenger compartment filter is in good condition and have the filter
elements replaced regularly.
W
e recommend the use of a combined passenger compartment filter. t
h
anks to its
special active additive, it contributes to the purification of the air breathed by the
occupants and the cleanliness of the passenger compartment (reduction of allergic
symptoms, bad odours and greasy deposits).
F
t
o e
nsure correct operation of the air conditioning system, you are also advised to have
it checked regularly as recommended in the warranty and maintenance record.
F
I
f the system does not produce cold air, switch it off and contact a P
e
uge
Ot
dealer or
a qualified workshop.
Recommendations for ventilation and air conditioning
If after an extended stop in sunshine,
the interior temperature is very high, first
ventilate the passenger compartment for
a few moments.
Put the air flow control at a setting high
enough to quickly change the air in the
passenger compartment.
th
e air conditioning system does not
contain chlorine and does not present
any danger to the ozone layer.
th
e condensation created by the air
conditioning results in a discharge
of water under the vehicle which is
perfectly normal.
When towing the maximum load on a steep gradient in high temperatures, switching off the
air conditioning increases the available engine power and so improves the towing ability.
Stop & Start
the heating and air conditioning
systems only work when the engine
is running. t
o m
aintain a comfortable
temperature in the passenger
compartment, you can temporarily
deactivate the Stop & Start system
(see the corresponding section).
3
ease of use and comfort
Page 121 of 396
119
Automatic operation of
hazard warning lamps
Hazard warning lamps
When braking in an emergency, depending on
the rate of deceleration, as well as when the
ABS regulation is invoked or in the event of an
impact, the hazard warning lamps come on
automatically.
th
ey switch off automatically the first time you
accelerate.
F
Y
ou can also switch them off by pressing
the button.
emergency or
assistance call
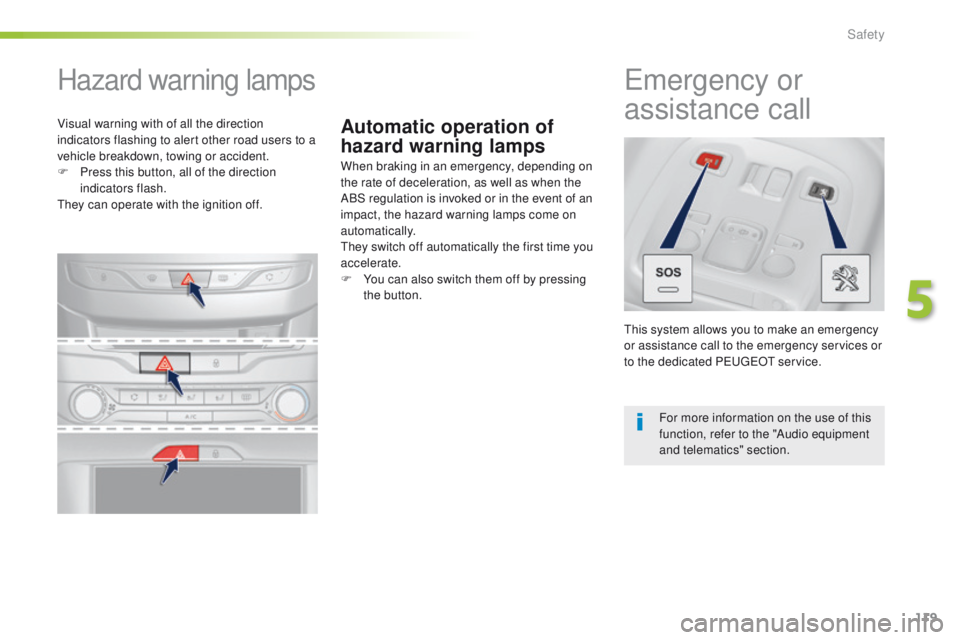
this system allows you to make an emergency
or assistance call to the emergency services or
to the dedicated P
e
uge
Ot
service.
For more information on the use of this
function, refer to the "Audio equipment
and telematics" section.
Visual warning with of all the direction
indicators flashing to alert other road users to a
vehicle breakdown, towing or accident.
F
P
ress this button, all of the direction
indicators flash.
th
ey can operate with the ignition off.
5
Safety
Page 149 of 396
147
When towing
Distribution of loads
F Distribute the load in the trailer so that the heaviest items are as close as possible to
the axle and the nose weight approaches
the maximum permitted without
exceeding
it.
Air density decreases with altitude, thus
reducing engine performance. Above
1
000 metres, the maximum towed load must
be reduced by 10
% for every 1 000 metres of
altitude.
Side wind
F take into account the increased sensitivity to side wind.
Cooling
towing a trailer on a slope increases the
temperature of the coolant.
As the fan is electrically controlled, its cooling
capacity is not dependent on the engine speed.
F
t
o l
ower the engine speed, reduce your
speed.
th
e maximum towed load on a long incline
depends on the gradient and the ambient
temperature.
In all cases, keep a check on the coolant
temperature.
F
I
f the warning lamp and the
STOP warning lamp come on,
stop the vehicle and switch off
the engine as soon as possible.
Braking
towing a trailer increases the braking distance.to a void overheating of the brakes, the use of
engine braking is recommended.
Ty r e s
F Check the tyre pressures of the towing vehicle and of the trailer, observing the
recommended pressures.
Lighting
F Check the electrical lighting and signalling on the trailer and the hadlamp beam height
of your vehicle.
For more information on adjusting the
headlamp beam height, refer to the
corresponding section.
For more information on weights (and
the towed loads which apply to your
vehicle) refer to the corresponding
section.
th
e rear parking sensors will be
deactivated automatically if a genuine
P
e
uge
Ot
towbar is used.
6
Driving
Page 157 of 396
155
electric parking brake
Never leave a child alone inside the
vehicle with the ignition on, as they
could release the parking brake.
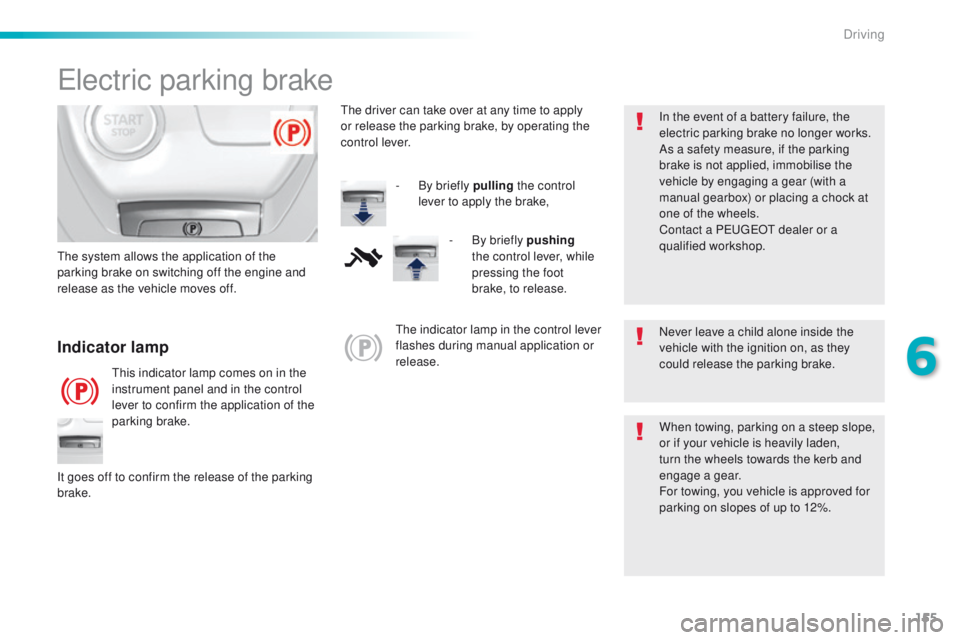
Indicator lamp
this indicator lamp comes on in the
instrument panel and in the control
lever to confirm the application of the
parking brake.
th
e system allows the application of the
parking brake on switching off the engine and
release as the vehicle moves off.
When towing, parking on a steep slope,
or if your vehicle is heavily laden,
turn the wheels towards the kerb and
engage a gear.
For towing, you vehicle is approved for
parking on slopes of up to 12%.
It goes off to confirm the release of the parking
brake.
th
e indicator lamp in the control lever
flashes during manual application or
release. In the event of a battery failure, the
electric parking brake no longer works.
As a safety measure, if the parking
brake is not applied, immobilise the
vehicle by engaging a gear (with a
manual gearbox) or placing a chock at
one of the wheels.
Contact a P
e
uge
Ot
dealer or a
qualified workshop.
th
e driver can take over at any time to apply
or release the parking brake, by operating the
control lever.
-
B
y briefly pulling
the control
lever to apply the brake,
-
B
y briefly pushing
the control lever, while
pressing the foot
brake, to release.
6
Driving
Page 161 of 396
159
Emergency braking
In the event of a failure of the main service
brake or in an exceptional situation (e.g. driver
taken ill, under instruction, etc) a continuous
pull on the control lever will brake the vehicle.
Braking takes place while the control lever is
being pulled. It is interrupted if the control lever
is released.
th
e ABS and DSC systems provide stability of
the vehicle during emergency braking.
If the emergency braking malfunctions, the
message "Parking brake control faulty" will be
displayed.
the
emergency braking should only be
used in an exceptional situation.
Repeat this procedure to reactivate automatic
operation.
Reactivation of automatic operation is
confirmed by the indicator lamp in the
instrument panel going off.
Deactivating automatic operation
In some situations, such as very cold weather
or towing (caravan, recovery), it may be
necessary to deactivate automatic operation of
the system.
F
S
tart the engine.
F
A
pply the parking brake with the control
lever, if it is released.
F
t
a
ke your foot off the brake pedal.
F
P
ush and hold the control lever in the
release direction for at least 10 seconds
and no more than 15 seconds.
F
R
elease the control lever.
F
P
ress and hold the brake pedal.
F
P
ull the control lever in the apply direction
for 2 seconds.
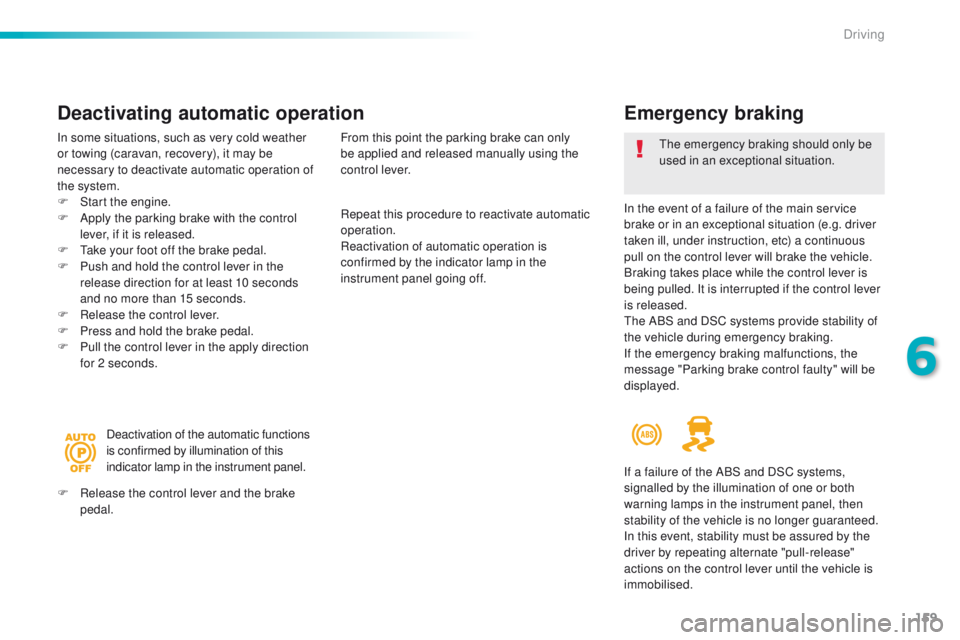
Deactivation of the automatic functions
is confirmed by illumination of this
indicator lamp in the instrument panel.
F
R
elease the control lever and the brake
pedal. From this point the parking brake can only
be applied and released manually using the
control lever.
If a failure of the ABS and DSC systems,
signalled by the illumination of one or both
warning lamps in the instrument panel, then
stability of the vehicle is no longer guaranteed.
In this event, stability must be assured by the
driver by repeating alternate "pull-release"
actions on the control lever until the vehicle is
immobilised.
6
Driving