headlamp Peugeot 308 2016 - RHD (UK, Australia) User Guide
[x] Cancel search | Manufacturer: PEUGEOT, Model Year: 2016, Model line: 308, Model: Peugeot 308 2016Pages: 398, PDF Size: 10.3 MB
Page 111 of 398
109
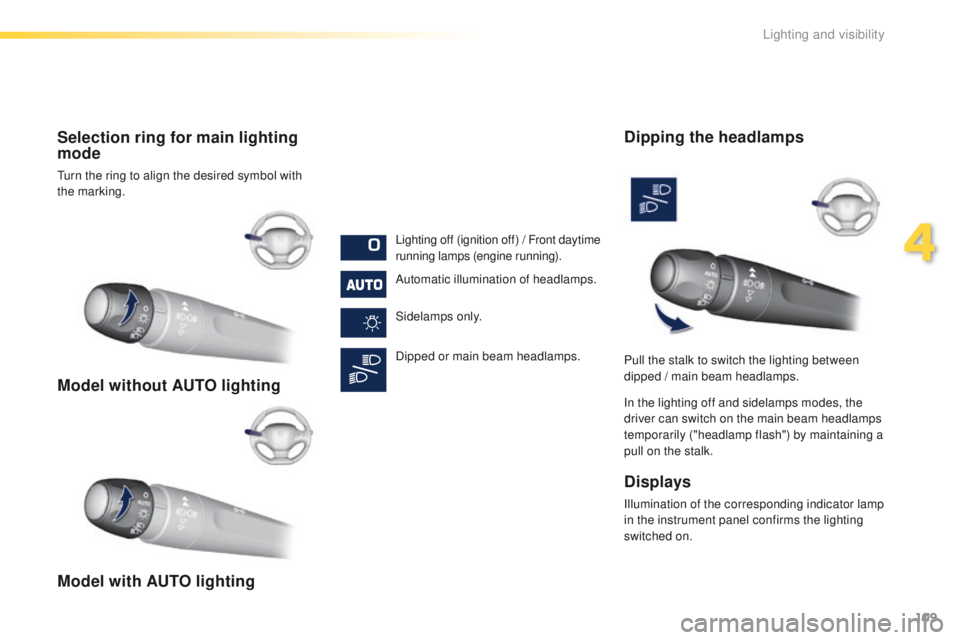
Model without AUTO lighting
Model with AUTO lighting Selection ring for main lighting
mode
turn the ring to align the desired symbol with
the marking.Lighting off (ignition off) / Front daytime
running lamps (engine running).
Automatic illumination of headlamps.
Sidelamps only.
Dipped or main beam headlamps.
Dipping the headlamps
In the lighting off and sidelamps modes, the
driver can switch on the main beam headlamps
temporarily ("headlamp flash") by maintaining a
pull on the stalk.
Displays
Illumination of the corresponding indicator lamp
in the instrument panel confirms the lighting
switched on. Pull the stalk to switch the lighting between
dipped / main beam headlamps.
4
Lighting and visibility
Page 112 of 398
110
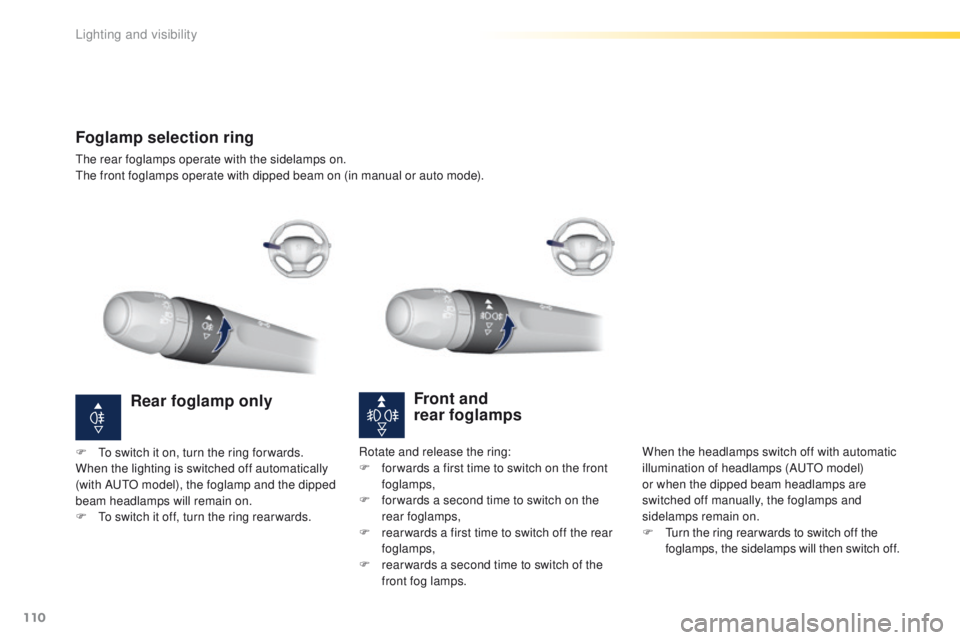
Foglamp selection ring
the rear foglamps operate with the sidelamps on.the front foglamps operate with dipped beam on (in manual or auto mode).
Front and
rear foglamps
When the headlamps switch off with automatic
illumination of headlamps (Au tO m odel)
or when the dipped beam headlamps are
switched off manually, the foglamps and
sidelamps remain on.
F
t
u
rn the ring rear wards to switch off the
foglamps, the sidelamps will then switch off.
Rear foglamp only
F to switch it on, turn the ring for wards.
When the lighting is switched off automatically
(with A
u
t
O m
odel), the foglamp and the dipped
beam headlamps will remain on.
F
t
o s
witch it off, turn the ring rear wards. Rotate and release the ring:
F
f or wards a first time to switch on the front
foglamps,
F
f
or wards a second time to switch on the
rear foglamps,
F
r
ear wards a first time to switch off the rear
foglamps,
F
r
ear wards a second time to switch of the
front fog lamps.
Lighting and visibility
Page 113 of 398
111
In good or rainy weather, both day
and night, the front foglamps and the
rear foglamps are prohibited. In these
situations, the power of their beams
may dazzle other drivers. t
he
y should
only be used in fog or snow.
In these weather conditions, it is your
responsibility to switch on the foglamps
and dipped headlamps manually as the
sunshine sensor may detect sufficient
light.
Do not forget to switch off the front
foglamps and the rear foglamps when
they are no longer needed.Lighting left on audible signal
An audible signal when a front door
is opened warns the driver that the
vehicle's exterior lighting is on, with the
ignition off and in manual lighting mode.
In this case, switching off the lighting
stops the audible signal.
With the ignition off, if the dipped
headlamps remain on, the vehicle goes
into "
eC
O" mode to avoid discharging
the battery.
th
e lighting goes off when you switch
off the ignition, but you can always
switch it on again using the lighting
control stalk.
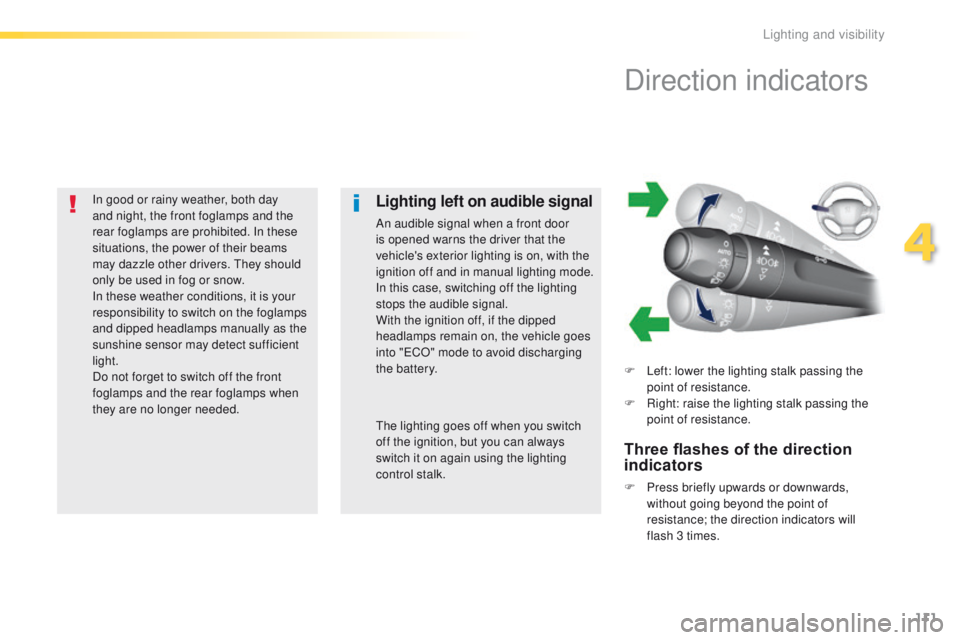
Direction indicators
F Left: lower the lighting stalk passing the point of resistance.
F
R
ight: raise the lighting stalk passing the
point of resistance.
Three flashes of the direction
indicators
F Press briefly upwards or downwards, without going beyond the point of
resistance; the direction indicators will
flash 3 times.
4
Lighting and visibility
Page 114 of 398
112
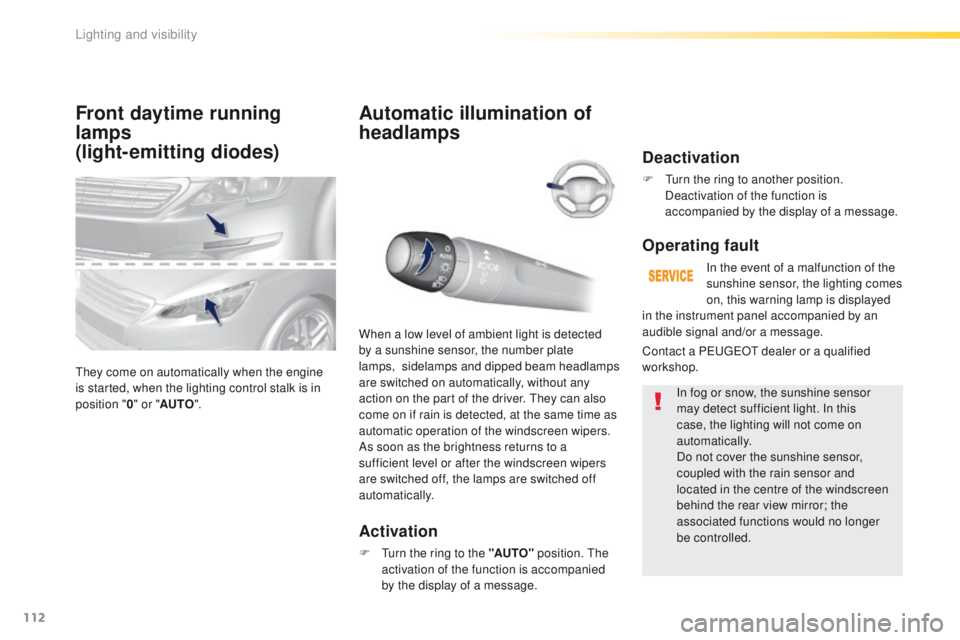
Front daytime running
lamps
(light-emitting diodes)
they come on automatically when the engine
is started, when the lighting control stalk is in
position "0" or " AUTO ".
Automatic illumination of
headlamps
Activation
F turn the ring to the "AUTO" position. th e
activation of the function is accompanied
by the display of a message.
When a low level of ambient light is detected
by a sunshine sensor, the number plate
lamps,
s
idelamps and dipped beam headlamps
are switched on automatically, without any
action on the part of the driver. t
h
ey can also
come on if rain is detected, at the same time as
automatic operation of the windscreen wipers.
As soon as the brightness returns to a
sufficient level or after the windscreen wipers
are switched off, the lamps are switched off
automatically.
Deactivation
F turn the ring to another position. Deactivation of the function is
accompanied by the display of a message.
Operating fault
In the event of a malfunction of the
sunshine sensor, the lighting comes
on, this warning lamp is displayed
In fog or snow, the sunshine sensor
may detect sufficient light. In this
case, the lighting will not come on
automatically.
Do not cover the sunshine sensor,
coupled with the rain sensor and
located in the centre of the windscreen
behind the rear view mirror; the
associated functions would no longer
be controlled.
Contact a P
e
uge
Ot
dealer or a qualified
workshop. in the instrument panel accompanied by an
audible signal and/or a message.
Lighting and visibility
Page 115 of 398
113
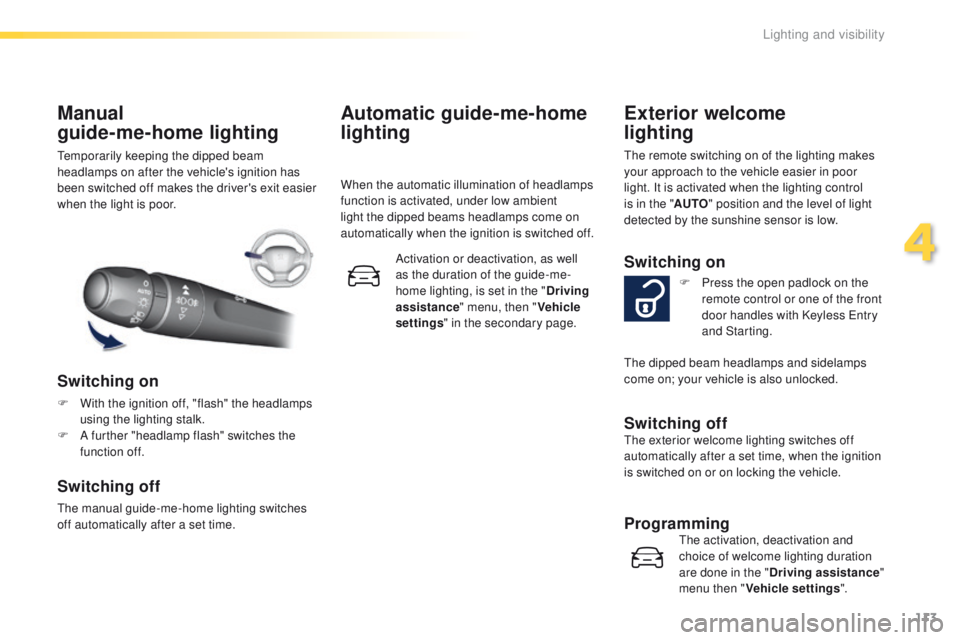
temporarily keeping the dipped beam
headlamps on after the vehicle's ignition has
been switched off makes the driver's exit easier
when the light is poor.
Manual
guide-me-home lighting
Switching on
F With the ignition off, "flash" the headlamps using the lighting stalk.
F
A f
urther "headlamp flash" switches the
function off.
Switching off
the manual guide-me-home lighting switches
off automatically after a set time.
Automatic guide-me-home
lighting
When the automatic illumination of headlamps
function is activated, under low ambient
light the dipped beams headlamps come on
automatically when the ignition is switched off.
Activation or deactivation, as well
as the duration of the guide-me-
home lighting, is set in the " Driving
assistance " menu, then " Vehicle
settings " in the secondary page.
Exterior welcome
lighting
the remote switching on of the lighting makes
your approach to the vehicle easier in poor
light. It is activated when the lighting control
is in the " AUTO" position and the level of light
detected by the sunshine sensor is low.
Switching on
F Press the open padlock on the remote control or one of the front
door handles with Keyless
e
n
try
and Starting.
Switching offthe exterior welcome lighting switches off
automatically after a set time, when the ignition
is switched on or on locking the vehicle.
Programmingthe activation, deactivation and
choice of welcome lighting duration
are done in the " Driving assistance "
menu then " Vehicle settings ".
th
e dipped beam headlamps and sidelamps
come on; your vehicle is also unlocked.
4
Lighting and visibility
Page 116 of 398
114
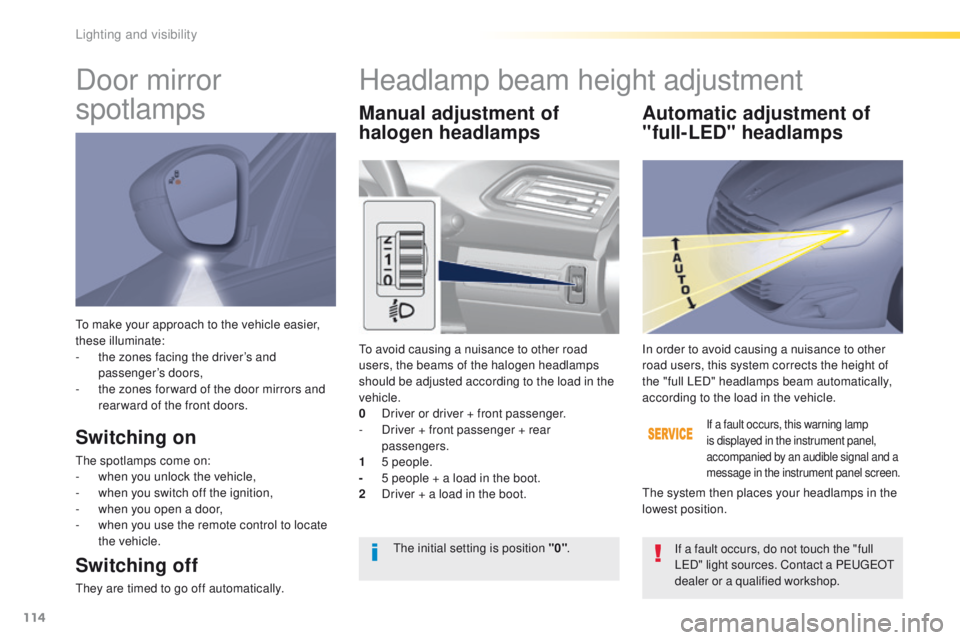
to make your approach to the vehicle easier,
these illuminate:
-
t
he zones facing the driver’s and
passenger’s doors,
-
t
he zones for ward of the door mirrors and
rear ward of the front doors.
Door mirror
spotlamps
Switching on
the spotlamps come on:
- w hen you unlock the vehicle,
-
w
hen you switch off the ignition,
-
w
hen you open a door,
-
w
hen you use the remote control to locate
the vehicle.
Switching off
they are timed to go off automatically.
Manual adjustment of
halogen headlamps Automatic adjustment of
"full-LED" headlamps
to avoid causing a nuisance to other road
users, the beams of the halogen headlamps
should be adjusted according to the load in the
vehicle.
0
D
river or driver + front passenger.
-
D
river + front passenger + rear
passengers.
1
5
people.
-
5 p
eople + a load in the boot.
2
D
river + a load in the boot.
If a fault occurs, this warning lamp
is displayed in the instrument panel,
accompanied by an audible signal and a
message in the instrument panel screen.
In order to avoid causing a nuisance to other
road users, this system corrects the height of
the "full L e
D
" headlamps beam automatically,
according to the load in the vehicle.
th
e system then places your headlamps in the
lowest position.
th
e initial setting is position "0" .
If a fault occurs, do not touch the "full
L
eD
" light sources. Contact a P
e
uge
Ot
d
ealer or a qualified workshop.
Headlamp beam height adjustment
Lighting and visibility
Page 118 of 398
116
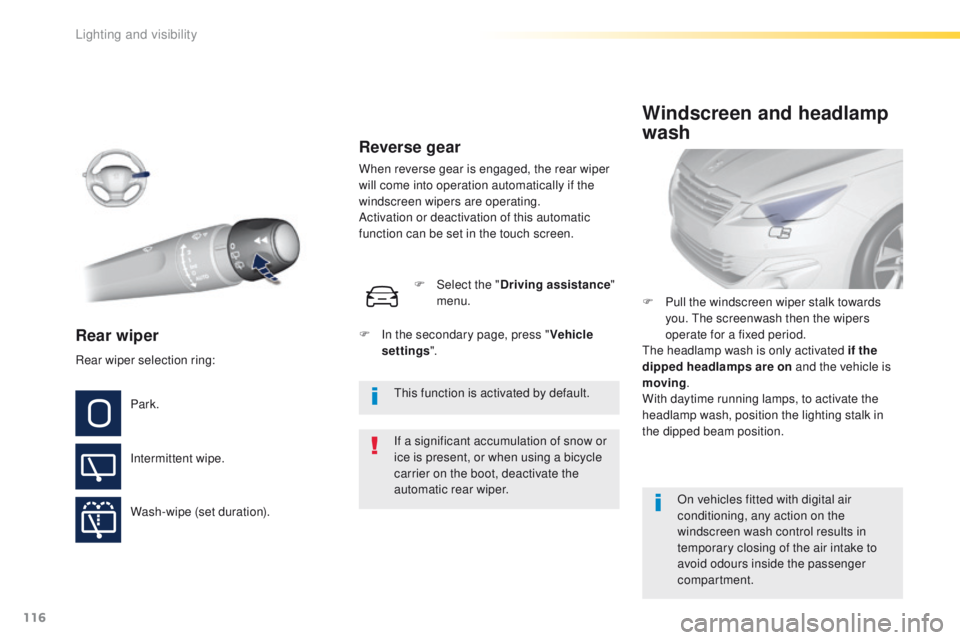
Rear wiper
If a significant accumulation of snow or
ice is present, or when using a bicycle
carrier on the boot, deactivate the
automatic rear wiper.
Park.
Intermittent wipe.
Wash-wipe (set duration). F
P
ull the windscreen wiper stalk towards
you. t
he
screenwash then the wipers
operate for a fixed period.
th
e headlamp wash is only activated if the
dipped headlamps are on and the vehicle is
moving .
With daytime running lamps, to activate the
headlamp wash, position the lighting stalk in
the dipped beam position.
Windscreen and headlamp
wash
On vehicles fitted with digital air
conditioning, any action on the
windscreen wash control results in
temporary closing of the air intake to
avoid odours inside the passenger
compartment.
Rear wiper selection ring:
th
is function is activated by default.
F
I
n the secondary page, press "
Vehicle
settings ".
F
Sel
ect the "
Driving assistance "
menu.
Reverse gear
When reverse gear is engaged, the rear wiper
will come into operation automatically if the
windscreen wipers are operating.
Activation or deactivation of this automatic
function can be set in the touch screen.
Lighting and visibility
Page 119 of 398
117
Screenwash/headlamp wash
level low
In the case of vehicles fitted with headlamp
washers, when the fluid reservoir low level
is reached this warning lamp comes on in
the instrument panel, accompanied by an
audible signal and a message.
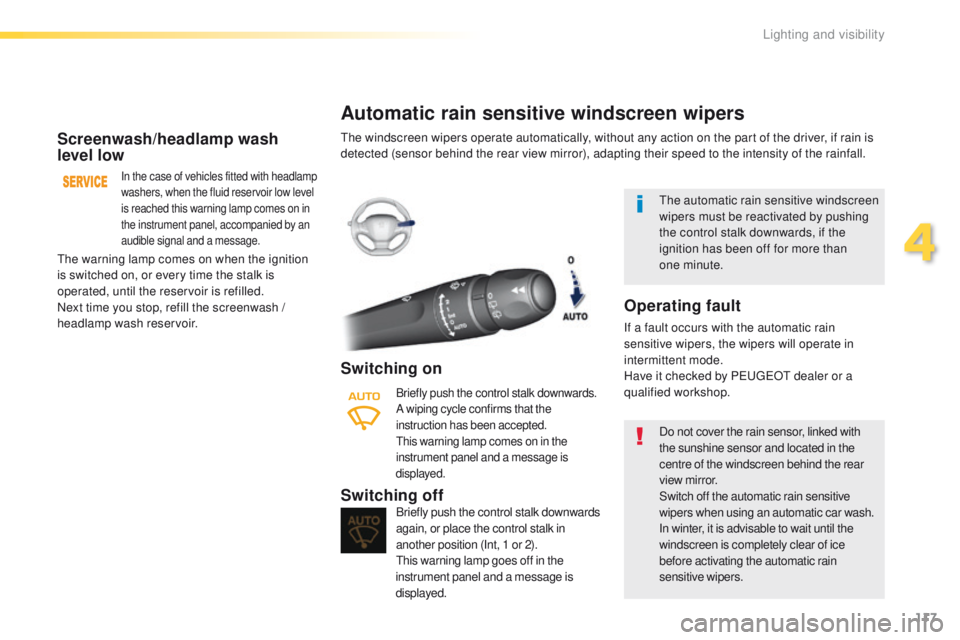
Automatic rain sensitive windscreen wipers
Switching on
Briefly push the control stalk downwards.
A wiping cycle confirms that the
instruction has been accepted.
th
is warning lamp comes on in the
instrument panel and a message is
displayed.
Briefly push the control stalk downwards
again, or place the control stalk in
another position (Int, 1 or 2).
th
is warning lamp goes off in the
instrument panel and a message is
displayed.Switching off
the automatic rain sensitive windscreen
wipers must be reactivated by pushing
the control stalk downwards, if the
ignition has been off for more than
one
minute.
th
e warning lamp comes on when the ignition
is switched on, or every time the stalk is
operated, until the reservoir is refilled.
Next time you stop, refill the screenwash /
headlamp wash reservoir.
th
e windscreen wipers operate automatically, without any action on the part of the driver, if rain is
detected (sensor behind the rear view mirror), adapting their speed to the intensity of the rainfall.
Do not cover the rain sensor, linked with
the sunshine sensor and located in the
centre of the windscreen behind the rear
view mirror.
Switch off the automatic rain sensitive
wipers when using an automatic car wash.
In winter, it is advisable to wait until the
windscreen is completely clear of ice
before activating the automatic rain
sensitive wipers.
Operating fault
If a fault occurs with the automatic rain
sensitive wipers, the wipers will operate in
intermittent mode.
Have it checked by P
e
uge
Ot
dealer or a
qualified workshop.
4
Lighting and visibility
Page 149 of 398
147
When towing
Distribution of loads
F Distribute the load in the trailer so that the heaviest items are as close as possible to
the axle and the nose weight approaches
the maximum permitted without
exceeding
it.
Air density decreases with altitude, thus
reducing engine performance. Above
1
000 metres, the maximum towed load must
be reduced by 10
% for every 1 000 metres of
altitude.
Side wind
F take into account the increased sensitivity to side wind.
Cooling
towing a trailer on a slope increases the
temperature of the coolant.
As the fan is electrically controlled, its cooling
capacity is not dependent on the engine speed.
F
t
o l
ower the engine speed, reduce your
speed.
th
e maximum towed load on a long incline
depends on the gradient and the ambient
temperature.
In all cases, keep a check on the coolant
temperature.
F
I
f the warning lamp and the
STOP warning lamp come on,
stop the vehicle and switch off
the engine as soon as possible.
Braking
towing a trailer increases the braking distance.to a void overheating of the brakes, the use of
engine braking is recommended.
Ty r e s
F Check the tyre pressures of the towing vehicle and of the trailer, observing the
recommended pressures.
Lighting
F Check the electrical lighting and signalling on the trailer and the hadlamp beam height
of your vehicle.
For more information on adjusting the
headlamp beam height, refer to the
corresponding section.
For more information on weights (and
the towed loads which apply to your
vehicle) refer to the corresponding
section.
th
e rear parking sensors will be
deactivated automatically if a genuine
P
e
uge
Ot
towbar is used.
6
Driving
Page 221 of 398
219
System which manages the duration of use of certain functions to conserve a sufficient level of
charge in the battery.
After the engine has stopped, you can still use functions such as the audio and telematics
system, windscreen wipers, dipped beam headlamps, courtesy lamps, etc. for a maximum
combined duration of about forty minutes.
energy economy mode
Switching to economy mode
A message then appears in the instrument
panel screen indicating that the vehicle has
switched to economy mode and the active
functions are put on standby.
If a telephone call is being made at this time, it
will be maintained for around 10 minutes with
the Bluetooth hands-free system of your audio
system.
Exiting economy mode
these functions are reactivated automatically
next time the vehicle is driven.
In order to restore the use of these functions
immediately, start the engine and let it run:
-
f
or less than ten minutes, to use the
equipment for approximately five minutes,
-
f
or more than ten minutes, to use the
equipment for up to approximately
thirty
minutes.
Let the engine run for the duration specified to
ensure that the battery charge is sufficient.
Do not repeatedly and continuously restart the
engine in order to charge the battery.
A flat battery prevents the engine from starting.
For more information on the battery, refer to the
corresponding section.
Load reduction mode
System which manages the use of certain
functions according to the level of charge
remaining in the battery.
When the vehicle is being driven, the load
reduction function temporarily deactivates
certain functions, such as the air conditioning,
the heated rear screen...
th
e deactivated functions are reactivated
automatically as soon as conditions permit.
7
Practical information