bulb Peugeot 308 2016 Owner's Manual
[x] Cancel search | Manufacturer: PEUGEOT, Model Year: 2016, Model line: 308, Model: Peugeot 308 2016Pages: 398, PDF Size: 9.38 MB
Page 5 of 398
308_en_Chap00a_sommaire_ed02-2015
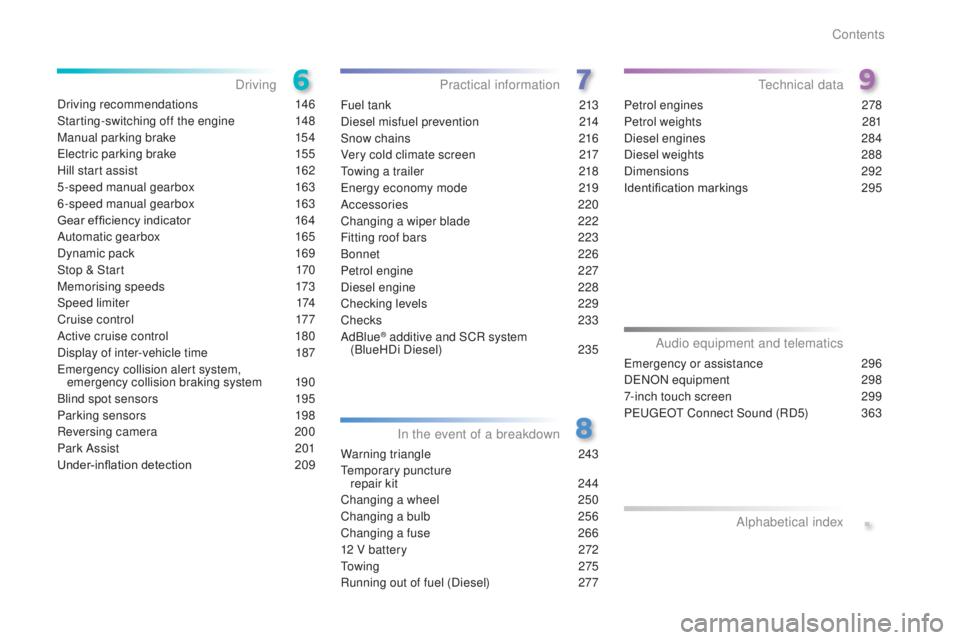
Driving recommendations 146
Starting-switching off the engine
14
8
Manual parking brake
15
4
ele
ctric parking brake
15
5
Hill start assist
16
2
5-speed manual gearbox
16
3
6-speed manual gearbox
16
3
Gear ef ficiency indicator
16
4
Automatic gearbox
16
5
Dynamic pack
16
9
Stop & Start
17
0
Memorising speeds
17
3
Speed limiter
17
4
Cruise control
17
7
Active cruise control
18
0
Display of inter-vehicle time
187
emer
gency collision alert system,
emergency collision braking system
19
0
Blind spot sensors
19
5
Parking sensors
19
8
Reversing camera
20
0
Park Assist
20
1
Under-inflation detection
209 F
uel tank 21 3
Diesel misfuel prevention
21
4
Snow chains
21
6
Very cold climate screen
21
7
tow
ing a trailer
21
8
ene
rgy economy mode
21
9
Accessories
22
0
Changing a wiper blade
22
2
Fitting roof bars
22
3
Bonnet
2
26
Petrol engine
22
7
Diesel engine
22
8
Checking levels
22
9
Checks
23
3
AdBlue
® additive and SCR system
(BlueHDi Diesel) 235
W
arning triangle
24
3
temp
orary puncture
repair kit
24
4
Changing a wheel
25
0
Changing a bulb
25
6
Changing a fuse
26
6
12 V battery
27
2
to w
i n g
2
7 5
Running out of fuel (Diesel)
27
7Petrol engines
27
8
Petrol weights
28
1
Diesel engines
28
4
Diesel weights
28
8
Dimensions
29
2
Identification markings
29
5
Driving
Practical information
In the event of a breakdowntec hnical data
.
emergency or assistance 296
D
eNO
N equipment
29
8
7-inch touch screen
29
9
P
eu
ge
Ot C
onnect Sound (RD5)
36
3
Audio equipment and telematics
Alphabetical index
Contents
Page 6 of 398
4
308_en_Chap00b_vue-ensemble_ed02-2015
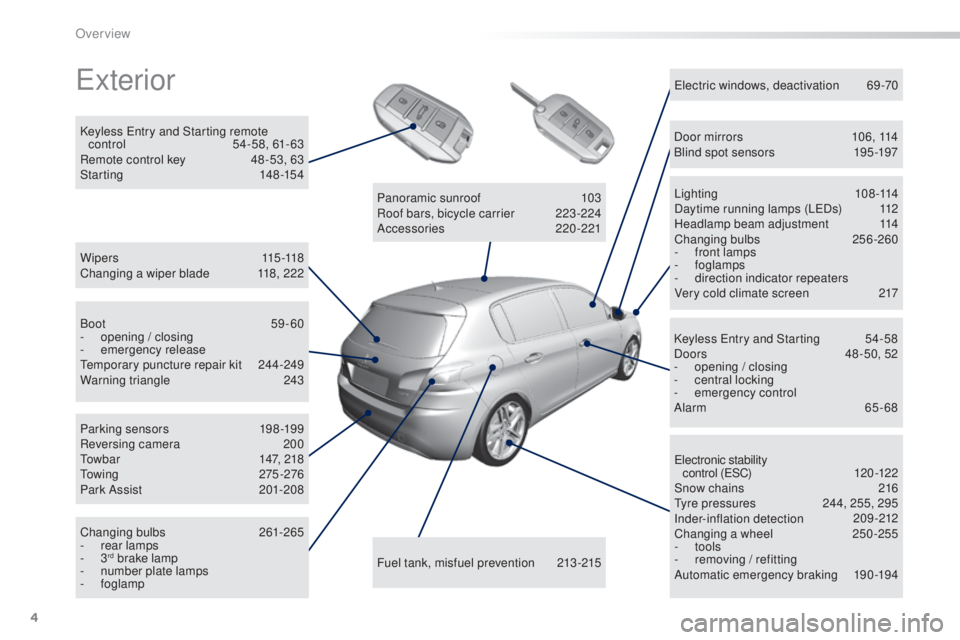
exterior
W i p e r s 115 -118
Changing a wiper blade 11 8, 222
Keyless
ent
ry and Starting remote
control
54
-58, 61- 63
Remote control key
48
-53, 63
Starting
14
8-154
elec
tronic stability
control (
eS
C)
120
-12 2
Snow chains
21
6
tyr
e pressures
24
4, 255, 295
Inder-inflation detection
209
-212
Changing a wheel
25
0-255
-
t
ools
-
re
moving / refitting
Automatic emergency braking
19
0-194
Lighting
1
08-114
Daytime running lamps (L
eDs
)
11
2
Headlamp beam adjustment
11
4
Changing bulbs
25
6-260
- fr ont lamps
- fo glamps
-
di
rection indicator repeaters
Very cold climate screen
21
7
ele
ctric windows, deactivation
69
-70
Keyless
ent
ry and Starting
54
-58
Doors
48
-50, 52
-
open
ing / closing
-
ce
ntral locking
-
emer
gency control
Alarm
6
5-68
Fuel tank, misfuel prevention
21
3-215
Panoramic sunroof
10
3
Roof bars, bicycle carrier
22
3 -224
Accessories
22
0-221
Boot
5
9-60
-
open
ing / closing
-
emer
gency release
tem
porary puncture repair kit
24
4-249
Warning triangle
24
3
Parking sensors
19
8-199
Reversing camera
20
0
tow
bar
14
7, 218
tow
ing
27
5 -276
Park Assist
20
1-208
Changing bulbs
26
1-265
-
re
ar lamps
-
3rd brake lamp
- nu mber plate lamps
-
fo
glamp Door mirrors
10
6, 114
Blind spot sensors
19
5 -197
Over view
Page 11 of 398
9
308_en_Chap00b_vue-ensemble_ed02-2015
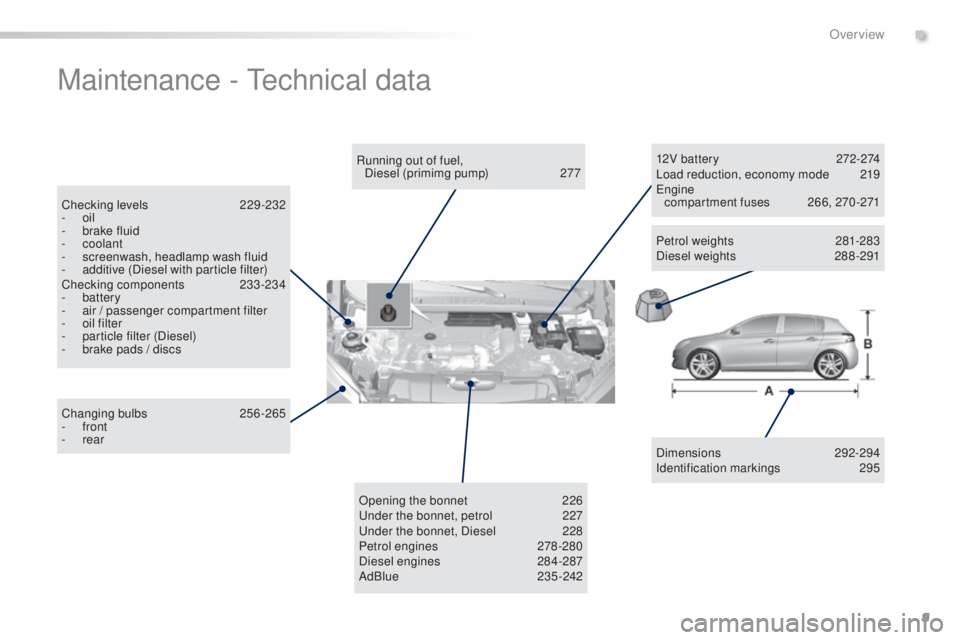
Maintenance - technical data
Dimensions 2 92-294
Identification markings 29 5
Running out of fuel,
Diesel (primimg pump)
27
7
Checking levels
22
9-232
-
o
il
-
br
ake fluid
-
c
oolant
-
sc
reenwash, headlamp wash fluid
-
ad
ditive (Diesel with particle filter)
Checking components
233
-234
-
b
attery
-
ai
r / passenger compartment filter
-
oi
l filter
-
pa
rticle filter (Diesel)
-
br
ake pads / discs
Changing bulbs
25
6-265
-
f
ront
- r
ear 12V battery
27
2-274
Load reduction, economy
mo
de
21
9
engin
e
compartment fuses
26
6, 270 -271
Opening the bonnet
22
6
und
er the bonnet, petrol
22
7
und
er the bonnet, Diesel
22
8
Petrol engines
27
8 -280
Diesel engines
28
4-287
AdBlue
2
35-242 Petrol weights
28
1-283
Diesel weights
28
8 -291
.
Over view
Page 223 of 398
221
308_en_Chap07_info-pratiques_ed02-2015
the fitting of electrical equipment
o r accessories which are not
recommended by P
eu
ge
Ot m
ay result
in a failure of your vehicle's electronic
system and excessive electrical
consumption.
Contact a P
eu
ge
Ot d
ealer
for information on the range of
recommended equipment and
accessories.
Installation of radio
communication
transmitters
Before installing any after-market radio
communication transmitter, you can
contact a P
eu
ge
Ot d
ealer for the
specification of transmitters which can
be fitted (frequency, maximum power,
aerial position, specific installation
requirements), in line with the Vehicle
ele
ctromagnetic Compatibility
Directive
(
2004/104/
eC)
. Depending on the legislation in force in
the country, certain safety equipment
may be compulsory: high visibility
safety vests, warning triangles,
breathalyzers, spare bulbs, spare fuses,
fire extinguisher, first aid kit, mud flaps
at the rear of the vehicle.
By visiting a P
eu
ge
Ot d
ealer, you can also
obtain products for cleaning and maintenance
(exterior and interior) - including ecological
products in the "
teCH
NA
tuRe" ra
nge, topping
up products (screenwash...), touch-up pens
and paint aerosols for the exact colour of your
vehicle, refills (cartridge for the temporary
puncture repair kit...), ...
7
Practical information
Page 258 of 398
256
308_en_Chap08_en-cas-de-panne_ed02-2015
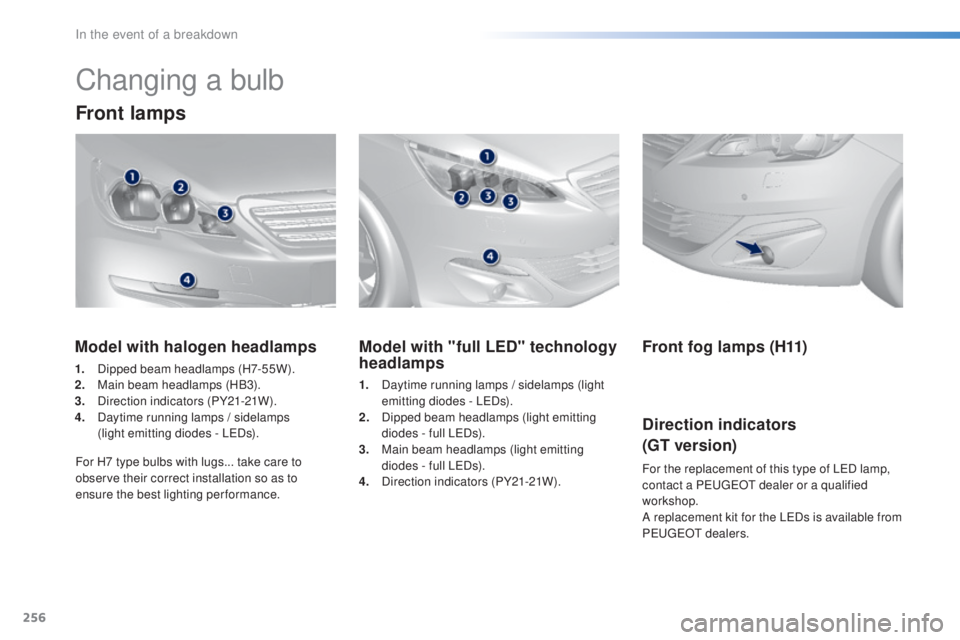
Changing a bulb
Front lamps
Model with "full LED" technology
headlamps
1. Daytime running lamps / sidelamps (light
e
mitting diodes - LeDs ).
2.
Dip
ped beam headlamps (light emitting
diodes - full L
eDs
).
3.
Ma
in beam headlamps (light emitting
diodes - full L
eDs
).
4.
Di
rection indicators (PY21-21W).
Model with halogen headlamps
1. Dipped beam headlamps (H7-55W).
2. Ma in beam headlamps (HB3).
3.
Di
rection indicators (PY21-21W).
4.
Da
ytime running lamps / sidelamps
(light emitting diodes - L
eDs
).
For H7 type bulbs with lugs... take care to
observe their correct installation so as to
ensure the best lighting performance.
Front fog lamps (H11)
Direction indicators
(GT version)
For the replacement of this type of LeD la mp,
contact a Peu geOt d ealer or a qualified
workshop.
A replacement kit for the L
eDs i
s available from
P
eu
ge
Ot dea
lers.
In the event of a breakdown
Page 259 of 398
257
308_en_Chap08_en-cas-de-panne_ed02-2015
In some weather conditions (e.g. low
temperature or humidity), the presence
of misting on the internal sur face of the
glass of the headlamps and rear lamps
is normal; it disappears after the lamps
have been on for a few minutes.the h
eadlamps are fitted with
polycarbonate glass with a protective
coating:
F
do n
ot clean them using a dr y
or abrasive cloth, nor with a
detergent or solvent product,
F
us
e a sponge and soapy water or a
pH neutral product,
F
wh
en using a high pressure washer
on persistent marks, do not keep
the lance directed towards the
lamps or their edges for too long,
so as not to damage their protective
coating and seals.
Changing a bulb should only be done
after the headlamp has been switched
off for several minutes (risk of serious
burns).
F
Do n
ot touch the bulb directly with
your fingers, use a lint-free cloth.
It is imperative to use only anti-
ultraviolet (
uV) t
ype bulbs to avoid
damaging the headlamp.
Always replace a failed bulb with a
new bulb with the same type and
specification.
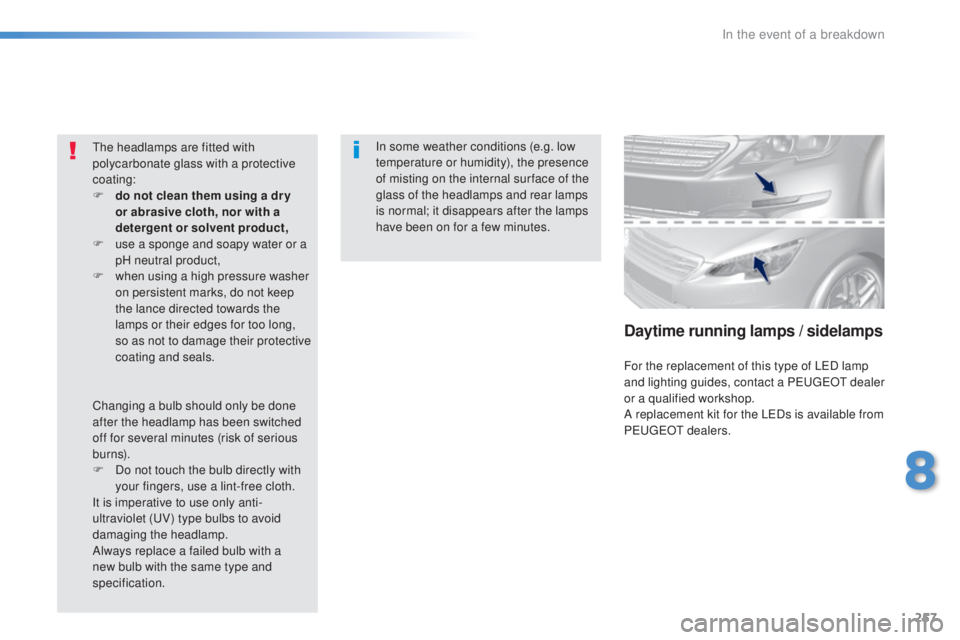
Daytime running lamps / sidelamps
For the replacement of this type of LeD la mp
and lighting guides, contact a Peu geOt d ealer
or a qualified workshop.
A replacement kit for the L
eDs i
s available from
P
eu
ge
Ot dea
lers.
8
In the event of a breakdown
Page 260 of 398
258
308_en_Chap08_en-cas-de-panne_ed02-2015
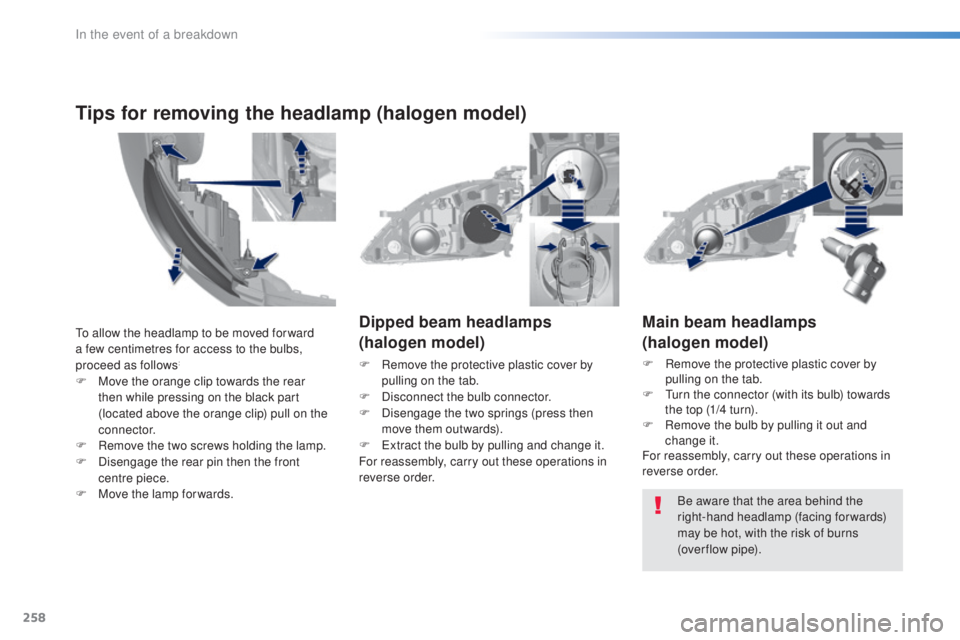
Main beam headlamps
(halogen model)
F Remove the protective plastic cover by
p
ulling on the tab.
F
t
ur
n the connector (with its bulb) towards
the top (1/4 turn).
F
Re
move the bulb by pulling it out and
change it.
For reassembly, carry out these operations in
reverse order.
Dipped beam headlamps
(halogen model)
F Remove the protective plastic cover by
p
ulling on the tab.
F
Di
sconnect the bulb connector.
F
Disenga
ge the two springs (press then
move them outwards).
F
e
xt
ract the bulb by pulling and change it.
For reassembly, carry out these operations in
reverse order.
Be aware that the area behind the
right-hand headlamp (facing forwards)
may be hot, with the risk of burns
(over flow
p
ipe).
to al
low the headlamp to be moved for ward
a few centimetres for access to the bulbs,
proceed as follows:
F Move the orange clip towards the rear
t hen while pressing on the black part
(located above the orange clip) pull on the
connector.
F
Re
move the two screws holding the lamp.
F
Disenga
ge the rear pin then the front
centre piece.
F
Mov
e the lamp for wards.
Tips for removing the headlamp (halogen model)
In the event of a breakdown
Page 261 of 398
259
308_en_Chap08_en-cas-de-panne_ed02-2015
For reassembly, carry out these operations in
reverse order.
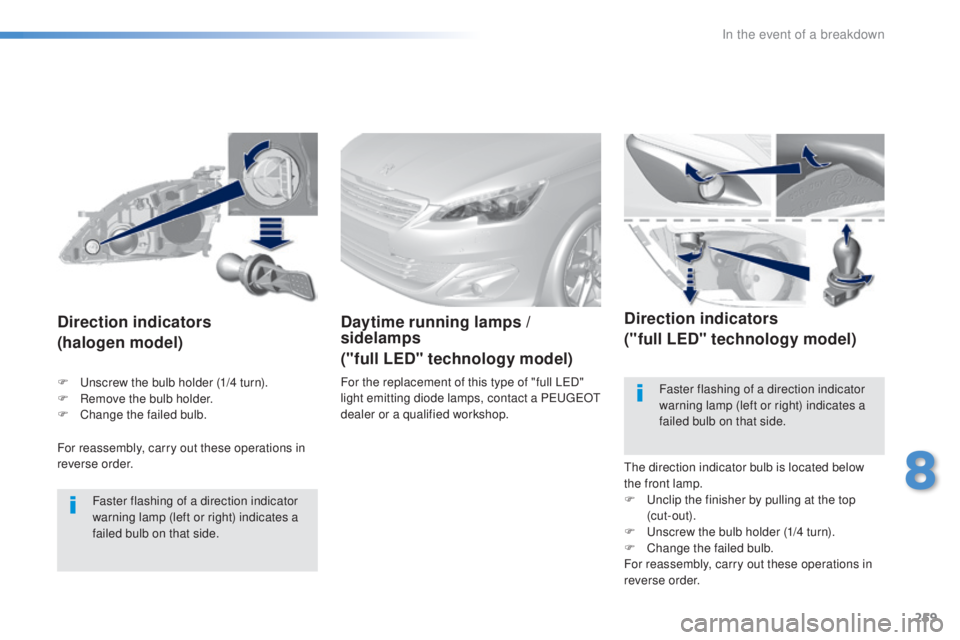
Direction indicators
(halogen model)
Faster flashing of a direction indicator
warning lamp (left or right) indicates a
failed bulb on that side.
Daytime running lamps /
sidelamps
("full LED" technology model)
For the replacement of this type of "full LeD"
l ight emitting diode lamps, contact a Peu geOt
d
ealer or a qualified workshop.
Direction indicators
("full LED" technology model)
the direction indicator bulb is located below
t he front lamp.
F
u
nc
lip the finisher by pulling at the top
(cut-out).
F
u
ns
crew the bulb holder (1/4 turn).
F
Ch
ange the failed bulb.
For reassembly, carry out these operations in
reverse order. Faster flashing of a direction indicator
warning lamp (left or right) indicates a
failed bulb on that side.
F
u
ns
crew the bulb holder (1/4 turn).
F
Re
move the bulb holder.
F
Ch
ange the failed bulb.
8
In the event of a breakdown
Page 262 of 398
260
308_en_Chap08_en-cas-de-panne_ed02-2015
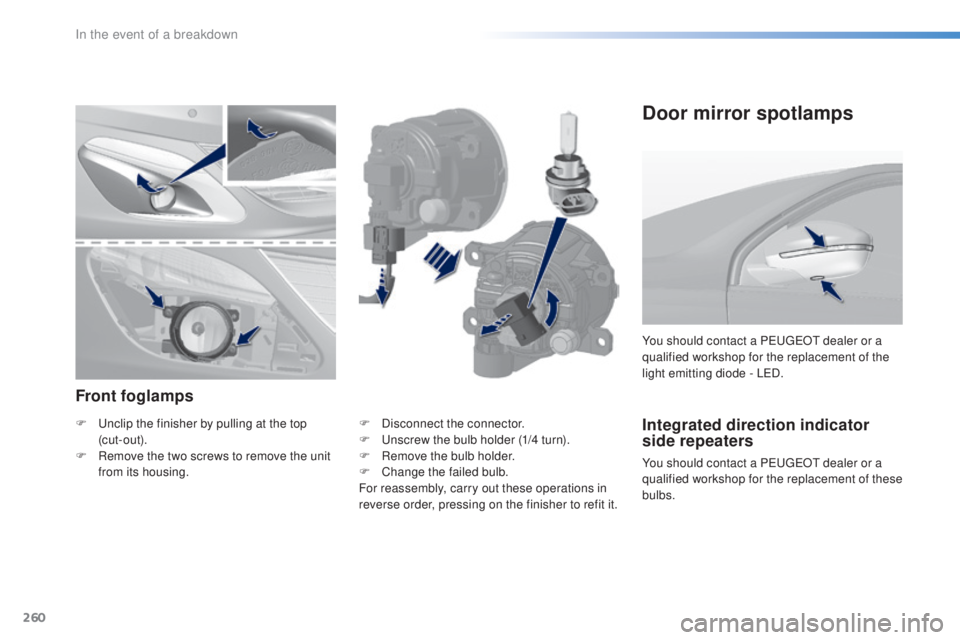
Integrated direction indicator
side repeaters
You should contact a Peu geOt d ealer or a
qualified workshop for the replacement of these
bulbs. You should contact a P
eu
ge
Ot d
ealer or a
qualified workshop for the replacement of the
light emitting diode - L
eD.
Front foglamps
F unclip the finisher by pulling at the top
( cut-out).
F
Re
move the two screws to remove the unit
from its housing. F Di
sconnect the connector.
F uns crew the bulb holder (1/4 turn).
F
Re
move the bulb holder.
F
Ch
ange the failed bulb.
For reassembly, carry out these operations in
reverse order, pressing on the finisher to refit it.
Door mirror spotlamps
In the event of a breakdown
Page 263 of 398
261
308_en_Chap08_en-cas-de-panne_ed02-2015
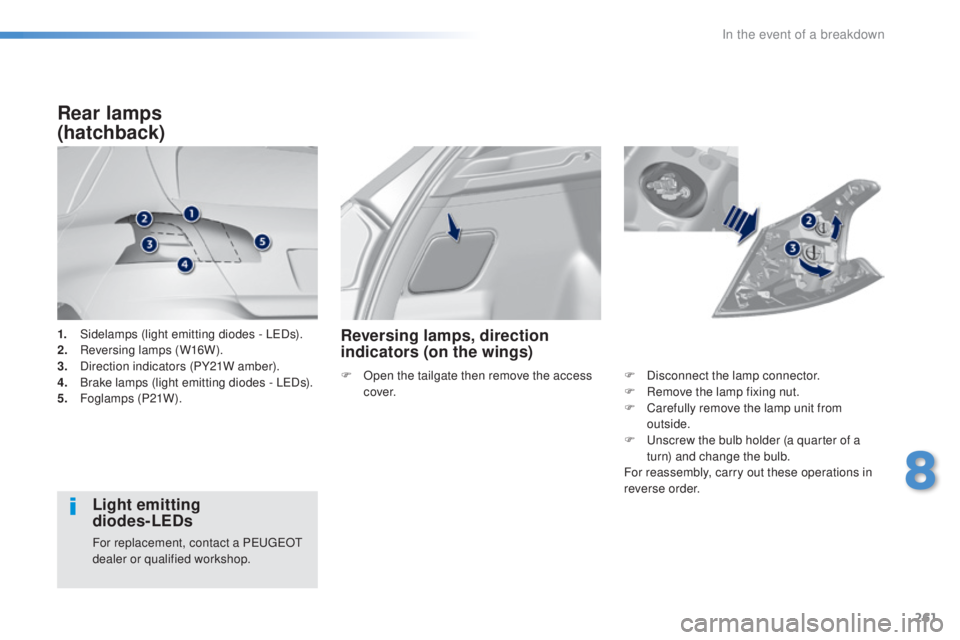
1. Sidelamps (light emitting diodes - LeDs ).
2. Re versing lamps (W16W).
3.
Di
rection indicators (PY21W amber).
4.
Br
ake lamps (light emitting diodes - L
eDs
).
5.
Fo
glamps (P21W).
Rear lamps
(hatchback)
Light emitting
diodes-LEDs
For replacement, contact a Peu geOt
d ealer or qualified workshop.
Reversing lamps, direction
indicators (on the wings)
F Disconnect the lamp connector.
F Re move the lamp fixing nut.
F
Ca
refully remove the lamp unit from
outside.
F
u
ns
crew the bulb holder (a quarter of a
turn) and change the bulb.
For reassembly, carry out these operations in
reverse order.
F Op
en the tailgate then remove the access
c ove r.
8
In the event of a breakdown