ECU Peugeot 308 2017 - RHD (UK, Australia) User Guide
[x] Cancel search | Manufacturer: PEUGEOT, Model Year: 2017, Model line: 308, Model: Peugeot 308 2017Pages: 392, PDF Size: 10.13 MB
Page 143 of 392
141
the incorrect installation of a child seat
in a vehicle compromises the child's
protection in the event of an accident.
Observe strictly the fitting instructions
provided with the child seat.
to s
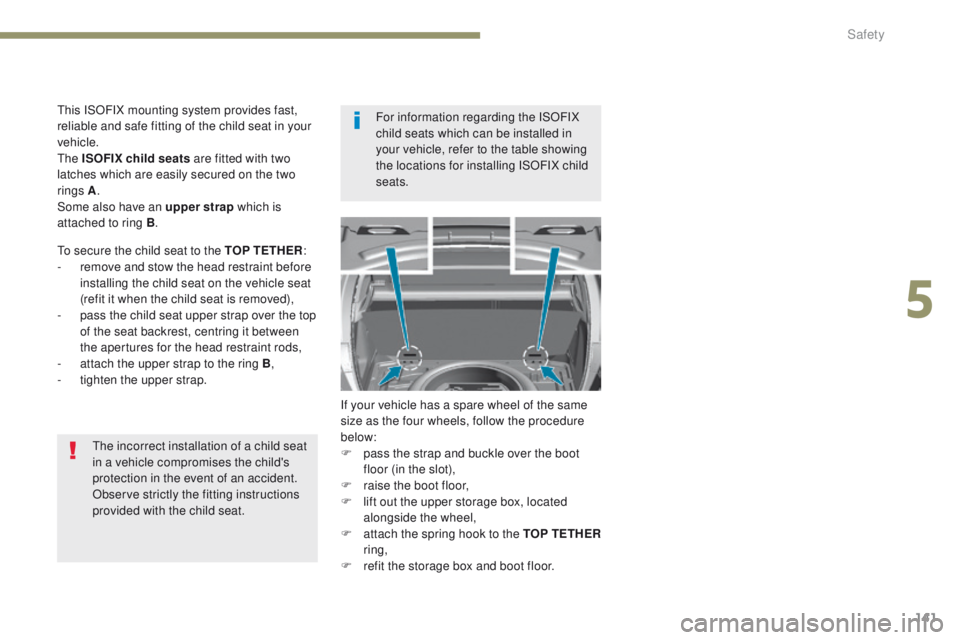
ecure the child seat to the TOP TETHER
:
-
r
emove and stow the head restraint before
installing the child seat on the vehicle seat
(refit it when the child seat is removed),
-
p
ass the child seat upper strap over the top
of the seat backrest, centring it between
the apertures for the head restraint rods,
-
a
ttach the upper strap to the ring B,
-
t
ighten the upper strap.
If your vehicle has a spare wheel of the same
size as the four wheels, follow the procedure
below:
F p ass the strap and buckle over the boot
floor (in the slot),
F
r
aise the boot floor,
F
l
ift out the upper storage box, located
alongside the wheel,
F
a
ttach the spring hook to the TOP TETHER
ring,
F
r
efit the storage box and boot floor.
th
is ISOFIX mounting system provides fast,
reliable and safe fitting of the child seat in your
vehicle.
th
e ISOFIX child seats are fitted with two
latches which are easily secured on the two
rings A .
Some also have an upper strap which is
attached to ring B . For information regarding the ISOFIX
child seats which can be installed in
your vehicle, refer to the table showing
the locations for installing ISOFIX child
seats.
5
Safety
Page 144 of 392
142
ISOFIX child seats recommended by PeugeOt
PeugeOt offers a range of ISOFIX child seats listed and type approved for your vehicle.
Refer also to the child seat manufacturer's fitting instructions for information on installing and removing the seat.
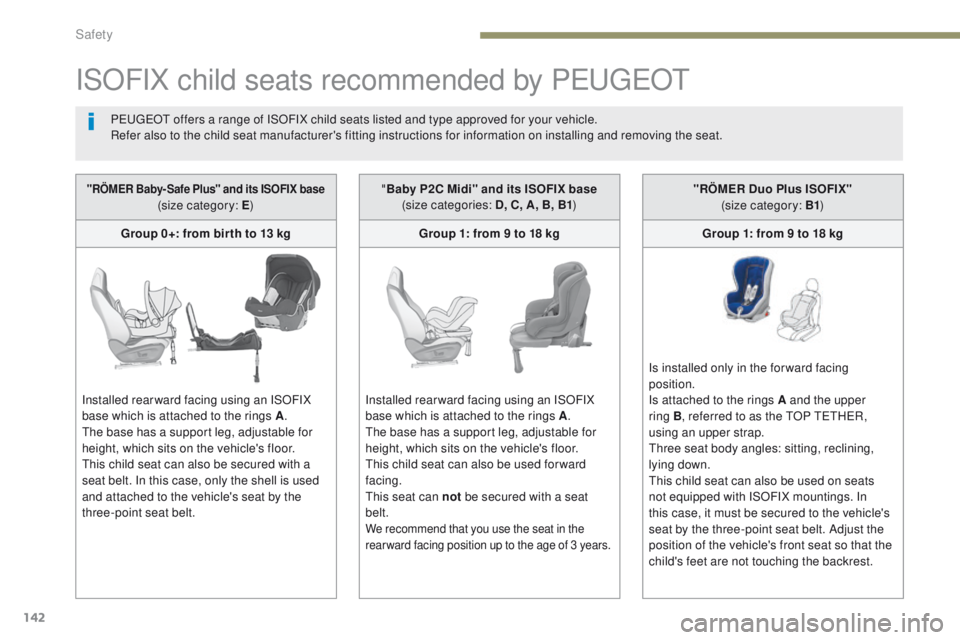
"RÖMER Baby- Safe Plus" and its ISOFIX base (size category: E)
Group 0+: from bir th to 13 kg
Installed rearward facing using an ISOFIX
base which is attached to the rings A .
th
e base has a support leg, adjustable for
height, which sits on the vehicle's floor.
th
is child seat can also be secured with a
seat belt. In this case, only the shell is used
and attached to the vehicle's seat by the
three-point seat belt. "
Baby P2C Midi" and its ISOFIX base
(size categories: D, C, A, B, B1
)
Group 1: from 9 to 18 kg
Installed rearward facing using an ISOFIX
base which is attached to the rings A .
th
e base has a support leg, adjustable for
height, which sits on the vehicle's floor.
th
is child seat can also be used for ward
facing.
th
is seat can not be secured with a seat
belt.
We recommend that you use the seat in the
rear ward facing position up to the age of 3 years.
"RÖMER Duo Plus ISOFIX" (size category: B1 )
Group 1: from 9 to 18 kg
Is installed only in the for ward facing
position.
Is attached to the rings A and the upper
ring
B , referred to as the
t
O
P tet
HeR
,
using an upper strap.
th
ree seat body angles: sitting, reclining,
lying down.
th
is child seat can also be used on seats
not equipped with ISOFIX mountings. In
this case, it must be secured to the vehicle's
seat by the three-point seat belt. Adjust the
position of the vehicle's front seat so that the
child's feet are not touching the backrest.
Safety
Page 146 of 392
144
IUF Seat suitable for the installation of an Isofix U niversal seat, F or ward facing
secured using the upper strap.
IL- SU
S
eat suitable for the installation of an
I sofix S emi-Universal seat either:
-
r
ear ward facing fitted with an upper strap
or a support leg,
-
f
or ward facing fitted with a support leg,
-
a
n infant car seat fitted with an upper strap
or a support leg. For more information on ISOFIX
mountings and child seats
and in
particular the upper strap, refer to the
corresponding section.
X
S
eat not suitable for the installation of a
child seat of the weight group indicated.
(a)
M
ove a seat without height adjustment
for wards by 1 notch from the mid position
for wards and backwards. A seat with
height adjustment must be in the highest
position.
(b)
t
h
e installation of an infant carrier on one
of the outer seats makes use of the other
two seats impossible.
(c)
A s
eat with height adjustment must be
placed in the highest position. Move the
seat without height adjustment for ward by
5 notches from the mid-position for wards
and backwards. Remove and stow the head restraint
before fitting a child seat with a
backrest to a passenger seat.
Refit the head restraint when the child
seat is removed.
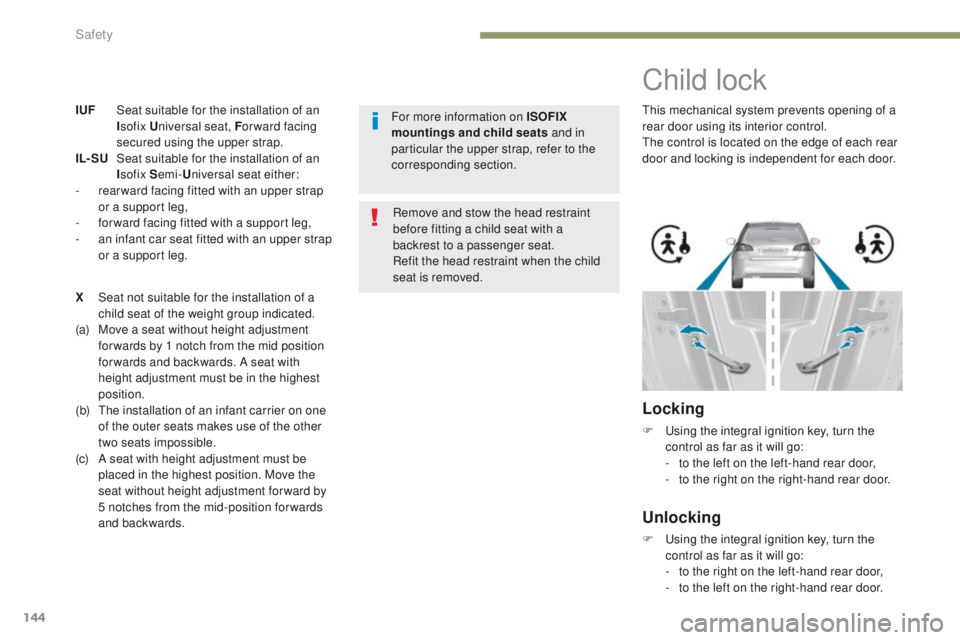
Child lock
this mechanical system prevents opening of a
rear door using its interior control.
th
e control is located on the edge of each rear
door and locking is independent for each door.
Locking
F using the integral ignition key, turn the control as far as it will go:
-
t
o the left on the left-hand rear door,
-
t
o the right on the right-hand rear door.
Unlocking
F using the integral ignition key, turn the control as far as it will go:
-
t
o the right on the left-hand rear door,
-
t
o the left on the right-hand rear door.
Safety
Page 147 of 392
145
Child seatsInstalling a booster
cushion
Recommendations
the legislation on carrying a child on the
front passenger seat is specific to each
country. Refer to the legislation in force in
the country in which you are driving.
Deactivate the passenger front airbag when
a rear ward facing child seat is installed on
the front passenger seat. Otherwise, the
child would risk being seriously injured or
killed if the airbag were deployed. For optimum installation of the forward facing
child seat, ensure that the back of the child
seat is as close as possible to the backrest
of the vehicle's seat, or in contact if possible.
th
e head restraint must be removed before
installing a child seat with a backrest on the
passenger seat.
en
sure that the head restraint is stowed or
attached securely so that it is not thrown
around the vehicle in the event of sharp
braking.
Refit the head restraint as soon as the child
seat is removed.
th
e incorrect installation of a child seat in a
vehicle compromises the child's protection in
the event of an accident.
Check that there is no seat belt or seat belt
buckle under the child seat as this could
destabilise it.
Remember to fasten the seat belts or the
child seat harnesses keeping the slack in
relation to the child's body to a minimum ,
even for short journeys.
For the installation of a child seat using a
seat belt, ensure that this is well tensioned
on the child seat and that it is holding the
child seat firmly against the seat of your
vehicle. If your front passenger seat is
adjustable, move it forward if necessary.
At the rear seats, always leave sufficient
space between the front seat and:
-
a r
ear ward facing child seat,
-
t
he feet of a child seated in a for ward
facing child seat.
For this, move the front seat for ward and if
necessary straighten its backrest.
Children at the front
the chest part of the seat belt must be
positioned on the child's shoulder without
touching the neck.
en
sure that the lap part of the seat belt
passes correctly over the child's thighs.
P
e
uge
Ot
recommends the use of a booster
seat which has a back, fitted with a seat belt
guide at shoulder level.
As a safety precaution, do not leave:
-
o
ne or more children alone and
unsupervised in a vehicle,
-
a c
hild or an animal in a vehicle which
is exposed to the sun, with the windows
closed,
-
t
he keys within reach of children inside
the vehicle.
to p
revent accidental opening of the doors,
use the child lock.
ta
ke care not to open the rear windows by
more than one third.
to p
rotect young children from the rays of
the sun, fit side blinds on the rear windows.
5
Safety
Page 163 of 392
161
SituationConsequences
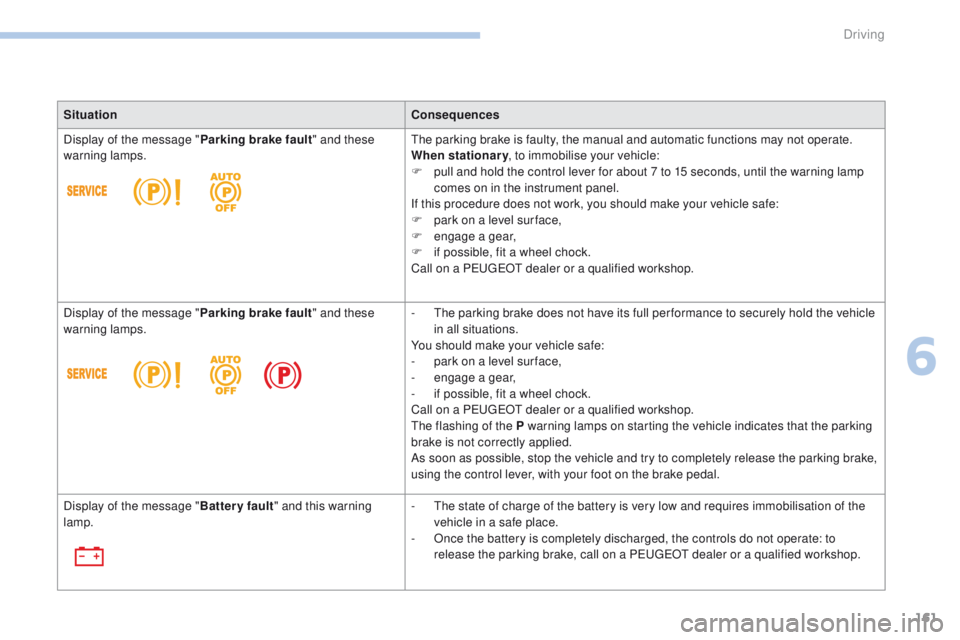
Display of the message " Parking brake fault" and these
warning lamps.
th
e parking brake is faulty, the manual and automatic functions may not operate.
When stationary , to immobilise your vehicle:
F
p
ull and hold the control lever for about 7 to 15 seconds, until the warning lamp
comes on in the instrument panel.
If this procedure does not work, you should make your vehicle safe:
F
p
ark on a level sur face,
F
enga
ge a gear,
F
i
f possible, fit a wheel chock.
Call on a P
e
uge
Ot
dealer or a qualified workshop.
Display of the message " Parking brake fault" and these
warning lamps. -
t
h
e parking brake does not have its full per formance to securely hold the vehicle
in all situations.
You should make your vehicle safe:
-
p
ark on a level sur face,
-
enga
ge a gear,
-
i
f possible, fit a wheel chock.
Call on a P
e
uge
Ot
dealer or a qualified workshop.
th
e flashing of the P warning lamps on starting the vehicle indicates that the parking
brake is not correctly applied.
As soon as possible, stop the vehicle and try to completely release the parking brake,
using the control lever, with your foot on the brake pedal.
Display of the message " Battery fault" and this warning
lamp. -
t
h
e state of charge of the battery is very low and requires immobilisation of the
vehicle in a safe place.
-
O
nce the battery is completely discharged, the controls do not operate: to
release the parking brake, call on a P
e
uge
Ot
dealer or a qualified workshop.
6
Driving
Page 178 of 392
176
On sharp acceleration, as when
descending a steep hill, the speed
limiter will not be able to prevent
the vehicle from exceeding the
programmed speed.
the
limiter is temporarily deactivated
and the displayed programmed speed
flashes.
An audible signal accompanies the
flashing of the programmed speed
when exceeding the speed is not due to
an action by the driver.
th
e use of mats not approved by
P
e
uge
Ot
may inter fere with the
operation of the speed limiter.
to a
void any risk of jamming of the
pedals:
-
e
nsure that the mat is secured
c o r r e c t l y,
-
d
o not fit one mat on top of another.
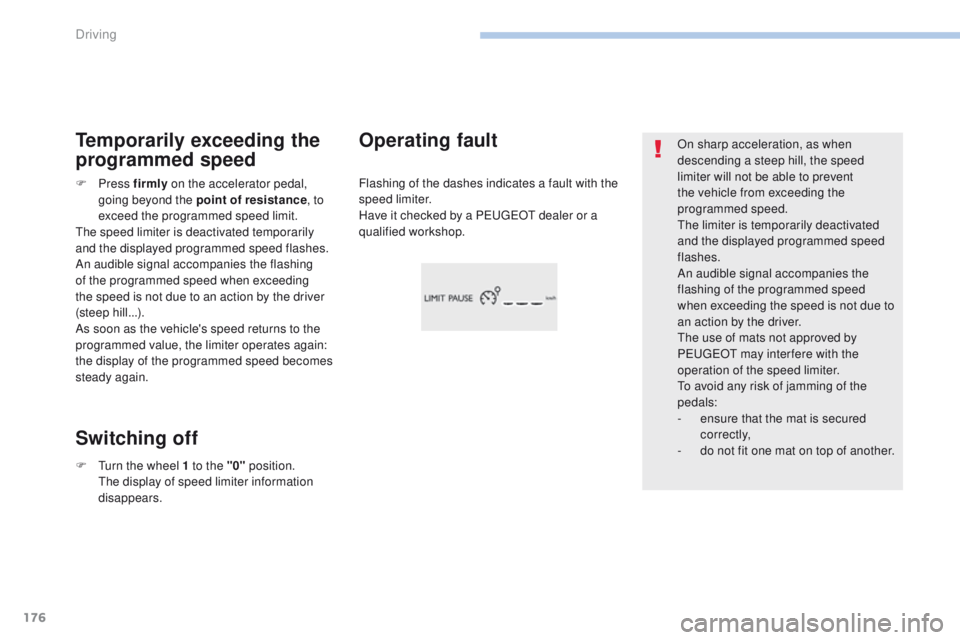
Flashing of the dashes indicates a fault with the
speed limiter.
Have it checked by a P
e
uge
Ot
dealer or a
qualified workshop.Operating fault
Temporarily exceeding the
programmed speed
Switching off
F Press f irmly on the accelerator pedal,
going beyond the point of resistance ,
to
exceed the programmed speed limit.
th
e speed limiter is deactivated temporarily
and the displayed programmed speed flashes.
An audible signal accompanies the flashing
of the programmed speed when exceeding
the speed is not due to an action by the driver
(steep hill...).
As soon as the vehicle's speed returns to the
programmed value, the limiter operates again:
the display of the programmed speed becomes
steady again.
F
t
u
rn the wheel 1 to the "0" position.
t
h
e display of speed limiter information
disappears.
Driving
Page 181 of 392
179
When the cruise control is switched on,
be careful if you maintain the pressure
on one of the programmed speed
changing buttons: this may result in a
very rapid change in the speed of your
vehicle.
Do not use the cruise control on
slippery roads or in heavy traffic.
On a steep descent, the cruise control
will not be able to prevent the vehicle
from exceeding the programmed speed.
On steep climbs or when towing, the
programmed speed may not be reached
or maintained.
th
e use of mats not approved by
P
e
uge
Ot
may inter fere with the
operation of the cruise control.
to a
void any risk of jamming of the
pedals:
-
e
nsure that the mat is secured
c o r r e c t l y,
-
n
ever fit one mat on top of another.
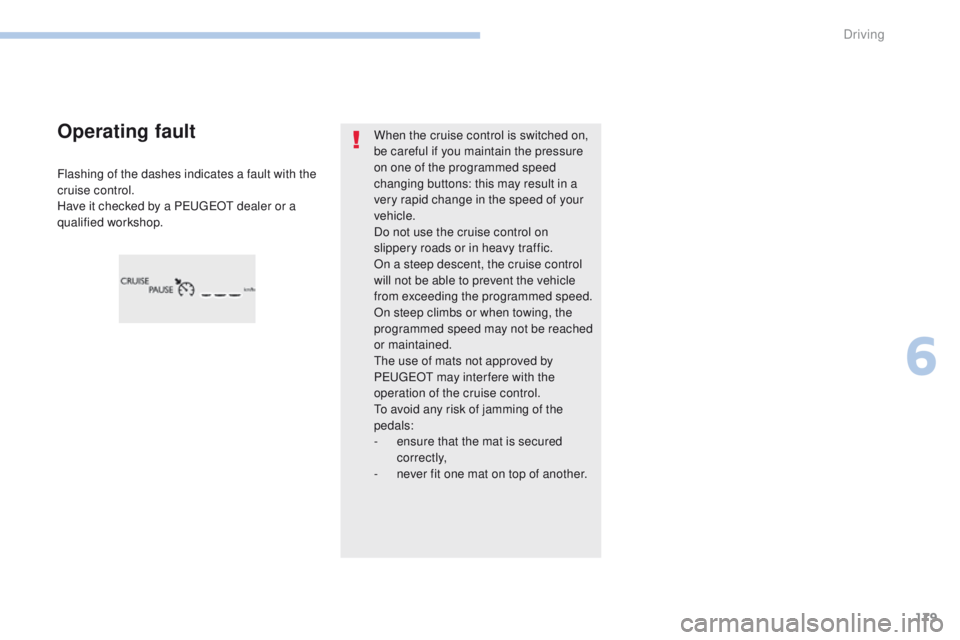
Flashing of the dashes indicates a fault with the
cruise control.
Have it checked by a P
e
uge
Ot
dealer or a
qualified workshop.Operating fault
6
Driving
Page 188 of 392
186
In the event of a fault with the dynamic cruise
control, you are alerted by an audible signal
and display of the message message "Driving
aid functions fault".
Have the system checked by a P
e
uge
Ot
dealer or a qualified workshop. When the cruise control is working, take
care if making a maintained press on
one of the cruise control programmed
speed modification buttons: this can
lead to a very quick change in the
speed of your vehicle.
Do not use the dynamic cruise control
on slippery sur faces or in heavy traffic.
When descending a steep hill, the
cruise control may not be able to
prevent the vehicle from exceeding the
programmed speed.
When ascending a steep hill or when
towing, it might not be possible to attain
or maintain the programmed speed.
Operating fault
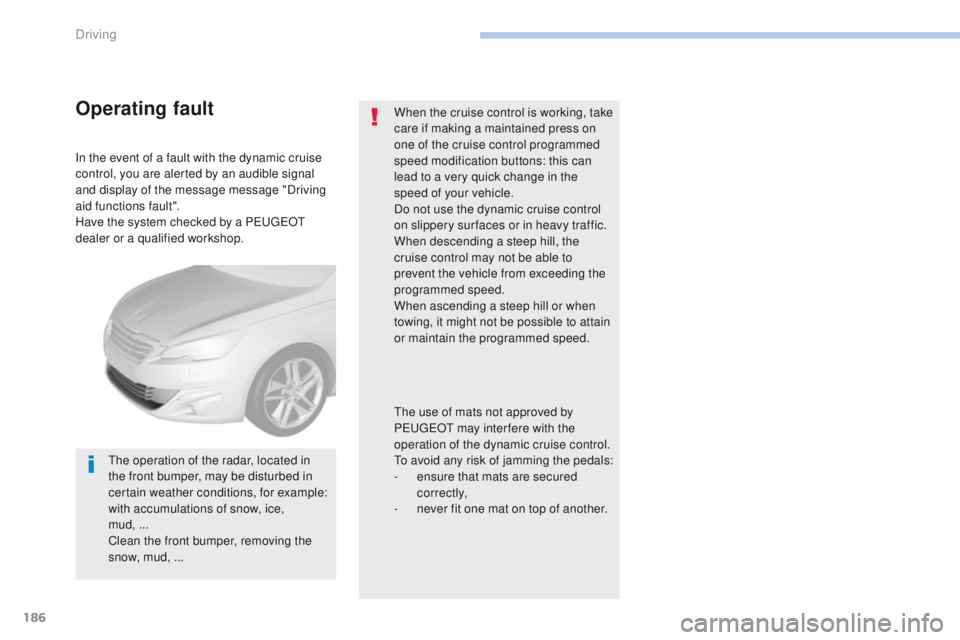
the operation of the radar, located in
the front bumper, may be disturbed in
certain weather conditions, for example:
with accumulations of snow, ice,
mud,
...
Clean the front bumper, removing the
snow, mud,
...
th
e use of mats not approved by
P
e
uge
Ot
may inter fere with the
operation of the dynamic cruise control.to a void any risk of jamming the pedals:
-
e
nsure that mats are secured
c o r r e c t l y,
-
n
ever fit one mat on top of another.
Driving
Page 222 of 392
220
"Multimedia"
Multimedia support, hands-free kit, DVD player,
driving aids, vehicle tracking system, ...
Accessories
A wide range of accessories and genuine parts is available from the PeugeOt dealer network.th
ese accessories and parts are all suitable for your vehicle and benefit from Pe ugeOt' s recommendation and warranty.
"Transport solutions"
Boot liners, roof bars, bicycle carrier on roof
bars, ski carrier, roof box, towbar harness, ...
to
w bar, which mst be fitted by P
e
uge
Ot
dealer or a qualified workshop.
Conversion kits
You can obtain an "en terprise" kit to convert a
trade vehicle to a private car and vice-versa.
"Styling"
alloy wheels from 15 inch to 18 inch, finishers
for wheels, door sills, gear lever knobs, ...
"Ligne S": 16 and 17 inch alloy wheels, body
kit, stickers, interior and exterior mirror shells,
gear lever knob, door sills, mats*, …
"Comfort"
Door deflectors, side blinds and rear blind,
cigarette lighter, boot dividers, coat hanger
fixed to head restraint, front centre armrest,
under shelf storage, front and rear parking
sensors, styling mudflaps, window film, boot
management system, ...
*
t
o a
void any risk of jamming of the pedals:
-
e
nsure that the mat is positioned and
secured correctly,
-
n
ever fit one mat on top of another.
"Security and safety"
Anti-theft alarm, window engraving, wheel
security bolts, child seats and booster
cushions, breathalyzer, first aid kit, warning
triangle, high visibility jacket, stolen vehicle
tracking system, temporary puncture repair kit,
snow chains, non-slip covers, front foglamps
kit, dog guard, ...
"Protection"
Mats*, seat covers compatible with lateral
airbags, mud flaps, side protection rubbing
strips, bumper protection rubbing strips,
bumper protectors, boot sill finishers, boot
mat,
...
Practical information
Page 225 of 392
223
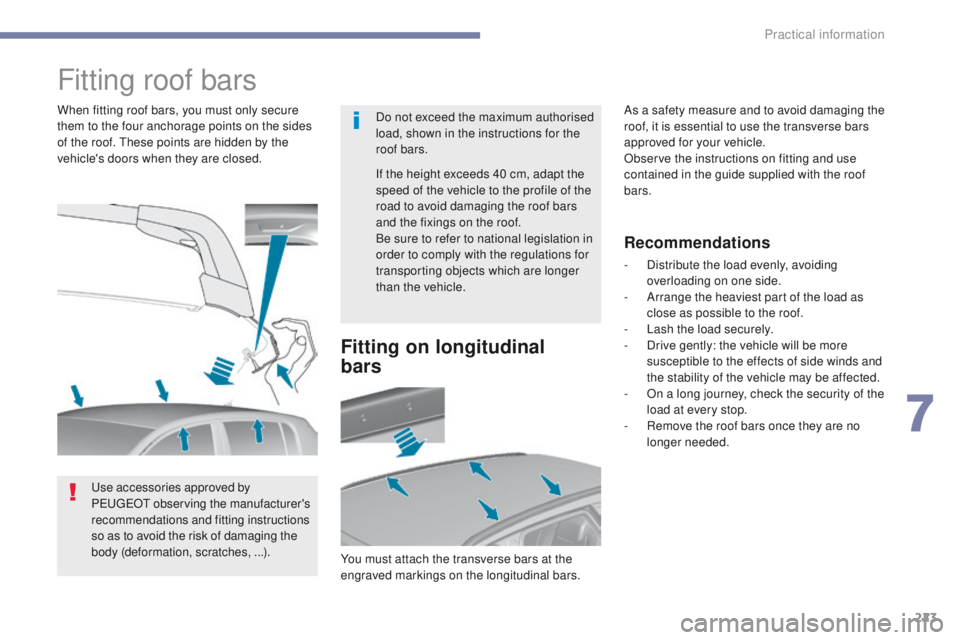
Fitting roof bars
Do not exceed the maximum authorised
load, shown in the instructions for the
roof bars.
When fitting roof bars, you must only secure
them to the four anchorage points on the sides
of the roof.
t
h
ese points are hidden by the
vehicle's doors when they are closed.
us
e accessories approved by
P
e
uge
Ot o
bserving the manufacturer's
recommendations and fitting instructions
so as to avoid the risk of damaging the
body (deformation, scratches, ...). If the height exceeds 40 cm, adapt the
speed of the vehicle to the profile of the
road to avoid damaging the roof bars
and the fixings on the roof.
Be sure to refer to national legislation in
order to comply with the regulations for
transporting objects which are longer
than the vehicle.
Fitting on longitudinal
bars
You must attach the transverse bars at the
engraved markings on the longitudinal bars.As a safety measure and to avoid damaging the
roof, it is essential to use the transverse bars
approved for your vehicle.
Observe the instructions on fitting and use
contained in the guide supplied with the roof
bars.
Recommendations
- Distribute the load evenly, avoiding
overloading on one side.
-
A
rrange the heaviest part of the load as
close as possible to the roof.
-
L
ash the load securely.
-
D
rive gently: the vehicle will be more
susceptible to the effects of side winds and
the stability of the vehicle may be affected.
-
O
n a long journey, check the security of the
load at every stop.
-
R
emove the roof bars once they are no
longer needed.
7
Practical information